





Analyze JD Edwards Data with Power Pivot

The ODBC protocol is used by a wide variety of Business Intelligence (BI) and reporting tools to get access to different databases. The CData ODBC Driver for JD Edwards brings the same power and ease of use to JD Edwards data. This article uses the driver to import JD Edwards data into Power Pivot.
Connect to JD Edwards as an ODBC Data Source
If you have not already, first specify connection properties in an ODBC DSN (data source name). This is the last step of the driver installation. You can use the Microsoft ODBC Data Source Administrator to create and configure ODBC DSNs.
The driver connects to JD Edwards through your Application Interface Services (AIS) Server. Set the following connection properties:
- URL: The base HTTPS URL of your AIS Server (e.g., https://jde-ais.example.com:8300).
- User: Your JD Edwards username.
- Password: Your JD Edwards password.
- Environment (optional): The JD Edwards environment to use (e.g., PD920 for production or DV920 for development). If not specified, the AIS Server's default environment is used.
- Role (optional): The JD Edwards role for the session. If not specified, the AIS Server's default role is used.
- DeviceName (optional): An identifier for the connecting device or application, used for auditing and logging on the AIS Server.
- Jasserver (optional): The specific Java Application Server (JAS) instance to route requests through, useful in clustered environments.
Choosing Which Data Is Exposed
JD Edwards organizes tables and business views by System Code, and the driver exposes each System Code as its own schema. Use these properties to control which schemas are available:
- DataModel: One or more ERP modules (comma-separated) whose System Codes are exposed as schemas, or All to expose every System Code in the connected instance. Defaults to FinancialManagement.
- SystemCodes: A comma-separated list of additional System Codes to expose alongside those from DataModel (e.g., 42,43).
When you connect, the driver sends your credentials to the AIS Server to obtain a session token and caches it. The driver requests a new token automatically before the session expires.
Connect from Power Pivot
Follow the steps below to connect to the DSN in Power Pivot.
- In Excel, click the Power Pivot Window icon on the Power Pivot tab to open Power Pivot.
- Launch the Table Import Wizard: Click the Get External Data from Other Data Sources button.
- Select the OLEDB/ODBC source option.
- Click Build to open the Data Link Properties dialog.
- In the Provider tab, select the Microsoft OLEDB Provider for ODBC Drivers option.
- In the Connection tab, select the Use Data Source Name option and then select the JD Edwards DSN in the menu.
Select and Filter Tables and Views
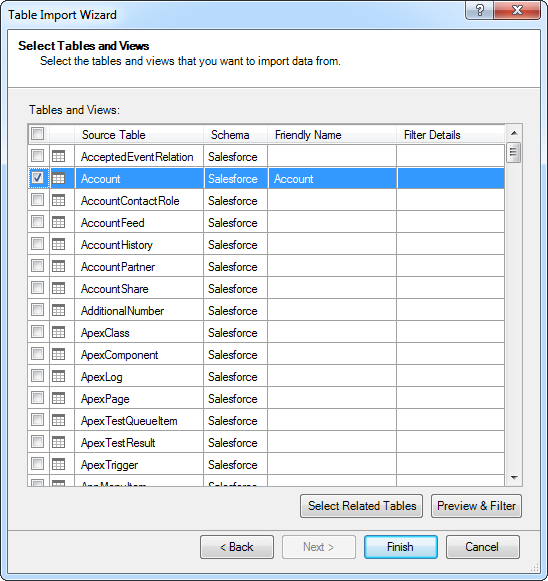
Follow the steps below to use the wizard to import JD Edwards tables. As you use the wizard to select, filter, and sort columns of JD Edwards tables, Power Pivot generates the query to be executed.
-
After selecting the DSN in the Table Import Wizard, select the option to select from a list of tables.
Click Preview & Filter to select specific columns, sort data, and visually build filters. To include or exclude columns, select and clear the option next to the column name.
To filter based on column values, click the down arrow button next to the column name. In the resulting dialog, select or clear the column values you want to filter. Alternatively, click Number Filters or Text Filters and then select a comparison operator. In the resulting dialog, build the filter criteria.
- Return to the Select Tables and Views page of the wizard. You can access filters by clicking the Applied Filters link in the Filter Details column.
Import and Filter with SQL
You can also import with an SQL query. The driver supports the standard SQL, allowing Excel to communicate with JD Edwards APIs.
- After selecting the DSN in the Table Import Wizard, select the option to write a query.
In the SQL Statement box, enter the query. Click Validate to check that the syntax of the query is valid. Click Design to preview the results and adjust the query before import.
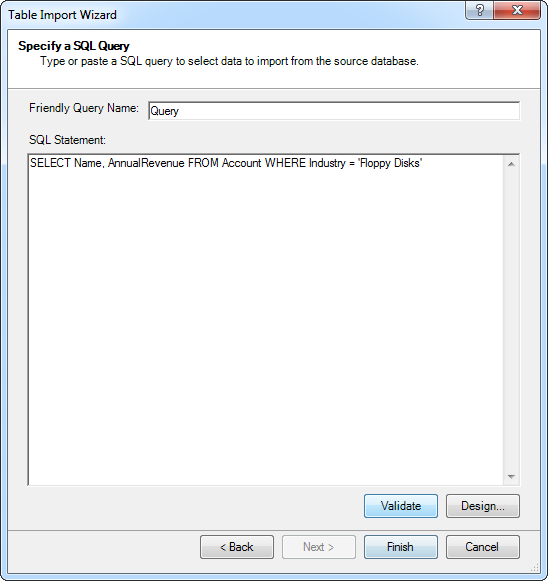
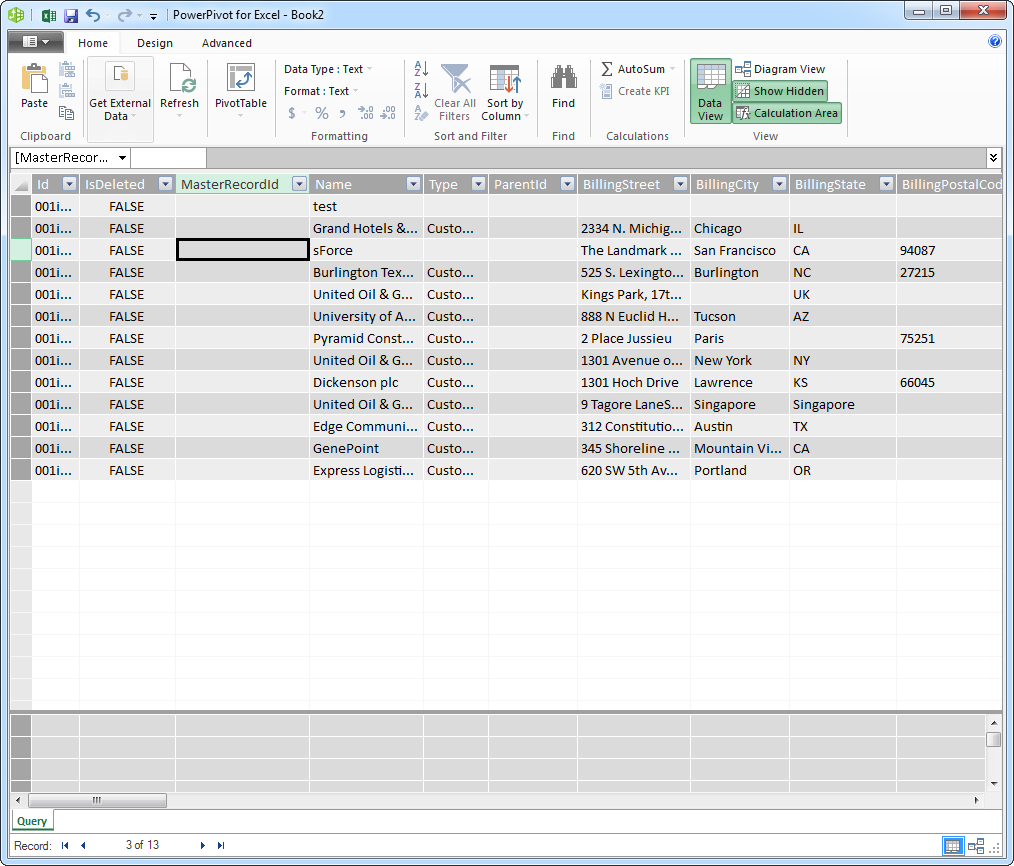
- Finish the wizard to import the data for your chosen query.
Refresh On Demand
Connectivity to JD Edwards APIs enables real-time analysis. To immediately update your workbook with any changes, click Refresh.
Ready to get started?
Download a free trial of the JD Edwards ODBC Driver to get started:
Download NowLearn more:
 JD Edwards ODBC Driver
The JD Edwards ODBC Driver is a powerful tool that allows you to connect with live data from JD Edwards, directly from any applications that support ODBC connectivity.
Access JD Edwards data like you would a database - read JD Edwards AccountLedger, ProposalofPayment, ContractRevenueSummary, EmployeeEnrollment, RentIncreaseAmounts, etc. through a standard ODBC Driver interface.