







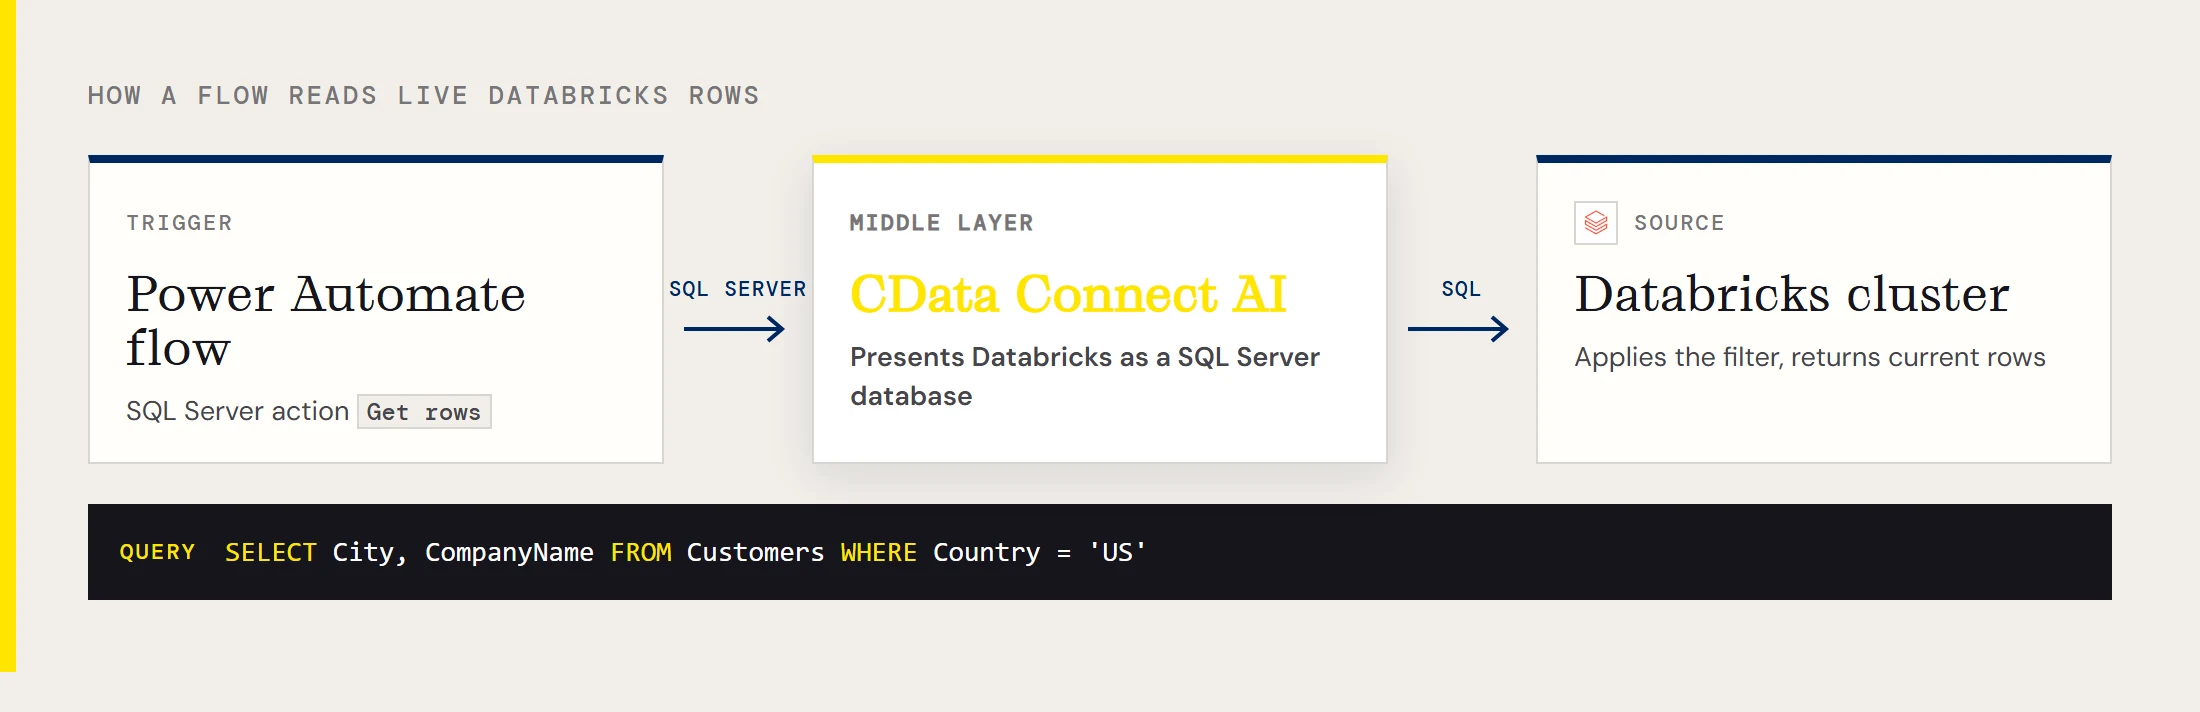
Power Automate is good at reacting to events and awkward at talking to a lakehouse. To read rows from a Databricks table, the shortest path is to make Databricks look like something Power Automate already understands: a SQL Server database. CData Connect AI does that. You register your Databricks cluster once in Connect AI, and the flow sees it as a database it can query with the ordinary SQL Server actions.
This guide builds one small flow end to end. It reads the City and CompanyName columns from a Customers table, keeps only the rows where Country is US, and hands them to whatever steps come next. Nothing is replicated, and each run asks Databricks for the current rows.
What the finished flow is made of
The flow has three parts, and each one comes from a different place.
| Piece | What it is | Where the value comes from |
|---|---|---|
| Databricks connection | A source in Connect AI named something like Databricks1 | Server Hostname, HTTP Path and token from your cluster |
| Connect AI user and PAT | The identity Power Automate signs in with | Connect AI settings page |
| SQL Server connection | The Power Automate connection to tds.cdata.com,14333 | The two items above |
The names matter later: the Databricks connection name becomes the "database" in Power Automate, and the Connect AI PAT becomes the password.
Register the cluster in Connect AI
Log in to Connect AI, open Sources, choose Add Connection, and pick Databricks. The form asks for three values, all of which live in your Databricks workspace.
Open Clusters, select the cluster, and look under Advanced Options for the JDBC/ODBC tab. Copy the Server Hostname into Server and the HTTP Path into HTTPPath. For Token, use a Databricks personal access token, which you can generate from User Settings on the Access Tokens tab. Click Save & Test.
For reference, the same driver expresses these properties in connection-string form as Server=...;Port=443;TransportMode=HTTP;HTTPPath=...;UseSSL=True;, with the token supplied through Token. You don't type that anywhere in Connect AI, but it helps to know the form fields map to those names. Then open the Permissions tab on the connection and set the user-based permissions, so only the Connect AI users who should read Databricks can do so.
Keep the two tokens straight
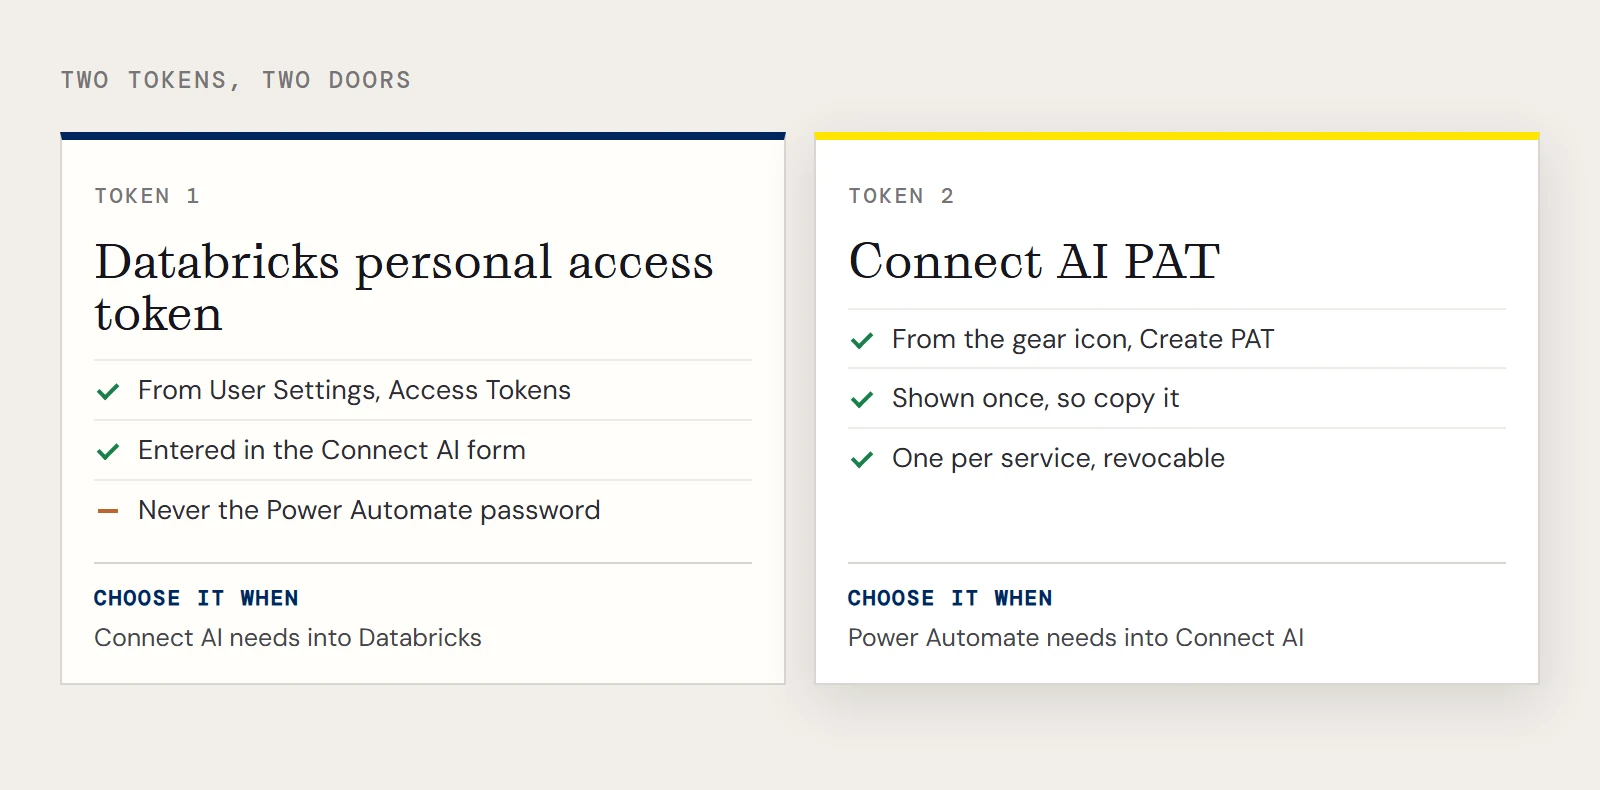
This setup has two tokens, and they protect different doors, which is where people tend to lose time. The Databricks personal access token lets Connect AI into Databricks, and you've already entered it. The Connect AI personal access token lets Power Automate into Connect AI. To make that one, click the gear icon at the top right of the Connect AI app, go to Personal Access Tokens, click Create PAT, and name it. The token is shown once, so copy it somewhere safe before closing the dialog. Connect AI's own guidance is to create a separate PAT for each service, so a PAT named for this flow can be revoked without breaking anything else.
Create the SQL Server connection in Power Automate
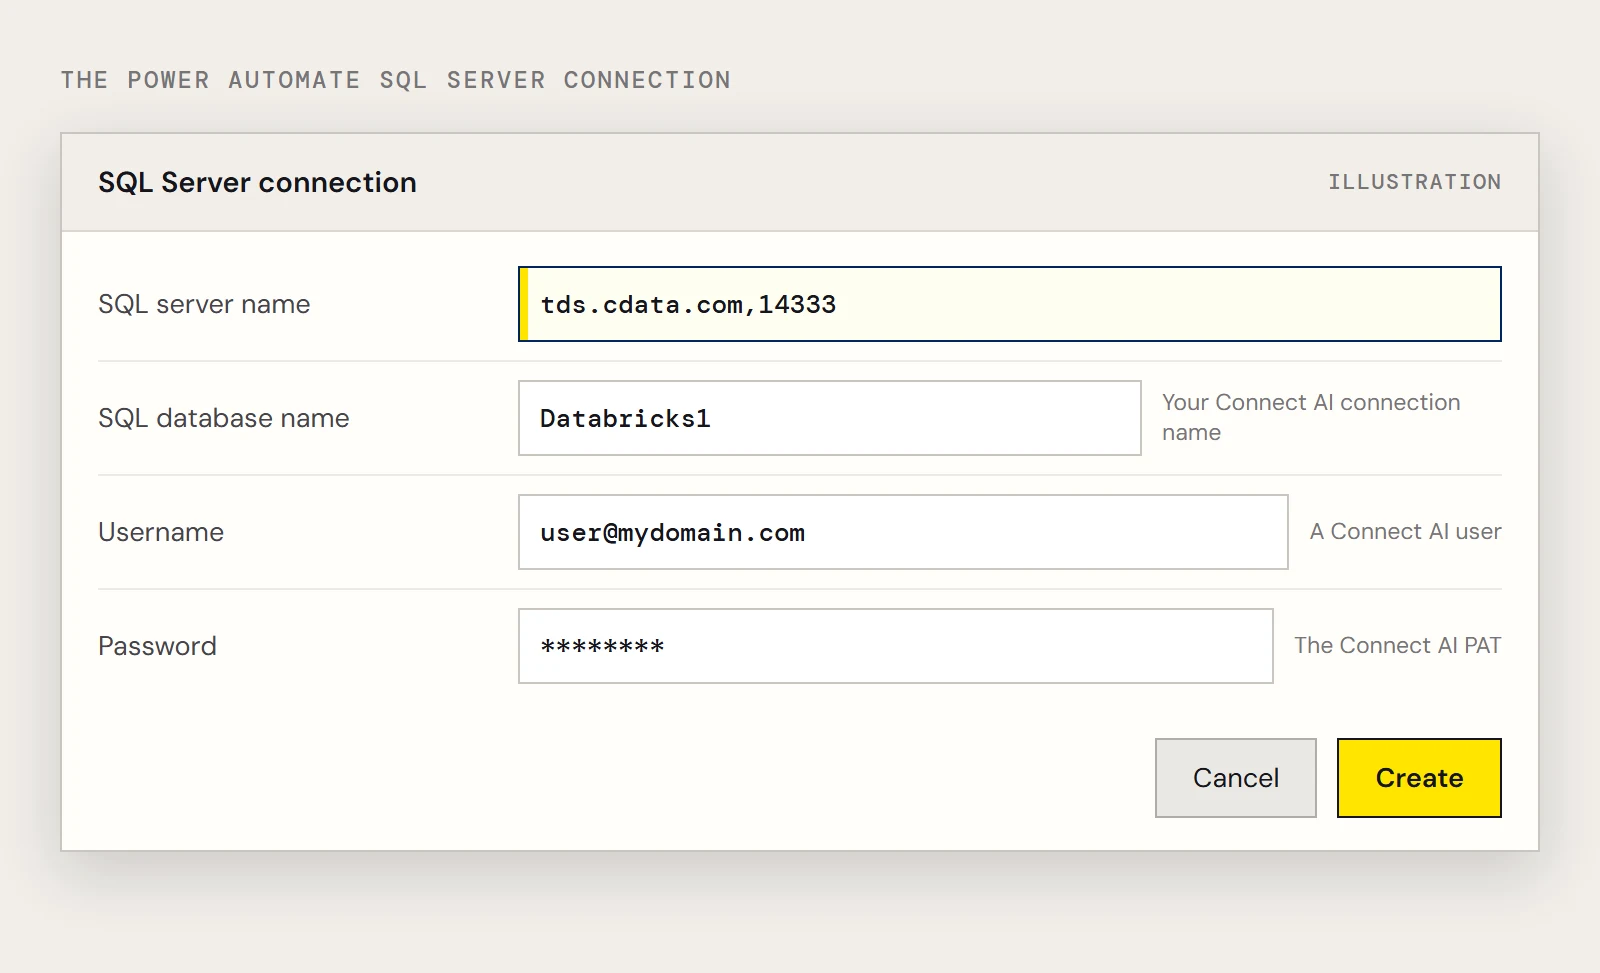
In Power Automate, go to Data > Connections > New connection and choose SQL Server. In the wizard, connect directly. Enter tds.cdata.com,14333 as the SQL server name and the name of the Databricks connection in Connect AI, for example Databricks1, as the SQL database name. For Username, use a Connect AI user such as [email protected], and for Password, the Connect AI PAT for that user. Click Create. If the wizard accepts it, Power Automate can see every table the Databricks connection exposes.
Build the flow
Go to My flows > New flow and start from blank or a template. Add a SQL Server action such as Get rows, select the connection you just made, and choose a table from the drop-down. Use the advanced options for filters and ordering. The query you're aiming for is equivalent to this:
SELECT City, CompanyName
FROM Customers
WHERE Country = 'US'
Connect AI pushes supported SQL operations, filters and joins included, down to Databricks, so Databricks applies the filter before rows come back. Add the actions that should follow, test the flow, and save it.
When the connection or the flow misbehaves
| What you see | Likely cause | Fix |
|---|---|---|
| Save & Test fails in Connect AI | Wrong HTTP Path or hostname, or an expired Databricks token | Copy both values again from the JDBC/ODBC tab and generate a fresh token |
| Power Automate rejects the credentials | The Databricks token was used as the password | Use the Connect AI PAT instead |
| Power Automate cannot find the database | The database name doesn't match the Connect AI connection name | Use the exact connection name, such as Databricks1 |
| A table is missing from the drop-down | The Connect AI user lacks permission | Check the connection's Permissions tab |
CData's own notes say its Databricks connectivity covers Databricks Runtime versions 9.1 through 13.X, on both Pro and Classic SQL. If your cluster runs something newer, confirm support with CData before you build on it.