




Deploy CData API Server to Azure App Service with SQL Server
Building a REST API on top of a database usually means writing backend code, and then maintaining it. And if you host that API on Azure App Service, there's a second catch: App Service instances don't keep local files for long. Restart the app and anything saved on the local disk is gone, including your settings.
CData API Server handles this by creating live REST and OData endpoints straight from your database tables, no backend code needed. And it can keep all of its configuration (settings, connections, API definitions, and user accounts) in a SQL Server database through one cdata.app.db connection, so nothing is lost on restart. In this article, we'll set up CData API Server on Azure App Service (Linux) with SQL Server as its configuration store.
Prerequisites
- An Azure subscription
- A SQL Server instance that Azure can reach (Azure SQL Database, or on-premises with public access)
- Java 17 on your local machine
- An FTPS client such as WinSCP or FileZilla
Step 1: Download and install the CData API Server
Download the Cross-Platform (.tar.gz) build, even if you're on Windows. This build has the raw apiserver.jar and webapp/ files that Azure App Service (Linux) can run directly.
- In CData API Server download the Cross-Platform (.tar.gz) build
- Extract the archive to a local folder (for example, C:\apiserver-work\)
After extracting, you'll see apiserver.jar, a webapp/ folder, a lib/ folder, and a few other files.
Step 2: Generate and edit the configuration file
Next, create the properties file that holds the settings.
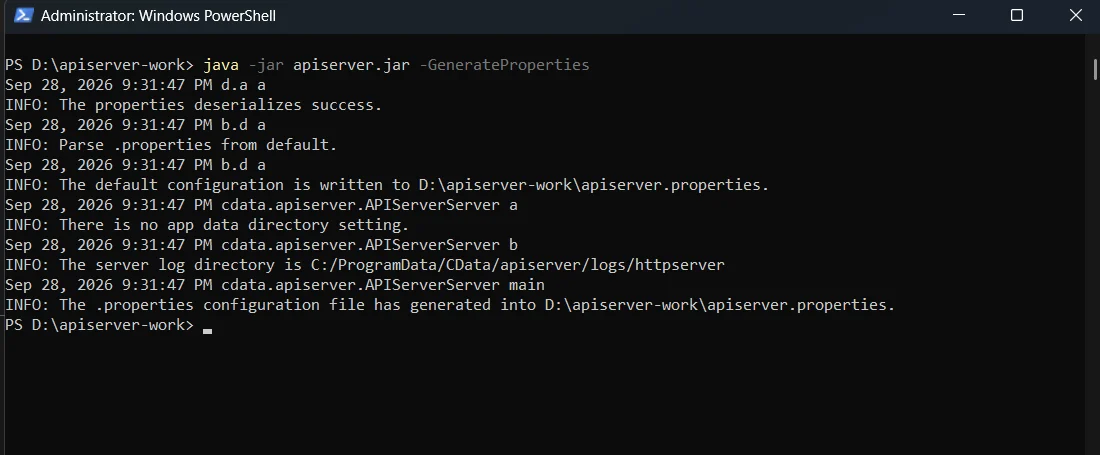
- Open a command prompt in the folder where you extracted the files and run:
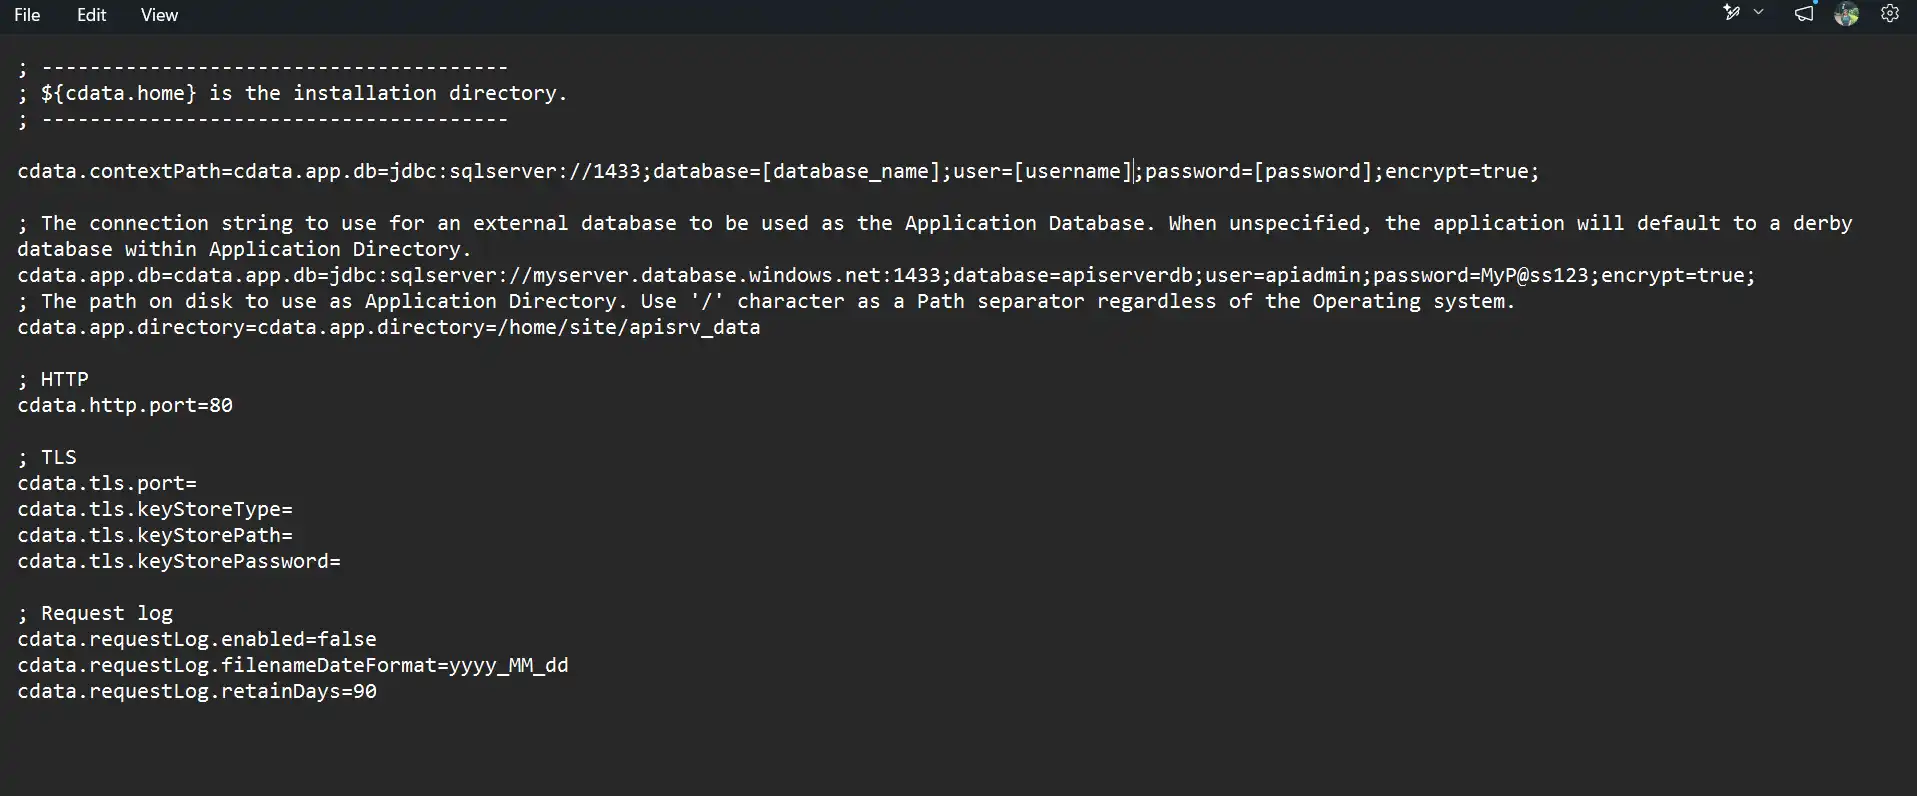
- Now point API Server at your SQL Server. Open apiserver.properties in any editor and change these three settings:
- Config database connection tells API Server to keep its configuration in SQL Server instead of a local file:
- Data directory is a folder on the App Service where API Server keeps runtime data like logs and cache. This path works natively on App Service Linux:
- Port Azure App Service expects the app to listen on port 80, so change it from the default 8080:
java -jar apiserver.jar -GenerateProperties
cdata.app.db=jdbc:sqlserver://[server]:1433;database=[database_name];user=[username];password=[password];encrypt=true;
cdata.app.directory=/home/site/apisrv_data
cdata.http.port=80
Note: Before saving, replace [server], [database_name], [username], and [password] with your real SQL Server details. The login needs permission to create tables in that database, because API Server builds its tables there on first start.
Step 4: Create the Azure App Service
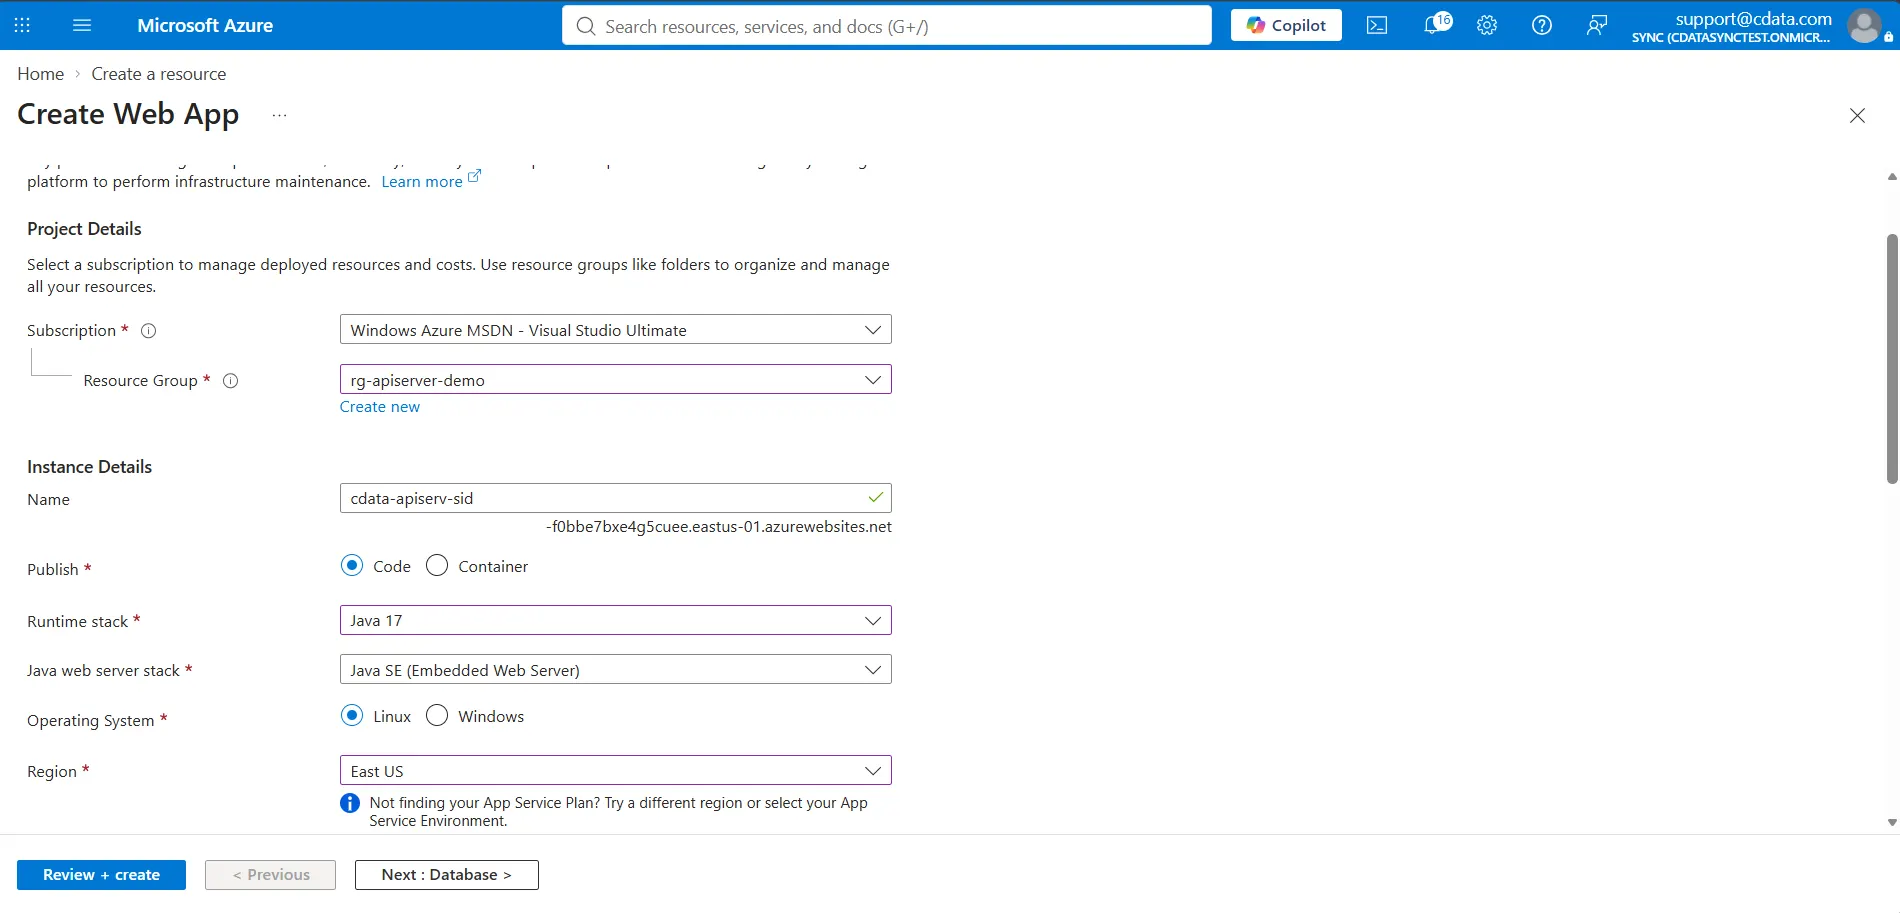
In the Azure Portal, create a new Web App with these settings on the Basics tab:
- Publish: Code
- Runtime stack: Java 17
- Java web server stack: Java SE (Embedded Web Server)
- Operating system: Linux
- Region: same region as your SQL Server, to keep latency low
- Pricing plan: Basic B1 or higher. The Free F1 tier only gives you 1 GB of disk
- On the Deployment tab, turn on Basic Authentication (FTPS needs it)
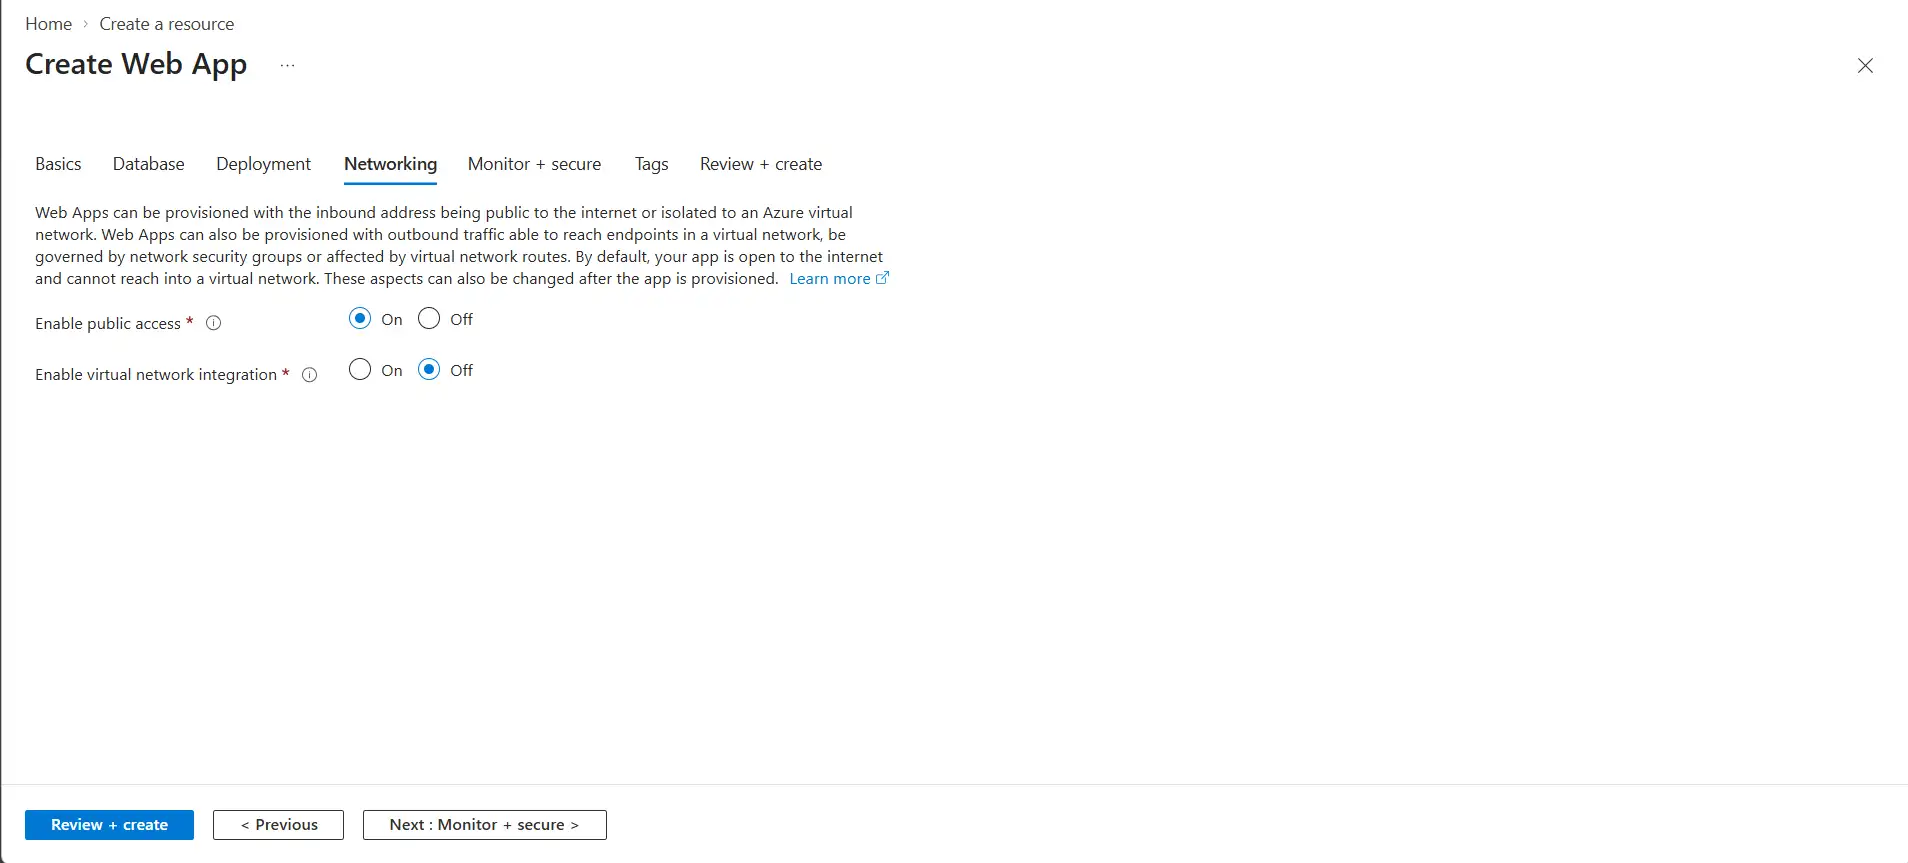
- On the Networking tab, keep Public Access on. Leave the rest at defaults
- Click Review + Create, to finish
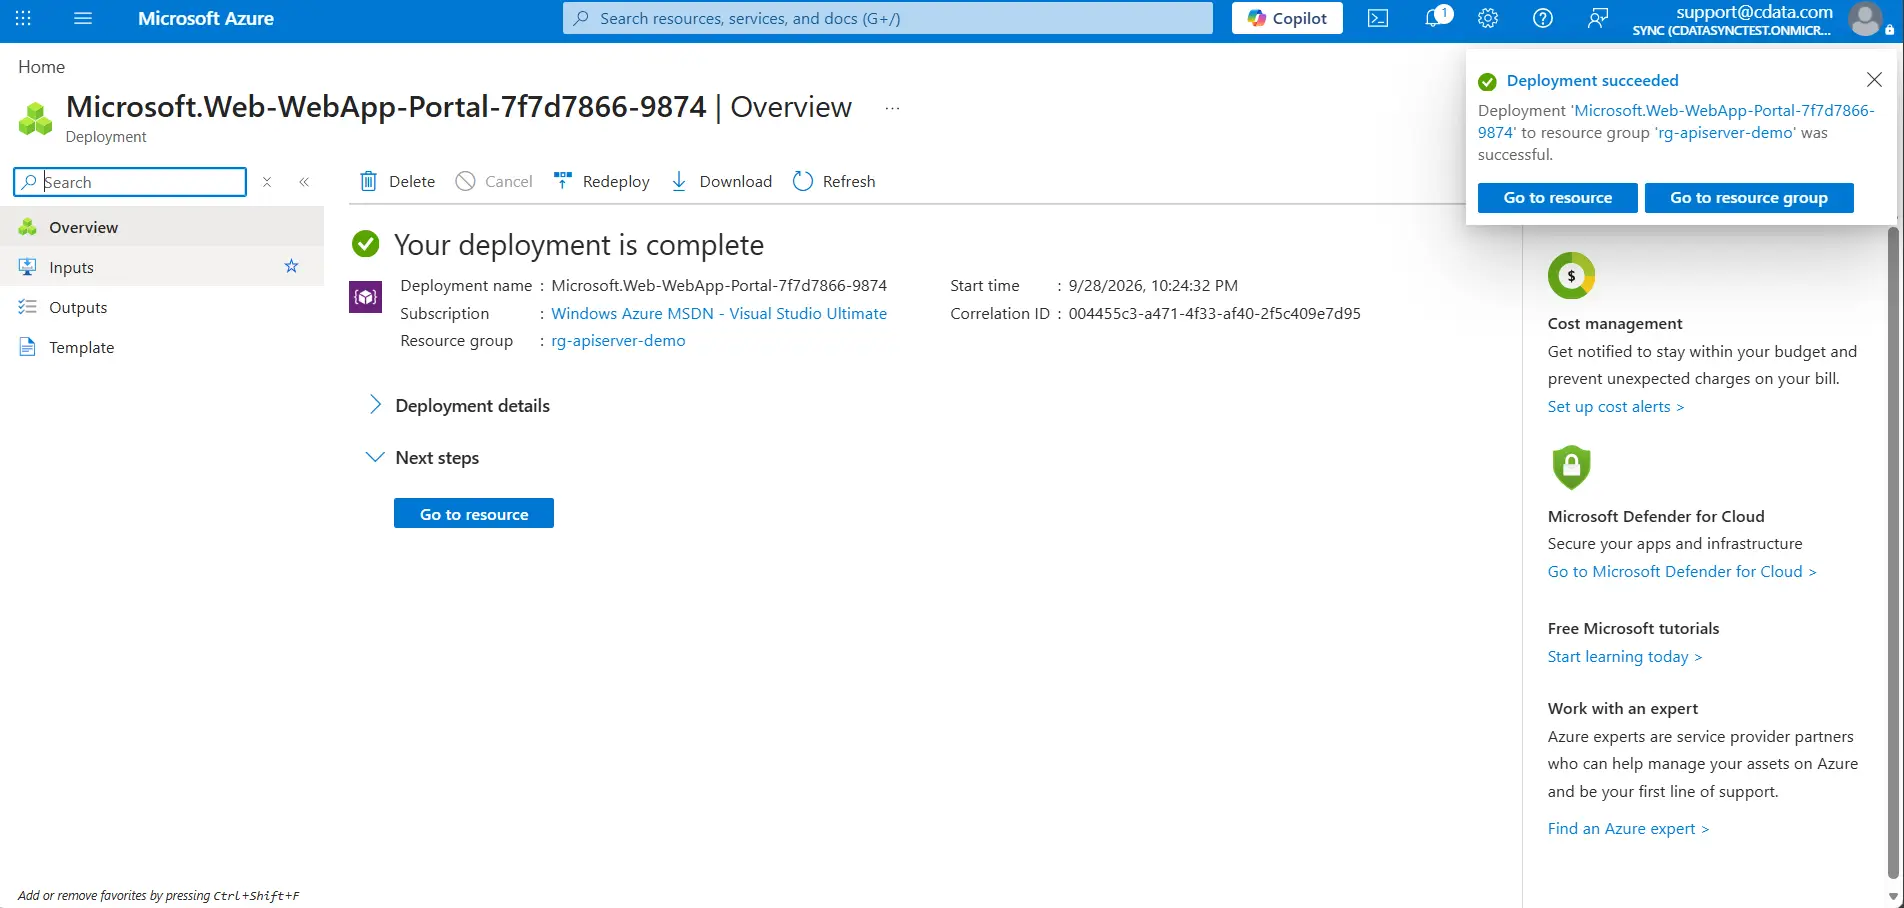
Step 5: Upload the API Server files via FTPS
Time to move the file using app's resource page.
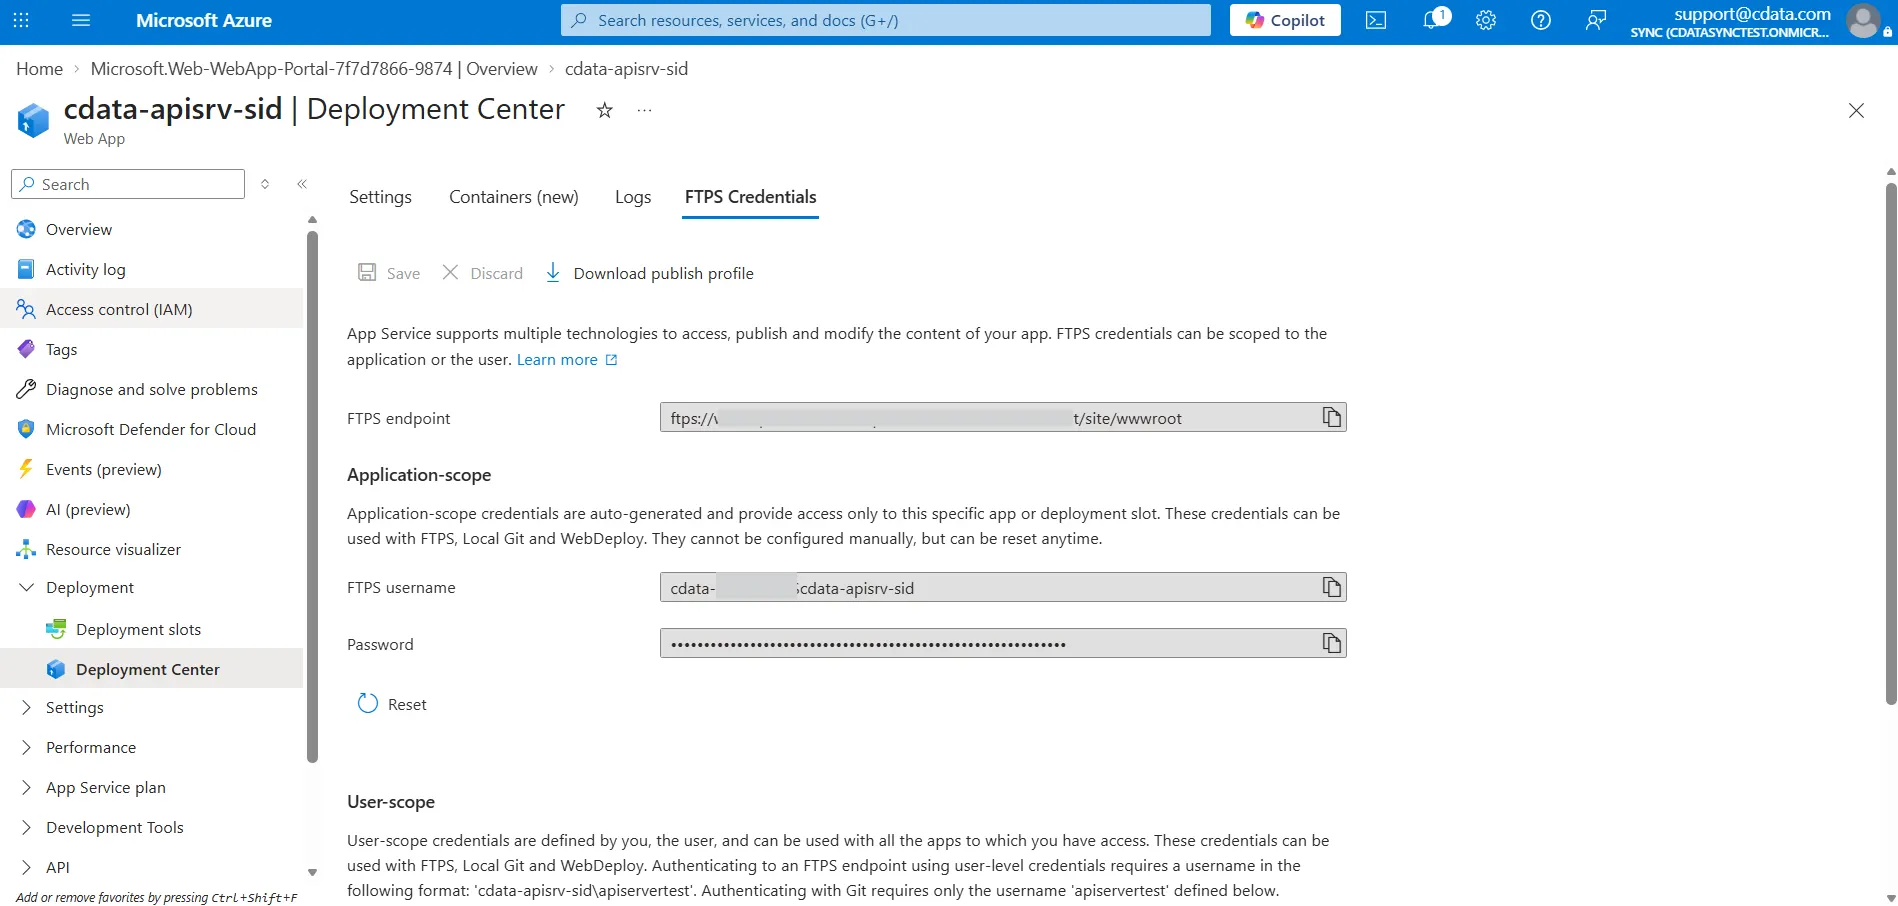
- Go to Deployment Center, and open the FTPS credentials tab. Copy the FTPS endpoint, username, and password
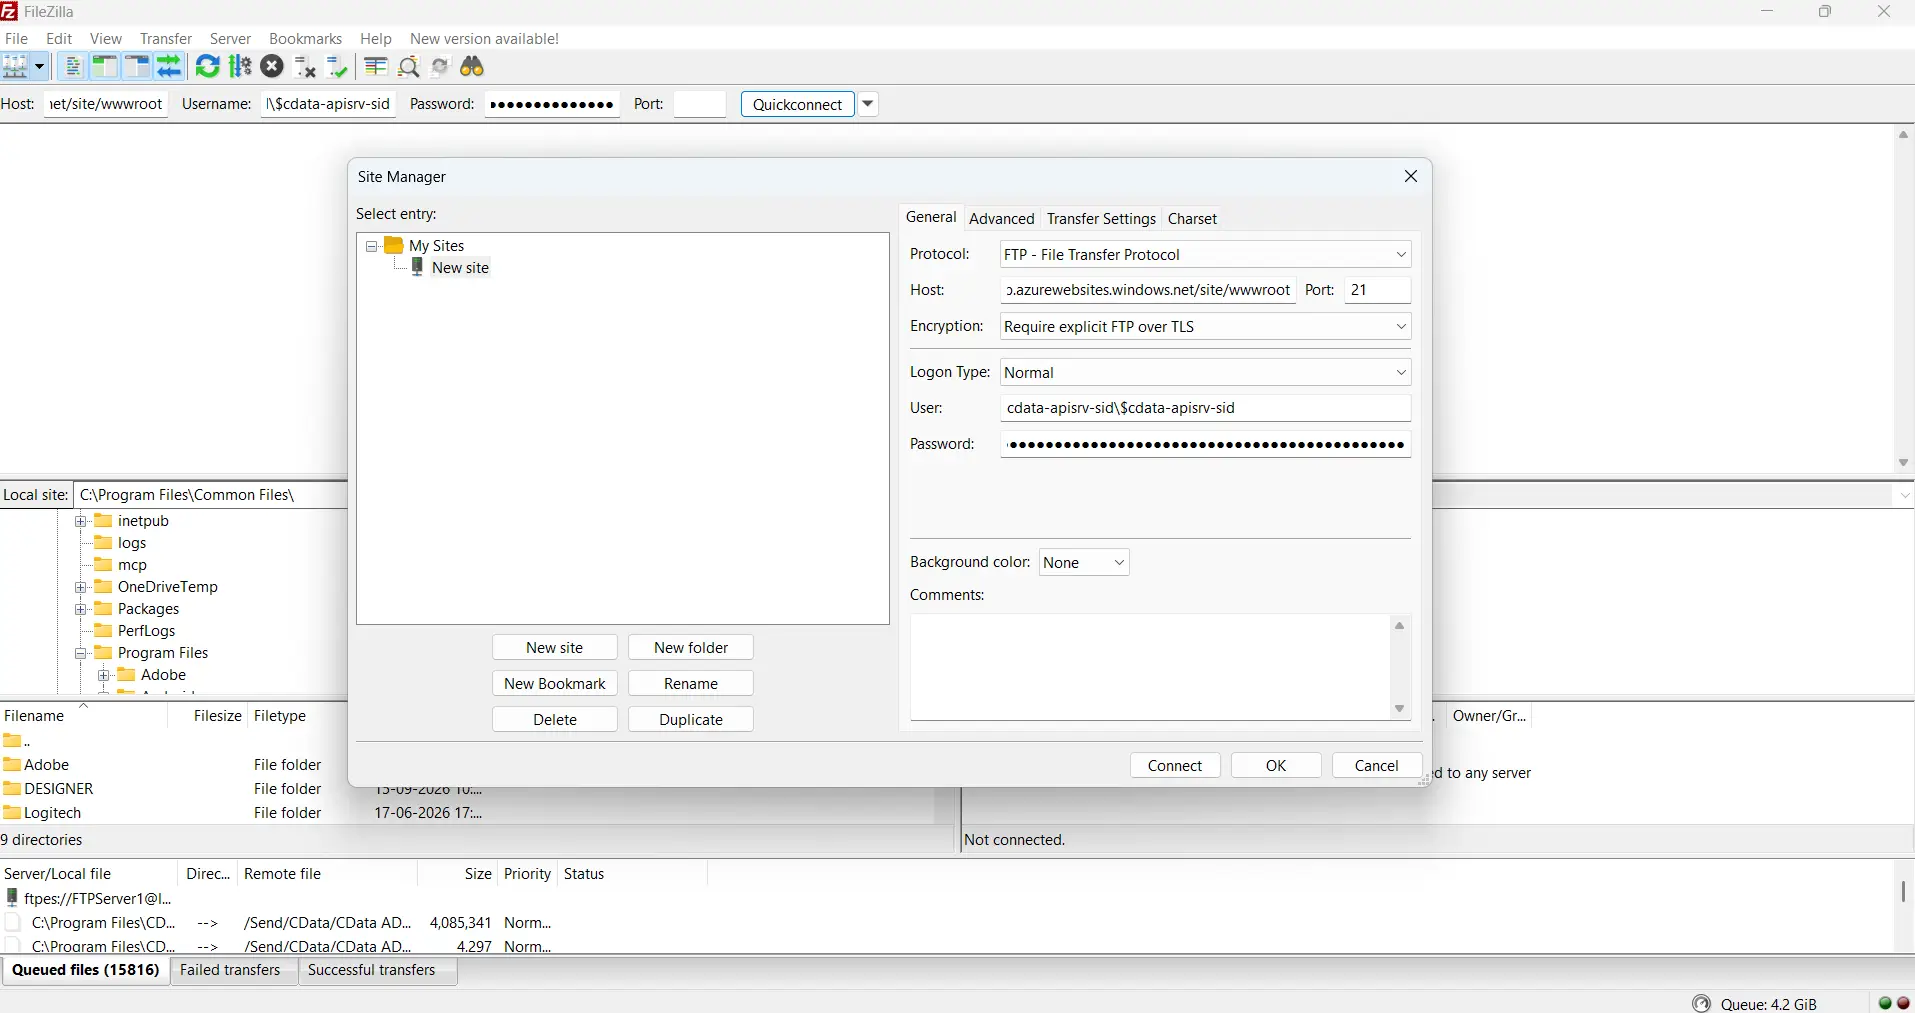
- Connect your FTPS client with those credentials, using explicit TLS on port 21
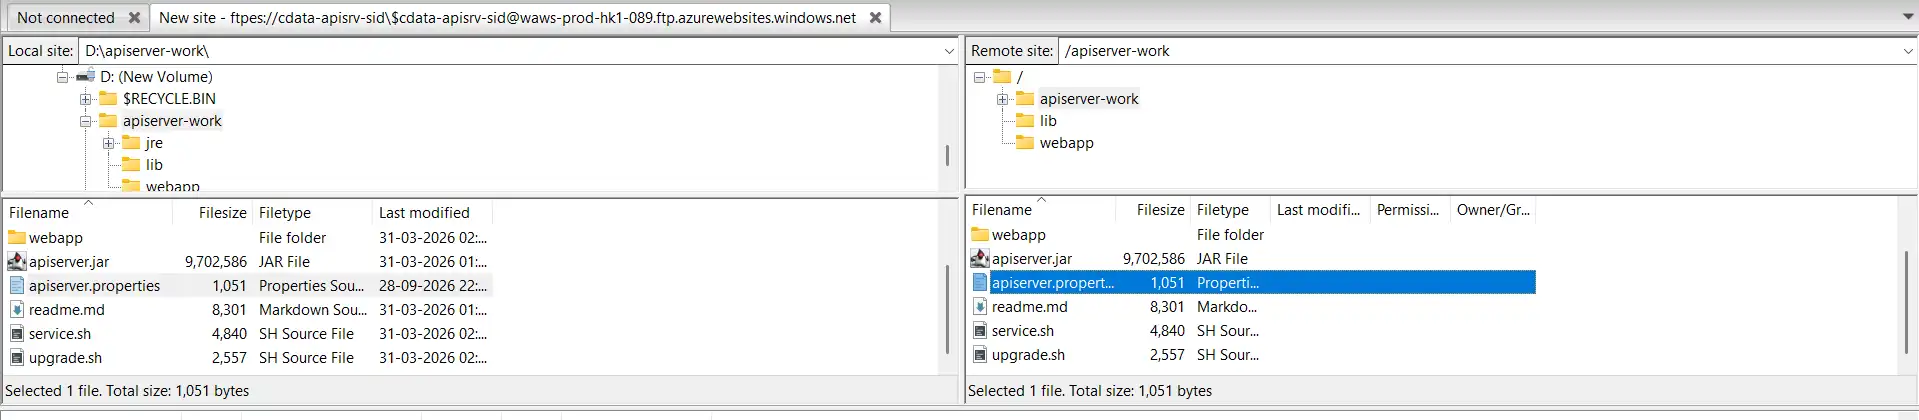
- Go to /site/wwwroot/ on the remote side and delete the placeholder files Azure put there
- Upload webapp/, lib/, apiserver.jar, and apiserver.properties into /site/wwwroot/
Skip the jre/ folder as App Service brings its own Java 17.
Step 6: Configure the startup command
Now tell App Service how to start the JAR:
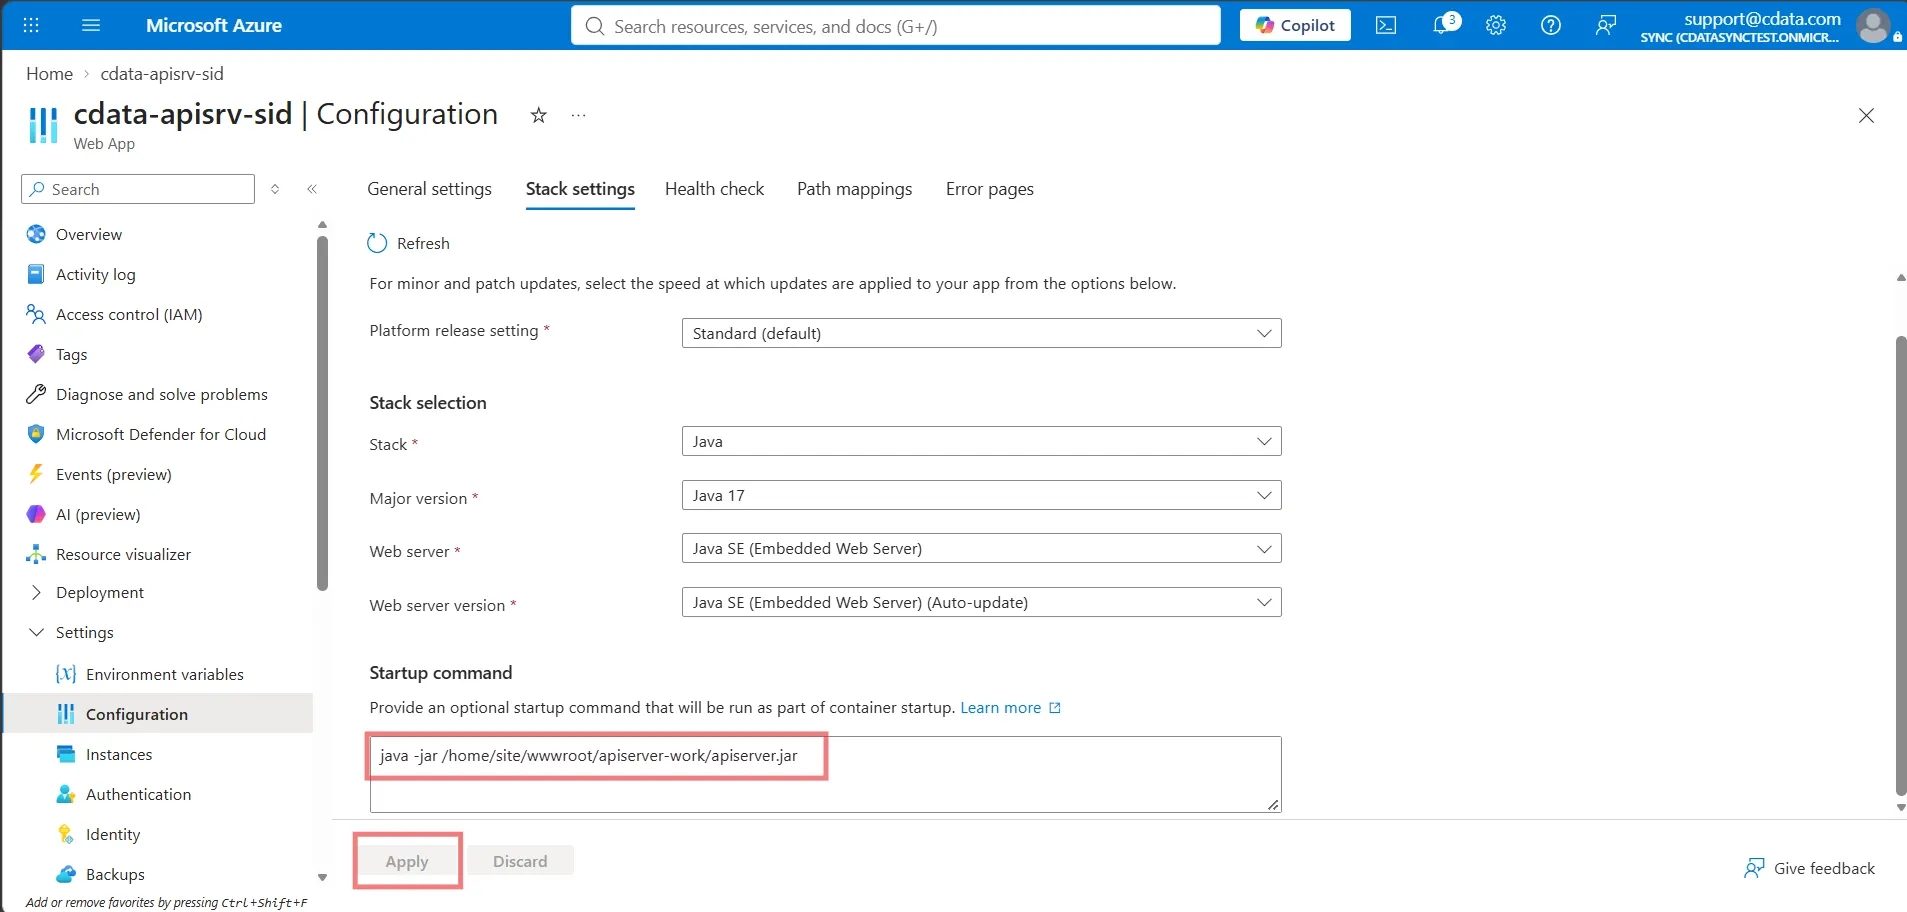
- In your App Service, open Configuration, then Stack settings
- In the Startup Command field, enter: java -jar /home/site/wwwroot/apiserver.jar
- Click Apply and Restart the App Service
Step 7: Access API Server and create your admin account
Open your browser and go to the default domain on the App Service Overview page (something like yourapp.azurewebsites.net). If everything worked, you'll see the API Server account creation page.
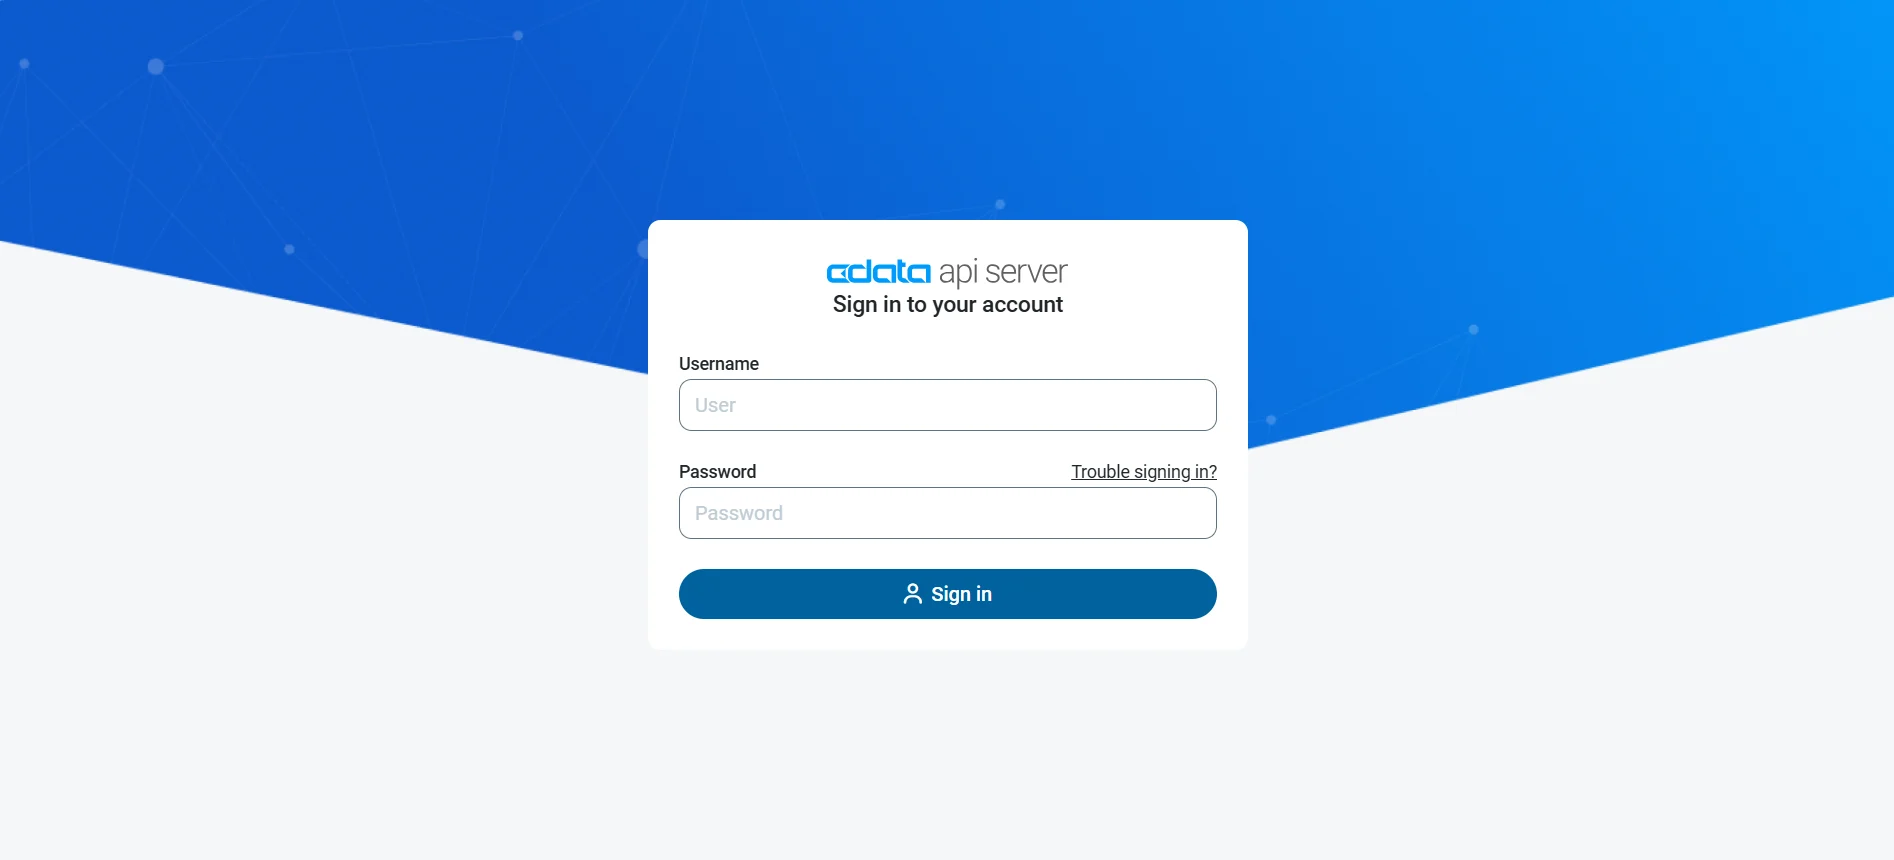
- Create your admin account with a strong password
- Activate your 30-day trial license for testing
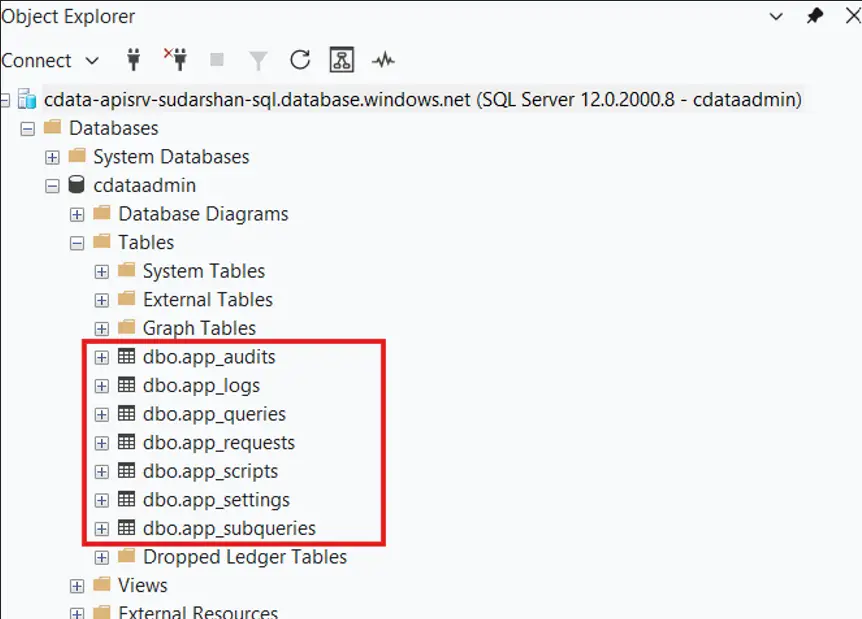
On first start, API Server creates its tables in the SQL Server database you set up. From now on, that's where your settings and user accounts live.
Troubleshooting
SQL Server driver error at startup:
- Download Microsoft's JDBC Driver for SQL Server and extract the ZIP
- Pick the JAR for Java 11 or later (mssql-jdbc-12.x.x.jre11.jar, not the .jre8 one)
- Upload it to /site/wwwroot/lib/ over FTPS and restart the App Service
Page not loading:
- Check the startup command in Stack settings
- Check that cdata.http.port=80 is set in apiserver.properties
- Open Log stream in the Azure Portal and look for Java errors
Configuration lost after restart:
- Check the cdata.app.db connection string
- Make sure Azure can reach your SQL Server. For Azure SQL, turn on "Allow Azure services and resources to access this server" in the firewall settings
Publish live REST APIs from Azure with CData
CData API Server is now running on Azure App Service, SQL Server holds its configuration, and any application can call your data through a public URL using standard REST and OData. Your settings survive every restart, and you're ready to scale when you need to. Download the free 30-day trial to try it with your own data. As always, our Support Team is happy to help with any questions.