




Connect to ActiveTrail Data in the Denodo Platform

Denodo Platform is a data virtualization product providing a single point of contact for enterprise database data. When paired with the CData API Driver for JDBC, Denodo users can work with live ActiveTrail data alongside other enterprise data sources. This article explains how to create a virtual data source for ActiveTrail in the Denodo Virtual DataPort Administrator.
With built-in optimized data processing, the CData JDBC Driver offers unmatched performance for interacting with live ActiveTrail data. When you issue complex SQL queries to ActiveTrail, the driver pushes supported SQL operations, like filters and aggregations, directly to ActiveTrail and utilizes the embedded SQL engine to process unsupported operations client-side (often SQL functions and JOIN operations). Its built-in dynamic metadata querying allows you to work with and analyze ActiveTrail data using native data types.
Create the ActiveTrail Virtual Port
To connect to live ActiveTrail data from Denodo, you need to copy the JDBC Driver JAR file to the external library directory for Denodo and create a new JDBC Data Source from the Virtual DataPort Administrator tool.
- Download the CData API Driver for JDBC installer, unzip the package, and run the JAR file to install the driver.
- Copy the JAR File (and license file if it exists) from the installation location (typically C:\Program Files\CData\CData API Driver for JDBC\lib\) to the Denodo external library directory (C:\Denodo\Denodo Platform\lib-external\jdbc-drivers\cdata-api-19).
- Open the Denodo Virtual DataPort Administrator tool and navigate to the Server Explorer tab.
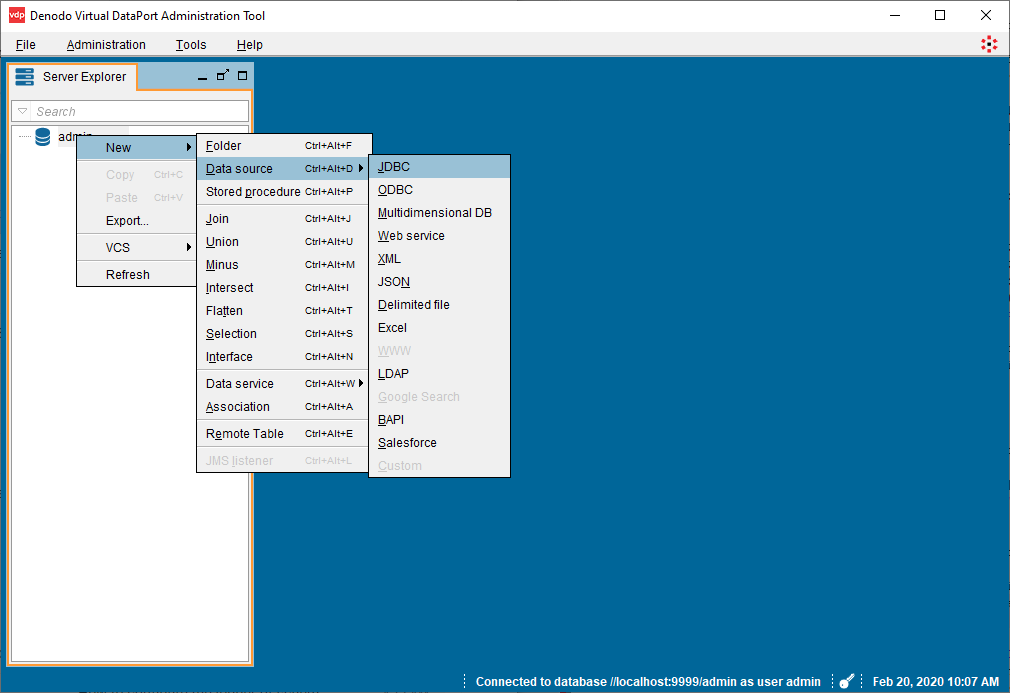
- Right-click "admin" and select New -> Data source -> JDBC.
- Configure the JDBC Connection:
- Name: your choice, e.g.: api
- Database adapter: Generic
- Driver class path: C:\Denodo\Denodo Platform\lib-external\jdbc-drivers\cdata-api-19
- Driver class: cdata.jdbc.api.APIDriver
Database URI: Set this to a JDBC URL using the necessary connection properties. For example,
jdbc:api:Profile=C:\profiles\ActiveTrail.apip;AuthScheme=APIKey;APIKey=your_api_key;
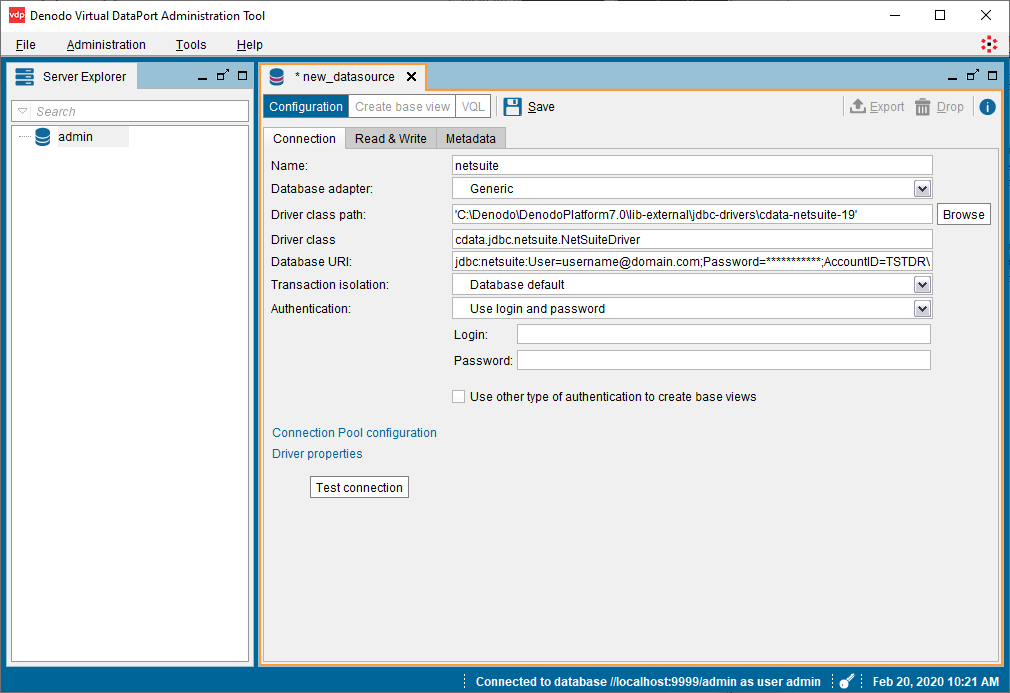
Information on creating the Database URI follows:
Built-In Connection String Designer
For assistance in constructing the JDBC URL, use the connection string designer built into the ActiveTrail JDBC Driver. Either double-click the JAR file or execute the jar file from the command-line.
java -jar cdata.jdbc.api.jarFill in the connection properties and copy the connection string to the clipboard.
Start by setting the Profile connection property to the location of the ActiveTrail Profile on disk (e.g. C:\profiles\ActiveTrail.apip). Next, set the ProfileSettings connection property to the connection string for ActiveTrail (see below).
ActiveTrail API Profile Settings
ActiveTrail uses API key authentication. To obtain an API key:
- Log in to your ActiveTrail account at https://app.activetrail.com
- Navigate to your account settings and locate the API integration section
- Generate or copy your existing API key
After obtaining your API key, set the following connection properties:
- AuthScheme: Set this to APIKey.
- APIKey: Set this to your ActiveTrail API key.

- Click the "Test connection" button to confirm the configuration and click Save.
View ActiveTrail Data in the VirtualPort Administrator Tool
After creating the data source, you can create a base view of ActiveTrail data for use in the Denodo Platform.
- Click the "Create base view" button in the newly created VirtualPort (admin.API).
- Expand the object tree and select the objects (tables) you wish to import.
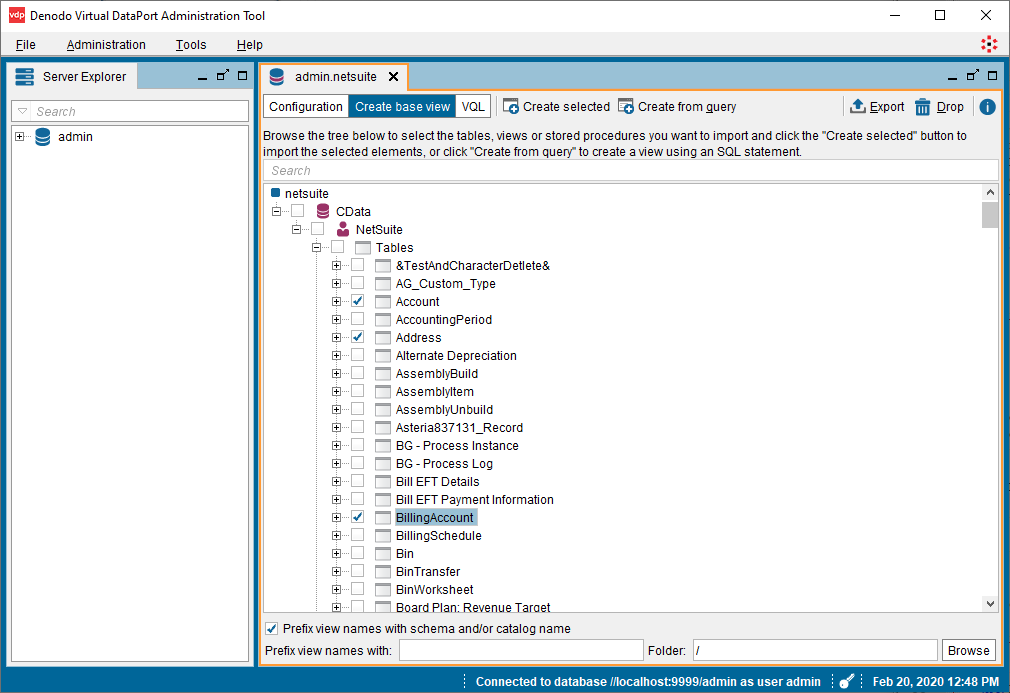
- Click the "Create selected" button to create views of the ActiveTrail data.
Optional: Click "Create associations from foreign keys" to define relationships between the objects. - With the view(s) created, navigate to a table (cdata_api_groupmembers) in the Server Explorer and double-click the selected table.
- In the new tab, click "Execution panel" to open a query panel.
- Customize the query in the "Execute" tab or use the default:
SELECT * FROM cdata_api_groupmembers CONTEXT ('i18n'='us_est', 'cache_wait_for_load'='true')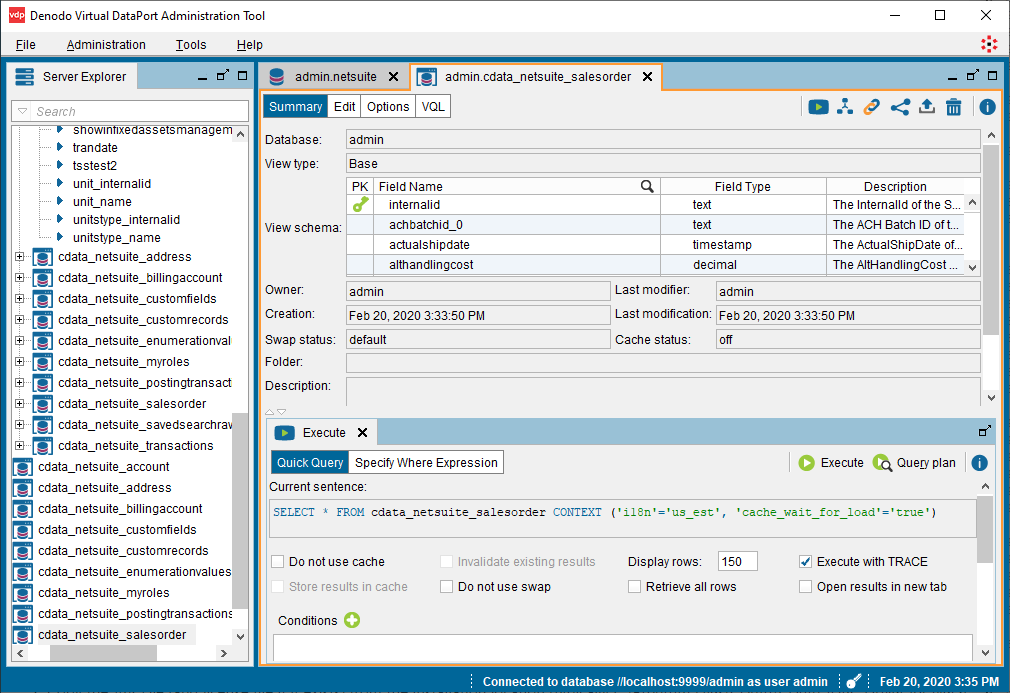
- Click Execute to view the data.
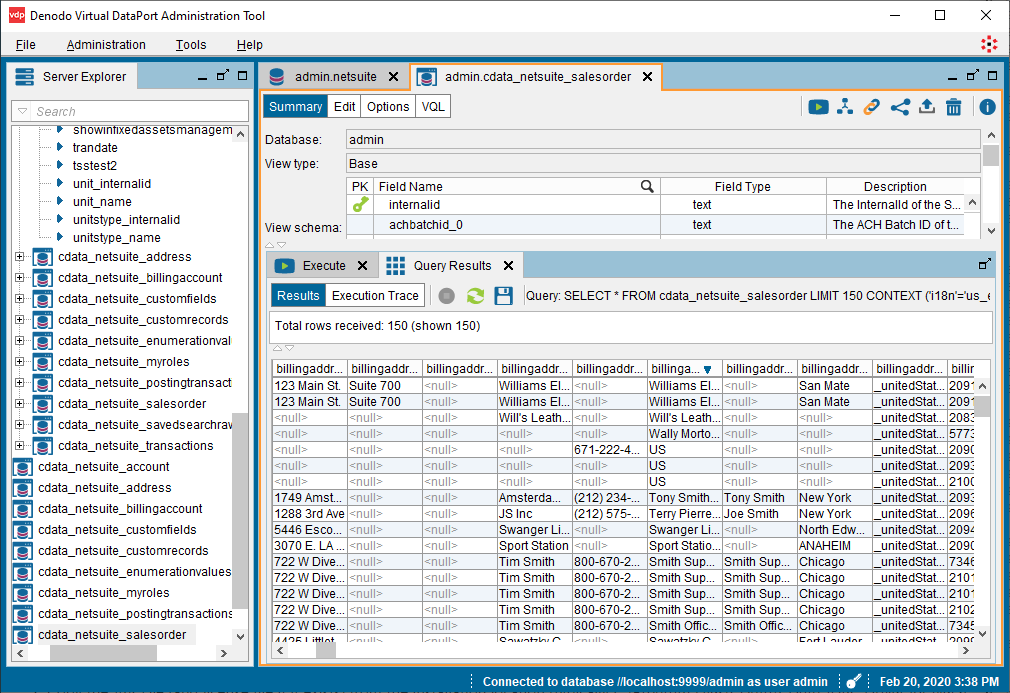
With the base view created, you can now work with live ActiveTrail data like you would any other data source in Denodo Platform, for example, querying ActiveTrail in the Denodo Data Catalog.
Download a free, 30-day trial of the CData API Driver for JDBC and start working with your live ActiveTrail data in Denodo Platform. Reach out to our Support Team if you have any questions.