Deploy the ADO.NET Provider for ApprovalMax on an SSRS Report Server

In this article, we will guide you through the deployment process of the CData ADO.NET Provider for ApprovalMax on an SQL Server Reporting Services (SSRS) report server. Additionally, you will learn how to establish a shared data source, which facilitates connectivity to real-time ApprovalMax data from various reports. You can then access these shared data sources from the Report Designer within Visual Studio. For detailed instructions on creating datasets in Report Designer using ADO.NET, please refer to the "Using ADO.NET" section in the help documentation.
Deploy the ADO.NET Provider
The provider installation automatically deploys the provider on report servers in native mode. On report servers in SharePoint mode, you can use the install-sprs.ps1 PowerShell script to deploy. Simply run the script from the lib subfolder in the installation directory, or pass in the "path" parameter.
Create a Shared Data Source for ApprovalMax
You can create shared data sources directly from a report server or SharePoint site. Alternatively, you can use Report Designer to create shared data sources.
Report Designer
You can use Report Designer to create shared data sources on native mode report servers and report servers on a SharePoint server farm.
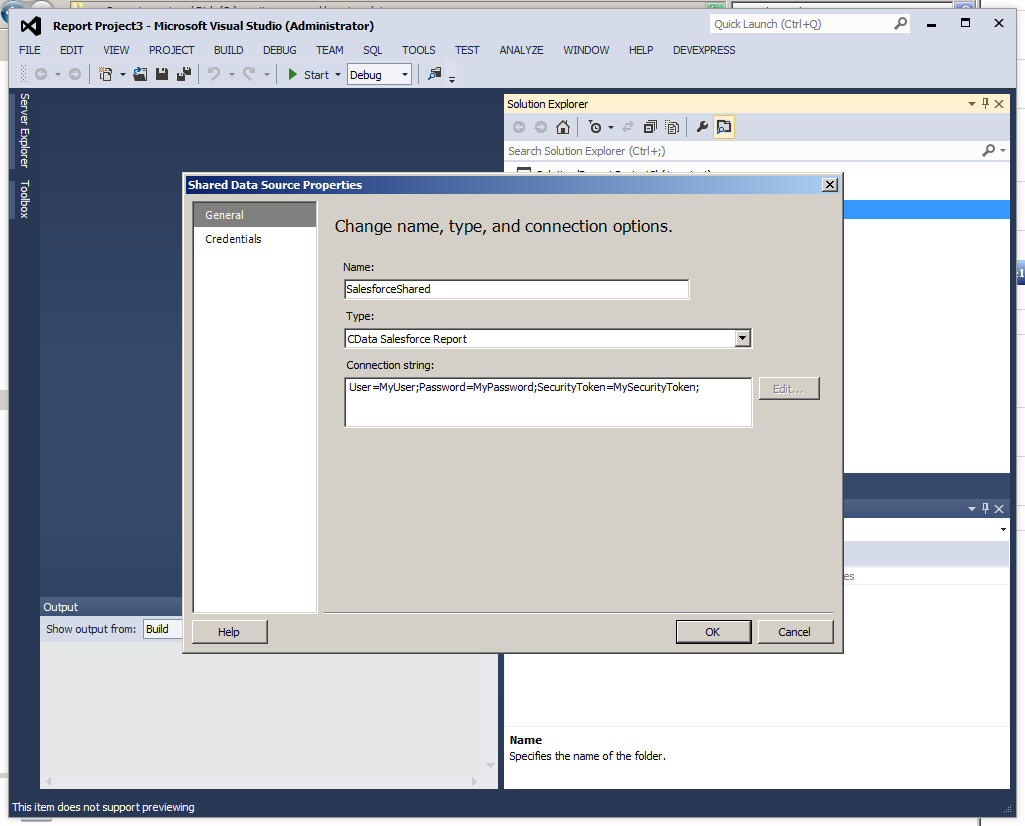
- In a Report Server Project in Visual Studio, right-click Shared Data Sources in Solution Explorer and click Add New Data Source.
- Enter a name for the data source and in the Type menu select CData API Report.
- In the Connection String box, enter the connection string to connect to ApprovalMax. A typical connection string is below:
Profile=C:\profiles\ApprovalMax.apip;AuthScheme=OAuth;InitiateOAuth=GETANDREFRESH;OAuthClientId=your_client_id;OAuthClientSecret=your_client_secret;CallbackURL=your_callback_url;Start by setting the Profile connection property to the location of the ApprovalMax Profile on disk (e.g. C:\profiles\ApprovalMax.apip). Next, set the ProfileSettings connection property to the connection string for ApprovalMax (see below).
ApprovalMax API Profile Settings
To authenticate to ApprovalMax and connect to your own data or to allow other users to connect to their data, the ApprovalMax Public API requires the OAuth 2.0 authorization code flow.
First, you will need to register an OAuth application with ApprovalMax. Sign in to the ApprovalMax Developer Portal (https://developer.approvalmax.com/applications) and create a new application. Your OAuth application will be assigned a Client ID and a Client Secret, and you must register at least one Redirect URI (Callback URL).
A Premium ApprovalMax subscription (or active trial) is required to use the Public API.
After setting the following connection properties, you are ready to connect:
- AuthScheme: Set this to OAuth.
- InitiateOAuth: Set this to GETANDREFRESH. You can use InitiateOAuth to manage the process to obtain the OAuthAccessToken.
- OAuthClientId: Set this to the Client ID that is shown in your application settings on the ApprovalMax Developer Portal.
- OAuthClientSecret: Set this to the Client Secret that is shown in your application settings on the ApprovalMax Developer Portal.
- CallbackURL: Set this to the Redirect URI that is registered in your application settings.
- Scope: (Optional) Override the default OAuth scopes. The default value openid offline_access https://www.approvalmax.com/scopes/public_api/read grants read-only access to all tables in this profile and enables refresh tokens. Use the principle of least privilege when narrowing this scope.
The OAuth Authorization URL is https://identity.approvalmax.com/connect/authorize and the Token URL is https://identity.approvalmax.com/connect/token. Both authorization_code and refresh_token grant types are supported.
When you configure the connection, you may also want to set the Max Rows connection property. This will limit the number of rows returned, which is especially helpful for improving performance when designing reports and visualizations.
- Set the folder and server URL in your project properties. If you are publishing to SharePoint, the values for all properties must be fully qualified URLs. For example:
- Report Server: http://MyServerName/ReportServer
- SharePoint: http://MyServerName/MySite/MySubsite
- Right-click the shared data source and click Deploy.
Report Manager
On native mode installations of report server, you can use Report Manager to create shared data sources. You must have permissions to manage data sources on the report server.
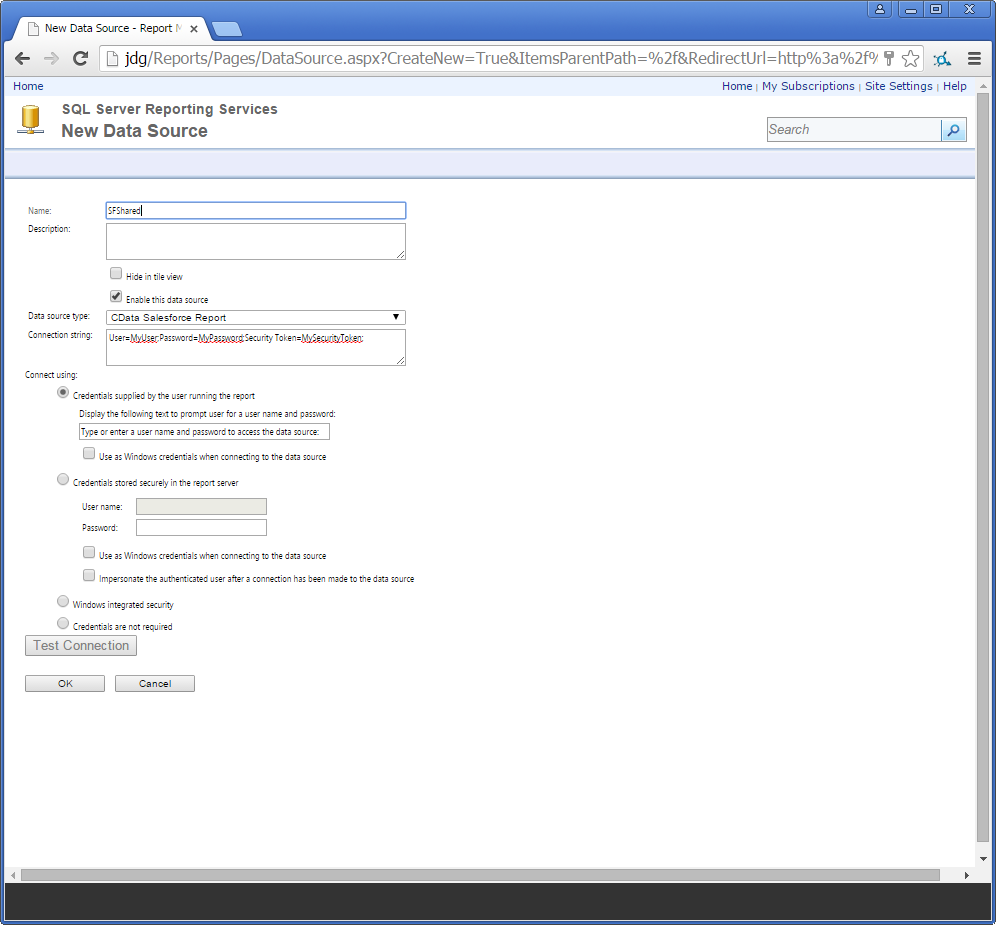
- From the Home page in Report Manager, click New Data Source. The New Data Source page is displayed.
- Enter a name for the data source and in the Data Source Type menu, select CData API Report.
- In the Connection String box, enter the connection string to connect to ApprovalMax. A typical connection string is below:
Profile=C:\profiles\ApprovalMax.apip;AuthScheme=OAuth;InitiateOAuth=GETANDREFRESH;OAuthClientId=your_client_id;OAuthClientSecret=your_client_secret;CallbackURL=your_callback_url;Start by setting the Profile connection property to the location of the ApprovalMax Profile on disk (e.g. C:\profiles\ApprovalMax.apip). Next, set the ProfileSettings connection property to the connection string for ApprovalMax (see below).
ApprovalMax API Profile Settings
To authenticate to ApprovalMax and connect to your own data or to allow other users to connect to their data, the ApprovalMax Public API requires the OAuth 2.0 authorization code flow.
First, you will need to register an OAuth application with ApprovalMax. Sign in to the ApprovalMax Developer Portal (https://developer.approvalmax.com/applications) and create a new application. Your OAuth application will be assigned a Client ID and a Client Secret, and you must register at least one Redirect URI (Callback URL).
A Premium ApprovalMax subscription (or active trial) is required to use the Public API.
After setting the following connection properties, you are ready to connect:
- AuthScheme: Set this to OAuth.
- InitiateOAuth: Set this to GETANDREFRESH. You can use InitiateOAuth to manage the process to obtain the OAuthAccessToken.
- OAuthClientId: Set this to the Client ID that is shown in your application settings on the ApprovalMax Developer Portal.
- OAuthClientSecret: Set this to the Client Secret that is shown in your application settings on the ApprovalMax Developer Portal.
- CallbackURL: Set this to the Redirect URI that is registered in your application settings.
- Scope: (Optional) Override the default OAuth scopes. The default value openid offline_access https://www.approvalmax.com/scopes/public_api/read grants read-only access to all tables in this profile and enables refresh tokens. Use the principle of least privilege when narrowing this scope.
The OAuth Authorization URL is https://identity.approvalmax.com/connect/authorize and the Token URL is https://identity.approvalmax.com/connect/token. Both authorization_code and refresh_token grant types are supported.
SharePoint
Follow the steps below to create a shared data source on a SharePoint site. Note that this step has the following prerequisites in SharePoint 2013:
- The Reporting Services add-in for SharePoint
- The Report Server Integration site collection feature
Follow the steps below to add the report server content types to your library:
- Log into SharePoint and open the library where you want to save the .rsds file.
- Click Library on the ribbon and then click Library Settings.
- In the General Settings section, click Advanced Settings.
- In the Content Types section, select Yes to allow the management of content types. The Content Types section is added to the Library Settings page.
- On the Library Settings page, click Add from existing site content types.
- In the Available Site Content Types list, select Report Data Source and click Add.
You can then create the shared data source. You will create an .rsds file that contains the connection information to ApprovalMax.
- Log into SharePoint and open the library where you want to save the .rsds file.
- On the ribbon click Documents -> New Document -> Report Data Source.
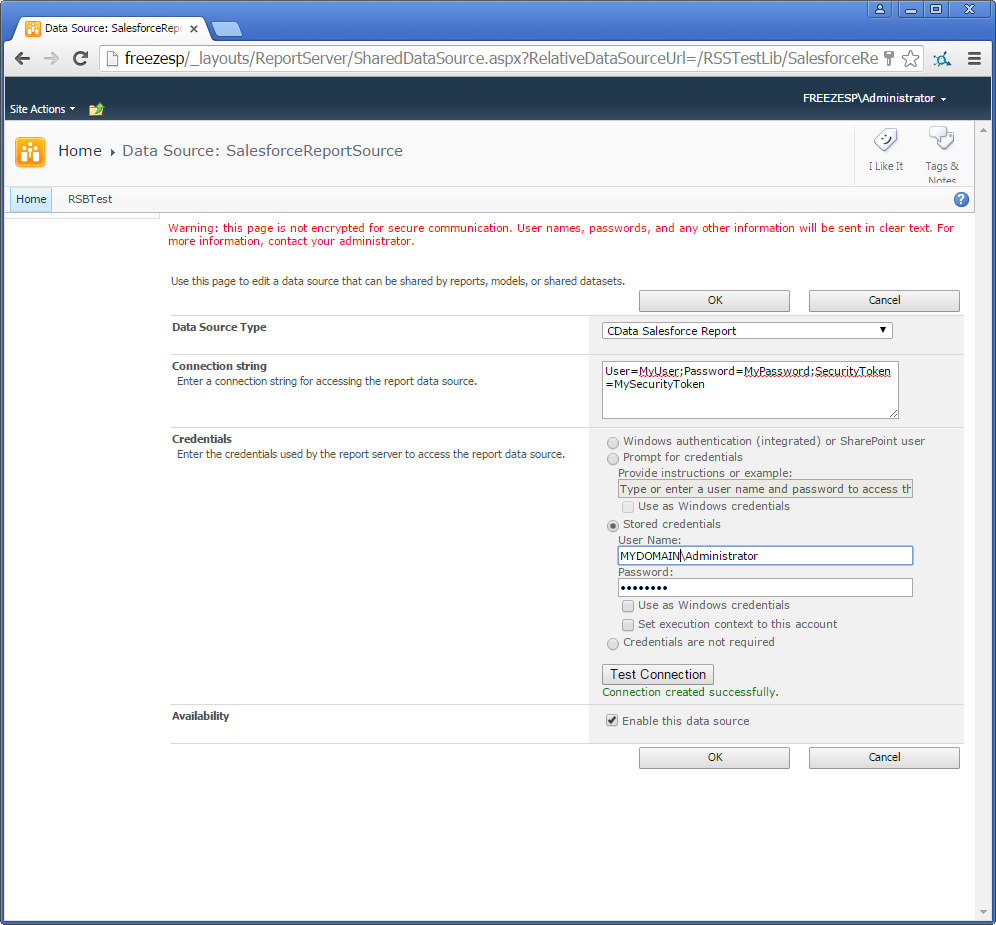
- Enter a name for the data source.
- In the Data Source Type menu, select CData API Report.
- In the Connection String box, enter the connection string to connect to ApprovalMax. A typical connection string is below:
Profile=C:\profiles\ApprovalMax.apip;AuthScheme=OAuth;InitiateOAuth=GETANDREFRESH;OAuthClientId=your_client_id;OAuthClientSecret=your_client_secret;CallbackURL=your_callback_url;Start by setting the Profile connection property to the location of the ApprovalMax Profile on disk (e.g. C:\profiles\ApprovalMax.apip). Next, set the ProfileSettings connection property to the connection string for ApprovalMax (see below).
ApprovalMax API Profile Settings
To authenticate to ApprovalMax and connect to your own data or to allow other users to connect to their data, the ApprovalMax Public API requires the OAuth 2.0 authorization code flow.
First, you will need to register an OAuth application with ApprovalMax. Sign in to the ApprovalMax Developer Portal (https://developer.approvalmax.com/applications) and create a new application. Your OAuth application will be assigned a Client ID and a Client Secret, and you must register at least one Redirect URI (Callback URL).
A Premium ApprovalMax subscription (or active trial) is required to use the Public API.
After setting the following connection properties, you are ready to connect:
- AuthScheme: Set this to OAuth.
- InitiateOAuth: Set this to GETANDREFRESH. You can use InitiateOAuth to manage the process to obtain the OAuthAccessToken.
- OAuthClientId: Set this to the Client ID that is shown in your application settings on the ApprovalMax Developer Portal.
- OAuthClientSecret: Set this to the Client Secret that is shown in your application settings on the ApprovalMax Developer Portal.
- CallbackURL: Set this to the Redirect URI that is registered in your application settings.
- Scope: (Optional) Override the default OAuth scopes. The default value openid offline_access https://www.approvalmax.com/scopes/public_api/read grants read-only access to all tables in this profile and enables refresh tokens. Use the principle of least privilege when narrowing this scope.
The OAuth Authorization URL is https://identity.approvalmax.com/connect/authorize and the Token URL is https://identity.approvalmax.com/connect/token. Both authorization_code and refresh_token grant types are supported.