




Process & Analyze ApprovalMax Data in Databricks (AWS)

Databricks is a cloud-based service that provides data processing capabilities through Apache Spark. When paired with the CData JDBC Driver, customers can use Databricks to perform data engineering and data science on live ApprovalMax data. This article explains how to host the CData JDBC Driver in AWS, as well as connect to and process live ApprovalMax data in Databricks.
With built-in optimized data processing, the CData JDBC Driver offers unmatched performance for interacting with live ApprovalMax data. When you issue complex SQL queries to ApprovalMax, the driver pushes supported SQL operations, like filters and aggregations, directly to ApprovalMax and utilizes the embedded SQL engine to process unsupported operations client-side (often SQL functions and JOIN operations). Its built-in dynamic metadata querying allows you to work with and analyze ApprovalMax data using native data types.
Install the CData JDBC Driver in Databricks
To work with live ApprovalMax data in Databricks, install the driver on your Databricks cluster.
- Navigate to your Databricks administration screen and select the target cluster.
- On the Libraries tab, click "Install New."
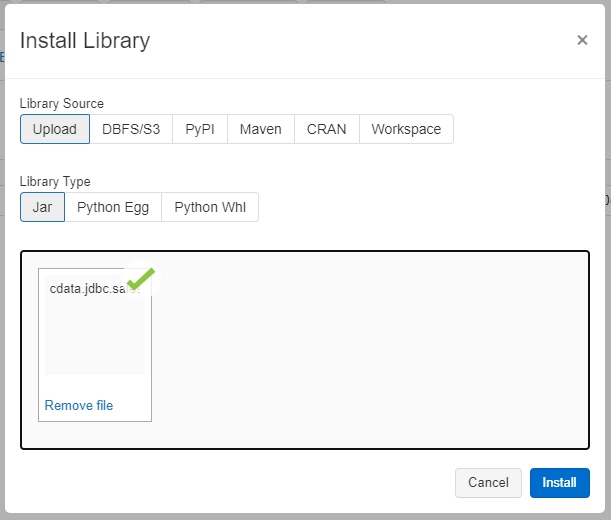
- Select "Upload" as the Library Source and "Jar" as the Library Type.
- Upload the JDBC JAR file (cdata.jdbc.api.jar) from the installation location (typically C:\Program Files\CData\CData API Driver for JDBC\lib).
Access ApprovalMax Data in your Notebook: Python
With the JAR file installed, we are ready to work with live ApprovalMax data in Databricks. Start by creating a new notebook in your workspace. Name the notebook, select Python as the language (though Scala is available as well), and choose the cluster where you installed the JDBC driver. When the notebook launches, we can configure the connection, query ApprovalMax, and create a basic report.
Configure the Connection to ApprovalMax
Connect to ApprovalMax by referencing the JDBC Driver class and constructing a connection string to use in the JDBC URL. Additionally, you will need to set the RTK property in the JDBC URL (unless you are using a Beta driver). You can view the licensing file included in the installation for information on how to set this property.
Step 1: Connection Information
driver = "cdata.jdbc.api.APIDriver"
url = "jdbc:api:RTK=5246...;Profile=C:\profiles\ApprovalMax.apip;AuthScheme=OAuth;InitiateOAuth=GETANDREFRESH;OAuthClientId=your_client_id;OAuthClientSecret=your_client_secret;CallbackURL=your_callback_url;"
Built-in Connection String Designer
For assistance in constructing the JDBC URL, use the connection string designer built into the ApprovalMax JDBC Driver. Either double-click the JAR file or execute the jar file from the command-line.
java -jar cdata.jdbc.api.jar
Fill in the connection properties and copy the connection string to the clipboard.
Start by setting the Profile connection property to the location of the ApprovalMax Profile on disk (e.g. C:\profiles\ApprovalMax.apip). Next, set the ProfileSettings connection property to the connection string for ApprovalMax (see below).
ApprovalMax API Profile Settings
To authenticate to ApprovalMax and connect to your own data or to allow other users to connect to their data, the ApprovalMax Public API requires the OAuth 2.0 authorization code flow.
First, you will need to register an OAuth application with ApprovalMax. Sign in to the ApprovalMax Developer Portal (https://developer.approvalmax.com/applications) and create a new application. Your OAuth application will be assigned a Client ID and a Client Secret, and you must register at least one Redirect URI (Callback URL).
A Premium ApprovalMax subscription (or active trial) is required to use the Public API.
After setting the following connection properties, you are ready to connect:
- AuthScheme: Set this to OAuth.
- InitiateOAuth: Set this to GETANDREFRESH. You can use InitiateOAuth to manage the process to obtain the OAuthAccessToken.
- OAuthClientId: Set this to the Client ID that is shown in your application settings on the ApprovalMax Developer Portal.
- OAuthClientSecret: Set this to the Client Secret that is shown in your application settings on the ApprovalMax Developer Portal.
- CallbackURL: Set this to the Redirect URI that is registered in your application settings.
- Scope: (Optional) Override the default OAuth scopes. The default value openid offline_access https://www.approvalmax.com/scopes/public_api/read grants read-only access to all tables in this profile and enables refresh tokens. Use the principle of least privilege when narrowing this scope.
The OAuth Authorization URL is https://identity.approvalmax.com/connect/authorize and the Token URL is https://identity.approvalmax.com/connect/token. Both authorization_code and refresh_token grant types are supported.

Load ApprovalMax Data
Once you configure the connection, you can load ApprovalMax data as a dataframe using the CData JDBC Driver and the connection information.
Step 2: Reading the data
remote_table = spark.read.format ( "jdbc" ) \
	.option ( "driver" , driver) \
	.option ( "url" , url) \
	.option ( "dbtable" , "UserProfiles") \
	.load ()
Display ApprovalMax Data
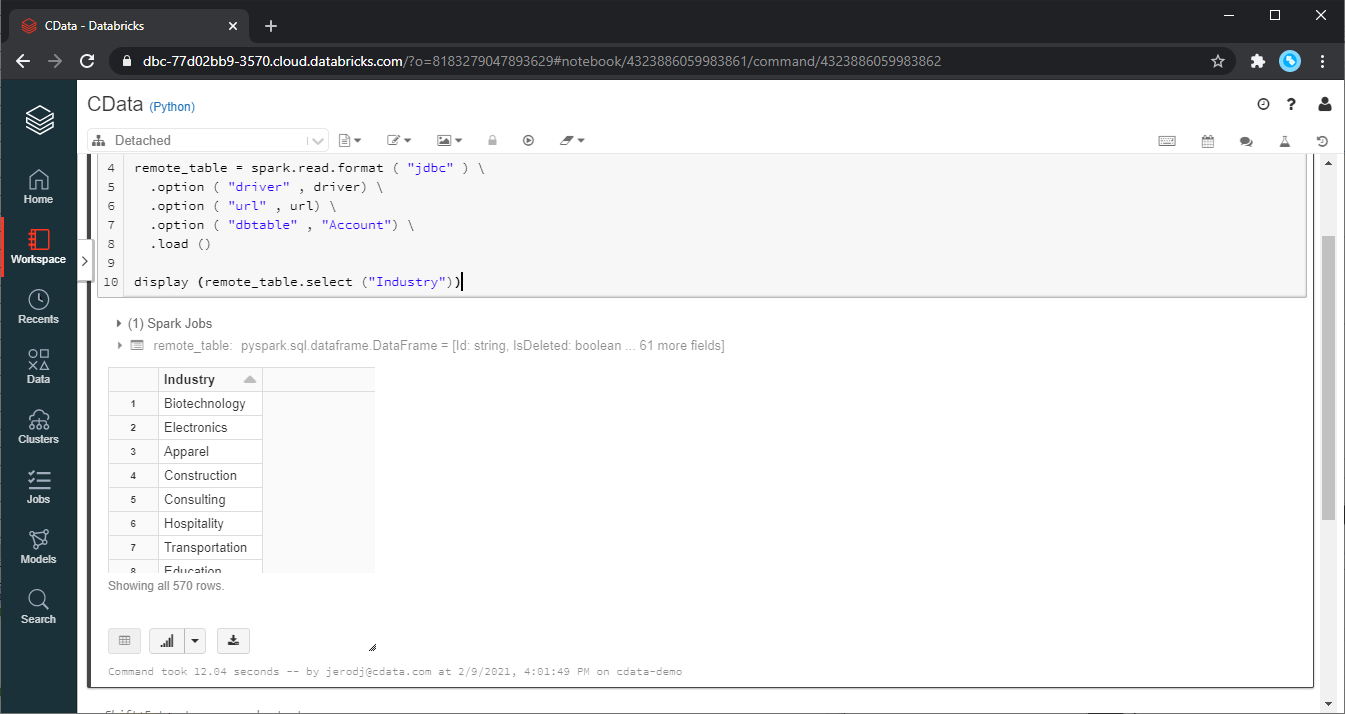
Check the loaded ApprovalMax data by calling the display function.
Step 3: Checking the result
display (remote_table.select ("UserId"))
Analyze ApprovalMax Data in Databricks
If you want to process data with Databricks SparkSQL, register the loaded data as a Temp View.
Step 4: Create a view or table
remote_table.createOrReplaceTempView ( "SAMPLE_VIEW" )
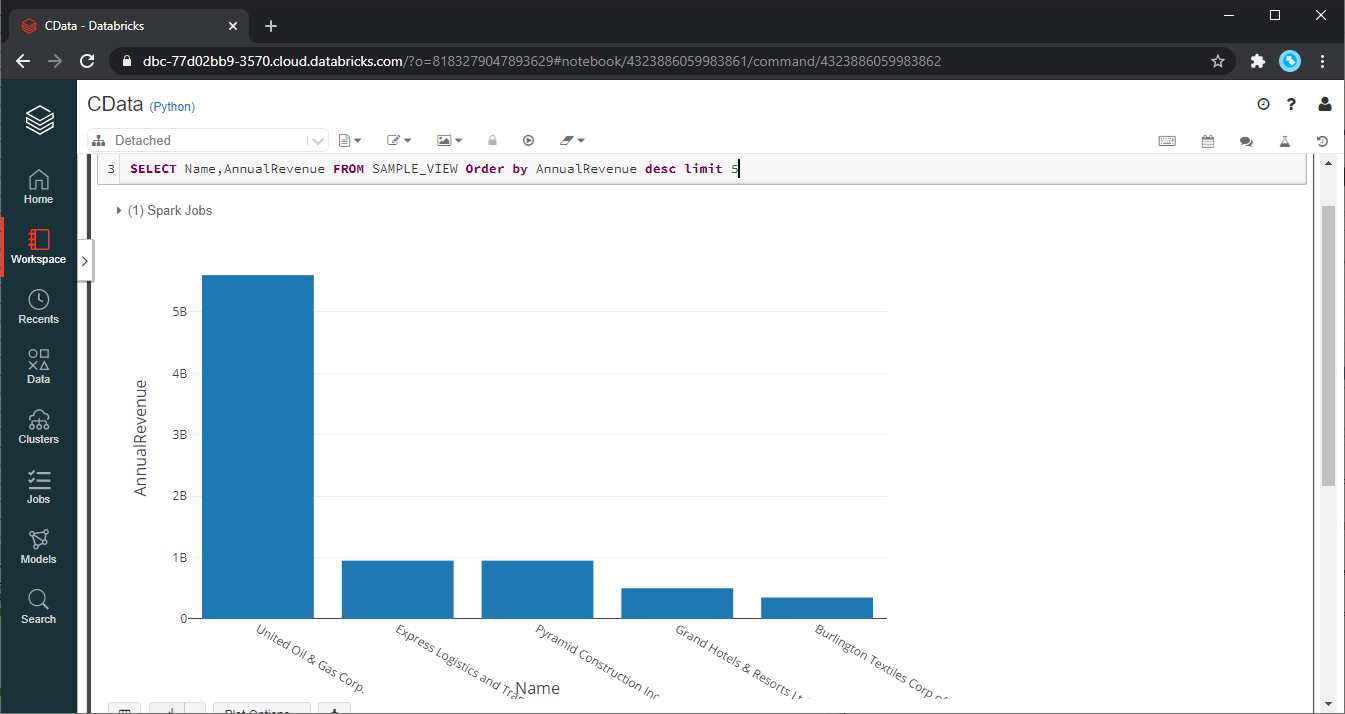
With the Temp View created, you can use SparkSQL to retrieve the ApprovalMax data for reporting, visualization, and analysis.
% sql

SELECT UserId, Email FROM SAMPLE_VIEW ORDER BY Email DESC LIMIT 5
The data from ApprovalMax is only available in the target notebook. If you want to use it with other users, save it as a table.
remote_table.write.format ( "parquet" ) .saveAsTable ( "SAMPLE_TABLE" )
Download a free, 30-day trial of the CData API Driver for JDBC and start working with your live ApprovalMax data in Databricks. Reach out to our Support Team if you have any questions.