




How to connect to ApprovalMax Data from Spring Boot

Spring Boot is a framework that makes engineering Java web applications easier. It offers the ability to create standalone applications with minimal configuration. When paired with the CData JDBC driver for ApprovalMax, Spring Boot can work with live ApprovalMax data. This article shows how to configure data sources and retrieve data in your Java Spring Boot Application, using the CData API Driver for JDBC.
With built-in optimized data processing, the CData JDBC Driver offers unmatched performance for interacting with live ApprovalMax data. When you issue complex SQL queries to ApprovalMax, the driver pushes supported SQL operations, like filters and aggregations, directly to ApprovalMax and utilizes the embedded SQL engine to process unsupported operations client-side (often SQL functions and JOIN operations). Its built-in dynamic metadata querying allows you to work with and analyze ApprovalMax data using native data types.
Creating the Spring Boot Project in Java
In an IDE (in this tutorial, we use IntelliJ), choose a Maven project:
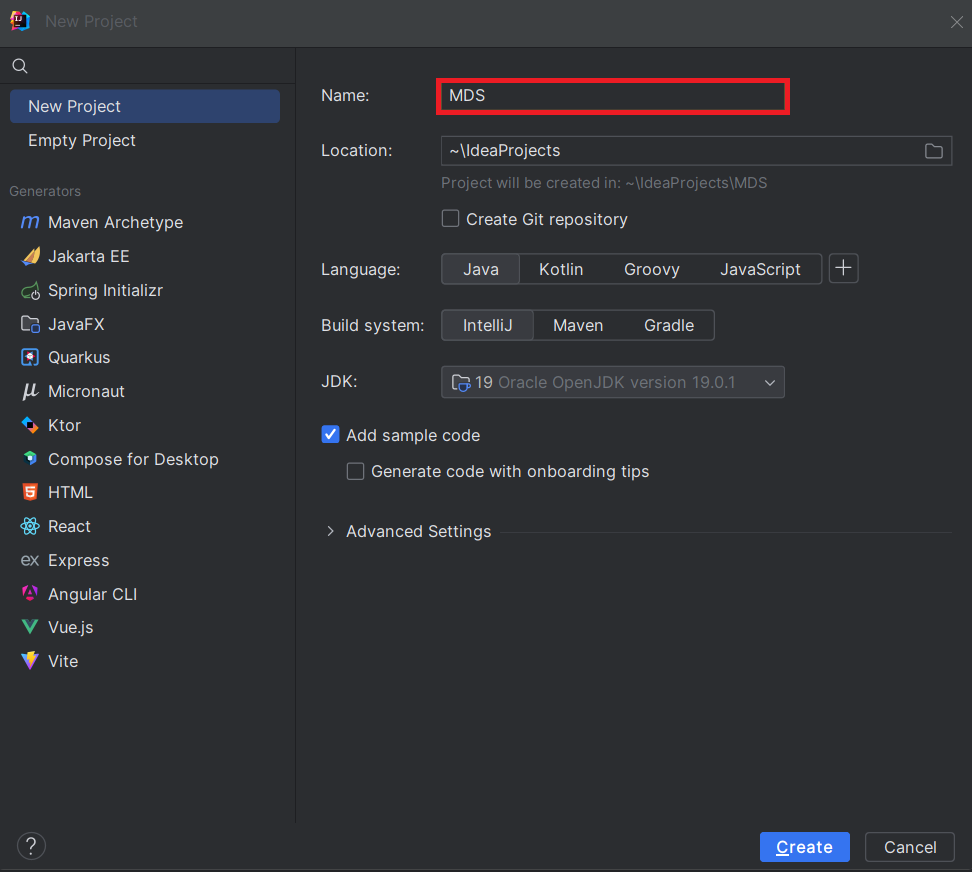 In the generated project, go to the pom.xml file, and add the required dependencies for Spring Boot:
<?xml version="1.0" encoding="UTF-8"?>
<project xmlns="http://maven.apache.org/POM/4.0.0" xmlns:xsi="http://www.w3.org/2001/XMLSchema-instance"
xsi:schemaLocation="http://maven.apache.org/POM/4.0.0 https://maven.apache.org/xsd/maven-4.0.0.xsd">
<modelVersion>4.0.0</modelVersion>
<parent>
<groupId>org.springframework.boot</groupId>
<artifactId>spring-boot-starter-parent</artifactId>
<version>2.7.2</version>
<relativePath/>
</parent>
<groupId>com.example</groupId>
<artifactId>demo</artifactId>
<version>0.0.1-SNAPSHOT</version>
<name>demo</name>
<description>Demo project for Spring Boot</description>
<properties>
<java.version>1.8</java.version>
</properties>
<build>
<plugins>
	<plugin>
		<groupId>org.springframework.boot</groupId>
		<artifactId>spring-boot-maven-plugin</artifactId>
	</plugin>

	<plugin>
		<groupId>org.apache.maven.plugins</groupId>
		<artifactId>maven-install-plugin</artifactId>
		<version>2.5.1</version>
		<executions>
			<execution>
				<id>id.install-file</id>
				<phase>clean</phase>
				<goals>
					<goal>install-file</goal>
				</goals>
				<configuration>
					<file>C:\Program Files\CData\CData API Driver for JDBC ####\lib\cdata.jdbc.api.jar</file>
					<groupId>org.cdata.connectors</groupId>
					<artifactId>cdata-api-connector</artifactId>
					<version>23</version>
					<packaging>jar</packaging>
				</configuration>
			</execution>
		</executions>
	</plugin>
</plugins>
</build>

<dependencies>
<dependency>
	<groupId>org.springframework.boot</groupId>
	<artifactId>spring-boot-starter-web</artifactId>
</dependency>
<dependency>
	<groupId>org.springframework.boot</groupId>
	<artifactId>spring-boot-starter-jdbc</artifactId>
	<version>2.7.0</version>
</dependency>
<dependency>
	<groupId>org.cdata.connectors</groupId>
	<artifactId>cdata-api-connector</artifactId>
	<version>23</version>
</dependency>

<dependency>
	<groupId>org.springframework.boot</groupId>
	<artifactId>spring-boot-starter-test</artifactId>
	<scope>test</scope>
</dependency>
</dependencies>


<distributionManagement>
<repository>
	<uniqueVersion>false</uniqueVersion>
	<id>test</id>
	<name>My Repository</name>
	<url>scp://repo/maven2</url>
	<layout>default</layout>
</repository>
</distributionManagement>

</project>
Note: The year (####) and the version number (as seen in the provided XML script) should be adjusted according to the current version of the CData JDBC driver being utilized.
Project Structure
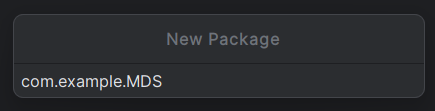
In the java directory, create a new package. Usually the name of the package is the name of the groupId
(com.example) followed by the artifactId (.MDS).
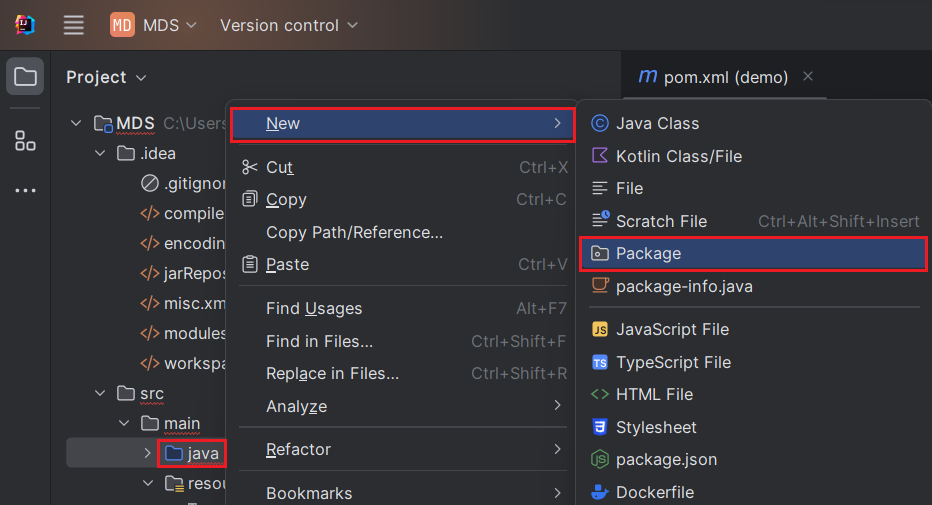
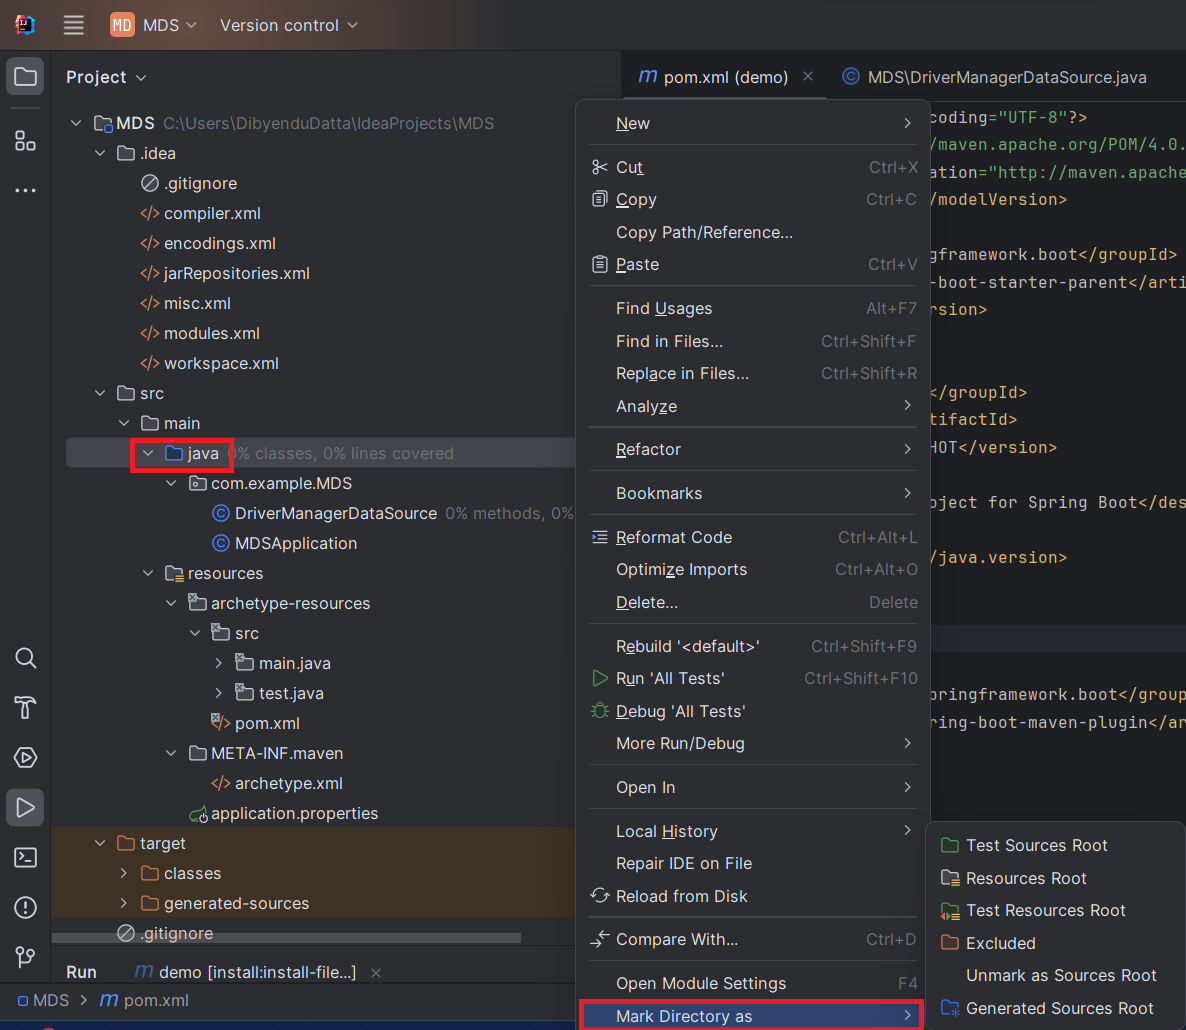
Mark the "java" directory as the "Sources Root" (denoted by a blue color). To do this, right-click the java directory and choose Mark Directory as -> Sources Root (As shown below). Additionally, mark the "resources" directory as the "Resources Root."
Store Database Connection Properties
Create an "application.properties" file to store the database connection properties. To do this, right-click on the "resources" folder, opt for New -> File, input the file name as "application.properties," and press Enter.
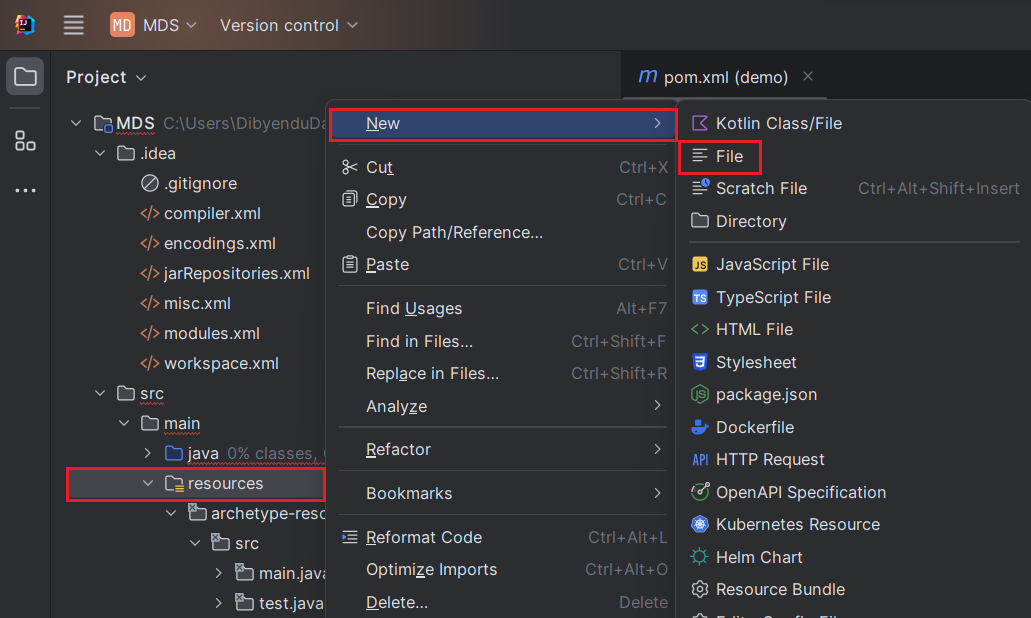
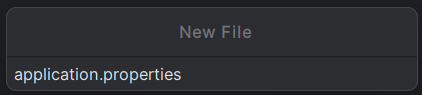
In the application.properties file, we set the configuration properties for the ApprovalMax JDBC Driver, using the Class name and JDBC URL:
	spring.datasource.driver=cdata.jdbc.api.APIDriver
	spring.datasource.url=jdbc:api:Profile=C:\profiles\ApprovalMax.apip;AuthScheme=OAuth;InitiateOAuth=GETANDREFRESH;OAuthClientId=your_client_id;OAuthClientSecret=your_client_secret;CallbackURL=your_callback_url;
Built-in Connection String Designer
For assistance in constructing the JDBC URL, use the connection string designer built into the ApprovalMax JDBC Driver. Either double-click the JAR file or execute the jar file from the command-line.
java -jar cdata.jdbc.api.jar
Start by setting the Profile connection property to the location of the ApprovalMax Profile on disk (e.g. C:\profiles\ApprovalMax.apip). Next, set the ProfileSettings connection property to the connection string for ApprovalMax (see below).
ApprovalMax API Profile Settings
To authenticate to ApprovalMax and connect to your own data or to allow other users to connect to their data, the ApprovalMax Public API requires the OAuth 2.0 authorization code flow.
First, you will need to register an OAuth application with ApprovalMax. Sign in to the ApprovalMax Developer Portal (https://developer.approvalmax.com/applications) and create a new application. Your OAuth application will be assigned a Client ID and a Client Secret, and you must register at least one Redirect URI (Callback URL).
A Premium ApprovalMax subscription (or active trial) is required to use the Public API.
After setting the following connection properties, you are ready to connect:
- AuthScheme: Set this to OAuth.
- InitiateOAuth: Set this to GETANDREFRESH. You can use InitiateOAuth to manage the process to obtain the OAuthAccessToken.
- OAuthClientId: Set this to the Client ID that is shown in your application settings on the ApprovalMax Developer Portal.
- OAuthClientSecret: Set this to the Client Secret that is shown in your application settings on the ApprovalMax Developer Portal.
- CallbackURL: Set this to the Redirect URI that is registered in your application settings.
- Scope: (Optional) Override the default OAuth scopes. The default value openid offline_access https://www.approvalmax.com/scopes/public_api/read grants read-only access to all tables in this profile and enables refresh tokens. Use the principle of least privilege when narrowing this scope.
The OAuth Authorization URL is https://identity.approvalmax.com/connect/authorize and the Token URL is https://identity.approvalmax.com/connect/token. Both authorization_code and refresh_token grant types are supported.

After setting the properties in the application.properties file, we now configure them.
Data Source Configuration
First, we mark the ApprovalMax data source as our primary data source. Then, we create a Data Source Bean.
Create a DriverManagerDataSource.java file and create a Bean within it, as shown below. If @Bean gives an error, Spring Boot may not have loaded properly. To fix this, go to File -> Invalidate Caches and restart. Additionally, make sure that Maven has added the Spring Boot dependencies.
To create a data source bean, we use the DriverManagerDataSource Class. This class allows us to set
the properties of the data source. To create this Java class, right-click on "com.example.MDS" package, and choose New -> Java Class.
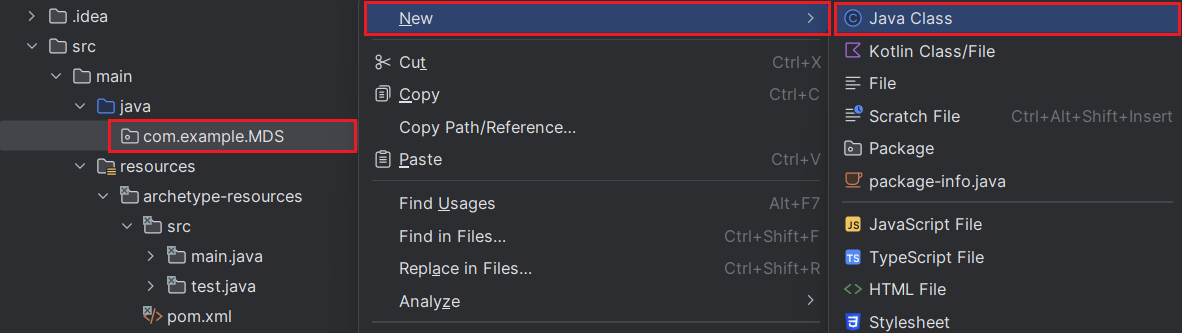
The following code shows the bean definition of our data source. Each driver should have a bean.
import org.springframework.beans.factory.annotation.Autowired;
import org.springframework.boot.jdbc.DataSourceBuilder;
import org.springframework.context.annotation.Bean;
import org.springframework.context.annotation.Primary;
import org.springframework.core.env.Environment;
import javax.sql.DataSource;

public class DriverManagerDataSource{
	@Autowired
	private static Environment env;

	@Bean(name ="API")
	@Primary
	public static DataSource APIDataSource()
	{

	DataSourceBuilder<?> dataSourceBuilder = DataSourceBuilder.create();
		dataSourceBuilder.driverClassName("cdata.jdbc.api.APIDriver");
		dataSourceBuilder.url("jdbc:api:Profile=C:\profiles\ApprovalMax.apip;AuthScheme=OAuth;InitiateOAuth=GETANDREFRESH;OAuthClientId=your_client_id;OAuthClientSecret=your_client_secret;CallbackURL=your_callback_url;");
		return dataSourceBuilder.build();
	}

	//@Override
	public void setEnvironment( final Environment environment) {
	env=environment;
	}
}
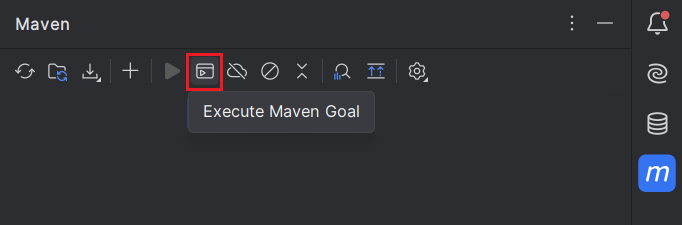
Next, move the ApprovalMax jar file to the Documents folder (see path in command below) - The idea is to have a path without any spaces for the jar file. Then, click the
Maven icon (top right corner of IntelliJ) and click "Execute Maven Goal." Now, run the following command:

mvn install:install-file "-Dfile=C:\Program Files\CData\CData API Driver for JDBC ####\lib\cdata.jdbc.api.jar" -DgroupId=org.cdata.connectors -DartifactId=cdata-api-connector -Dversion=23 -Dpackaging=jar
Follow either of the given steps to run this command:
- The "-Dfile location" can be kept as the default installation path of the CData JDBC Driver. Make sure to keep the path in quotations in this case. Also, change the year and "Dversion" based on the current version of the driver being used.
- As mentioned earlier in the article, in case you relocate the
jar file to the Documents folder, make sure to modify the path in the provided command. In such instances, avoid enclosing the Dfile location in quotations and edit "Dversion" based on the current version of the driver being used.
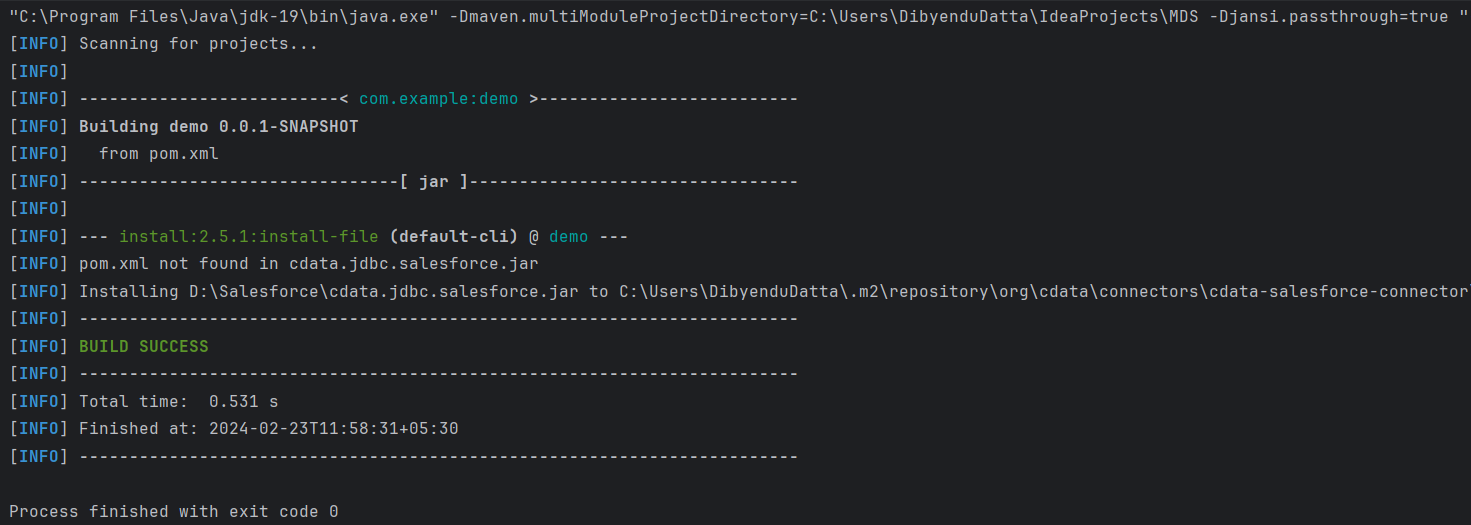
After pressing enter, we see the following output:
Testing the Connection
The last step is testing the connection. Create a new Java class following the format
import org.springframework.boot.SpringApplication;
import org.springframework.boot.autoconfigure.SpringBootApplication;
import org.springframework.boot.autoconfigure.jdbc.DataSourceAutoConfiguration;
import java.sql.Connection;
import java.sql.SQLException;
import static com.example.demo.DriverManagerDataSources.APIDataSource;


@SpringBootApplication(exclude = {DataSourceAutoConfiguration.class})
	public class MDSApplication {
		//remove the comment on the line below
		public static void main (){
		SpringApplication.run(DemoApplication.class, args);
		Connection conn = APIDataSource().getConnection();
		System.out.println("Catalog: "+ conn.getCatalog());
	}
}
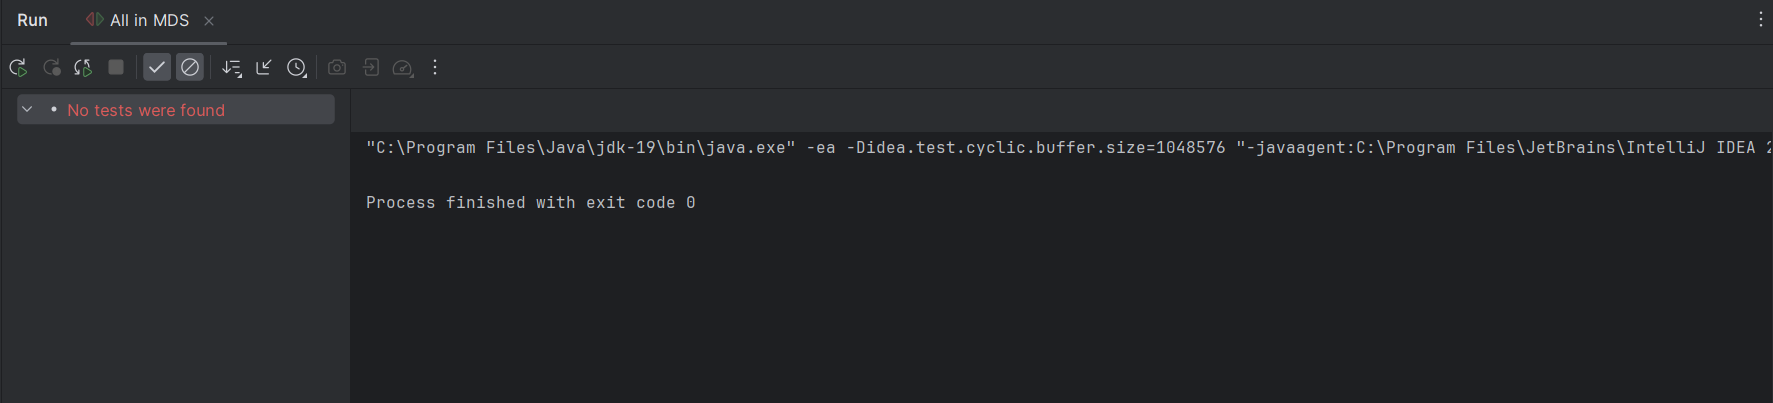
The output generated should look like this:
Free Trial & More Information
Download a free, 30-day trial of the CData JDBC Driver for ApprovalMax and start working with your live ApprovalMax in Spring Boot.