




Connect to Real-Time ApprovalMax Data in Power Apps Using Dataflows to Build Custom Applications

Power Apps is a suite of apps, services, and connectors that allows users to build custom applications with minimal or no coding. It empowers businesses to create tailored apps that solve specific business challenges, automate workflows, and integrate with various data sources, including Microsoft Dataverse, SQL Server, and third-party services.
Dataflows in Power Apps simplify the process of importing, transforming, and loading external data into Microsoft Dataverse or other storage systems. They allow users to connect to multiple data sources (like Salesforce, Excel, or SQL databases), clean or shape the data, and store it in Power Apps. When paired with the CData API Driver for Power BI, it provides access to ApprovalMax data to build custom applications and more
This article demonstrates how you can easily connect to ApprovalMax using the CData API Driver for Power BI and integrate your ApprovalMax data through the Power Apps on-premises data gateway.
Configure a DSN to connect to ApprovalMax data
Installing the Power BI Connector creates a DSN (data source name) called CData PBI ApprovalMax Sys. This the name of the DSN that Power BI uses to request a connection to the data source. Configure the DSN by filling in the required connection properties.
You can use the Microsoft ODBC Data Source Administrator to create a new DSN or configure (and rename) an existing DSN: From the Start menu, enter "ODBC Data Sources." Ensure that you run the version of the ODBC Administrator that corresponds to the bitness of your Power BI Desktop installation (32-bit or 64-bit).
Start by setting the Profile connection property to the location of the ApprovalMax Profile on disk (e.g. C:\profiles\ApprovalMax.apip). Next, set the ProfileSettings connection property to the connection string for ApprovalMax (see below).
ApprovalMax API Profile Settings
To authenticate to ApprovalMax and connect to your own data or to allow other users to connect to their data, the ApprovalMax Public API requires the OAuth 2.0 authorization code flow.
First, you will need to register an OAuth application with ApprovalMax. Sign in to the ApprovalMax Developer Portal (https://developer.approvalmax.com/applications) and create a new application. Your OAuth application will be assigned a Client ID and a Client Secret, and you must register at least one Redirect URI (Callback URL).
A Premium ApprovalMax subscription (or active trial) is required to use the Public API.
After setting the following connection properties, you are ready to connect:
- AuthScheme: Set this to OAuth.
- InitiateOAuth: Set this to GETANDREFRESH. You can use InitiateOAuth to manage the process to obtain the OAuthAccessToken.
- OAuthClientId: Set this to the Client ID that is shown in your application settings on the ApprovalMax Developer Portal.
- OAuthClientSecret: Set this to the Client Secret that is shown in your application settings on the ApprovalMax Developer Portal.
- CallbackURL: Set this to the Redirect URI that is registered in your application settings.
- Scope: (Optional) Override the default OAuth scopes. The default value openid offline_access https://www.approvalmax.com/scopes/public_api/read grants read-only access to all tables in this profile and enables refresh tokens. Use the principle of least privilege when narrowing this scope.
The OAuth Authorization URL is https://identity.approvalmax.com/connect/authorize and the Token URL is https://identity.approvalmax.com/connect/token. Both authorization_code and refresh_token grant types are supported.
Configure the on-premises data gateway to recognize the CData API Driver for Power BI
In this section, we will configure the on-premises data gateway to detect the CData API Driver for Power BI installed on your system. If you haven't installed the data gateway yet, you can download it from Microsoft's official website.
Set Up the Power BI Gateway
Follow the given process to configure the on-premise data gateway on your machine:
- Download and install the on-premises data gateway (recommended) option.
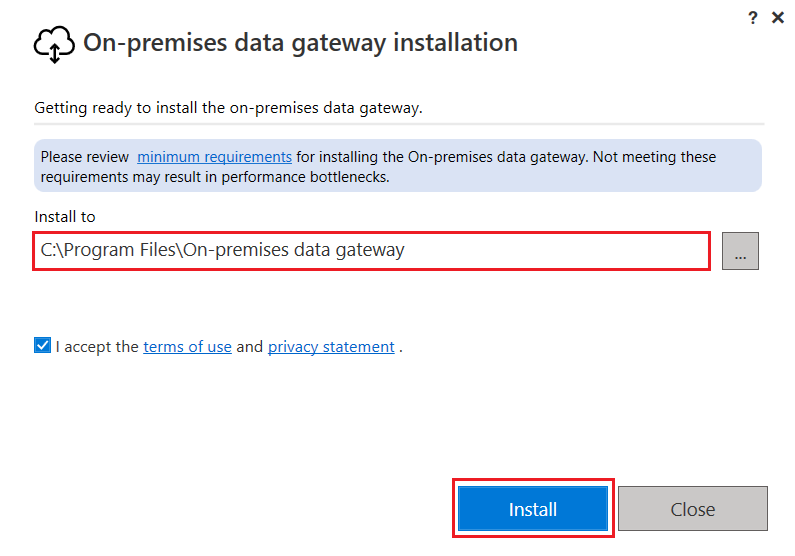
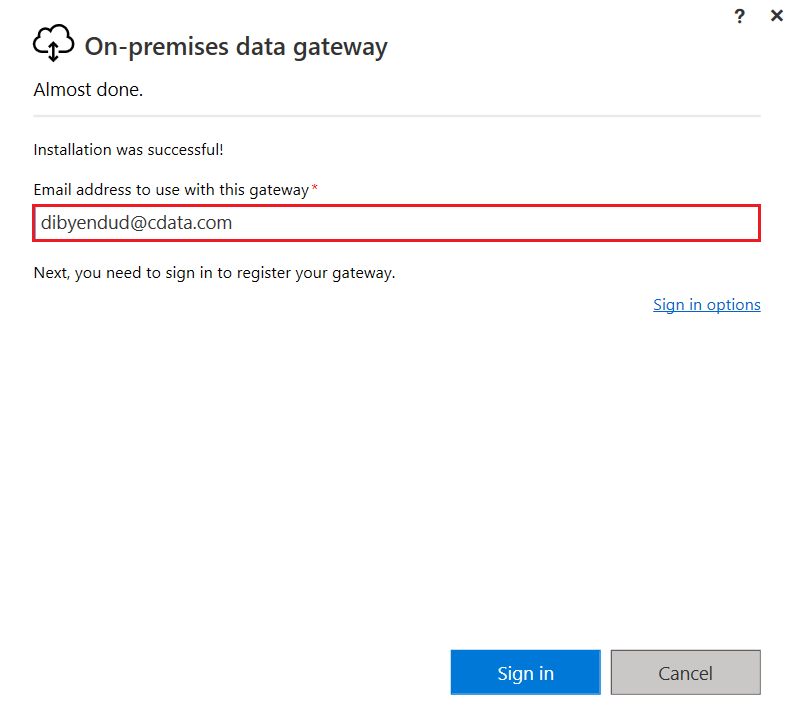
- Sign into the gateway.
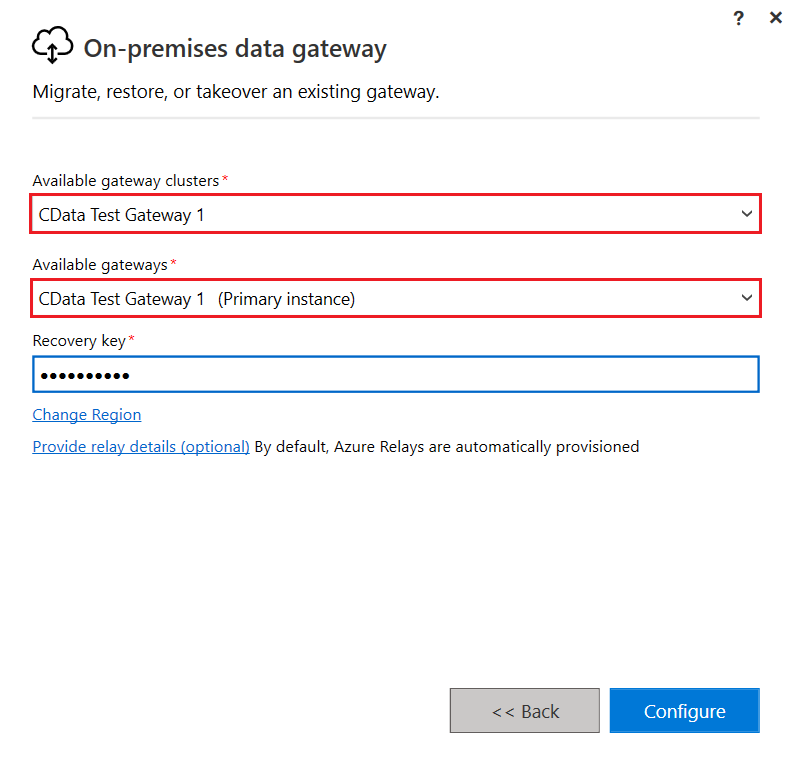
- Create a name for the new gateway and specify a recovery key.
- Open the new gateway, navigate to the Connector tab, and select the path C:\Program Files\CData\CData API Driver for Power BI from the folder. Click on Apply.
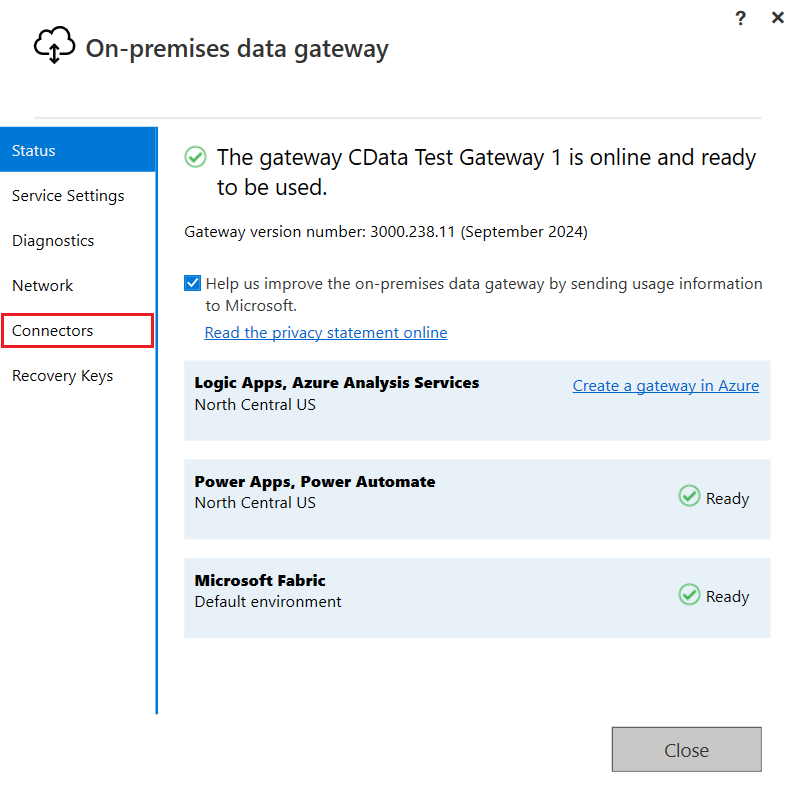
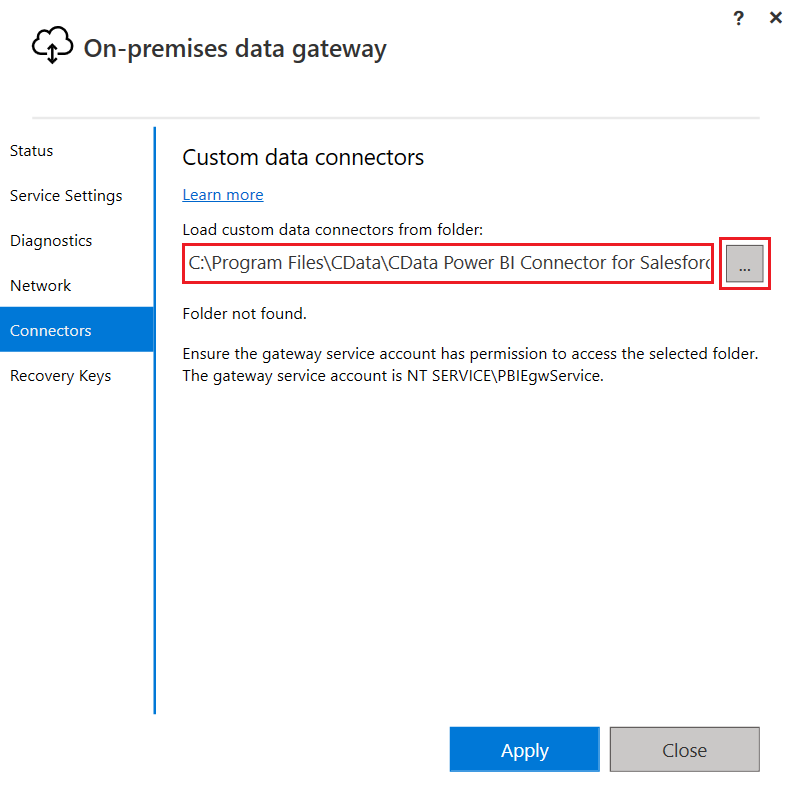
NOTE: Select the folder where the gateway will search for the CData Power BI Connector.
- Once the CData API Driver for Power BI is identified by the gateway, you're good to go.
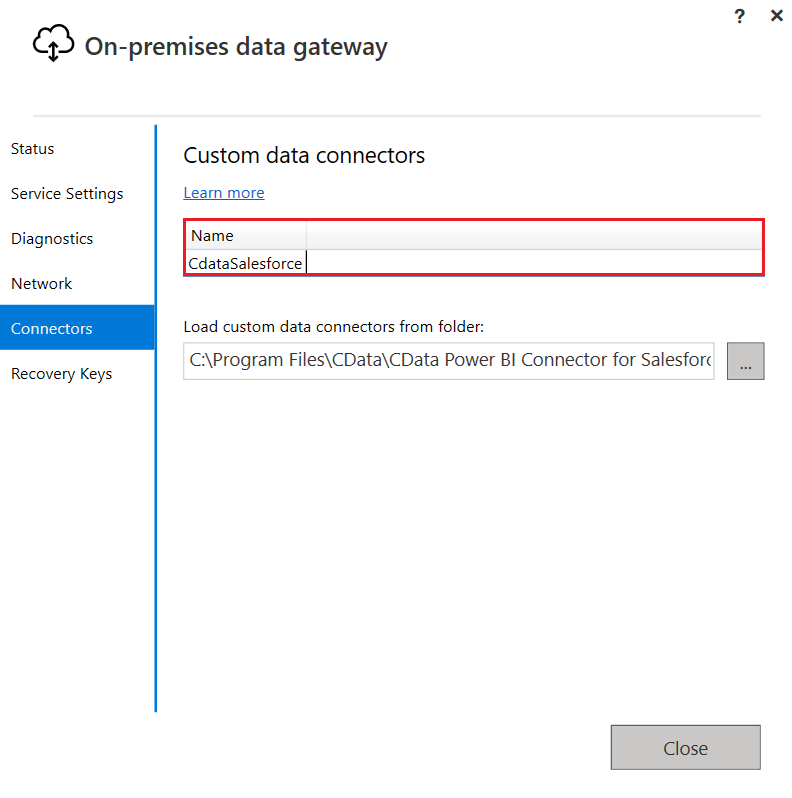
Configure a dataflow connection in Power Apps
Once the on-premise data gateway is configured and a new gateway is created, follow these steps to create a dataflow that pulls in the ApprovalMax data into Power Apps:
- Open Power Apps.
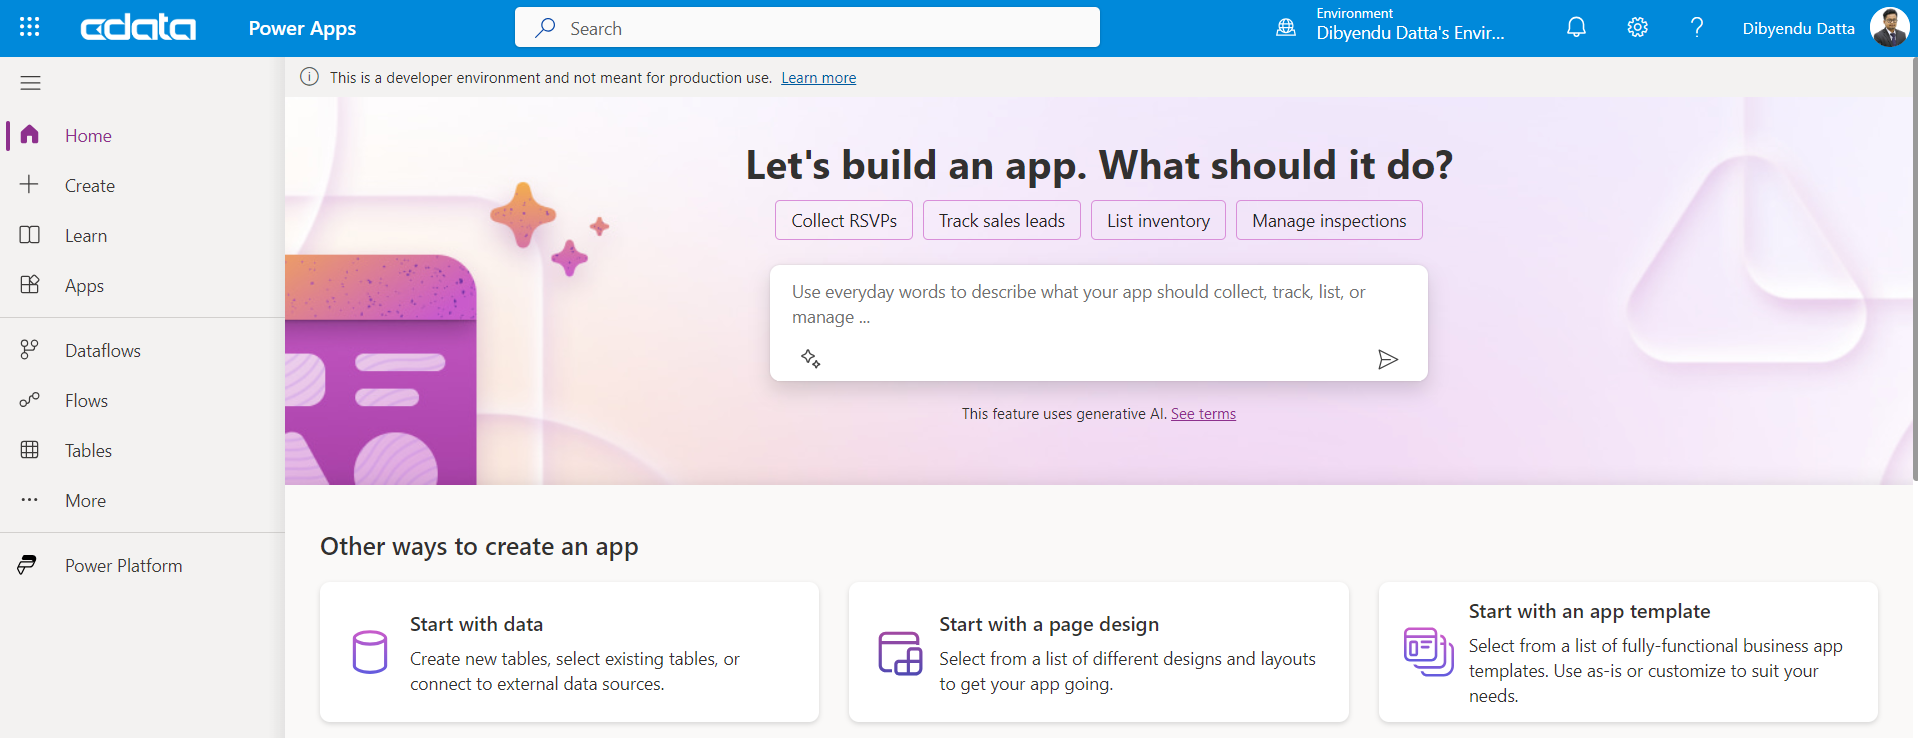
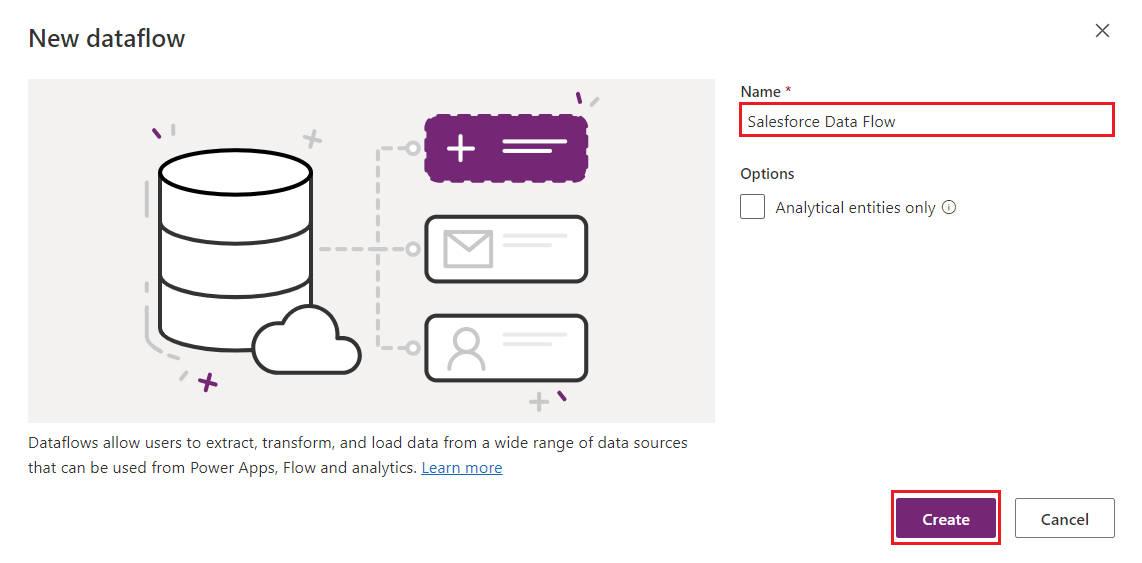
- Select Dataflows from the left panel on the Power Apps screen and click + New Dataflow.
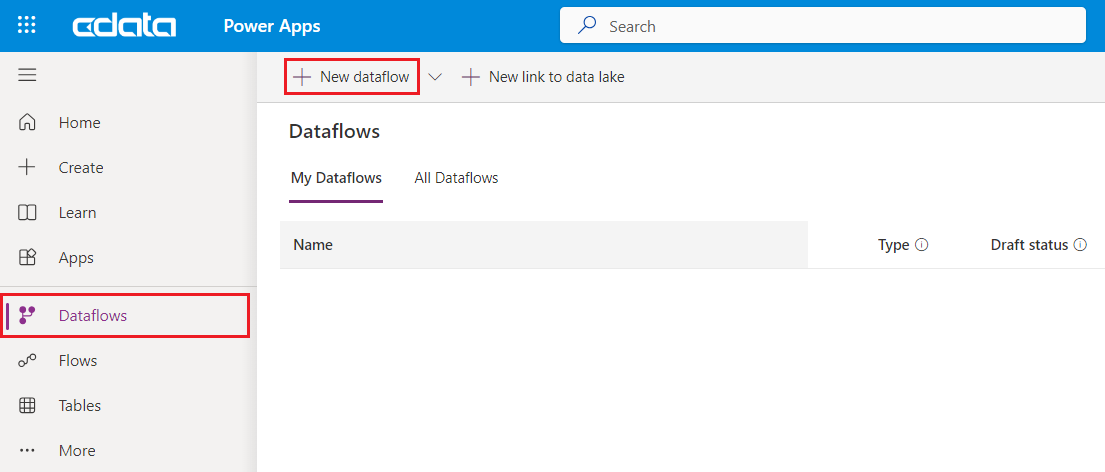
- Provide a name to the dataflow and click Create.
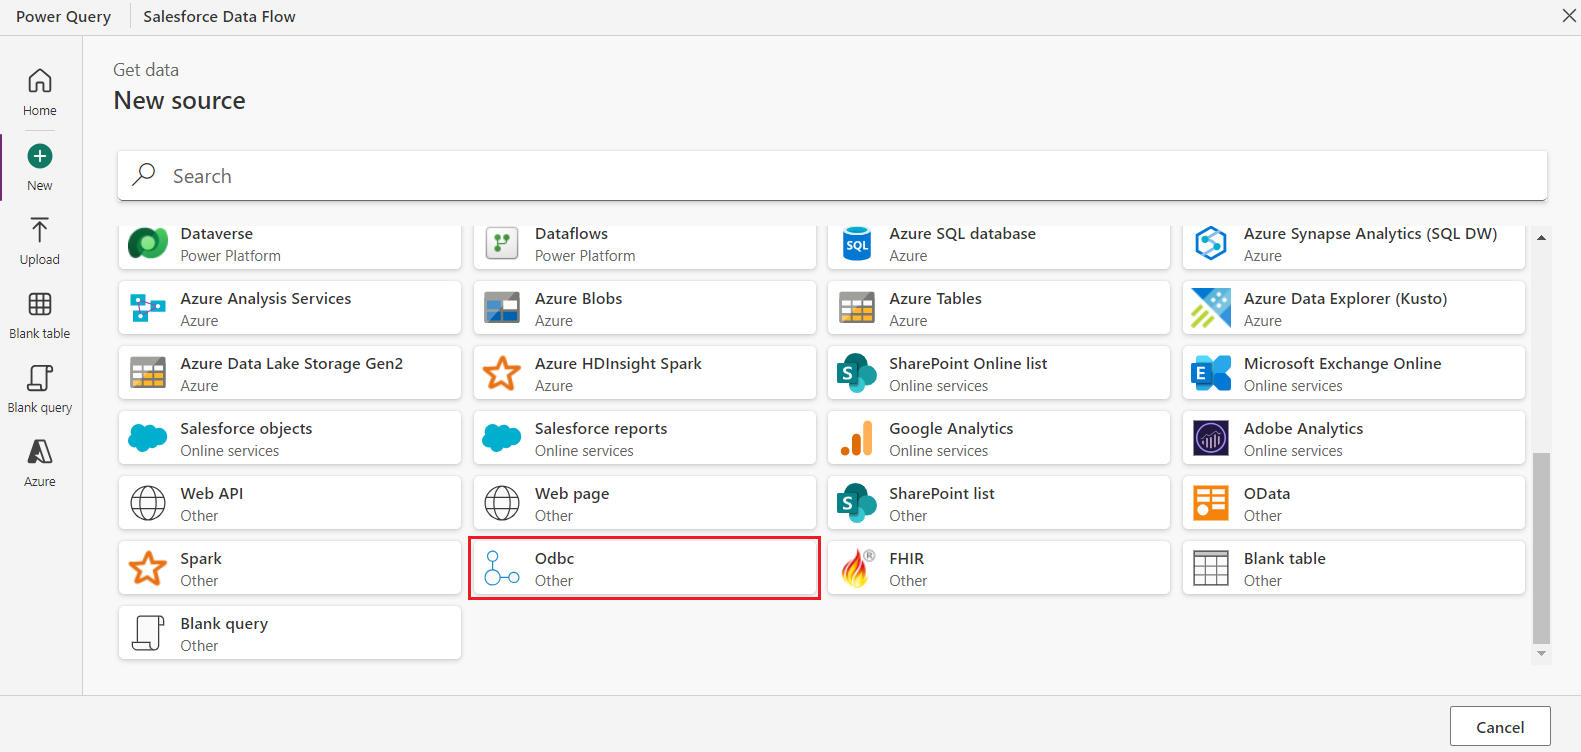
- Select ODBC from the list of data sources.
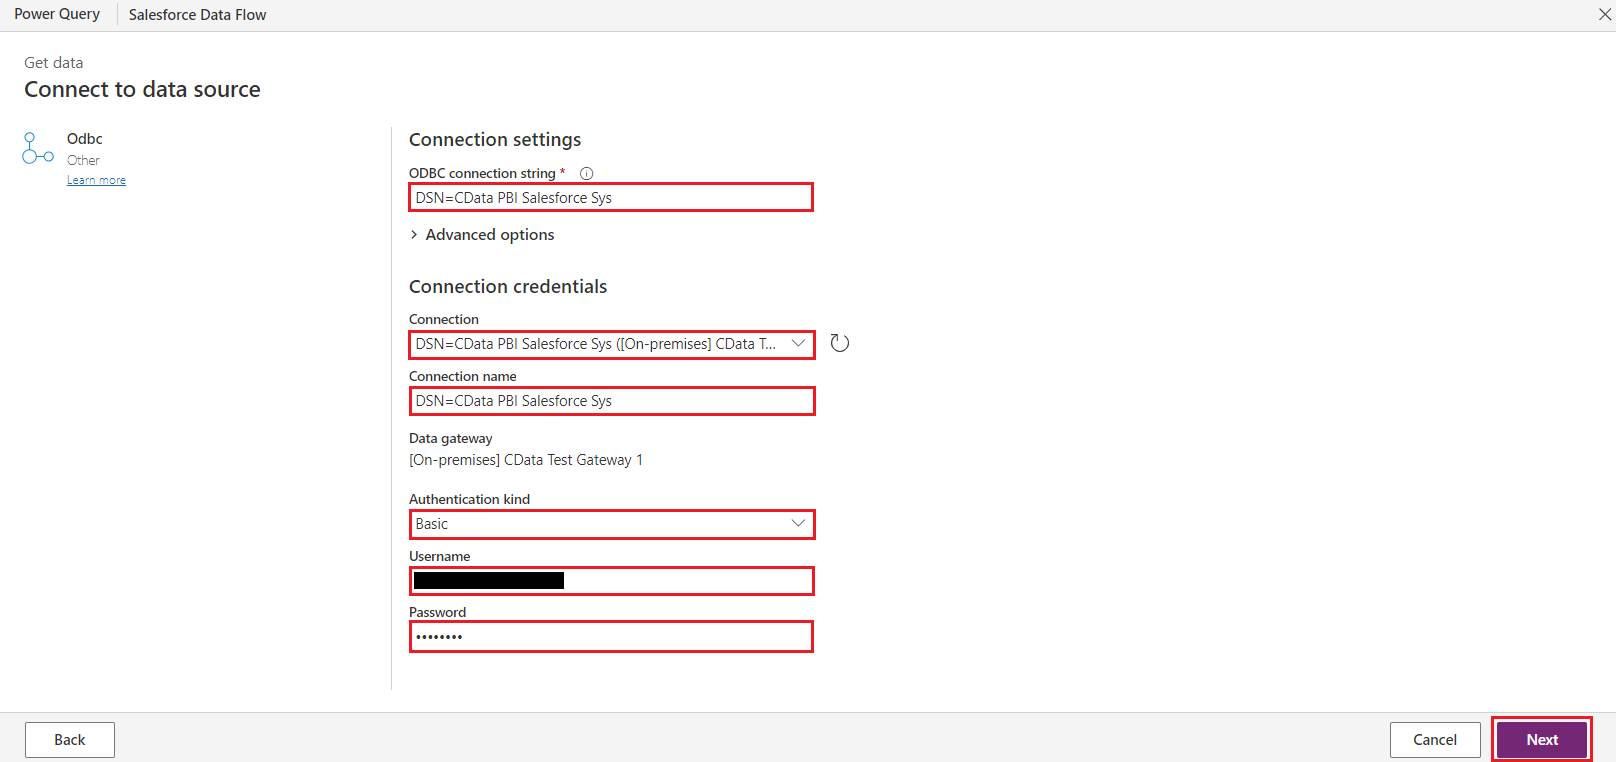
- On the ODBC Connection settings screen, use the connection details you set up earlier by entering DSN=Connection name (in this case, DSN=CData PBI ApprovalMax Sys) in the connection string. The on-premise data gateway will display available gateways for connection - select the one you created. Due to the current specifications of Power Apps dataflows, authentication is required for ODBC connections. Choose Basic as the authentication type and enter the ApprovalMax Username and Password. Click Next.
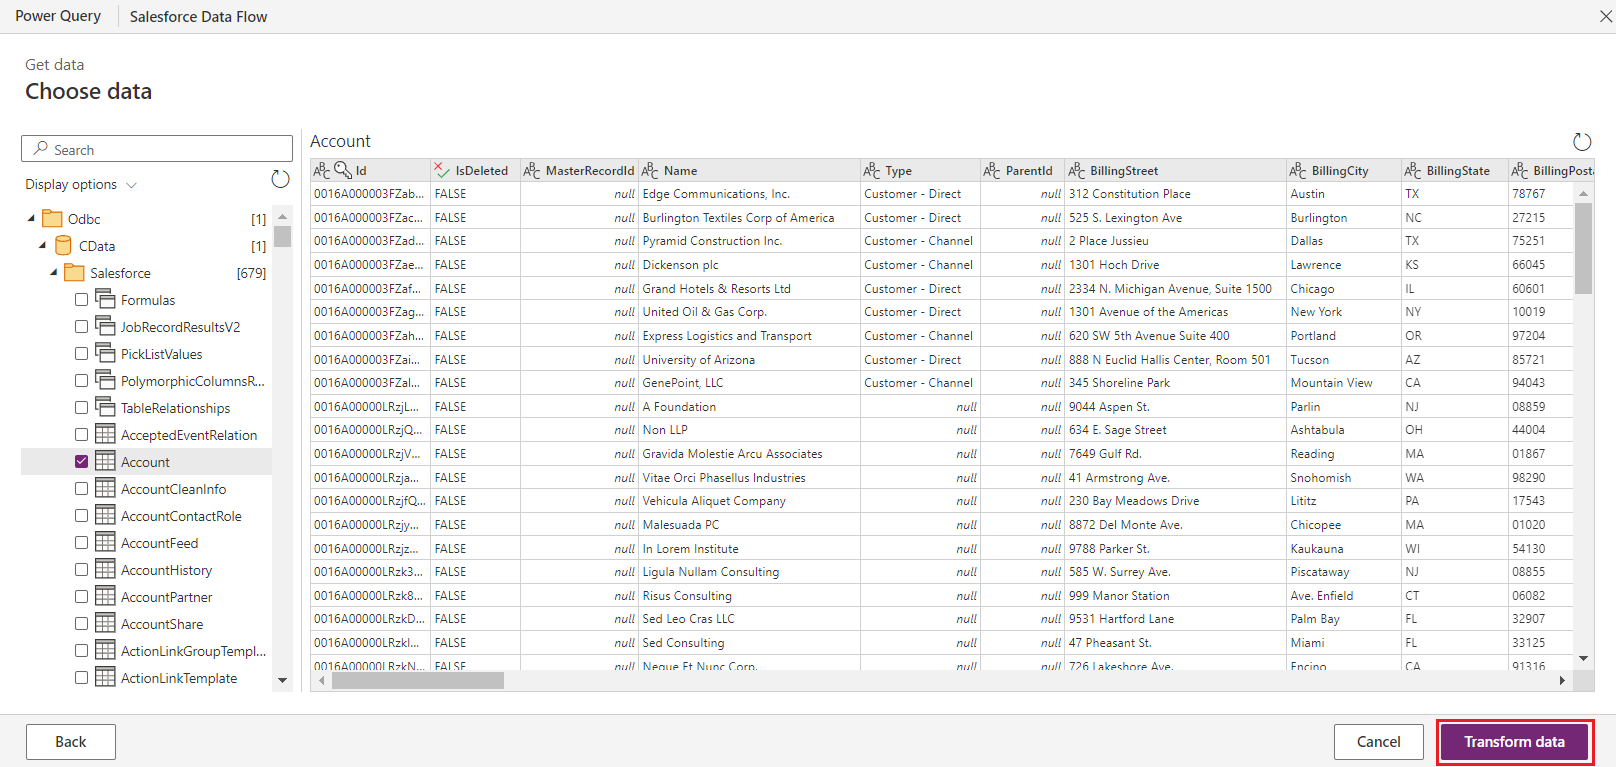
- ApprovalMax is now connected to Power Apps. Under Display options, expand CData under ODBC and ApprovalMax under CData, and a list of all the ApprovalMax tables will appear in the panel. When you select any one of these tables, a preview will appear, showing that the ApprovalMax data is correctly referenced through the Power BI connector and on-premise data gateway. Next, click on Transform Data.
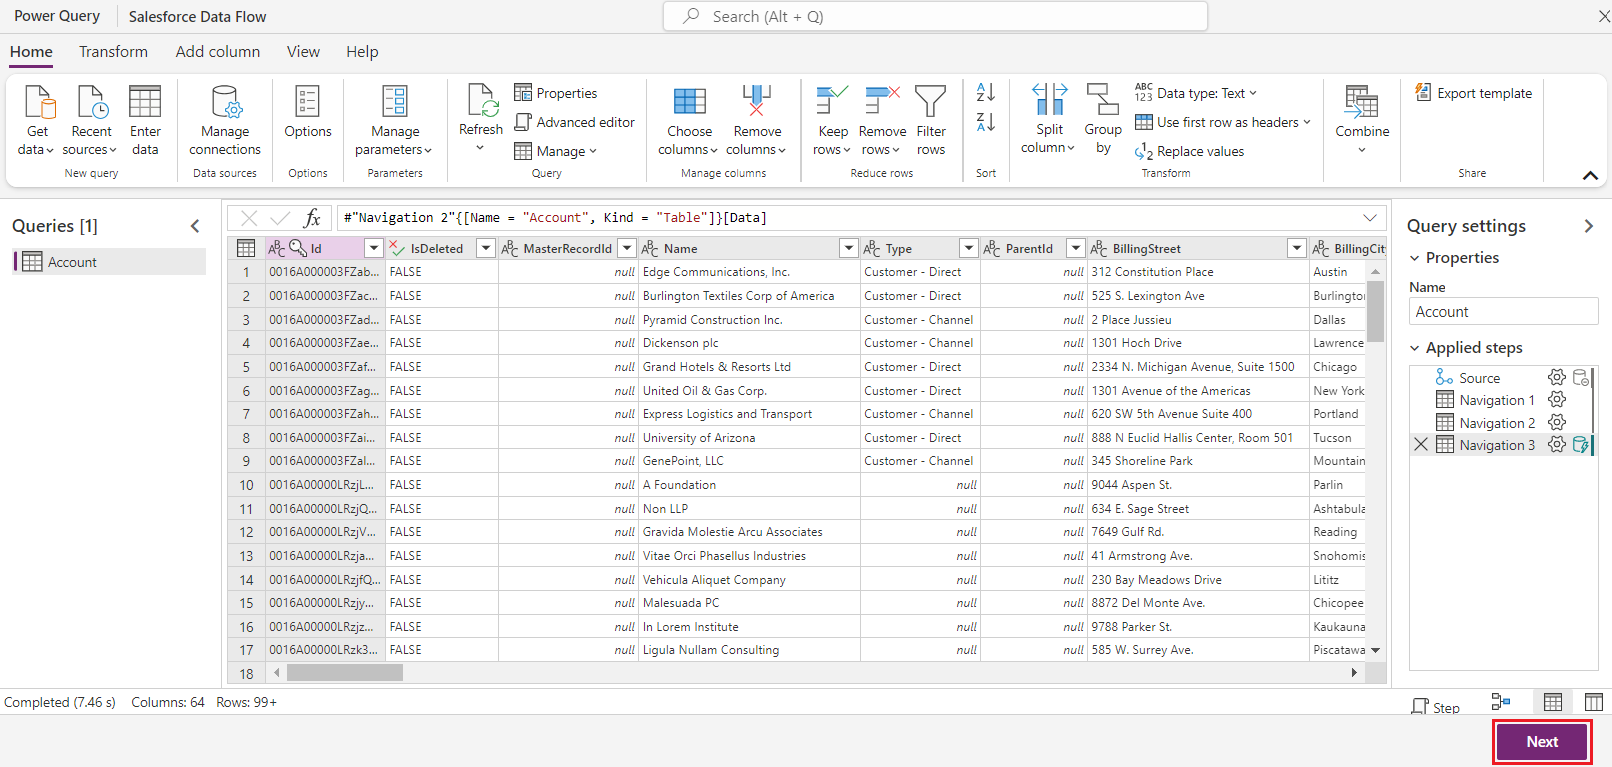
- On the query editing screen, if no column conversion is needed, you can skip this step and proceed by clicking on Next.
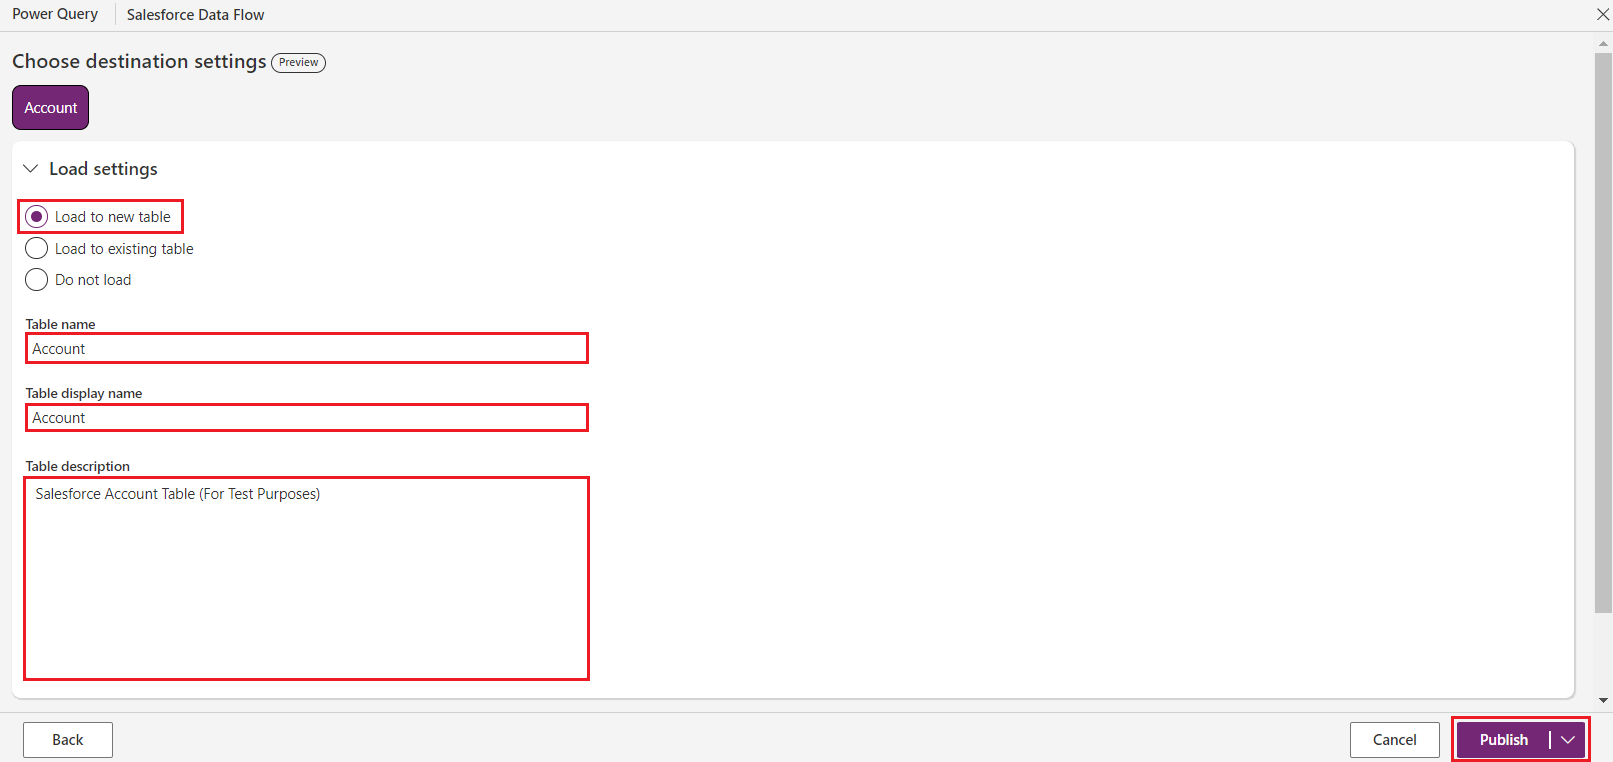
- In the Choose destination settings screen, you can select how the selected table needs to be loaded by choosing options like Load to new table, Load to existing table, and Do not load. You can also change the Table display name and description as required.
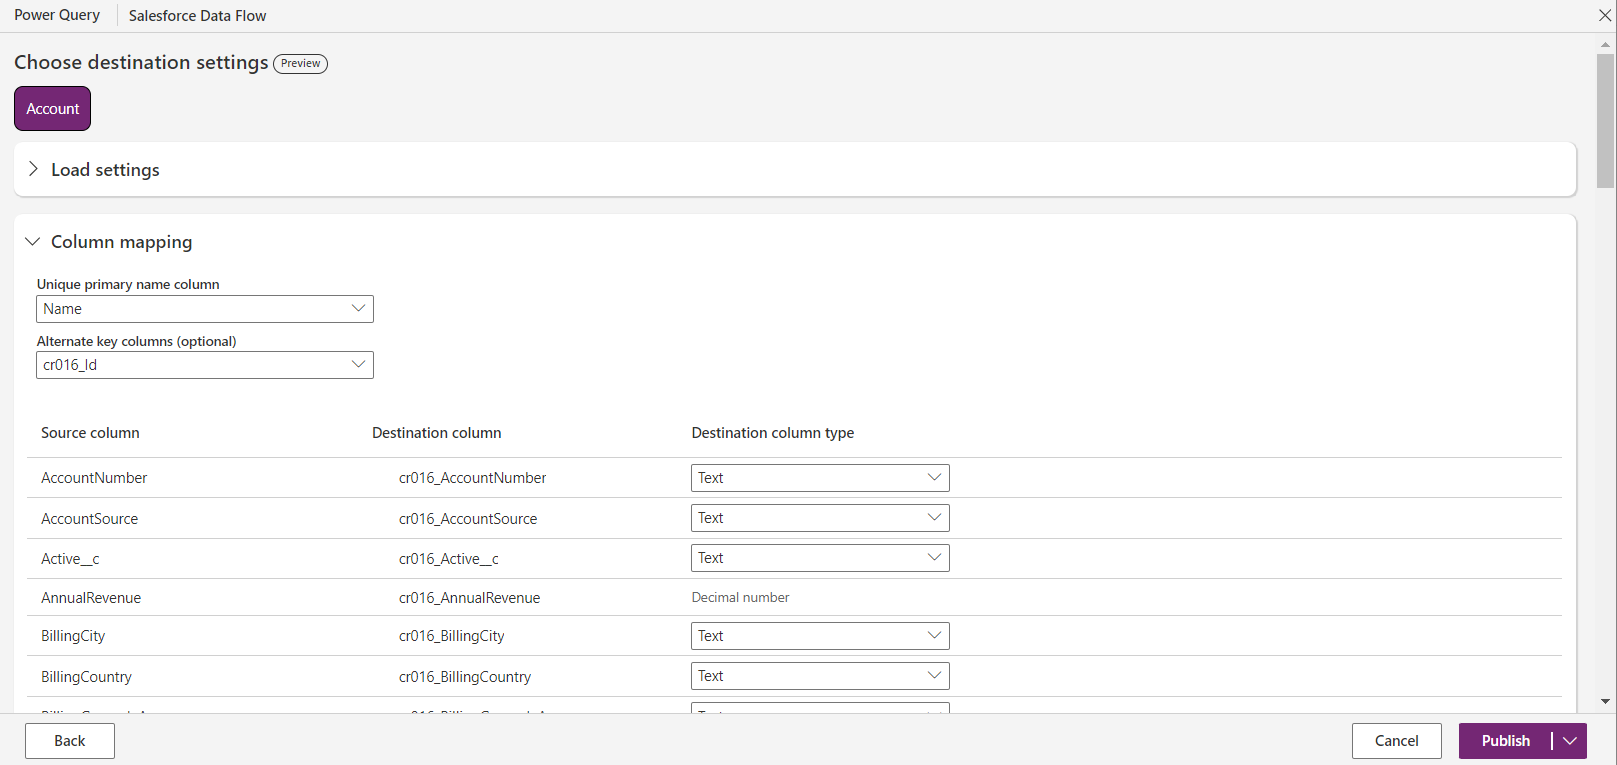
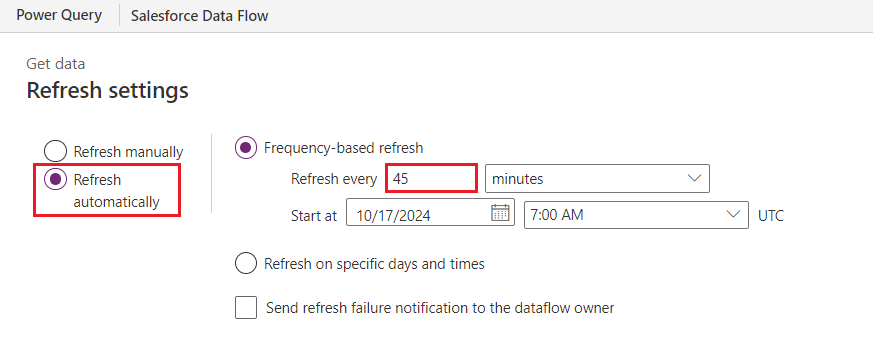
- Finally, choose how you'd like to update your data: Refresh manually or Refresh automatically. In this case, we have set it to Refresh automatically. By scheduling it to update every 45 minutes, as shown below, data will be collected and registered every 45 minutes timeframe, ensuring the most up-to-date information is always available. (You can select any timeframe based on your convenience)
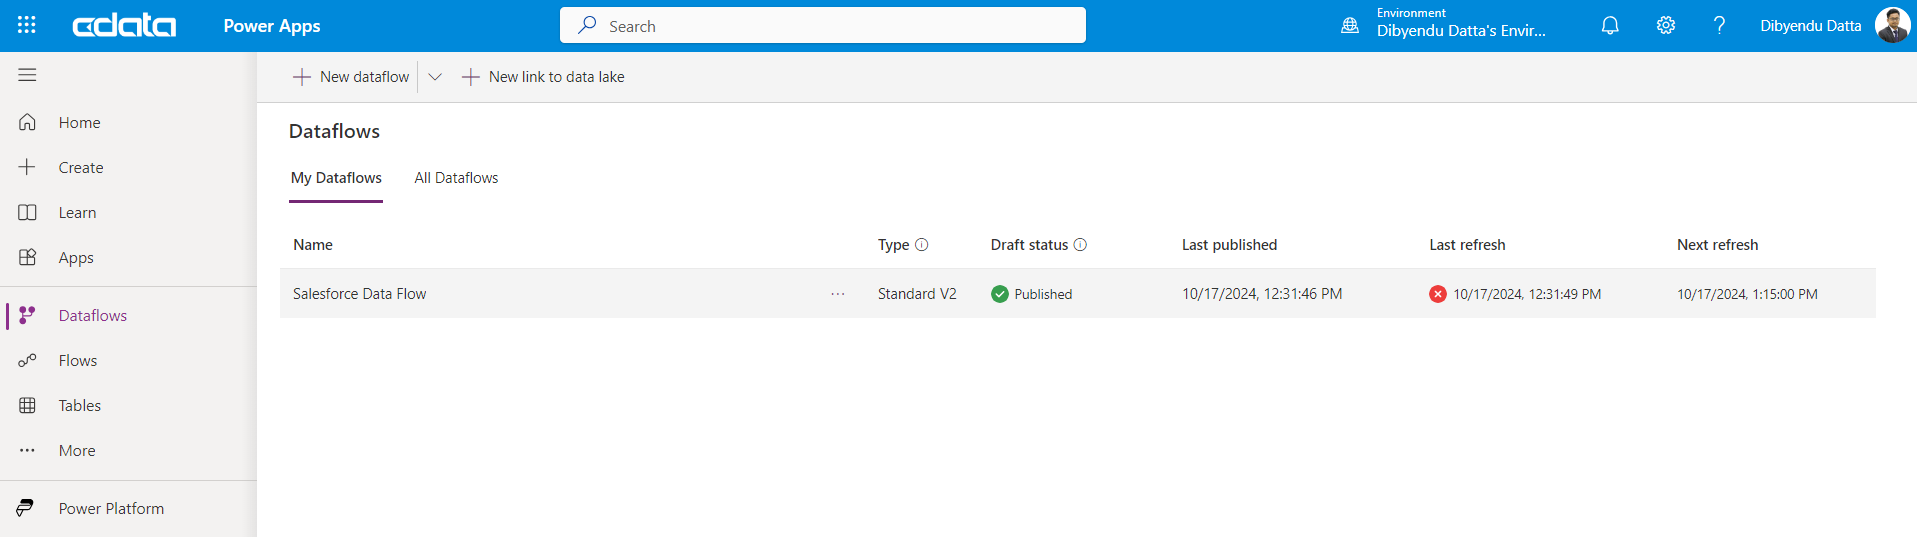
- Click on Publish. The dataflow will now be created, published, and displayed as a part of the dataflow list on the Dataflows screen.
Get Started Today
At this point, you will have created a dataflow using live ApprovalMax data and connected it to Power Apps. To learn more, explore the CData Power BI Connectors for Salesforce and download a free 30-day trial from the CData API Driver for Power BI page.
Feel free to reach out to our Support Team with any questions.