




Use Dash to Build to Web Apps on ApprovalMax Data

The rich ecosystem of Python modules lets you get to work quickly and integrate your systems more effectively. With the CData API Driver for Python, the pandas module, and the Dash framework, you can build ApprovalMax-connected web applications for ApprovalMax data. This article shows how to connect to ApprovalMax with the CData Connector and use pandas and Dash to build a simple web app for visualizing ApprovalMax data.
With built-in, optimized data processing, the CData Python Connector offers unmatched performance for interacting with live ApprovalMax data in Python. When you issue complex SQL queries from ApprovalMax, the driver pushes supported SQL operations, like filters and aggregations, directly to ApprovalMax and utilizes the embedded SQL engine to process unsupported operations client-side (often SQL functions and JOIN operations).
Connecting to ApprovalMax Data
Connecting to ApprovalMax data looks just like connecting to any relational data source. Create a connection string using the required connection properties. For this article, you will pass the connection string as a parameter to the create_engine function.
Start by setting the Profile connection property to the location of the ApprovalMax Profile on disk (e.g. C:\profiles\ApprovalMax.apip). Next, set the ProfileSettings connection property to the connection string for ApprovalMax (see below).
ApprovalMax API Profile Settings
To authenticate to ApprovalMax and connect to your own data or to allow other users to connect to their data, the ApprovalMax Public API requires the OAuth 2.0 authorization code flow.
First, you will need to register an OAuth application with ApprovalMax. Sign in to the ApprovalMax Developer Portal (https://developer.approvalmax.com/applications) and create a new application. Your OAuth application will be assigned a Client ID and a Client Secret, and you must register at least one Redirect URI (Callback URL).
A Premium ApprovalMax subscription (or active trial) is required to use the Public API.
After setting the following connection properties, you are ready to connect:
- AuthScheme: Set this to OAuth.
- InitiateOAuth: Set this to GETANDREFRESH. You can use InitiateOAuth to manage the process to obtain the OAuthAccessToken.
- OAuthClientId: Set this to the Client ID that is shown in your application settings on the ApprovalMax Developer Portal.
- OAuthClientSecret: Set this to the Client Secret that is shown in your application settings on the ApprovalMax Developer Portal.
- CallbackURL: Set this to the Redirect URI that is registered in your application settings.
- Scope: (Optional) Override the default OAuth scopes. The default value openid offline_access https://www.approvalmax.com/scopes/public_api/read grants read-only access to all tables in this profile and enables refresh tokens. Use the principle of least privilege when narrowing this scope.
The OAuth Authorization URL is https://identity.approvalmax.com/connect/authorize and the Token URL is https://identity.approvalmax.com/connect/token. Both authorization_code and refresh_token grant types are supported.
After installing the CData ApprovalMax Connector, follow the procedure below to install the other required modules and start accessing ApprovalMax through Python objects.
Install Required Modules
Use the pip utility to install the required modules and frameworks:
pip install pandas
pip install dash
pip install dash-daq
Visualize ApprovalMax Data in Python
Once the required modules and frameworks are installed, we are ready to build our web app. Code snippets follow, but the full source code is available at the end of the article.
First, be sure to import the modules (including the CData Connector) with the following:
import os
import dash
import dash_core_components as dcc
import dash_html_components as html
import pandas as pd
import cdata.api as mod
import plotly.graph_objs as go
You can now connect with a connection string. Use the connect function for the CData ApprovalMax Connector to create a connection for working with ApprovalMax data.
cnxn = mod.connect("Profile=C:\profiles\ApprovalMax.apip;AuthScheme=OAuth;InitiateOAuth=GETANDREFRESH;OAuthClientId=your_client_id;OAuthClientSecret=your_client_secret;CallbackURL=your_callback_url;")
Execute SQL to ApprovalMax
Use the read_sql function from pandas to execute any SQL statement and store the result set in a DataFrame.
df = pd.read_sql("SELECT UserId, Email FROM UserProfiles WHERE CompanyId = '00000000-0000-0000-0000-000000000000'", cnxn)
Configure the Web App
With the query results stored in a DataFrame, we can begin configuring the web app, assigning a name, stylesheet, and title.
app_name = 'dash-apiedataplot'

external_stylesheets = ['https://codepen.io/chriddyp/pen/bWLwgP.css']

app = dash.Dash(__name__, external_stylesheets=external_stylesheets)
app.title = 'CData + Dash'
Configure the Layout
The next step is to create a bar graph based on our ApprovalMax data and configure the app layout.
trace = go.Bar(x=df.UserId, y=df.Email, name='UserId')

app.layout = html.Div(children=[html.H1("CData Extension + Dash", style={'textAlign': 'center'}),
	dcc.Graph(
		id='example-graph',
		figure={
			'data': [trace],
			'layout':
			go.Layout(title='ApprovalMax UserProfiles Data', barmode='stack')
		})
], className="container")
Set the App to Run
With the connection, app, and layout configured, we are ready to run the app. The last lines of Python code follow.
if __name__ == '__main__':
    app.run_server(debug=True)
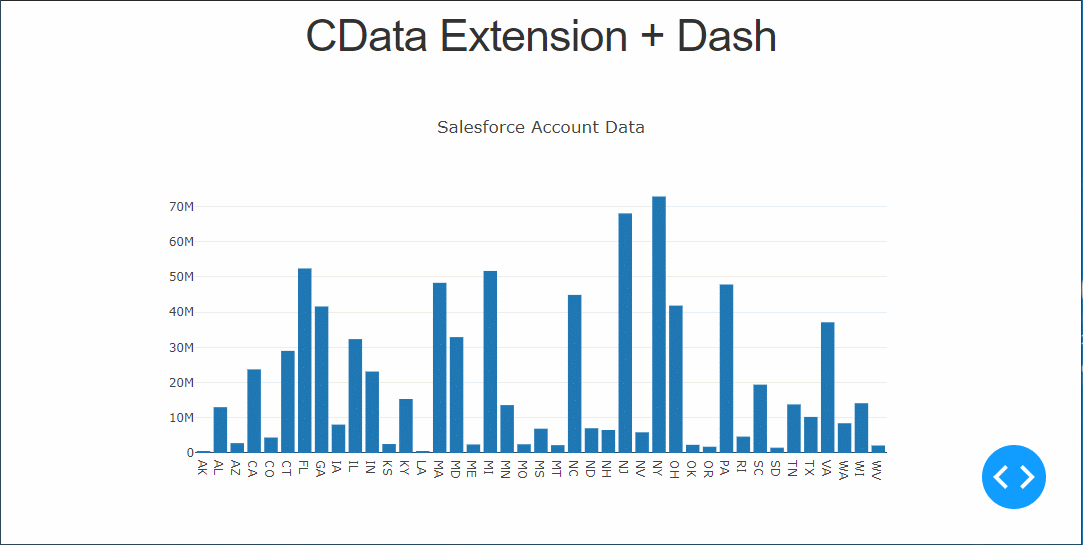
Now, use Python to run the web app and a browser to view the ApprovalMax data.
python api-dash.py
Free Trial & More Information
Download a free, 30-day trial of the CData API Driver for Python to start building Python apps with connectivity to ApprovalMax data. Reach out to our Support Team if you have any questions.
Full Source Code
import os
import dash
import dash_core_components as dcc
import dash_html_components as html
import pandas as pd
import cdata.api as mod
import plotly.graph_objs as go

cnxn = mod.connect("Profile=C:\profiles\ApprovalMax.apip;AuthScheme=OAuth;InitiateOAuth=GETANDREFRESH;OAuthClientId=your_client_id;OAuthClientSecret=your_client_secret;CallbackURL=your_callback_url;")

df = pd.read_sql("SELECT UserId, Email FROM UserProfiles WHERE CompanyId = '00000000-0000-0000-0000-000000000000'", cnxn)
app_name = 'dash-apidataplot'

external_stylesheets = ['https://codepen.io/chriddyp/pen/bWLwgP.css']

app = dash.Dash(__name__, external_stylesheets=external_stylesheets)
app.title = 'CData + Dash'
trace = go.Bar(x=df.UserId, y=df.Email, name='UserId')

app.layout = html.Div(children=[html.H1("CData Extension + Dash", style={'textAlign': 'center'}),
	dcc.Graph(
		id='example-graph',
		figure={
			'data': [trace],
			'layout':
			go.Layout(title='ApprovalMax UserProfiles Data', barmode='stack')
		})
], className="container")

if __name__ == '__main__':
    app.run_server(debug=True)