




ETL BugHerd in Oracle Data Integrator

Leverage existing skills by using the JDBC standard to connect to BugHerd: Through drop-in integration into ETL tools like Oracle Data Integrator (ODI), the CData JDBC Driver for BugHerd connects real-time BugHerd data to your data warehouse, business intelligence, and Big Data technologies.
JDBC connectivity enables you to work with BugHerd just as you would any other database in ODI. As with an RDBMS, you can use the driver to connect directly to the BugHerd APIs in real time instead of working with flat files.
This article covers a JDBC-based ETL -- BugHerd to Oracle. After reverse engineering a data model of BugHerd entities, you will create a mapping and select a data loading strategy -- since the driver supports SQL-92, this last step can easily be accomplished by selecting the built-in SQL to SQL Loading Knowledge Module.
Install the Driver
To install the driver, copy the driver JAR (cdata.jdbc.api.jar) and .lic file (cdata.jdbc.api.lic), located in the installation folder, into the ODI appropriate directory:
- UNIX/Linux without Agent: ~/.odi/oracledi/userlib
- UNIX/Linux with Agent: ~/.odi/oracledi/userlib and $ODI_HOME/odi/agent/lib
- Windows without Agent: %APPDATA%\Roaming\odi\oracledi\userlib
- Windows with Agent: %APPDATA%\odi\oracledi\userlib and %APPDATA%\odi\agent\lib
Restart ODI to complete the installation.
Reverse Engineer a Model
Reverse engineering the model retrieves metadata about the driver's relational view of BugHerd data. After reverse engineering, you can query real-time BugHerd data and create mappings based on BugHerd tables.
-
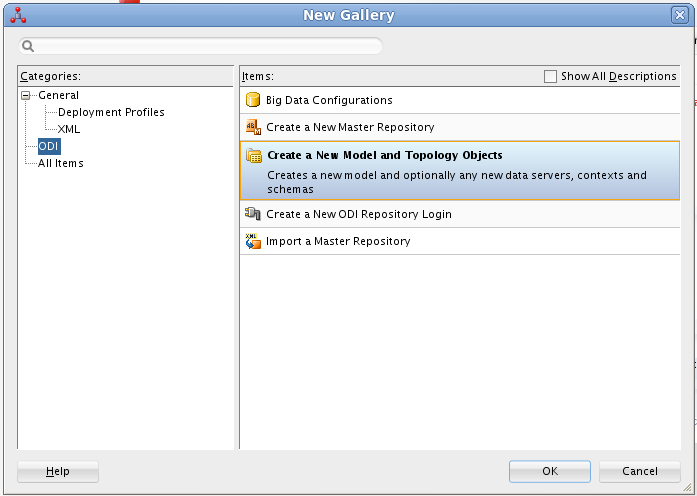
In ODI, connect to your repository and click New -> Model and Topology Objects.
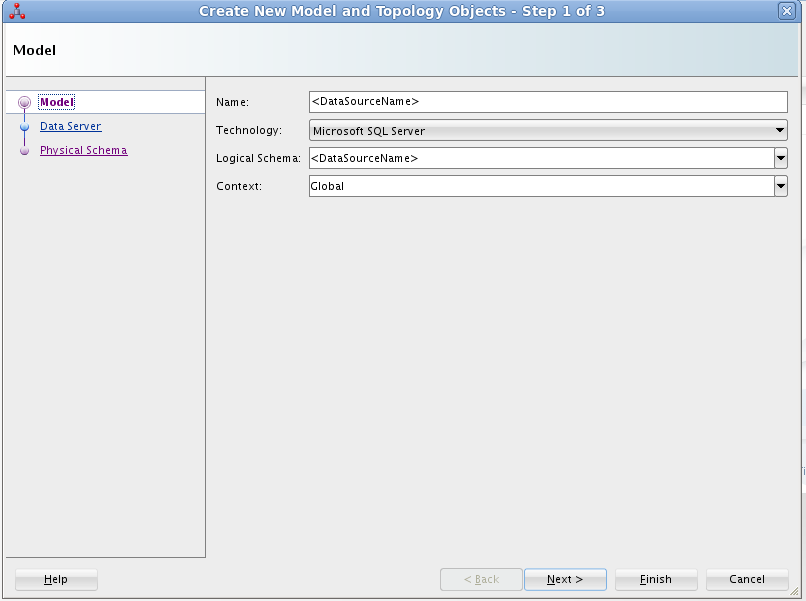
- On the Model screen of the resulting dialog, enter the following information:
- Name: Enter API.
- Technology: Select Generic SQL (for ODI Version 12.2+, select Microsoft SQL Server).
- Logical Schema: Enter API.
- Context: Select Global.
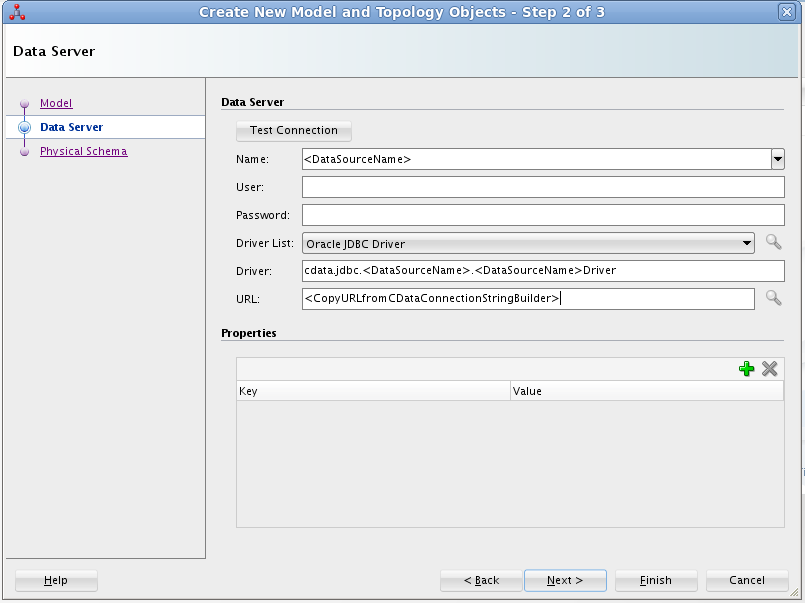
- On the Data Server screen of the resulting dialog, enter the following information:
- Name: Enter API.
- Driver List: Select Oracle JDBC Driver.
- Driver: Enter cdata.jdbc.api.APIDriver
- URL: Enter the JDBC URL containing the connection string.
Start by setting the Profile connection property to the location of the BugHerd Profile on disk (e.g. C:\profiles\BugHerd.apip). Next, set the ProfileSettings connection property to the connection string for BugHerd (see below).
BugHerd API Profile Settings
BugHerd uses HTTP Basic authentication with an API key as the username. To obtain an API key:
- Sign in to your BugHerd account at https://www.bugherd.com
- Navigate to Settings > General Settings
- Locate the API Key section and copy the generated key
After obtaining your API key, set the following connection properties:
- AuthScheme: Set this to APIKey.
Set the following in the ProfileSettings connection property:
- APIKey: Set this to your BugHerd API key. The driver uses the key as the Basic auth username and sets the password internally to the literal value 'x' as required by BugHerd.
Built-in Connection String Designer
For assistance in constructing the JDBC URL, use the connection string designer built into the BugHerd JDBC Driver. Either double-click the JAR file or execute the jar file from the command-line.
java -jar cdata.jdbc.api.jarFill in the connection properties and copy the connection string to the clipboard.

Below is a typical connection string:
jdbc:api:Profile=C:\profiles\BugHerd.apip;AuthScheme=APIKey;ProfileSettings='APIKey=your_api_key';
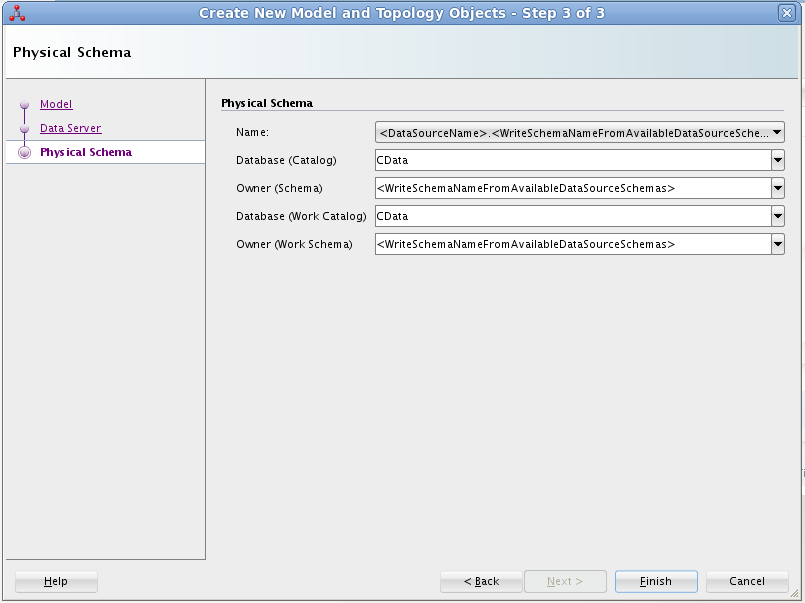
- On the Physical Schema screen, enter the following information:
- Name: Select from the Drop Down menu.
- Database (Catalog): Enter CData.
- Owner (Schema): If you select a Schema for BugHerd, enter the Schema selected, otherwise enter API.
- Database (Work Catalog): Enter CData.
- Owner (Work Schema): If you select a Schema for BugHerd, enter the Schema selected, otherwise enter API.
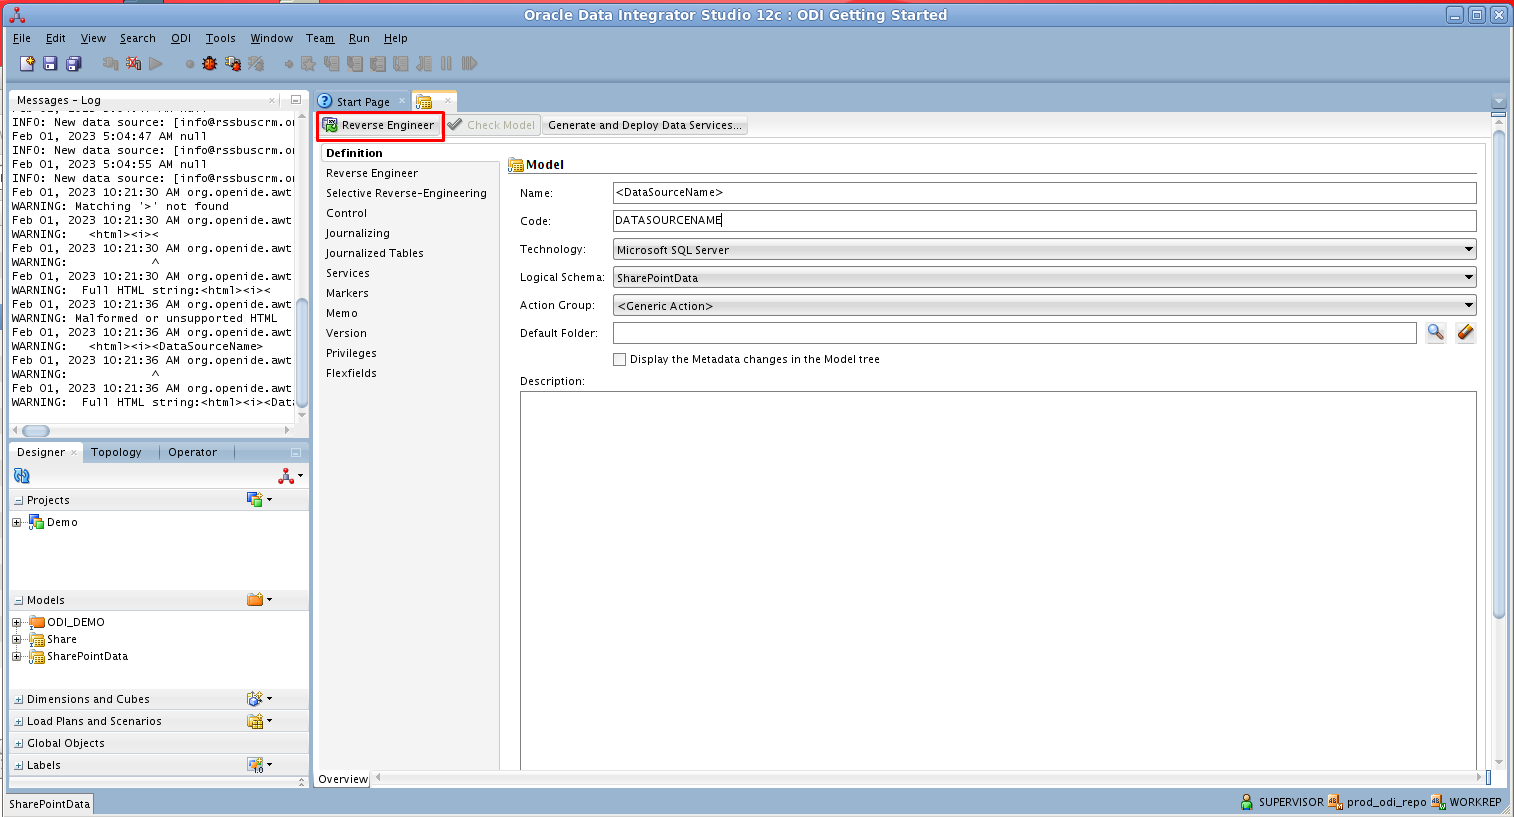
- In the opened model click Reverse Engineer to retrieve the metadata for BugHerd tables.
Edit and Save BugHerd Data
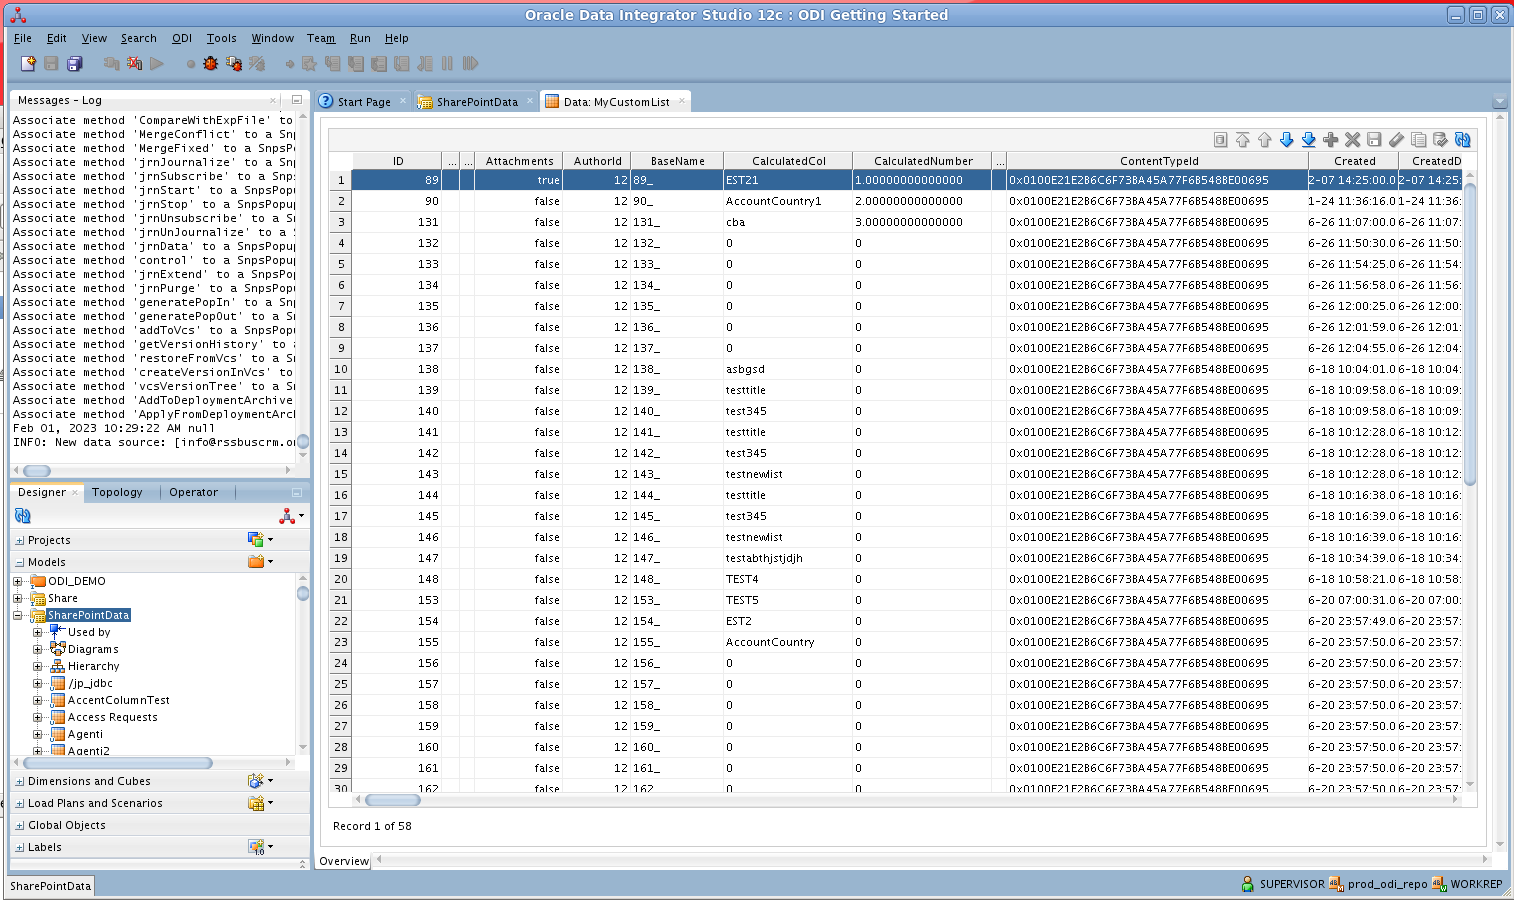
After reverse engineering you can now work with BugHerd data in ODI.
To view BugHerd data, expand the Models accordion in the Designer navigator, right-click a table, and click View data.
Create an ETL Project
Follow the steps below to create an ETL from BugHerd. You will load Tasks entities into the sample data warehouse included in the ODI Getting Started VM.
Open SQL Developer and connect to your Oracle database. Right-click the node for your database in the Connections pane and click new SQL Worksheet.
Alternatively you can use SQLPlus. From a command prompt enter the following:
sqlplus / as sysdba- Enter the following query to create a new target table in the sample data warehouse, which is in the ODI_DEMO schema. The following query defines a few columns that match the Tasks table in BugHerd:
CREATE TABLE ODI_DEMO.TRG_TASKS (TITLE NUMBER(20,0),Id VARCHAR2(255)); - In ODI expand the Models accordion in the Designer navigator and double-click the Sales Administration node in the ODI_DEMO folder. The model is opened in the Model Editor.
- Click Reverse Engineer. The TRG_TASKS table is added to the model.
- Right-click the Mappings node in your project and click New Mapping. Enter a name for the mapping and clear the Create Empty Dataset option. The Mapping Editor is displayed.
- Drag the TRG_TASKS table from the Sales Administration model onto the mapping.
- Drag the Tasks table from the BugHerd model onto the mapping.
- Click the source connector point and drag to the target connector point. The Attribute Matching dialog is displayed. For this example, use the default options. The target expressions are then displayed in the properties for the target columns.
- Open the Physical tab of the Mapping Editor and click TASKS_AP in TARGET_GROUP.
- In the TASKS_AP properties, select LKM SQL to SQL (Built-In) on the Loading Knowledge Module tab.
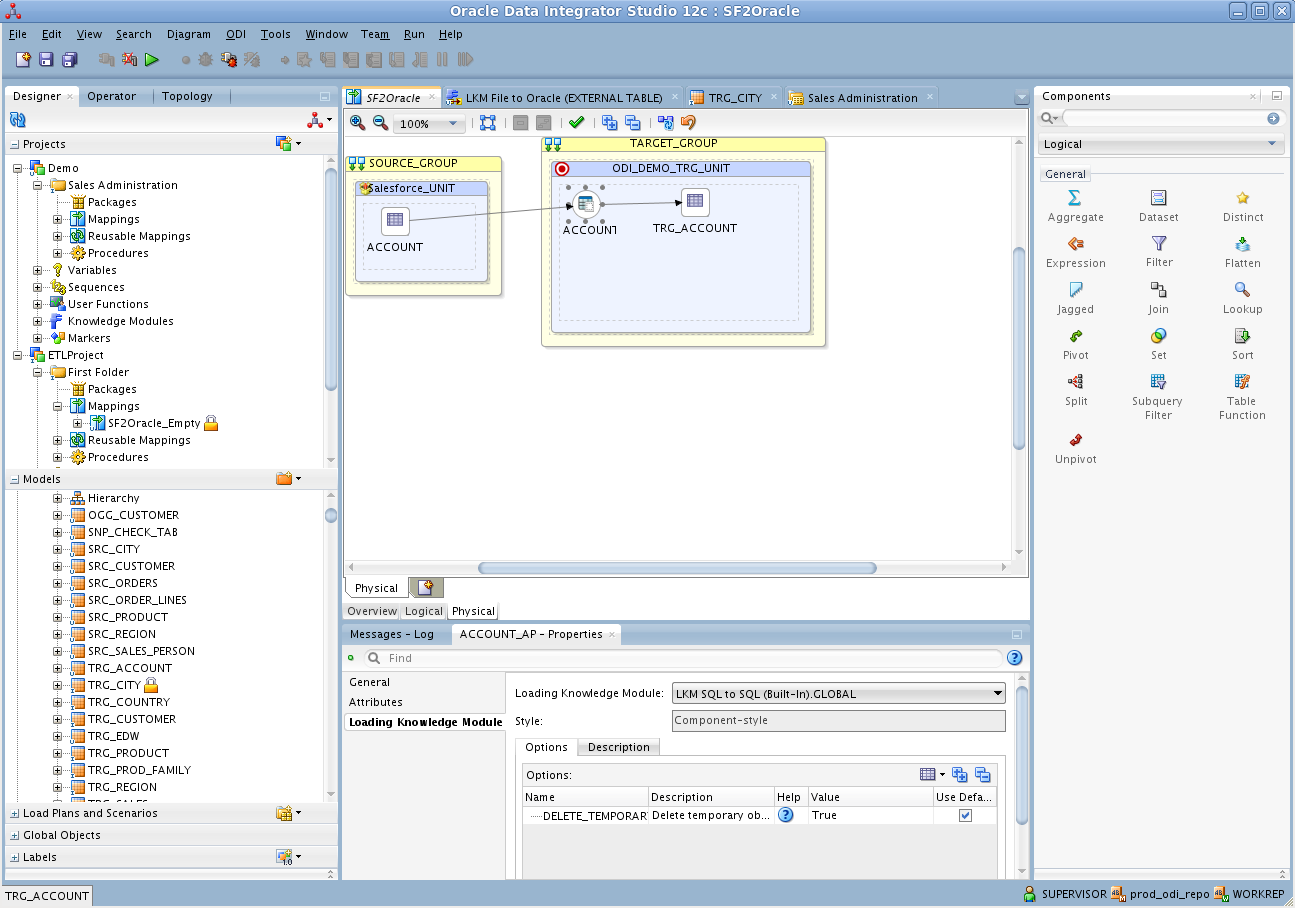
You can then run the mapping to load BugHerd data into Oracle.