




Create SSAS Tabular Models from Clarifai Data

SQL Server Analysis Services (SSAS) is an analytical data engine used in decision support and business analytics. It provides enterprise-grade semantic data models for business reports and client applications, such as Power BI, Excel, Reporting Services reports, and other data visualization tools. When paired with the CData API Driver for ODBC, you can create a tabular model from Clarifai data for deeper and faster data analysis.
Create a Connection to Clarifai Data
If you have not already, first specify connection properties in an ODBC DSN (data source name). This is the last step of the driver installation. You can use the Microsoft ODBC Data Source Administrator to create and configure ODBC DSNs.
Start by setting the Profile connection property to the location of the Clarifai Profile on disk (e.g. C:\profiles\Clarifai.apip). Next, set the ProfileSettings connection property to the connection string for Clarifai (see below).
Clarifai API Profile Settings
Clarifai uses Personal Access Tokens (PATs) for authentication. To obtain a PAT:
- Log in to your Clarifai account at https://clarifai.com.
- Navigate to your profile settings and select Security.
- Click Create Personal Access Token.
- Select the required scopes and click Create Token.
- Copy the generated token (it will only be shown once).
After obtaining your Personal Access Token, set the following connection properties:
- AuthScheme: Set this to APIKey.
Set the following in the ProfileSettings connection property:
- APIKey: Set this to your Clarifai Personal Access Token (PAT).
Creating a Data Source for Clarifai
Start by creating a new Analysis Services Tabular Project in Visual Studio. Ensure that you select a Compatibility Level of 1400 or higher in the Tabular model designer dialog. Next create a Data Source for Clarifai in the project.
- In the Tabular Model Explorer, right-click Data Sources and select "New Data Source"
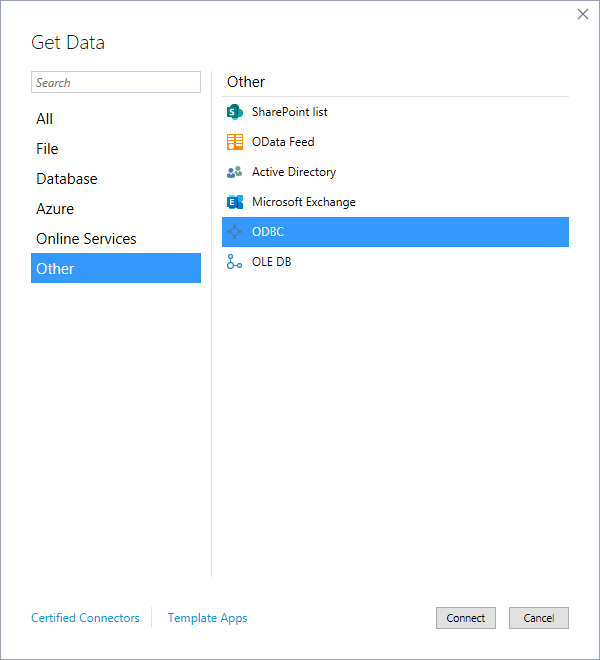
- Select "ODBC" from the Other tab and click "Connect"
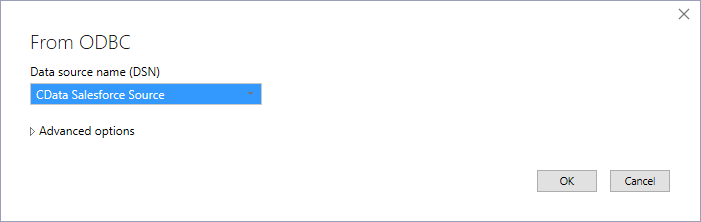
- Select the DSN you previously configured
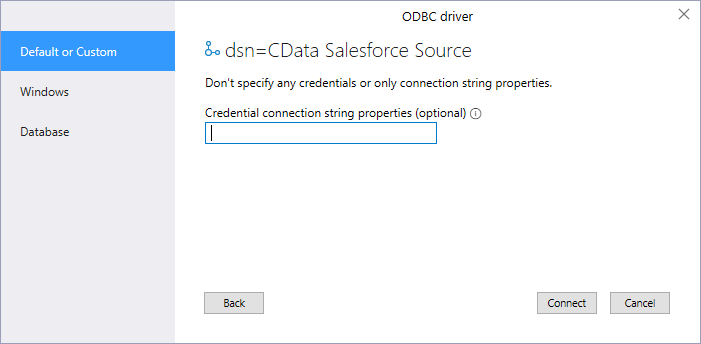
- Choose "Default or Custom" as the authentication option and click "Connect"
Add Tables & Relationships
After creating the data source you are ready to import tables and define the relationships between the tables.
- Right-click the new data source, click "Import New Tables" and select the tables to import
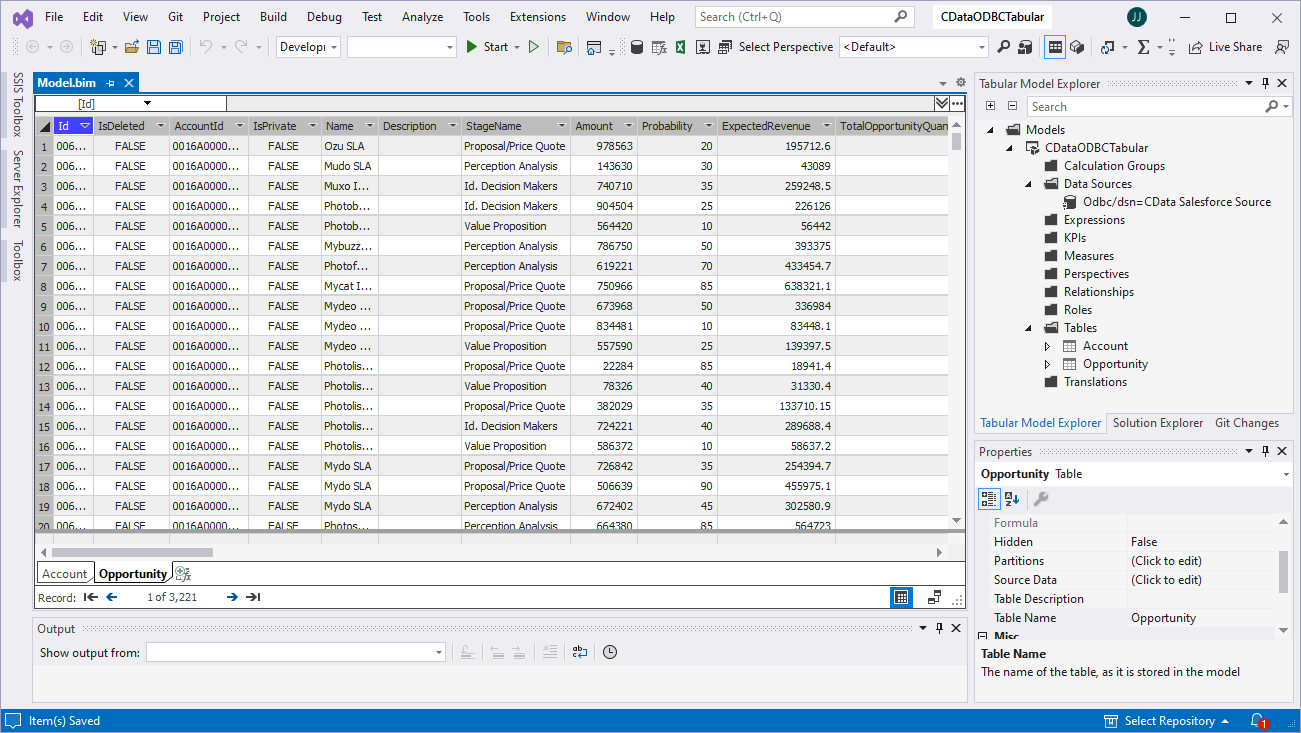
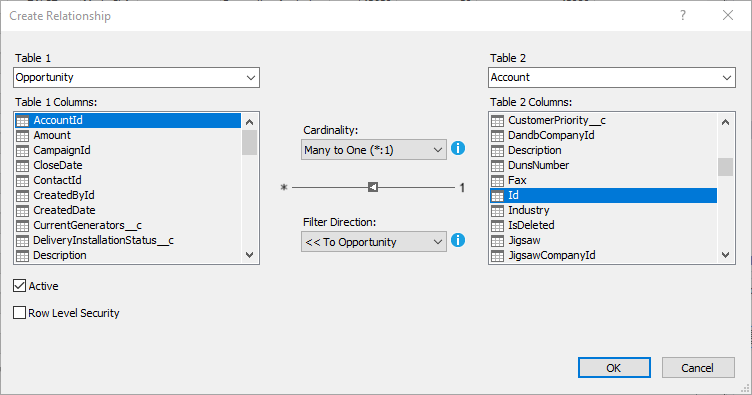
- After importing the tables, right-click "Relationships" and click "Create Relationships"
- Select table(s), and choose the foreign keys, cardinality, and filter direction
Create Measures
After importing the tables and defining the relationships, you are ready to create measures.
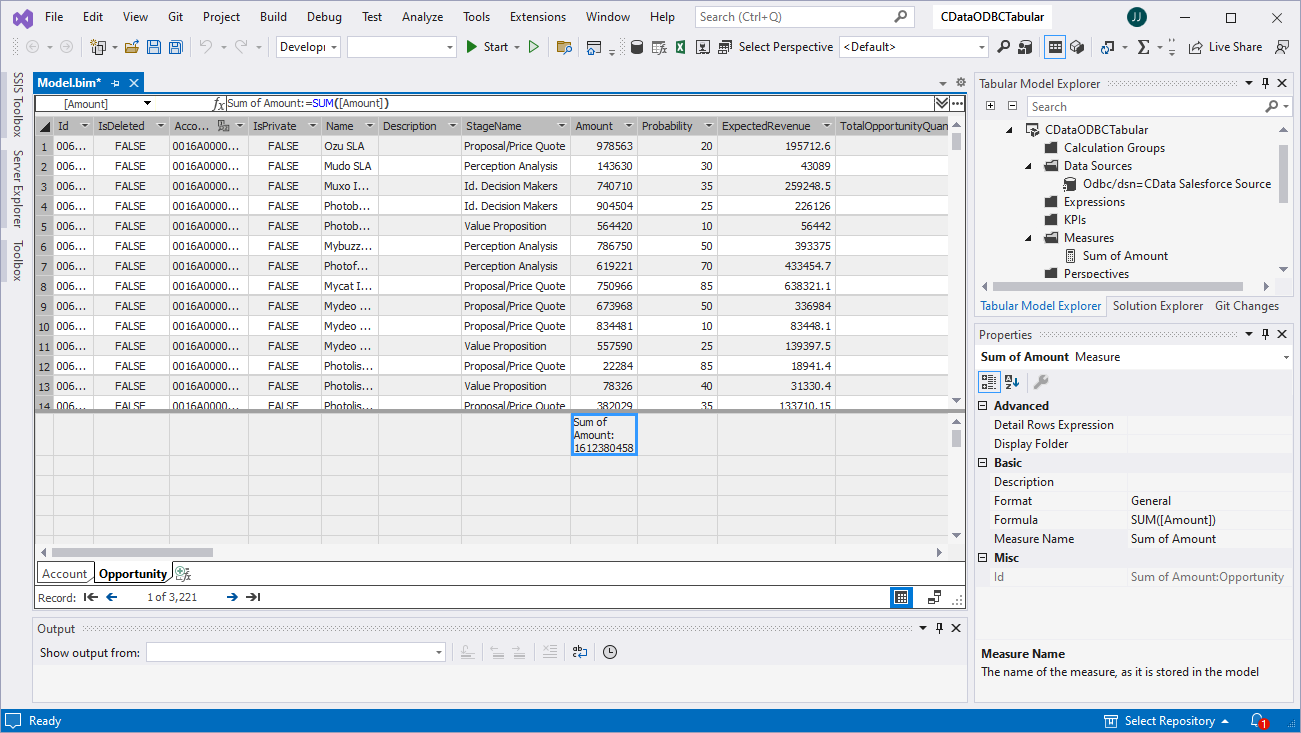
- Select the column in the table for which you wish to create a measure
- In the Extensions menu -> click "Columns" -> "AutoSum" and select your aggregation method
Deploy the Model
Once you create measures, you are ready to deploy the model. Configure the target server and database by right-clicking the project found in the Solution Explorer and selecting "Properties." Configure the "Deployment Server" properties and click "OK."
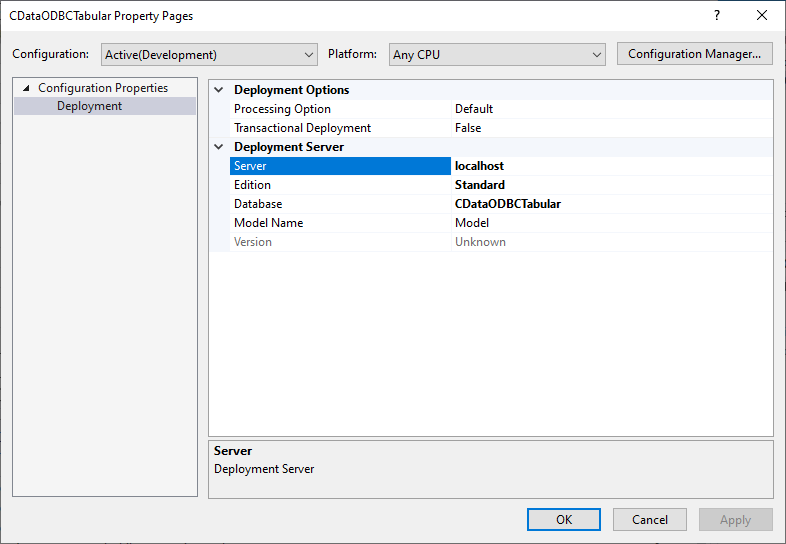
After configuring the deployment server, open the "Build" menu and click "Deploy Solution." You now have a tabular model for Clarifai data in your SSAS instance, ready to be analyzed, reported, and viewed. Get started with a free, 30-day trial of the CData API Driver for ODBC.