




Publish CleverPush-Connected Dashboards in Tableau Server via JDBC

Tableau Server is a visual analytics platform transforming the way businesses use data to solve problems. When paired with the CData API Driver for JDBC, you get access to live CleverPush data within Tableau Server. This article shows how to connect to CleverPush in Tableau Desktop, publish a Data Source to Tableau Server, and build a simple chart from that data.
The CData JDBC Driver enables high-speed access to live CleverPush data in Tableau Server. Once you install the driver, you simply authenticate with CleverPush and you can immediately start building responsive, dynamic visualizations and dashboards. By surfacing CleverPush data using native Tableau data types and handling complex filters, aggregations, & other operations automatically, CData JDBC Driver grants seamless access to CleverPush data.
Enable Connectivity to CleverPush in Tableau Server
Start by installing the CData JDBC Driver on the machine hosting Tableau Server.
If your server is a Linux Machine:
- Copy cdata.jdbc.api.jar and cdata.tableau.api.lic.
- Place the copies in the Tableau Server Connectors folder (/opt/tableau/tableau_driver/jdbc).
- Restart Tableau Server.
If your server is a Windows Machine:
- Copy cdata.jdbc.api.jar and cdata.tableau.api.lic.
- Place the copy in the Tableau Server drivers directory (C:\ Program Files\Tableau\Drivers).
- Restart Tableau Server.
Next, install the CData JDBC Driver on the machine running Tableau Desktop. Before starting Tableau on Windows, make sure that you have placed the .jar file in the C:\Program Files\Tableau\Drivers folder. Before starting Tableau on macOS, make sure that you have placed the .jar file in the ~/Library/Tableau/Drivers folder.
Connect to CleverPush in Tableau Desktop
Once the driver is installed on the Server machine, we can configure a connection to CleverPush in Tableau Desktop and publish a CleverPush-based Data Source to Tableau Server.
- Open Tableau Desktop.
- Click More under Connect -> To a Server.
- Select "Other Databases (JDBC)".
- Configure the connection to the data. The driver comes with a connection string builder that streamlines creating and managing the content of connection strings. Note that you will need to manually add "jdbc:api" to the beginning of the connection string.
- Click "Sign In".
Start by setting the Profile connection property to the location of the Cleverpush Profile on disk (e.g. C:\profiles\Cleverpush.apip). Next, set the ProfileSettings connection property to the connection string for Cleverpush (see below).
Cleverpush API Profile Settings
CleverPush uses private API keys to authenticate requests. Your API key is passed as the Authorization request header value on every API call.
You can find your private API key in the CleverPush dashboard under Settings > API. Use the private key (not the public key) for server-side access.
After setting the following connection properties, you are ready to connect:
- AuthScheme: Set this to APIKey.
- APIKey: Set this to your CleverPush private API key.
Optional Connection Properties
- ChannelId: Set this to your default CleverPush channel identifier. Most tables require a channel filter. Setting this property allows queries without specifying ChannelId in every WHERE clause.
Discover Schemas and Query Data
Once you establish the connection to CleverPush data, you can configure which entities to visualize.
- Select CData from the Database pull-down menu.
- Select API from the Schema pull-down menu.
- Drag the tables and views you wish to visualize onto the join area. You can include multiple tables.
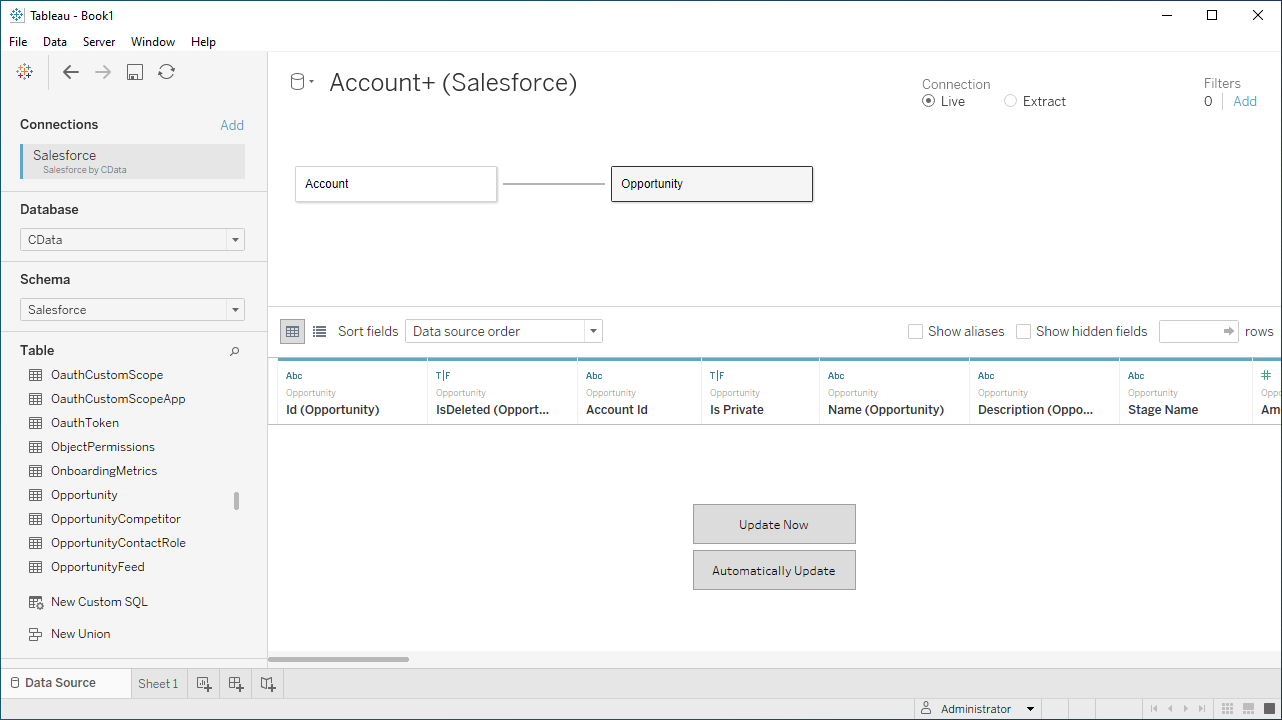
- Select Update Now or Automatically Update. Update Now lets you preview the first 10,000 rows of the data source (or enter the number of rows you want to see in the Rows text box). Automatically Update auto-loads the changes in the preview area.
Publish Data to Tableau Server
After you configure the data you wish to visualize, you can publish the Data Source to a Tableau Server instance. In Tableau Desktop:
- Click Server -> Sign In.
- Enter the URL for your Tableau Server.
- Authenticate with Tableau Server credentials.
- Click Server -> Publish Data Source and select your data source.
- Click Publish.
- Select the Project, name the Data Source, and optionally add a description.
- Click Publish.
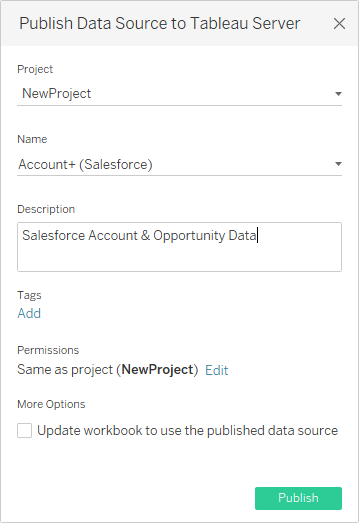
This creates a new entry under the server's data source list, from which you an change the data source's permissions, view its history, and perform other management tasks.
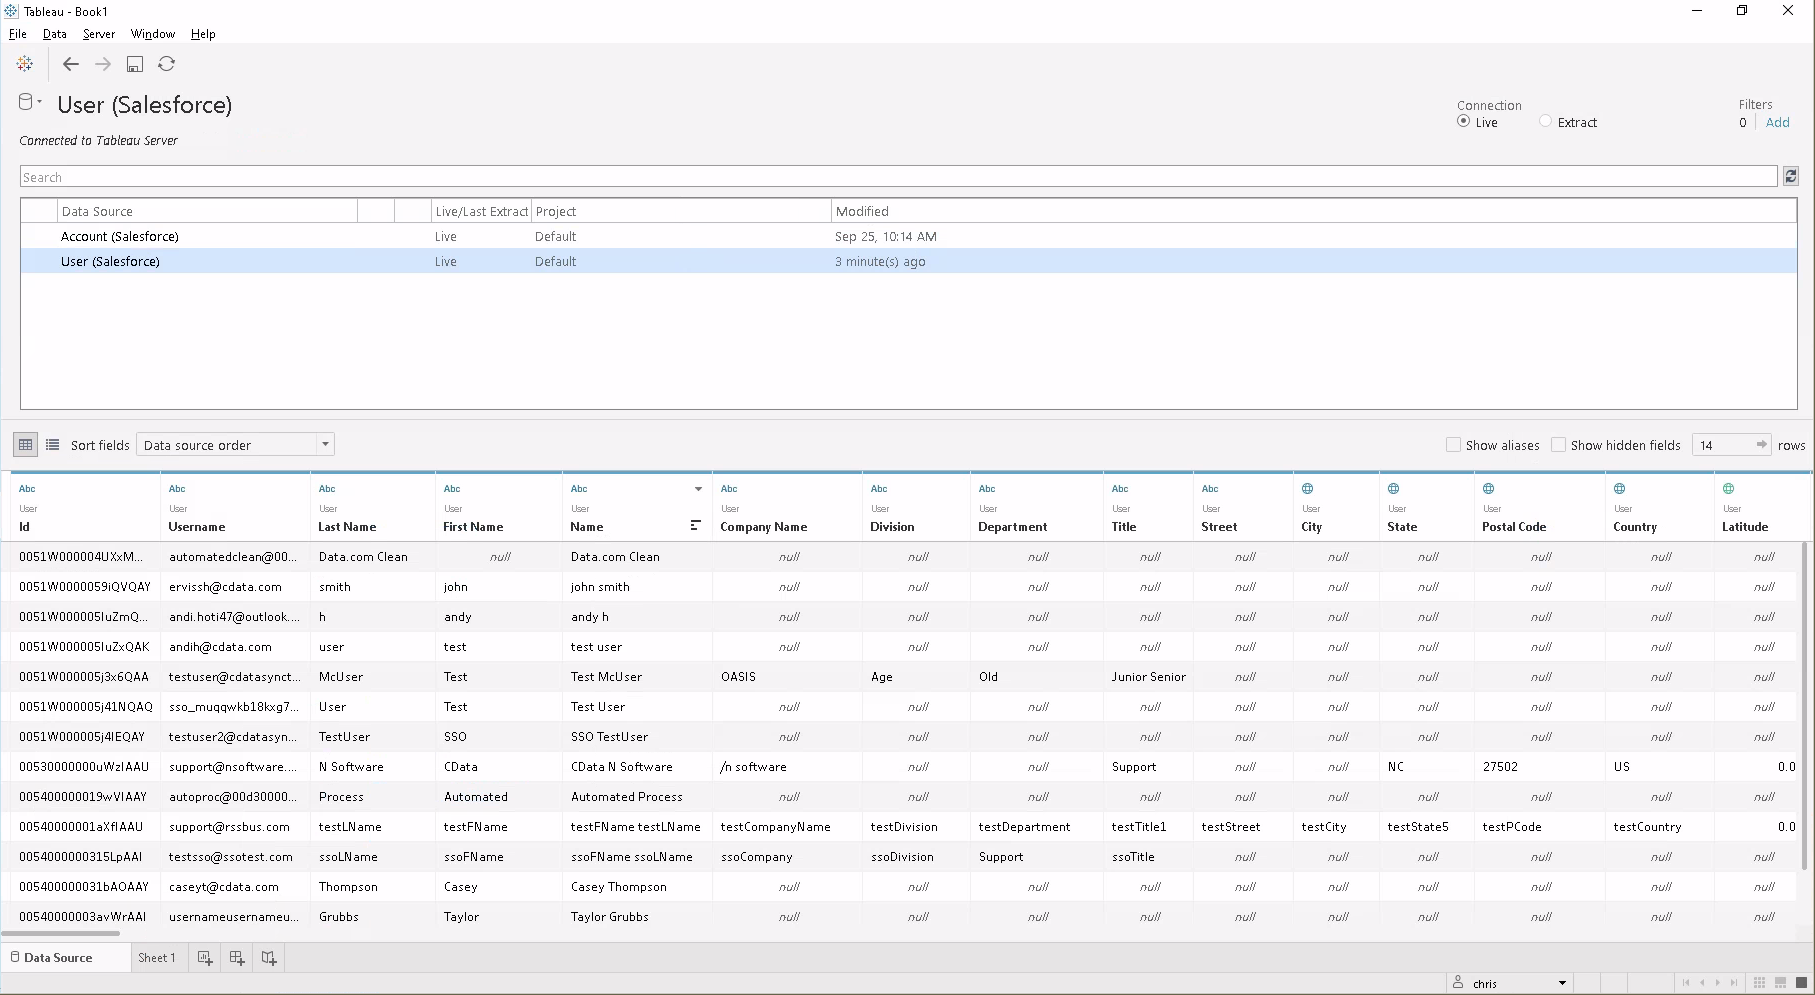
Note that workstation connected to the same server will be able to use the same source in Tableau Desktop, even if the driver isn't installed there. Also, workbooks created directly on Tableau Server (via the web interface) can use this source.
Visualize CleverPush Data in Tableau Server
With the Data Source published to Tableau Server, you are ready to visualize CleverPush data.
- Login to your Tableau Server instance.
- Connect to the remote source using the Search for Data -> Tableau Server in the Connect sidebar.
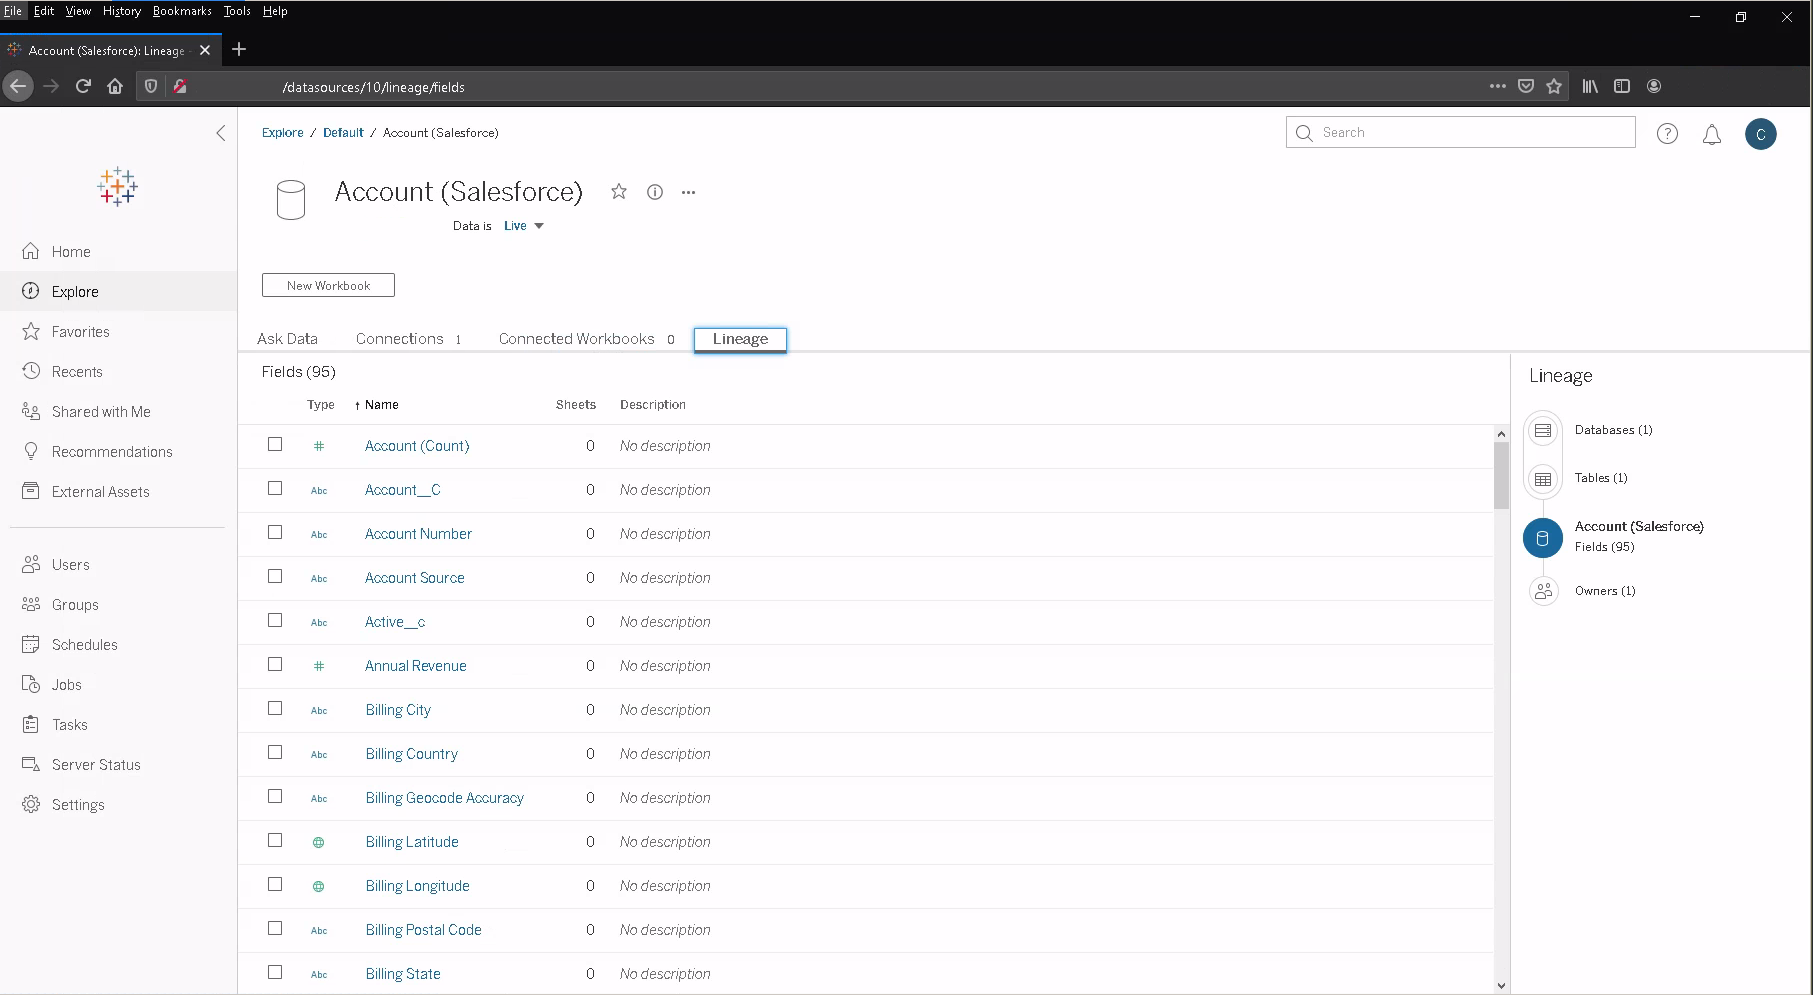
- Click the published Data Source.
- Click New Workbook.
- In the workbook, CleverPush fields are listed as Dimensions and Measures, depending on the data type. The CData JDBC Driver discovers data types automatically, allowing you to leverage the powerful data processing and visualization features of Tableau.
- Drag a field from the Dimensions or Measures area to Rows or Columns. Tableau creates column or row headers.
- Select one of the chart types from the Show Me tab. Tableau displays the chart type that you selected.
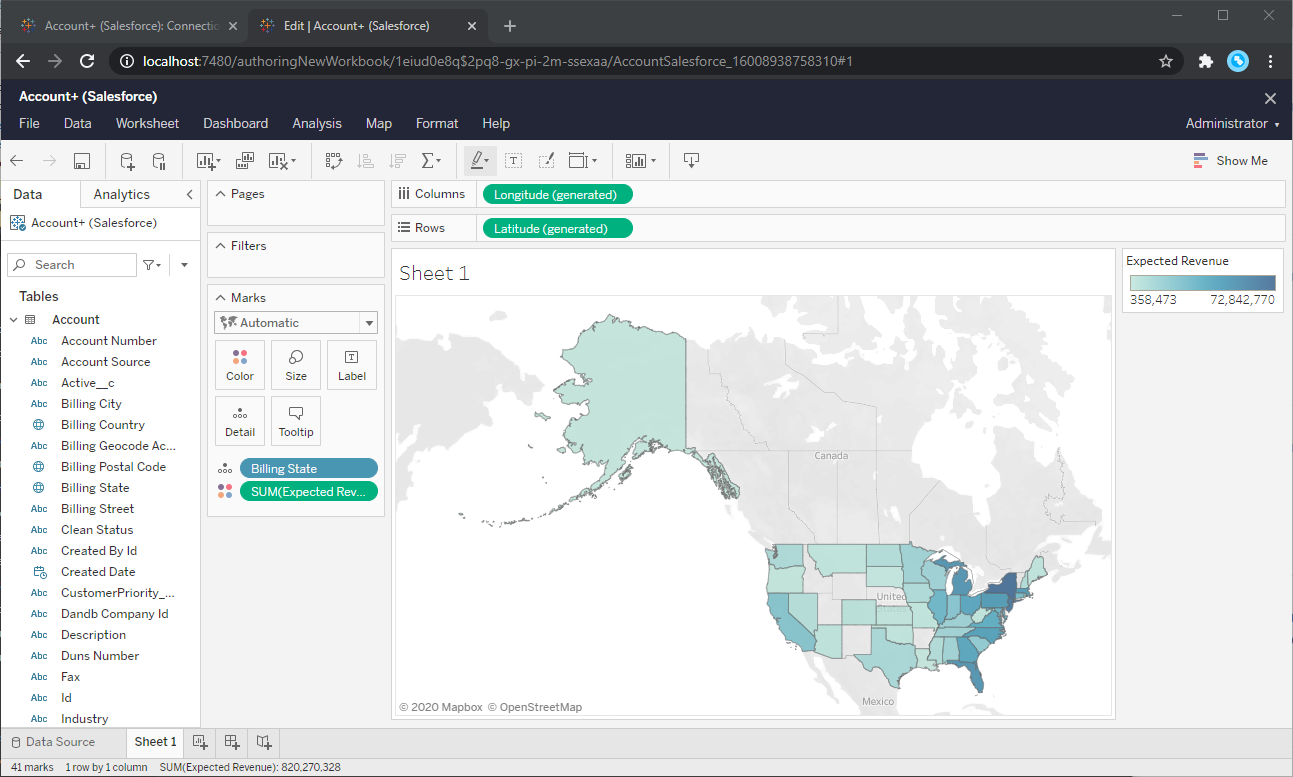
Using the CData API Driver for JDBC with Tableau Server, you can easily create robust visualizations and reports on CleverPush data. Download a free, 30-day trial and get started today.