




Establish a Live Connection with CleverPush Data using Tableau Bridge

The Tableau Bridge enables you to publish dashboards to Tableau Cloud while maintaining live connectivity with any data source. In this article, you will use the Tableau Bridge to maintain data freshness in a published workbook by listening for changes in the underlying CleverPush data.
The CData ODBC drivers offer unmatched performance for interacting with live CleverPush data in Tableau Cloud due to optimized data processing built into the driver. When you issue complex SQL queries from Tableau Cloud to CleverPush, the driver pushes supported SQL operations, like filters and aggregations, directly to CleverPush and utilizes the embedded SQL engine to process unsupported operations (often SQL functions and JOIN operations) client-side. With built-in dynamic metadata querying, you can visualize and analyze CleverPush data using native Tableau data types.
Connect to CleverPush as an ODBC Data Source
If you have not already, first specify connection properties in an ODBC DSN (data source name). This is the last step of the driver installation. You can use the Microsoft ODBC Data Source Administrator to create and configure ODBC DSNs.
Start by setting the Profile connection property to the location of the Cleverpush Profile on disk (e.g. C:\profiles\Cleverpush.apip). Next, set the ProfileSettings connection property to the connection string for Cleverpush (see below).
Cleverpush API Profile Settings
CleverPush uses private API keys to authenticate requests. Your API key is passed as the Authorization request header value on every API call.
You can find your private API key in the CleverPush dashboard under Settings > API. Use the private key (not the public key) for server-side access.
After setting the following connection properties, you are ready to connect:
- AuthScheme: Set this to APIKey.
- APIKey: Set this to your CleverPush private API key.
Optional Connection Properties
- ChannelId: Set this to your default CleverPush channel identifier. Most tables require a channel filter. Setting this property allows queries without specifying ChannelId in every WHERE clause.
When you configure the DSN, you may also want to set the Max Rows connection property. This will limit the number of rows returned, which is especially helpful for improving performance when designing reports and visualizations.
Add CleverPush Data to a Dashboard
- From a new workbook, click Data -> New Data Source -> Other Databases (ODBC).
Select the CData Data Source Name (for example: CData API Source). - In the Database menu, select CData.
- In the Table box, enter a table name or click New Custom SQL to enter an SQL query. This article retrieves the Segments table.
- Drag the table onto the join area. At this point, you can include multiple tables, leveraging the built-in SQL engine to process complex data requests.
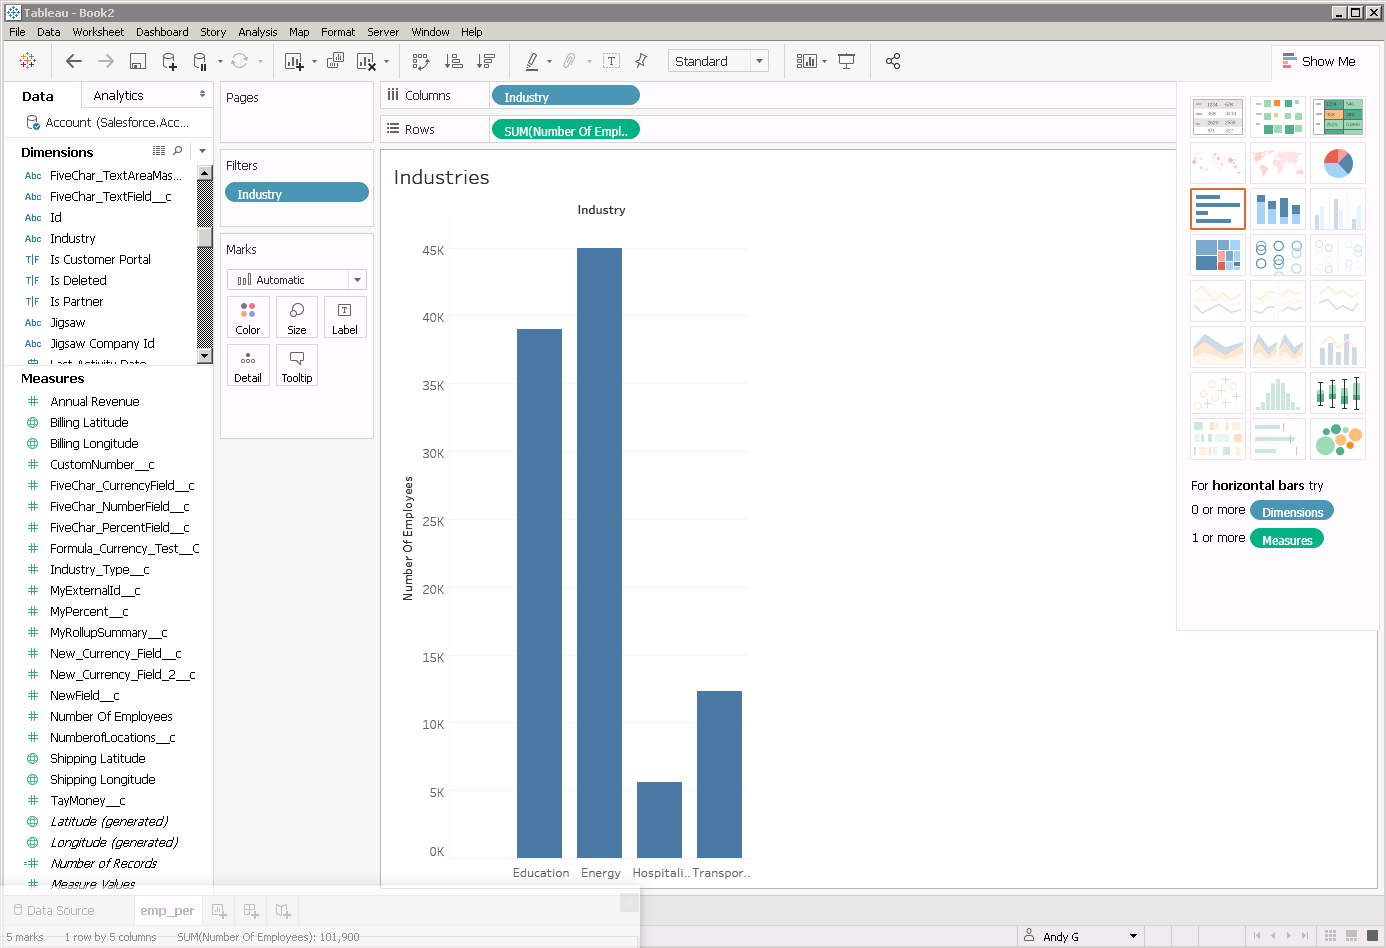
- Click the tab for your worksheet. Columns are listed as Dimensions and Measures, which you can drag and drop onto the dashboard to create visualizations.
Set Up Tableau Bridge as a Service
- In the Server menu, select Start Tableau Bridge Client.
- Sign in to the Tableau Bridge using a site admin level account.
- If prompted, select the Tableau Cloud site where you want to publish live data. The bridge client will open and is accessible from the system tray.
- By default, the Tableau Bridge client is set to Application mode. Select 'Switch to service' to enable Tableau Bridge to handle live connections.
- Log in to your Tableau Cloud site as an administrator.
- From your site, click Settings, then Bridge.
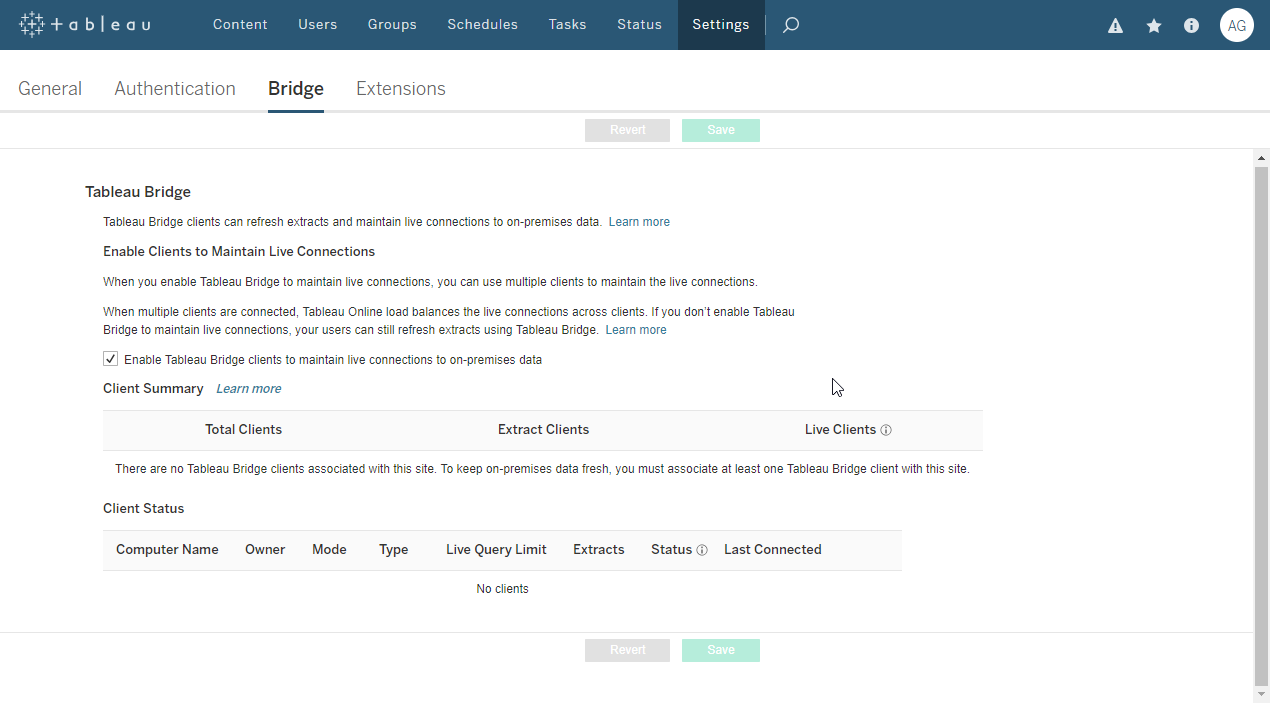
- In the Bridge settings, under Enable Clients to Maintain Live Connections, check the box labeled 'Enable Tableau Bridge clients to maintain live connections to on-premises data.'
Publish a Dashboard Containing the Live Data Source
Having configured both the Tableau Bridge and Tableau Cloud to enable live data connections, you can now publish your workbook to Tableau Cloud. From the Server menu, select Publish Workbook.
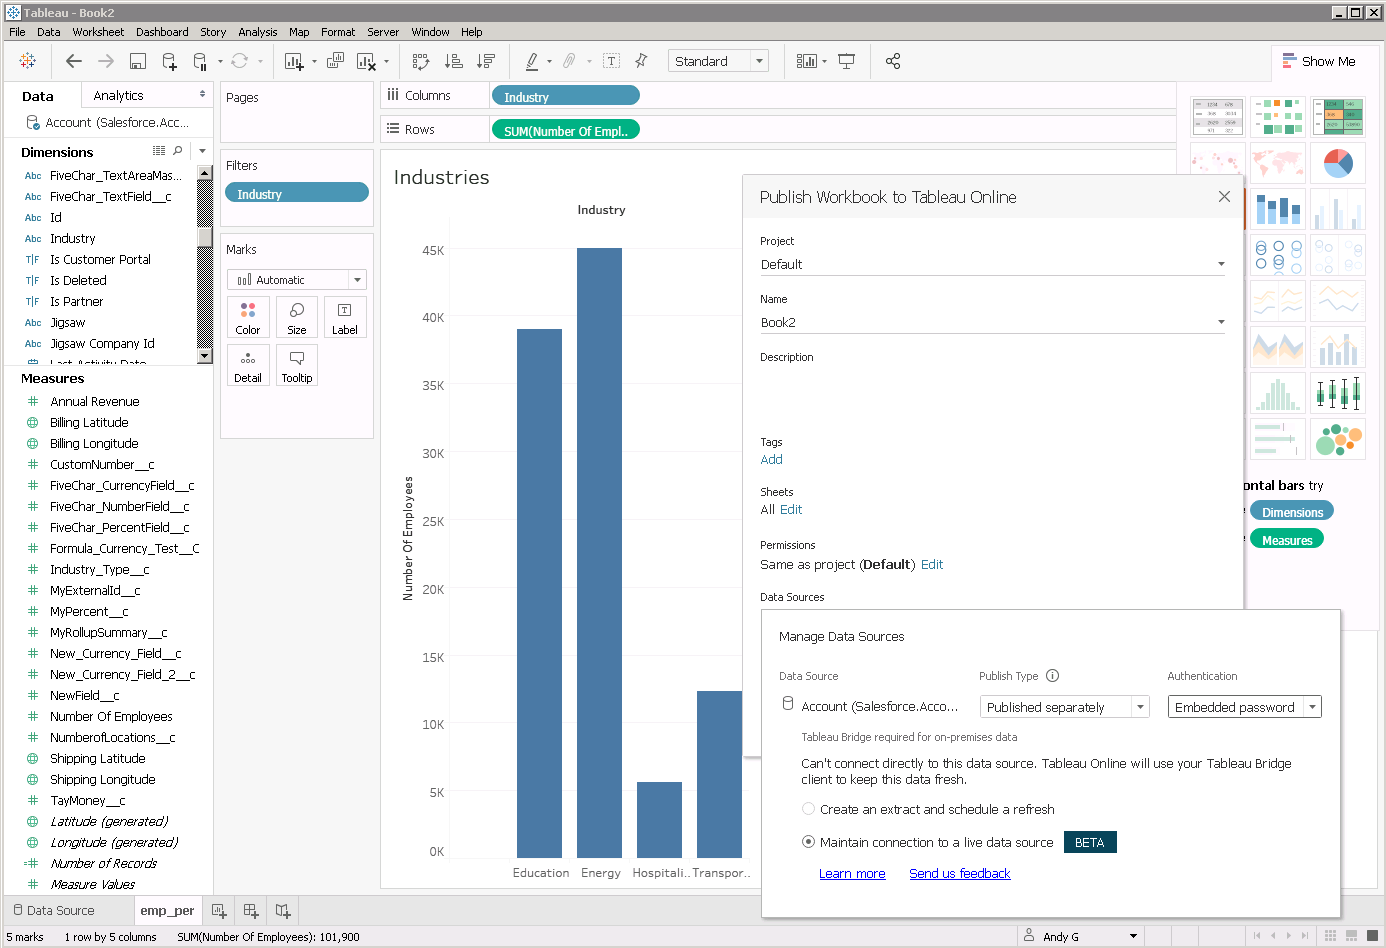
After choosing the workbook name and project that you wish to publish to, configure the deployment so that the CData ODBC driver for CleverPush is embedded in your workbook as a separate, live data source.
- Under Data Sources, select the option to Edit the embedded data sources in the workbook.
- Change Publish Type to 'Published separately,' then select a desired means of authentication.
- Last, select 'Maintain connection to a live data source' and click the green Publish Workbook button.
The published workbook now updates alongside the underlying CleverPush data. From a published dashboard, simply click the Refresh button to reflect the most recent changes.