





Connect Halo Service Desk to IBM WebSphere Using the CData JDBC Driver

IBM WebSphere is a powerful application server that runs many enterprise level Java applications and services. When paired with the CData API Driver for JDBC, IBM WebSphere applications can connect to Halo Service Desk and work with data using standard SQL queries instead of complex APIs. This simplifies integration, reduces development effort, and provides secure, real-time access to critical business data.
Prerequisites
- Access to a Halo Service Desk account (with API permissions)
- IBM WebSphere Application Server (configured and running)
- CData API Driver for JDBC
- Java Servlet WAR application ready for deployment
Note: This article uses Salesforce as a demonstration data source, but the same steps can be followed to connect to any of the 250+ JDBC Drivers available in our portfolio.
Getting Started
Step 1: Download and install the CData API Driver for JDBC
Download and install the CData API Driver for JDBC, which provides a .jar file: cdata.jdbc.api.jar
Step 2: Install and configure IBM Websphere
- Create an account in IBM WebSphere using the official IBM site.
- Install and configure the IBM Websphere Application server in the local system using the documentation: IBM Websphere Application Server
- Once the application server is installed, start the WebSphere Server using the Admin Console in your browser: https://your-server:9043/ibm/console
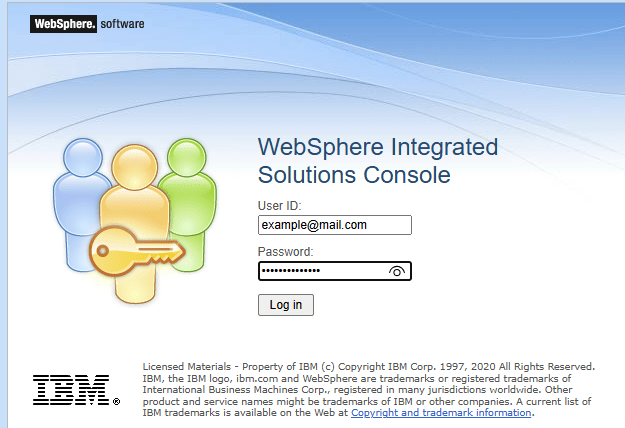
Step 3: Set up the JDBC provider and data source for Halo Service Desk
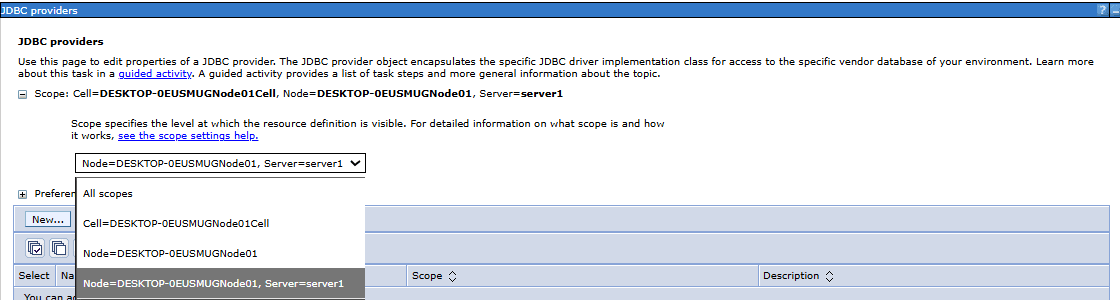
- Go to Resources, expand the JDBC section, and then select JDBC providers to create a new provider
- Select the appropriate scope from the drop down menu
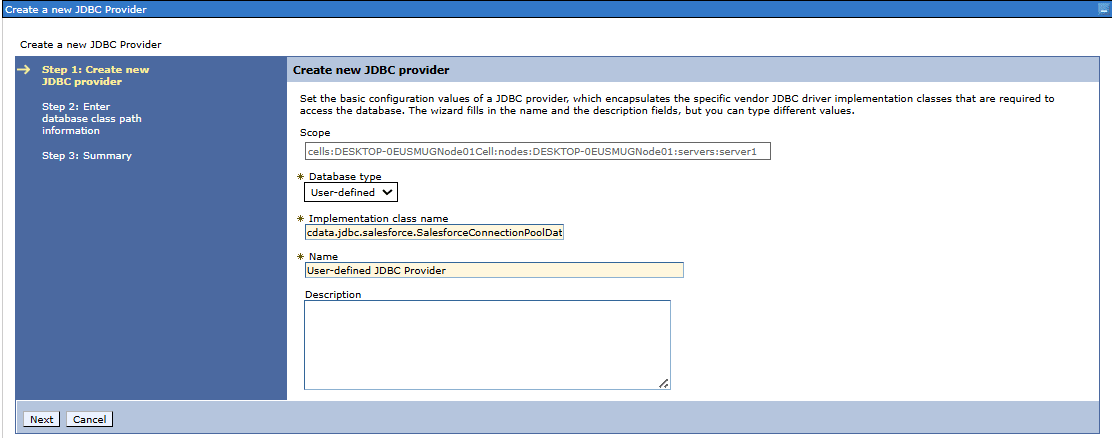
- Click New to add a JDBC provider
- Choose User defined as the database type
- Enter cdata.jdbc.api.APIConnectionPoolDataSource as the implementation class name
- Type a name for the provider, for example User defined JDBC Provider
- Enter the full path of the JDBC driver JAR file in the classpath field
- Click Next, then Finish, and save the changes to the master configuration.
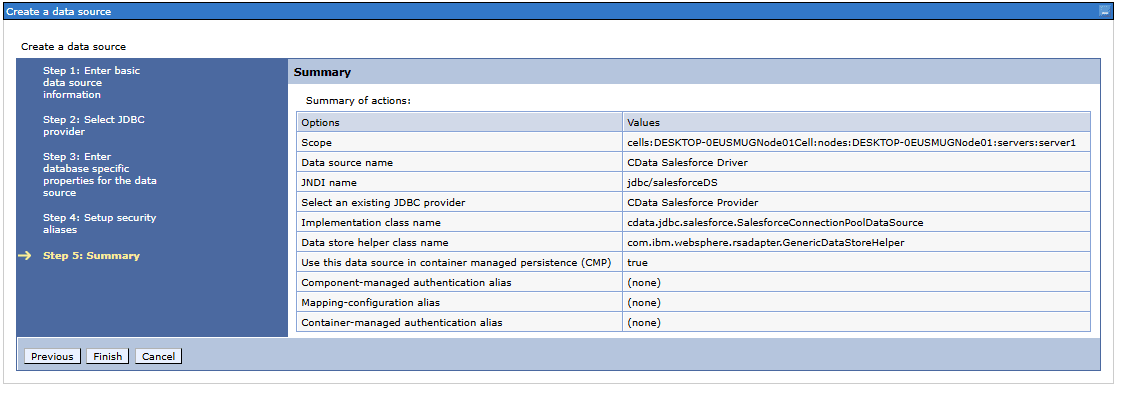
- Once the JDBC provider is created, add a JDBC data source.
- Enter the basic details such as Data Source Name and JNDI name
- Select the existing JDBC provider created earlier (e.g., CData Halo Service Desk Provider)
- Provide the Implementation class name: cdata.jdbc.api.APIConnectionPoolDataSource
- Add the Data Store Helper Class Name: com.ibm.websphere.rsadapter.GenericDataStoreHelper
- Configure security by setting authentication aliases if required
- Review the Summary page to verify all details and click Finish to complete the data source creation
- Select the newly created data source from the list and open Custom properties
-
Add the JDBC connection string under the URL property and press OK. For example:
jdbc:api:RTK=5246...;Profile=C:\profiles\HaloServiceDesk.apip;AuthScheme=APIKey;ProfileSettings='APIKey=your_api_key;Domain=yourcompany.haloservicedesk.com';Start by setting the Profile connection property to the location of the HaloServiceDesk Profile on disk (e.g. C:\profiles\HaloServiceDesk.apip). Next, set the ProfileSettings connection property to the connection string for HaloServiceDesk (see below).
HaloServiceDesk API Profile Settings
HaloServiceDesk uses API key authentication. You can find or create API keys in HaloServiceDesk under Administration > Integrations > Halo API.
Set the following connection properties to connect:
- AuthScheme: Set this to APIKey.
- APIKey: Set this to the API key from your HaloServiceDesk account.
- Domain: Set this to the hostname of your HaloServiceDesk instance (e.g. yourcompany.haloservicedesk.com).
Built-in Connection String Designer
For assistance in constructing the JDBC URL, use the connection string designer built into the Halo Service Desk JDBC Driver. Either double-click the JAR file or execute the jar file from the command-line.
java -jar cdata.jdbc.api.jarFill in the connection properties and copy the connection string to the clipboard.
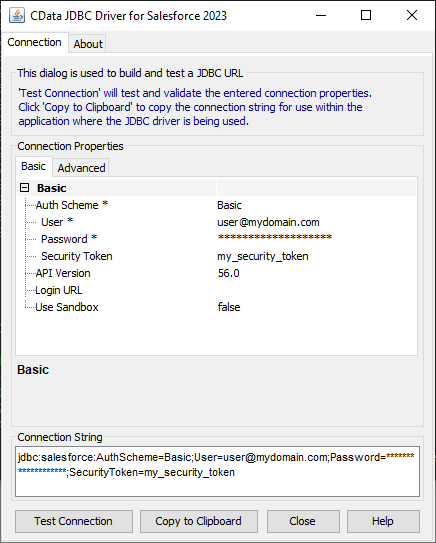
Note: If the URL property is not available, create it and then add the JDBC connection string.
Tip: Always test the connection string with the driver before entering it in the URL property.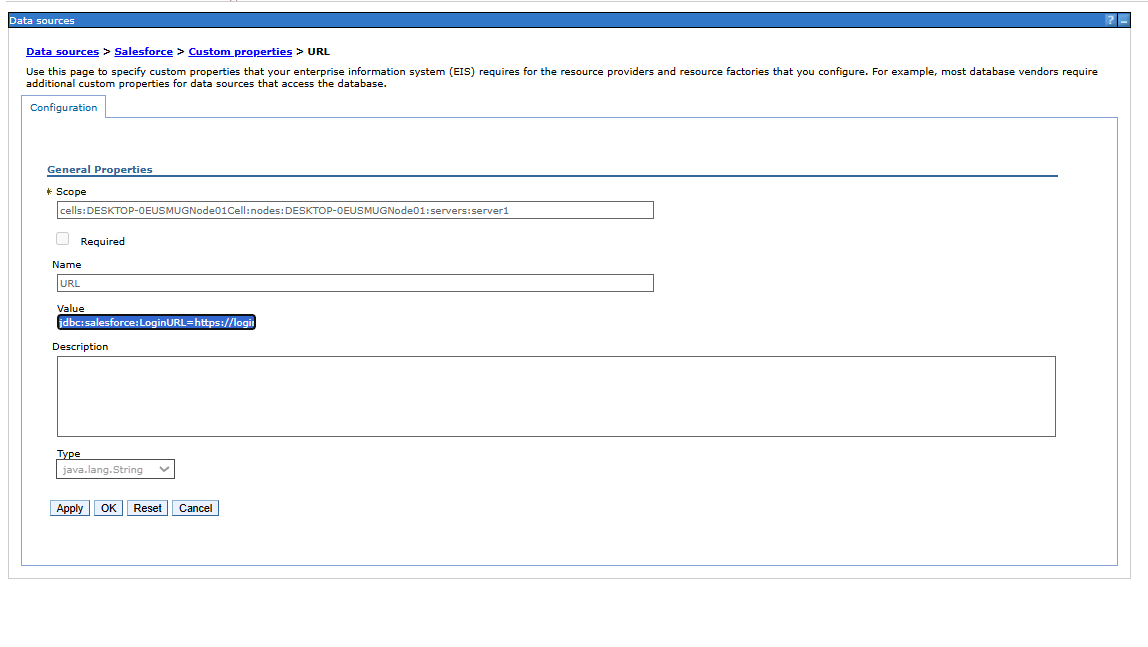
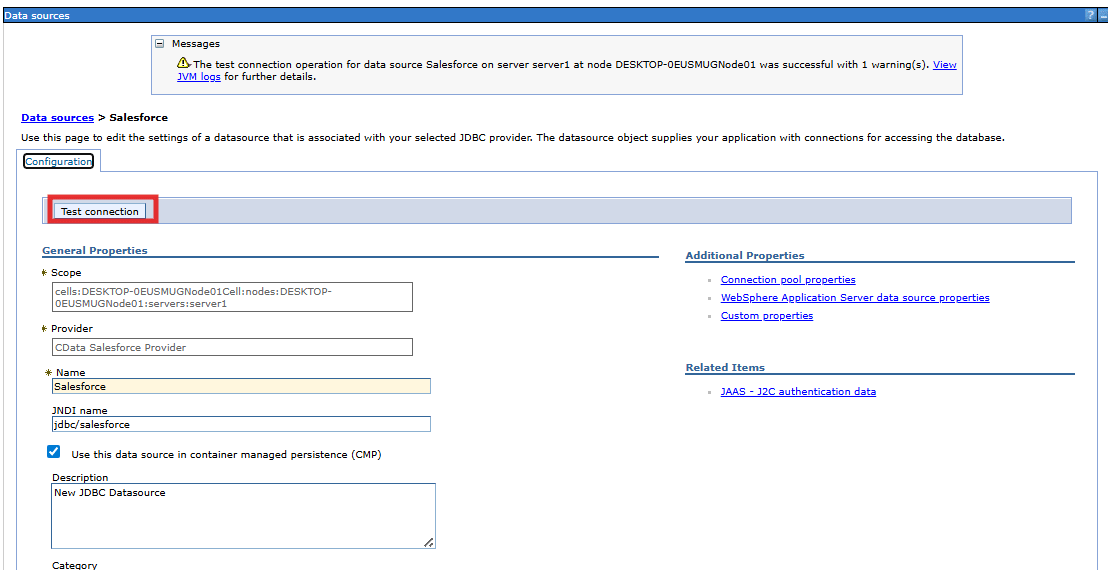
- Now open the data source and choose Test Connection
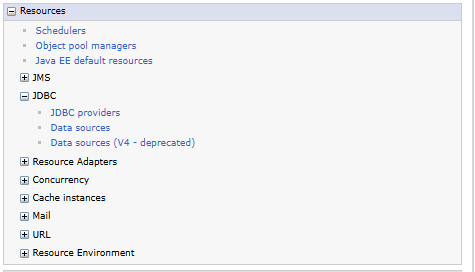
Step 4: Build the web application
- Build the web application using preferred Java framework (Servlet, JSP, or Spring). The resulting .war file will typically follow a structure like this:
- Define the data access logic using JDBC or JPA, referencing the data source through a JNDI name
- This article explains how to set up a JDBC connection and deploy a Java Servlet application
- Package the project as a WAR (Web Application Archive) or EAR (Enterprise Archive) file for deployment
- In a terminal compile the java file using the command:
cd webcontent jar cvf ..\Halo Service DeskServletApp.war *
Halo Service DeskServletApp.war
|--webcontent
|  |--index.jsp                 -- JSP page (entry point)
|  |
|  |--WEB-INF/                  --Hidden from direct browser access
|     |--web.xml                 -- Deployment descriptor
|     |
|     |--classes/                  --Compiled .class files
|       |--com/example/Halo Service Desk/
|          |--Halo Service DeskServlet.class
|
|--lib/                      --Dependency JARs
|--cdata.jdbc.haloservicedesk.jarStep 5: Deploy the Halo Service Desk application in WebSphere
- In the WebSphere admin console, go to Applications and select Install New Application
- Browse and upload the WAR file, then continue with the installation wizard.
Step 6: Retrieve Halo Service Desk data through WebSphere
- Access the application using its context root: http://hostname:port/context-root/page
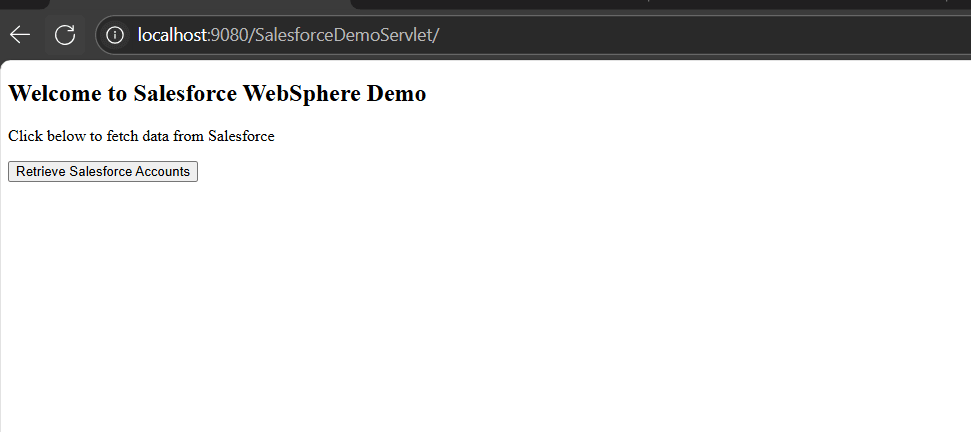 Note: Ensure the deployed application is started before opening it in the browser.
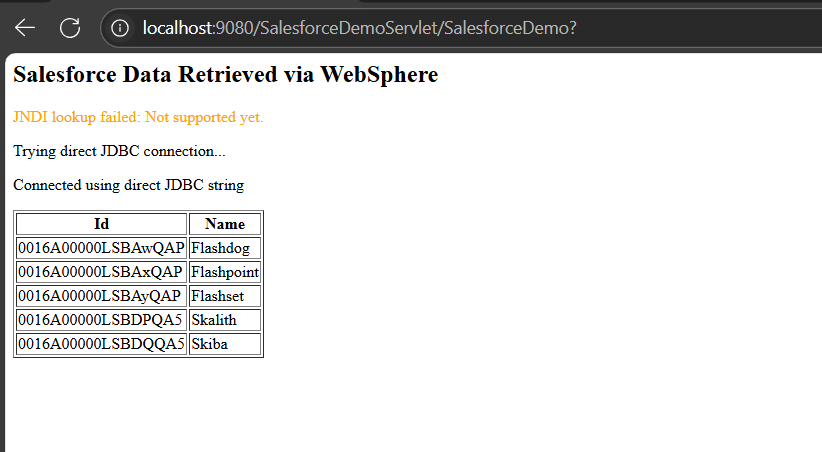
We can now view the retrieved data from the source. The data is accessible directly through IBM WebSphere. This setup demonstrates how a servlet can be deployed in WebSphere to retrieve Halo Service Desk data using the JDBC driver, creating a strong foundation for building advanced Halo Service Desk powered enterprise applications.
Get Started with Connecting Halo Service Desk to IBM WebSphere
Start connecting Halo Service Desk to IBM WebSphere with the CData JDBC Connector today. Download the free 30-day trial and explore how easy it is to enable secure, real-time data access for your applications. As always, our world-class Support Team is available to help with any questions you may have.