




Build MVC Applications with Connectivity to JD Edwards Data

In this article, we will guide you through the process of utilizing wizards within Visual Studio to seamlessly integrate the CData ADO.NET Provider for JD Edwards into a basic MVC (Model, View, Controller) project.
Create the Entity Framework Model
Follow the steps below to save connection properties and map tables to entities in the data model.
- Create a new MVC project in Visual Studio. In this example, the project name is MvcJDEdwardsApp.
If you are using Entity Framework 6, you will need to take the preliminary step of registering the JD Edwards Entity Framework provider for your project. See the "LINQ and Entity Framework" chapter in the help documentation for a guide.
Note that MVC 3 scaffolding and MVC 4 scaffolding do not support Entity Framework 6. You can use your scaffolding with Entity Framework 6 by upgrading to the latest version of MVC.- To add the .edmx file from the designer, right-click your Models folder and click Add New Item. Select ADO.NET Entity Data Model, name the model, and click Add. In this example, the name of the model is JDEdwardsModel.
- In the Entity Data Model wizard, select the option 'EF Designer from database'. The Entity Data Model wizard is displayed.
- Click New Connection. Select CData JD Edwards Data Source in the dialog that is displayed.
Specify the required connection string properties.
The driver connects to JD Edwards through your Application Interface Services (AIS) Server. Set the following connection properties:
- URL: The base HTTPS URL of your AIS Server (e.g., https://jde-ais.example.com:8300).
- User: Your JD Edwards username.
- Password: Your JD Edwards password.
- Environment (optional): The JD Edwards environment to use (e.g., PD920 for production or DV920 for development). If not specified, the AIS Server's default environment is used.
- Role (optional): The JD Edwards role for the session. If not specified, the AIS Server's default role is used.
- DeviceName (optional): An identifier for the connecting device or application, used for auditing and logging on the AIS Server.
- Jasserver (optional): The specific Java Application Server (JAS) instance to route requests through, useful in clustered environments.
Choosing Which Data Is Exposed
JD Edwards organizes tables and business views by System Code, and the driver exposes each System Code as its own schema. Use these properties to control which schemas are available:
- DataModel: One or more ERP modules (comma-separated) whose System Codes are exposed as schemas, or All to expose every System Code in the connected instance. Defaults to FinancialManagement.
- SystemCodes: A comma-separated list of additional System Codes to expose alongside those from DataModel (e.g., 42,43).
When you connect, the driver sends your credentials to the AIS Server to obtain a session token and caches it. The driver requests a new token automatically before the session expires.
A typical connection string is below:
URL=https://your-jde-environment-app.example.com;User=admin;Password=myPassword;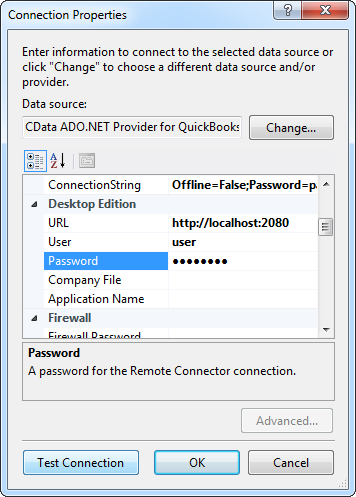
Name the connection and select whether to include sensitive information, such as connection credentials, in the connection string. For simplicity, this example saves sensitive information in Web.config. The connection settings are saved as JDEdwardsEntities.
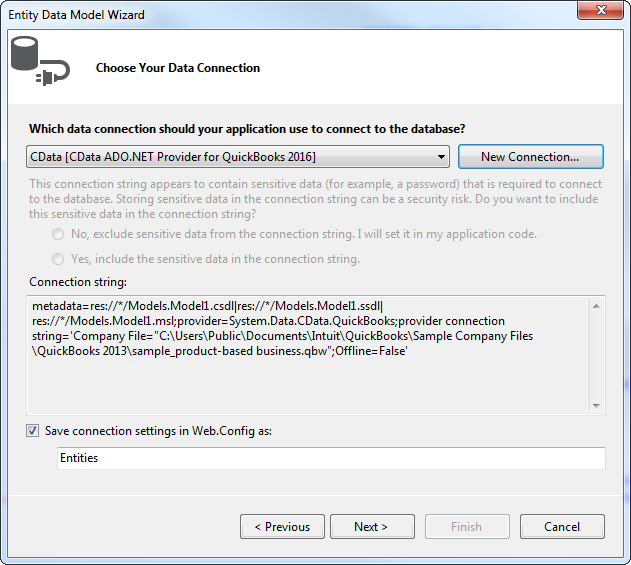
- Select the views you need. In this example, AccountsPayable.AccountLedger is imported. Also, the option to pluralize object names is deselected in this example. Click Finish to create the .edmx file.
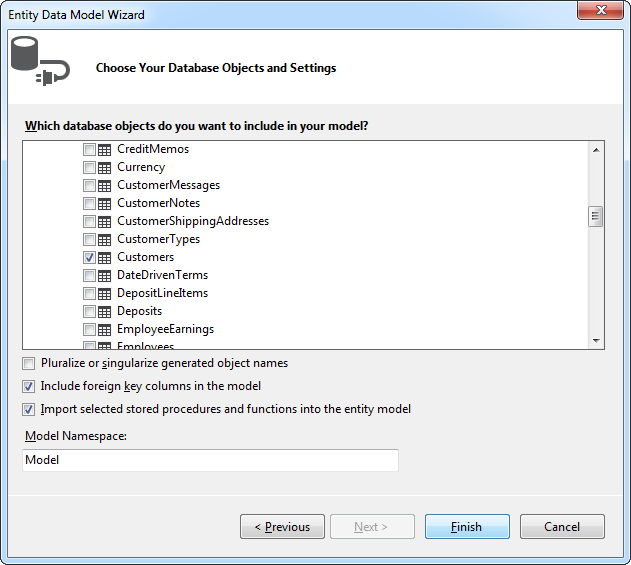
- Build your project to complete this step.
Scaffold the Controller and Views
Once you've established the model and completed the project build, you can employ ASP.NET Scaffolding wizards to generate both the controller and the views.
- In Solution Explorer, right-click the controllers folder and click Add -> Controller. Select MVC 5 Controller with views, using Entity Framework.
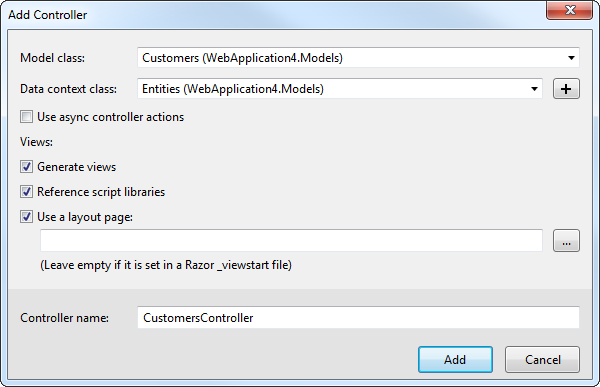
- In the Add Controller dialog that is then displayed, select the following options:
- Model class: Select a table you imported; for example, AccountsPayable.AccountLedger.
- Data context class: Select your context class.
-
Leave the default values for the other fields.
Ready to get started?
Download a free trial of the JD Edwards Data Provider to get started:
Download NowLearn more:
 JD Edwards ADO.NET Provider
Rapidly create and deploy powerful .NET applications that integrate with JD Edwards data including AccountLedger, ProposalofPayment, ContractRevenueSummary, EmployeeEnrollment, RentIncreaseAmounts, and more!