




Provide OData Services of JD Edwards Data from a WCF Application

The CData ADO.NET Provider for JD Edwards enables you to rapidly develop service-oriented applications using the Windows Communication Foundation (WCF) framework, providing JD Edwards data data to OData consumers. This article guides you through creating an entity data model for connectivity and a WCF Data Service to expose OData services. You can then consume the feed with various OData clients, such as Power Pivot or applications using the CData ADO.NET Provider for OData.
Create the OData Service
Follow the steps below to create a WCF service application that will provide connectivity to JD Edwards data via OData.
- Open Visual Studio and create a new project. Select the WCF Service Application template.
- Delete the autogenerated IService.cs and Service1.svc.
- Install Entity Framework 6:
Use the Package Manager Console in Visual Studio to install the latest version of Entity Framework. Run the following command to download and install Entity Framework automatically:
Install-Package EntityFramework - Register the Entity Framework provider:
- Add the following provider entry in the "providers" section of your App.config or Web.config file. This section should already exist if the Entity Framework installation was successful.
<configuration> ... <entityFramework> <providers> ... <provider invariantName="System.Data.CData.JDEdwards" type="System.Data.CData.JDEdwards.JDEdwardsProviderServices, System.Data.CData.JDEdwards.Entities.EF6" /> </providers> </entityFramework> </configuration> - Add a reference to System.Data.CData.JDEdwards.Entities.dll, located in lib/4.0 in the installation directory.
- Build the project to complete the setup for using EF6.
- Add the following provider entry in the "providers" section of your App.config or Web.config file. This section should already exist if the Entity Framework installation was successful.
- Click Project -> Add New Item -> ADO.NET Entity Data Model.
- In the Entity Data Model wizard that is displayed, select the 'EF Designer from Database' option.
- In the resulting Choose Your Connection dialog, click New Connection.
In the Connection properties dialog, select the CData JD Edwards Data Source and enter the necessary credentials.
A typical connection string is below:
URL=https://your-jde-environment-app.example.com;User=admin;Password=myPassword;The driver connects to JD Edwards through your Application Interface Services (AIS) Server. Set the following connection properties:
- URL: The base HTTPS URL of your AIS Server (e.g., https://jde-ais.example.com:8300).
- User: Your JD Edwards username.
- Password: Your JD Edwards password.
- Environment (optional): The JD Edwards environment to use (e.g., PD920 for production or DV920 for development). If not specified, the AIS Server's default environment is used.
- Role (optional): The JD Edwards role for the session. If not specified, the AIS Server's default role is used.
- DeviceName (optional): An identifier for the connecting device or application, used for auditing and logging on the AIS Server.
- Jasserver (optional): The specific Java Application Server (JAS) instance to route requests through, useful in clustered environments.
Choosing Which Data Is Exposed
JD Edwards organizes tables and business views by System Code, and the driver exposes each System Code as its own schema. Use these properties to control which schemas are available:
- DataModel: One or more ERP modules (comma-separated) whose System Codes are exposed as schemas, or All to expose every System Code in the connected instance. Defaults to FinancialManagement.
- SystemCodes: A comma-separated list of additional System Codes to expose alongside those from DataModel (e.g., 42,43).
When you connect, the driver sends your credentials to the AIS Server to obtain a session token and caches it. The driver requests a new token automatically before the session expires.
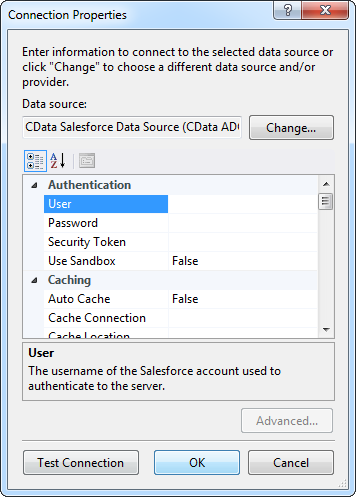
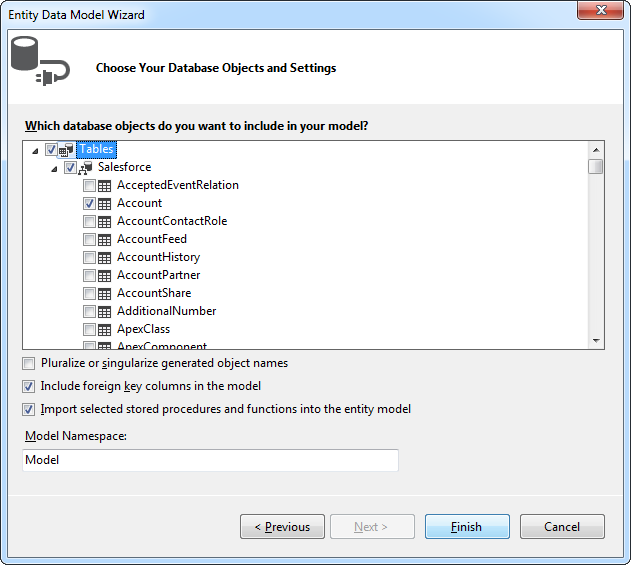
- Select JD Edwards tables and views that you want OData clients to access.
- Click Project -> Add New Item -> WCF Data Service.
Specify the data source class and configure access to the new WCF Data Service. In the example below, the Access Rule for the entities is set to All. This means that any user will be able to read and modify data.
using System; using System.Collections.Generic; using System.Data.Services; using System.Data.Services.Common; using System.Linq; using System.ServiceModel.Web; using System.Web; namespace JDEdwardsService{ public class JDEdwardsDataService : DataService<JDEdwardsEntities> { public static void InitializeService(DataServiceConfiguration config) { config.SetEntitySetAccessRule("*", EntitySetRights.All); config.DataServiceBehavior.MaxProtocolVersion = DataServiceProtocolVersion.V3; } } }-
Run the project. Applications that support OData can now access the Salesforce data and reflect any changes. You can access the feed in your browser. The feed will resemble the following:

Consume the OData Service from Power Pivot
You can now use the service from any OData client; for example, Excel Power Pivot.
- Open Excel and click on the Power Pivot Window button.
- A new pop-up will appear. Select the option From Data Feeds.
- In the resulting Table Import Wizard, enter the OData URL. For example, http://localhost:12449/JDEdwardsDataService.svc/.
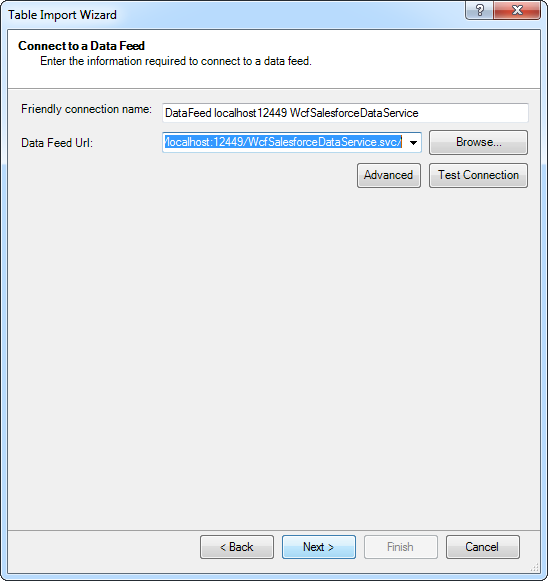
- After connecting to the OData service, click the Next button at the bottom of the window.
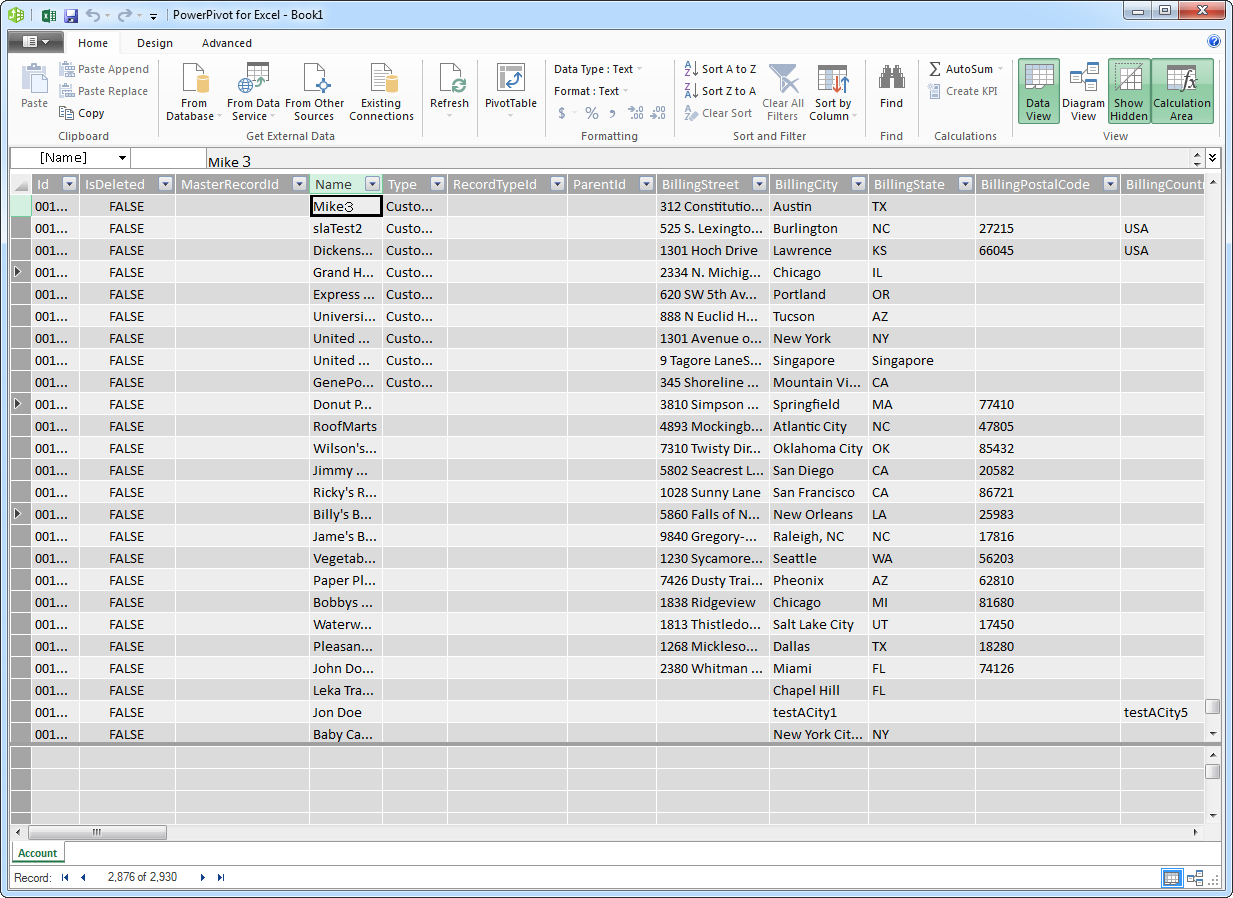
- A table listing of the available tables will appear in the next window of the wizard. Select which tables you want to import and click Finish.
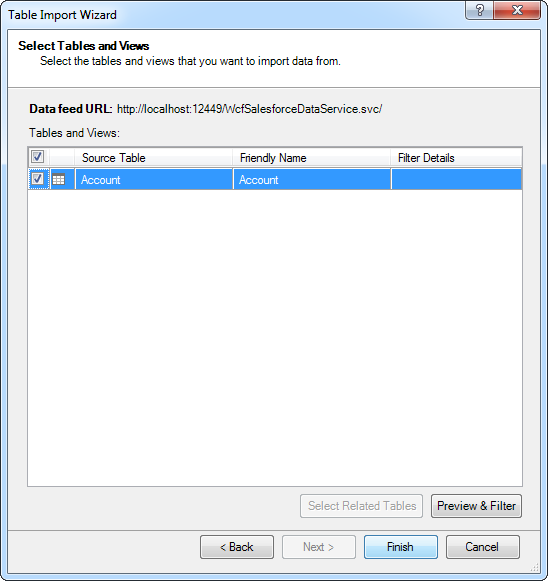
- Click Close to import the data in Power Pivot.
Ready to get started?
Download a free trial of the JD Edwards Data Provider to get started:
Download NowLearn more:
 JD Edwards ADO.NET Provider
Rapidly create and deploy powerful .NET applications that integrate with JD Edwards data including AccountLedger, ProposalofPayment, ContractRevenueSummary, EmployeeEnrollment, RentIncreaseAmounts, and more!