




Integrating LangGraph with JD Edwards Data via CData Connect AI

LangGraph is a framework for building and visualizing intelligent, graph-based AI workflows that combine reasoning models (LLMs) with tool integrations and data operations. By integrating it with the CData Connect AI, you can enable agents to securely access, query, and act on live enterprise data in real-time via a standardized toolset.
CData Connect AI is a managed MCP-platform that allows you to expose your data sources (such as JD Edwards) through the Model Context Protocol (MCP). This means your AI agents can work with metadata, catalogs, tables, and SQL-enabled data access from hundreds of data sources, without complex ETL or custom integrations.
This article explores how to register the MCP endpoint in LangGraph, configure data source connectivity via CData Connect AI, and build a workflow that queries and visualizes live data (for example, JD Edwards objects) on demand. It demonstrates how to use the built-in MCP toolset (getCatalogs, getSchemas, getTables, queryData, etc.) to enable natural-language agents to interact with your enterprise data securely and interactively.
Prerequisites
- An account in CData Connect AI.
- Python version 3.10 or higher, to install the LangGraph packages.
- Generate and save an OpenAI API key.
- Install Visual Studio Code in your system.
- Obtain and save the LangGraph API key from LangGraph.
Step 1: Configure JD Edwards Connectivity for LangGraph
Before LangGraph can access JD Edwards, a JD Edwards connection must be created in CData Connect AI. This connection is then exposed to LangGraph through the remote MCP server.
- Log in to Connect AI click Sources, and then click + Add Connection

- From the available data sources, choose JD Edwards

-
Enter the necessary authentication properties to connect to JD Edwards.
The driver connects to JD Edwards through your Application Interface Services (AIS) Server. Set the following connection properties:
- URL: The base HTTPS URL of your AIS Server (e.g., https://jde-ais.example.com:8300).
- User: Your JD Edwards username.
- Password: Your JD Edwards password.
- Environment (optional): The JD Edwards environment to use (e.g., PD920 for production or DV920 for development). If not specified, the AIS Server's default environment is used.
- Role (optional): The JD Edwards role for the session. If not specified, the AIS Server's default role is used.
- DeviceName (optional): An identifier for the connecting device or application, used for auditing and logging on the AIS Server.
- Jasserver (optional): The specific Java Application Server (JAS) instance to route requests through, useful in clustered environments.
Choosing Which Data Is Exposed
JD Edwards organizes tables and business views by System Code, and the driver exposes each System Code as its own schema. Use these properties to control which schemas are available:
- DataModel: One or more ERP modules (comma-separated) whose System Codes are exposed as schemas, or All to expose every System Code in the connected instance. Defaults to FinancialManagement.
- SystemCodes: A comma-separated list of additional System Codes to expose alongside those from DataModel (e.g., 42,43).
When you connect, the driver sends your credentials to the AIS Server to obtain a session token and caches it. The driver requests a new token automatically before the session expires.

- Click Save & Test
- Once authenticated, open the Permissions tab in the JD Edwards connection and configure user-based permissions as required

Generate a Personal Access Token (PAT)
LangGraph authenticates to Connect AI using an account email and a Personal Access Token (PAT). Creating separate PATs for each integration is recommended to maintain granular access control.
- In Connect AI, select the Gear icon in the top-right to open Settings
- Under Access Tokens, select Create PAT
- Provide a descriptive name for the token and select Create

- Copy the token and store it securely. The PAT will only be visible during creation
With the JD Edwards connection configured and a PAT generated, LangGraph is prepared to connect to JD Edwards data through the CData MCP server.
Step 2: Set up your development environment
Set up your project directory and install the required dependencies to connect LangGraph with CData Connect AI and use OpenAI LLM for reasoning. This setup enables LangGraph to call the JD Edwards MCP server tools exposed by Connect AI while OpenAI processes the natural language reasoning.
- Create a new folder for your LangGraph project:
mkdir LangGraph cd LangGraph - Install the required Python packages:
pip install langgraph langchain-openai langchain-mcp-adapters python-dotenv "langgraph-cli[inmem]" - Ensure you have Python 3.10+ and a valid OpenAI API key configured in your environment.
Step 3: Configure the MCP connection environment variables
LangGraph uses environment variables to connect to the CData Connect AI and define the API credentials and configuration settings. Store these credentials in a .env file to keep them secure and reusable. LangGraph automatically reads this file at runtime, so the script can authenticate and communicate with the MCP server without hardcoding sensitive information.
- Create a new file named .env in your project directory.
- Add the following environment variables to define your LangGraph, CData Connect AI, and OpenAI configuration:
# LangSmith (Optional) LANGSMITH_API_KEY=lsv2_pt_xxxx #LangSmith API Key LANGCHAIN_TRACING_V2=true LANGCHAIN_PROJECT=LangGraph-Demo # MCP Configuration MCP_BASE_URL=https://mcp.cloud.cdata.com/mcp #MCP Server URL MCP_AUTH=base64encoded(EMAIL:PAT) #Base64 encoded Connect AI Email:PAT OPENAI_API_KEY=sk-proj-xxxx - Save the file. LangGraph uses these values to authenticate with the CData Connect AI JD Edwards MCP server to connect with the JD Edwards data and initialize the OpenAI model for reasoning.
Note: You can generate the Base64-encoded authorization string using any online Base64 encoder, such as Base64 encoding tool. Encode your CData Connect AI username and PAT (obtained in the prerequisites).
Step 4: Create the LangGraph agent script
In this step, you need to create a Python script that connects LangGraph to your CData Connect AI MCP server. The script retrieves the available MCP tools, such as getCatalogs, getSchemas, and queryData, builds a LangGraph workflow, and runs a natural language prompt against your connected JD Edwards data.
The workflow uses the MCP to securely retrieve live JD Edwards data from Connect AI and uses OpenAI GPT-4o to interpret and reason over that data. You also expose the graph so you can visualize it later in LangGraph Studio.
Create the file
Create a new Python file named test.py inside your LangGraph project folder.
Add the following code
Use the following script into test.py:
import asyncio
import os
import operator
from typing_extensions import TypedDict, Annotated
from dotenv import load_dotenv

from langgraph.graph import StateGraph, START, END
from langchain.agents import create_agent
from langchain_mcp_adapters.client import MultiServerMCPClient
from langchain_openai import ChatOpenAI
from langchain_core.messages import BaseMessage, HumanMessage

# Load environment variables
load_dotenv()

# Define the agent state
class AgentState(TypedDict):
    messages: Annotated[list[BaseMessage], operator.add]

# Define the async agent logic
async def run_agent(user_prompt: str) -> str:
    MCP_BASE_URL = os.getenv("MCP_BASE_URL")
    MCP_AUTH = os.getenv("MCP_AUTH")
    OPENAI_API_KEY = os.getenv("OPENAI_API_KEY")

    print("Connecting to the MCP server...")
    mcp_client = MultiServerMCPClient(
        connections={
            "default": {
                "transport": "streamable_http",
                "url": MCP_BASE_URL,
                "headers": {"Authorization": f"Basic {MCP_AUTH}"} if MCP_AUTH else {},
            }
        }
    )

    print("Loading available MCP tools...")
    all_mcp_tools = await mcp_client.get_tools()
    print(f"Loaded tools: {[tool.name for tool in all_mcp_tools]}")

    # Initialize the LLM
    llm = ChatOpenAI(model="gpt-4o", temperature=0.2, api_key=OPENAI_API_KEY)

    print("Creating the LangGraph agent...")
    agent = create_agent(
        model=llm,
        tools=all_mcp_tools,
        system_prompt="You are a helpful assistant. Use tools when needed."
    )

    # Build the workflow graph
    builder = StateGraph(AgentState)
    builder.add_node("agent", agent)
    builder.add_edge(START, "agent")
    builder.add_edge("agent", END)
    graph_instance = builder.compile()

    print(f"Processing user query: {user_prompt}\n")
    initial_state = {"messages": [HumanMessage(content=user_prompt)]}
    result = await graph_instance.ainvoke(initial_state)
    print(f"Agent Response:\n{result['messages'][-1].content}")

# Expose the graph for visualization
builder = StateGraph(AgentState)
builder.add_node(
    "agent",
    create_agent(
        model=ChatOpenAI(model="gpt-4o", temperature=0.2, api_key=os.getenv("OPENAI_API_KEY")),
        tools=[],
        system_prompt="You are a helpful assistant."
    )
)
builder.add_edge(START, "agent")
builder.add_edge("agent", END)
graph = builder.compile()

if __name__ == "__main__":
    import argparse
    parser = argparse.ArgumentParser()
    parser.add_argument("--serve", action="store_true", help="Run visualization server")
    args = parser.parse_args()

    if args.serve:
        print("To visualize the graph, run:")
        print("langgraph dev")
    else:
        asyncio.run(run_agent("List the first 2 catalogs available"))
Step 5: Configure the LangGraph project
Configure the LangGraph project so the CLI recognizes the workflow graph and environment settings. Create a configuration file that registers the graph for use in LangGraph Studio or during local visualization runs.
Create the configuration file
Create a new file named langgraph.json in your project directory.
Add the following configuration
Use the content below in the langgraph.json file:
{
  "dependencies": ["."],
  "graphs": {
    "agent": "./test.py:graph"
  },
  "env": ".env"
}
Step 6: Prompt JD Edwards using LangGraph (via Connect AI)
Run the LangGraph development server to view and interact with your workflow in LangGraph Studio. This allows direct visualization of how the agent processes prompts, invokes tools, and retrieves JD Edwards data through the MCP server.
Start the LangGraph development server
Open a terminal in your project directory and run:
langgraph dev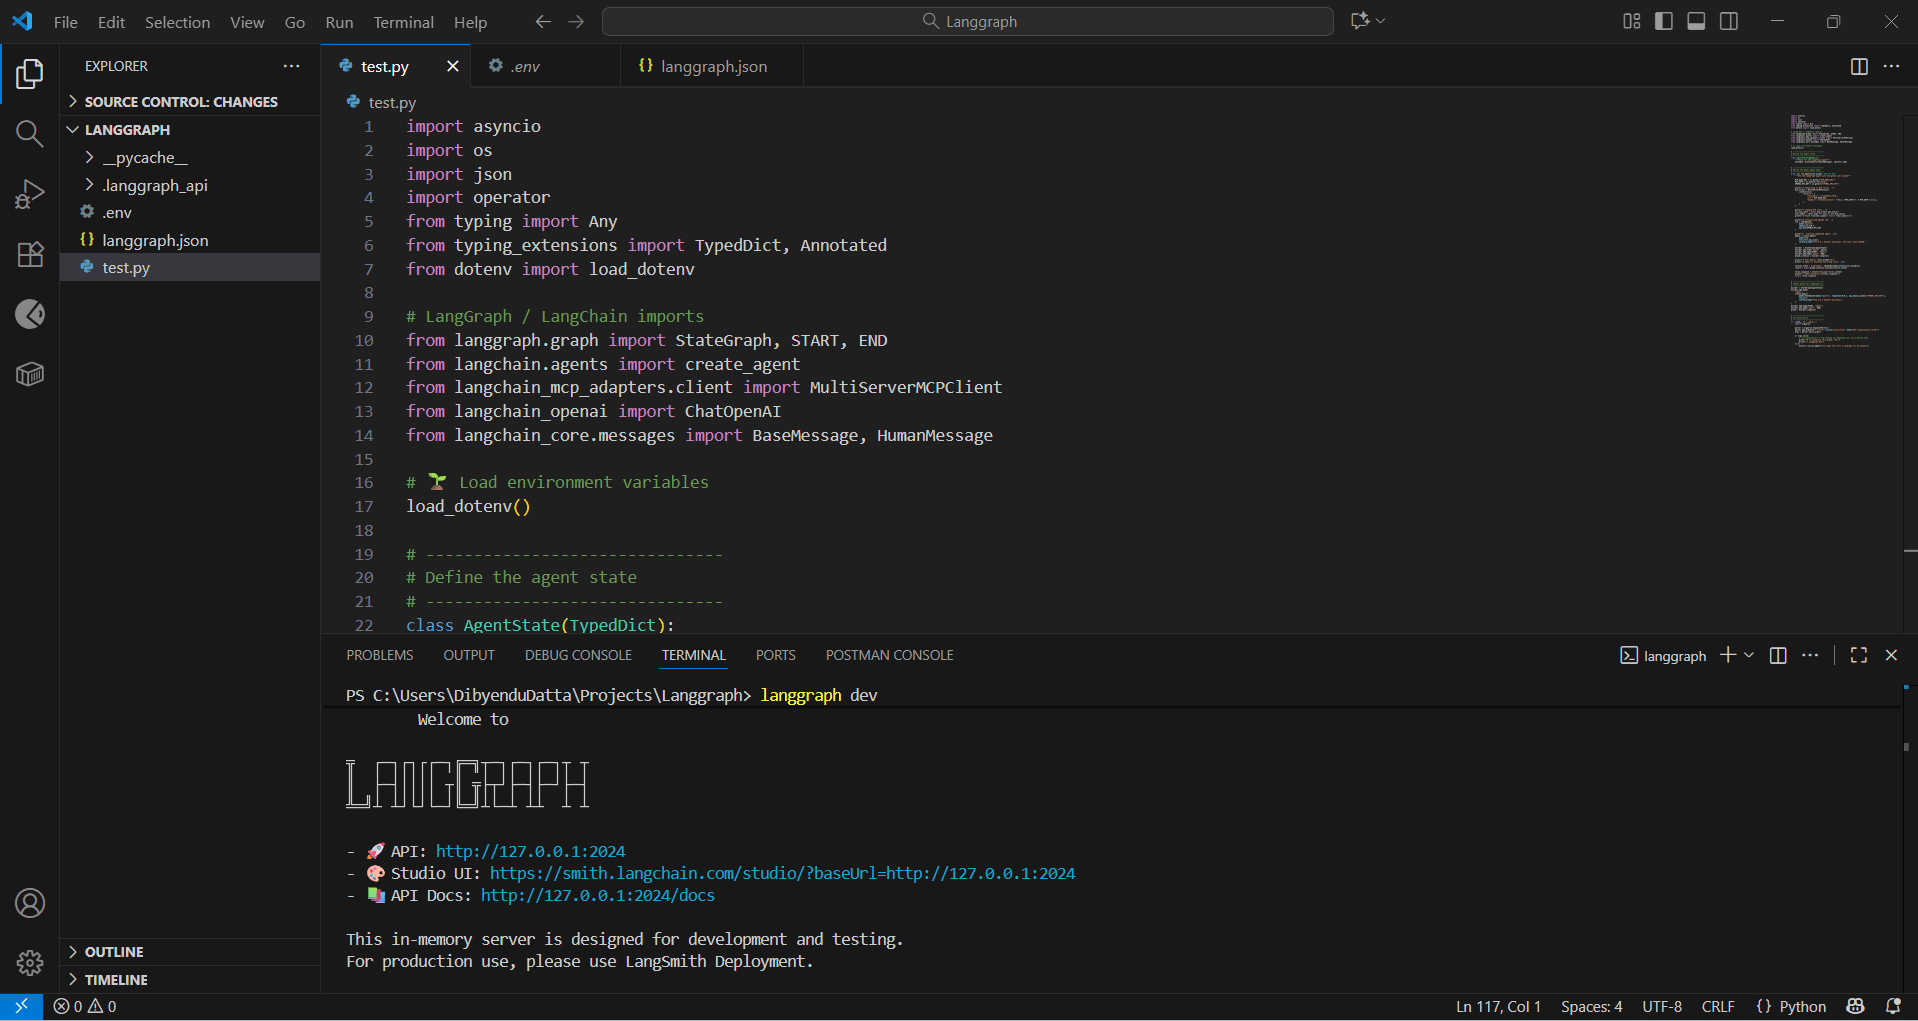
Access the Studio interface
After the server starts, LangGraph launches a local API and provides a link to the Studio UI:
https://smith.langchain.com/studio/?baseUrl=http://127.0.0.1:2024Ideally, the link opens automatically when the command is run. If not, open this link in your browser to load the LangGraph Studio dashboard.
Interact with the agent
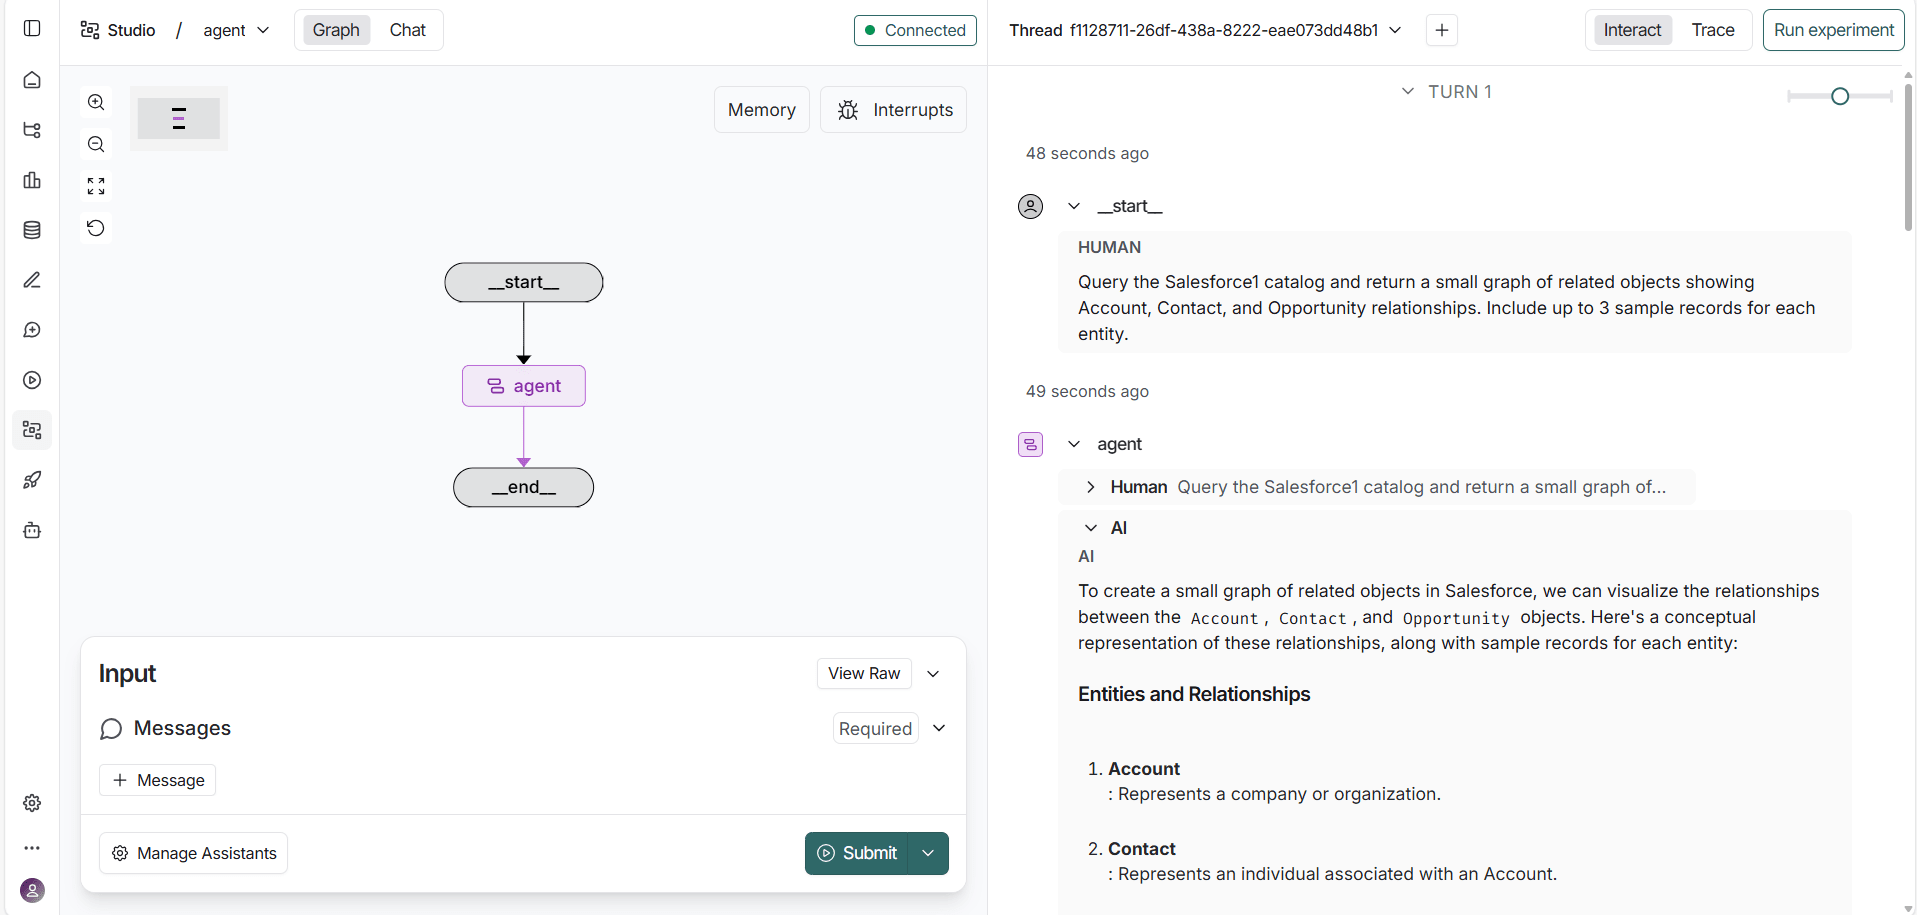
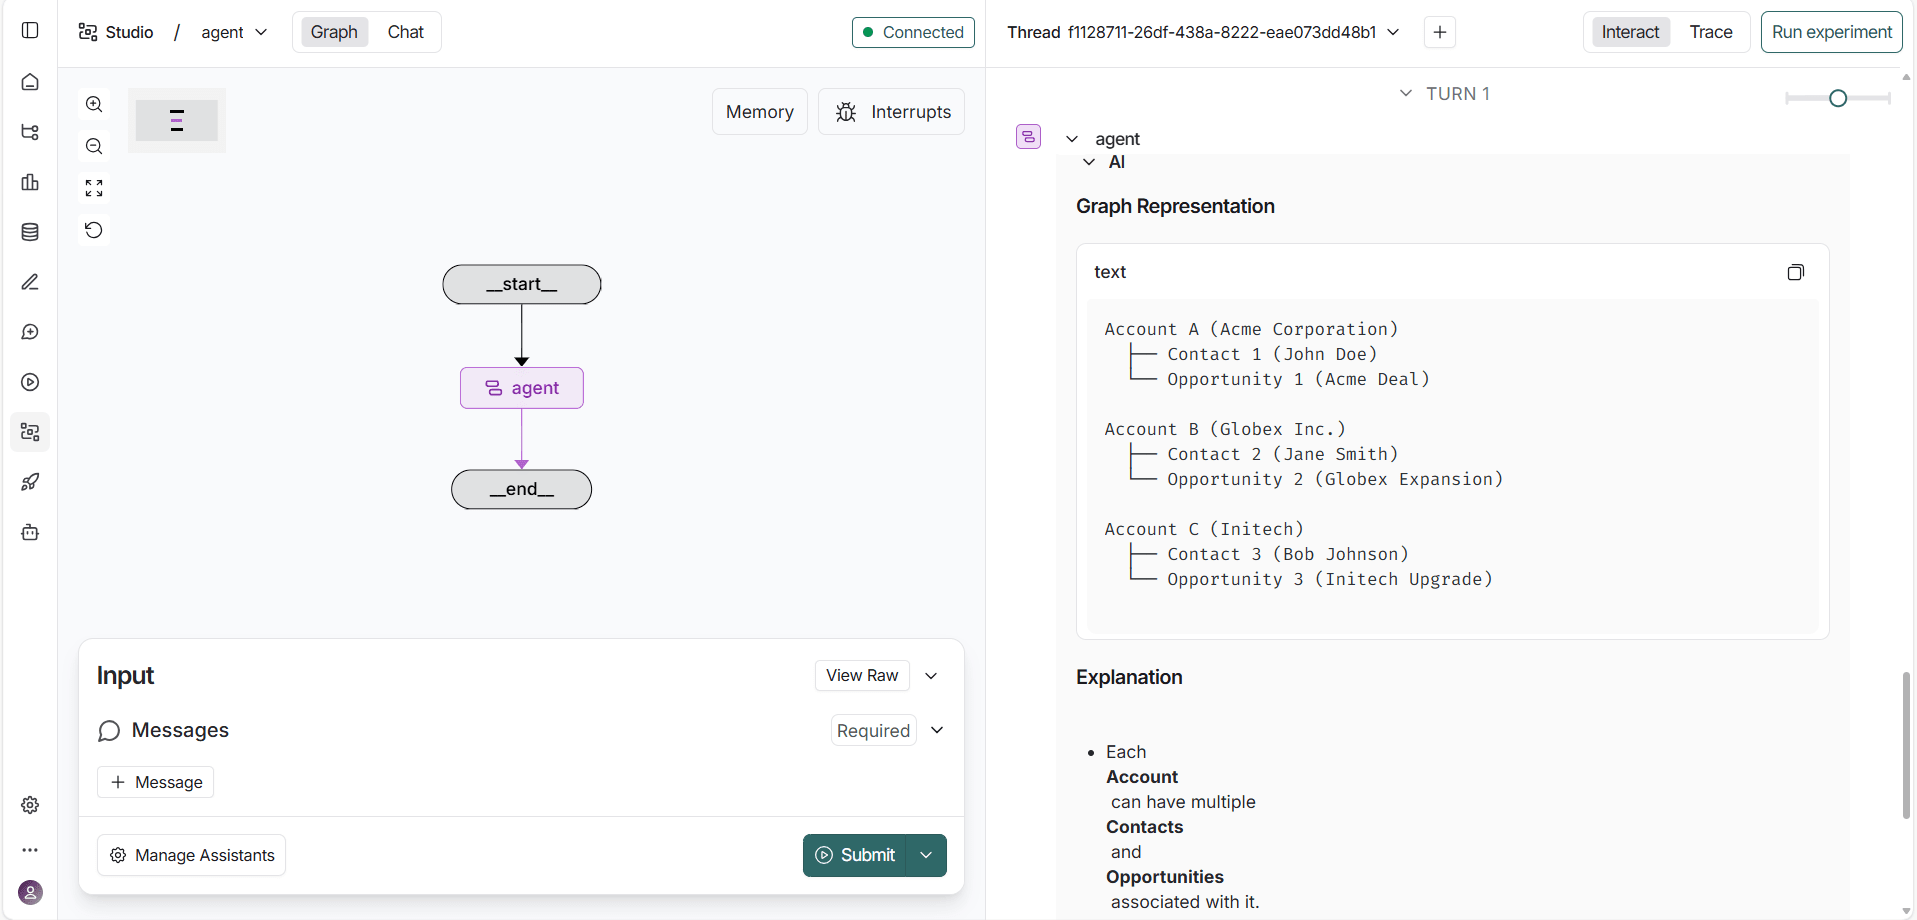
In the Studio interface, enter a natural language prompt such as:
Show all JD Edwards tables available in my catalogLangGraph displays a real-time visualization of the agent's reasoning flow, showing how it interprets the prompt, calls the appropriate MCP tools, and retrieves live data from JD Edwards.
Get CData Connect AI
To get live data access to hundreds of SaaS, Big Data, and NoSQL sources directly from your cloud applications, try CData Connect AI today!