




Search External JD Edwards Objects in Salesforce Connect

CData Connect AI, enables you to access JD Edwards data from cloud-based applications like the Salesforce console and mobile applications like the Salesforce Mobile App. In this article, you will use CData Connect AI and Salesforce Connect to access external JD Edwards objects alongside standard Salesforce objects.
Connect to JD Edwards from Salesforce
To work with live JD Edwards data in Salesforce Connect, we need to connect to JD Edwards from Connect AI, provide user access to the connection, and create a Workspace for the JD Edwards data.
Connect to JD Edwards from Connect AI
CData Connect AI uses a straightforward, point-and-click interface to connect to data sources.
- Log into Connect AI, click Sources, and then click Add Connection
- Select "JD Edwards" from the Add Connection panel
-
Enter the necessary authentication properties to connect to JD Edwards.
The driver connects to JD Edwards through your Application Interface Services (AIS) Server. Set the following connection properties:
- URL: The base HTTPS URL of your AIS Server (e.g., https://jde-ais.example.com:8300).
- User: Your JD Edwards username.
- Password: Your JD Edwards password.
- Environment (optional): The JD Edwards environment to use (e.g., PD920 for production or DV920 for development). If not specified, the AIS Server's default environment is used.
- Role (optional): The JD Edwards role for the session. If not specified, the AIS Server's default role is used.
- DeviceName (optional): An identifier for the connecting device or application, used for auditing and logging on the AIS Server.
- Jasserver (optional): The specific Java Application Server (JAS) instance to route requests through, useful in clustered environments.
Choosing Which Data Is Exposed
JD Edwards organizes tables and business views by System Code, and the driver exposes each System Code as its own schema. Use these properties to control which schemas are available:
- DataModel: One or more ERP modules (comma-separated) whose System Codes are exposed as schemas, or All to expose every System Code in the connected instance. Defaults to FinancialManagement.
- SystemCodes: A comma-separated list of additional System Codes to expose alongside those from DataModel (e.g., 42,43).
When you connect, the driver sends your credentials to the AIS Server to obtain a session token and caches it. The driver requests a new token automatically before the session expires.

- Click Save & Test
-
Navigate to the Permissions tab in the Add JD Edwards Connection page and update the User-based permissions.



Add a Personal Access Token
When connecting to Connect AI through the REST API, the OData API, or the Virtual SQL Server, a Personal Access Token (PAT) is used to authenticate the connection to Connect AI. It is best practice to create a separate PAT for each service to maintain granularity of access.
- Click on the Gear icon () at the top right of the Connect AI app to open the settings page.
- On the Settings page, go to the Access Tokens section and click Create PAT.
-
Give the PAT a name and click Create.

- The personal access token is only visible at creation, so be sure to copy it and store it securely for future use.
Configure JD Edwards Endpoints for Salesforce Connect
After connecting to JD Edwards, create a workspace for your desired table(s).
-
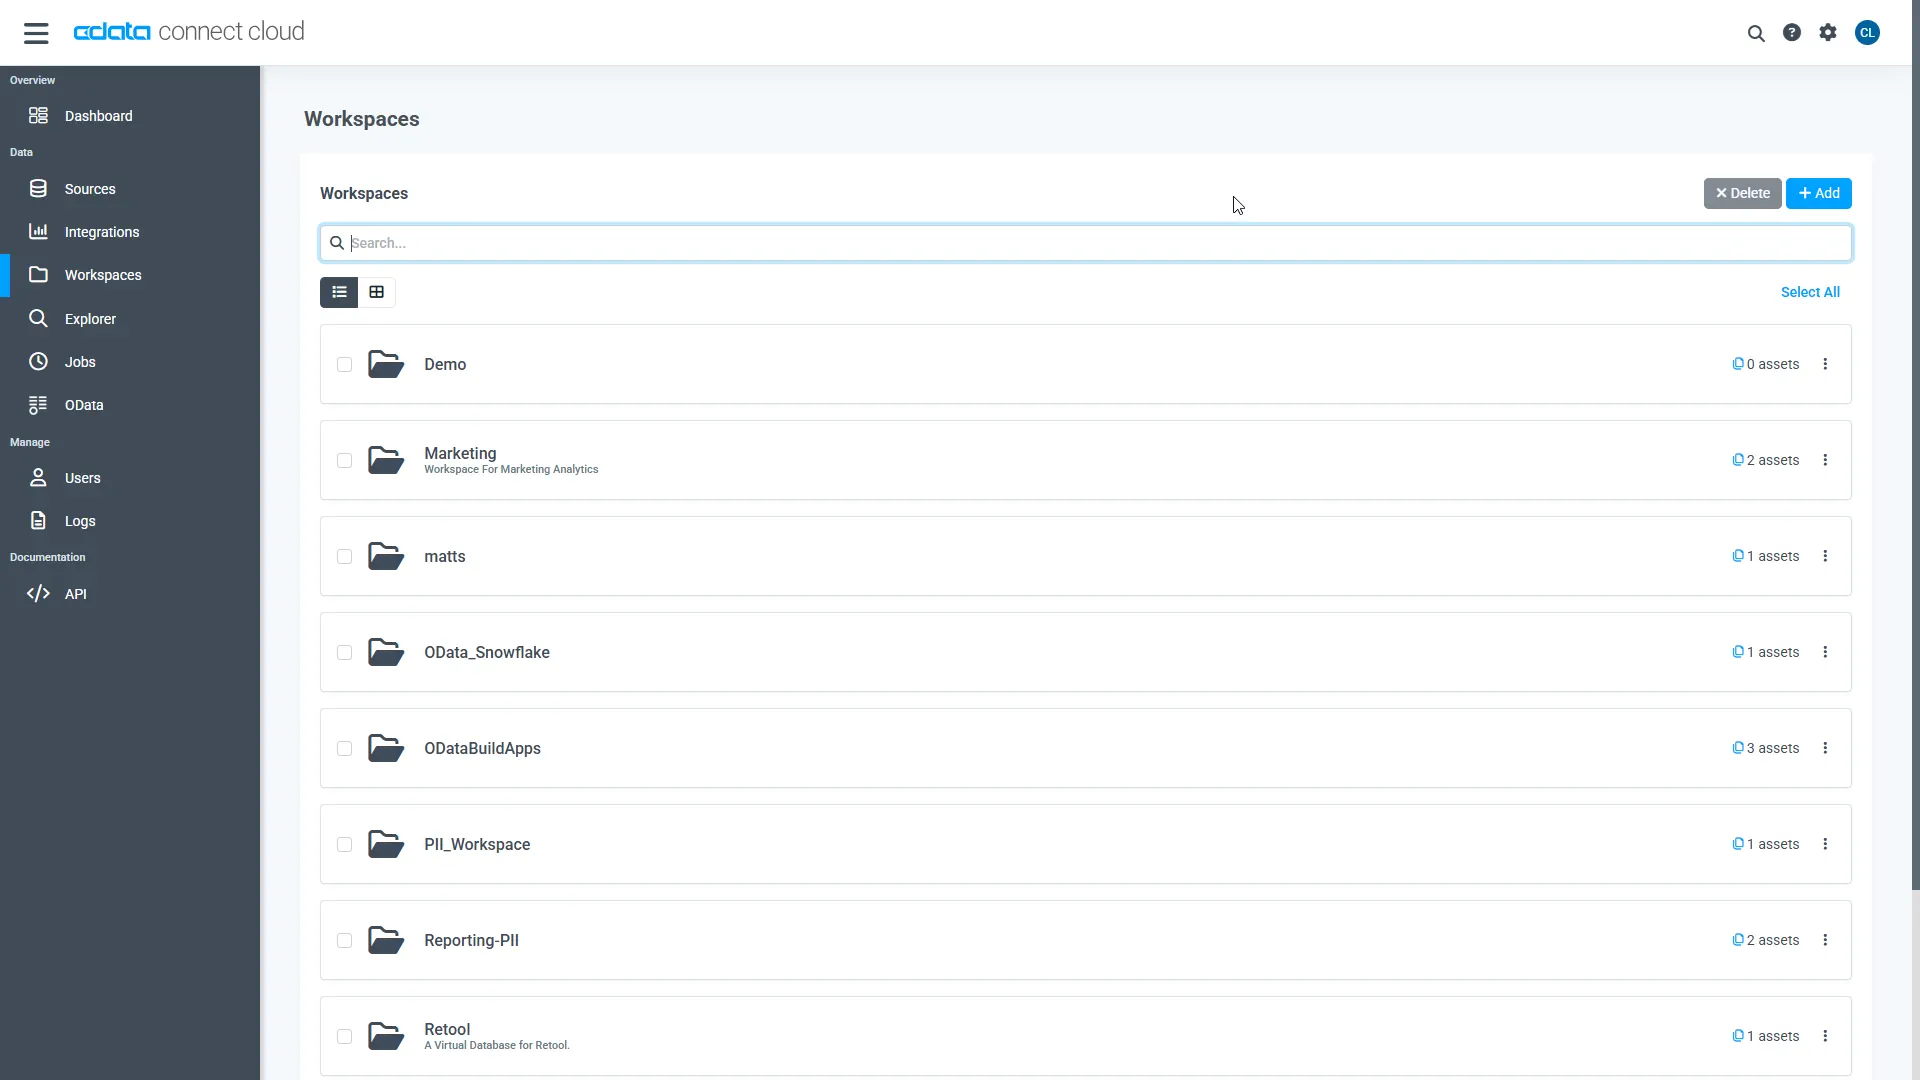
Navigate to the Workspaces page and click Add to create a new Workspace (or select an existing workspace).
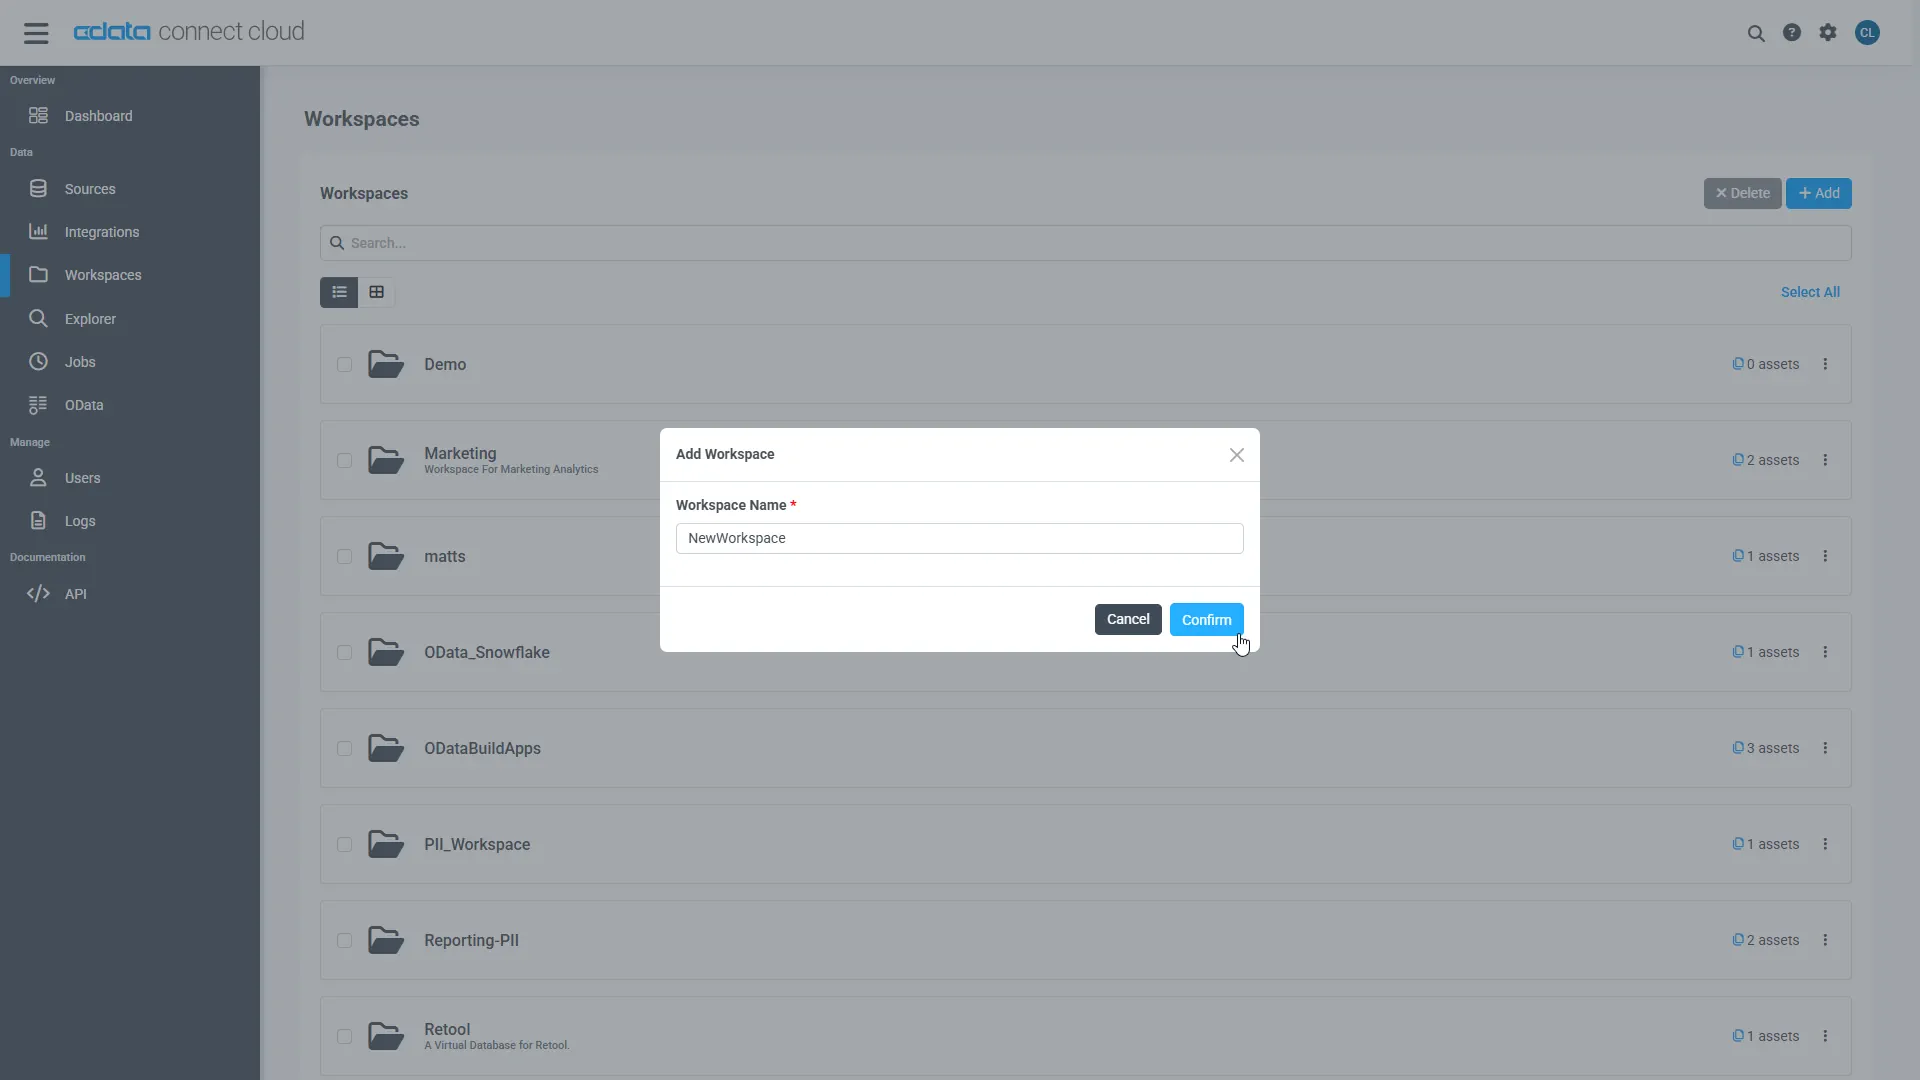
- Click Add to add new assets to the Workspace.
-
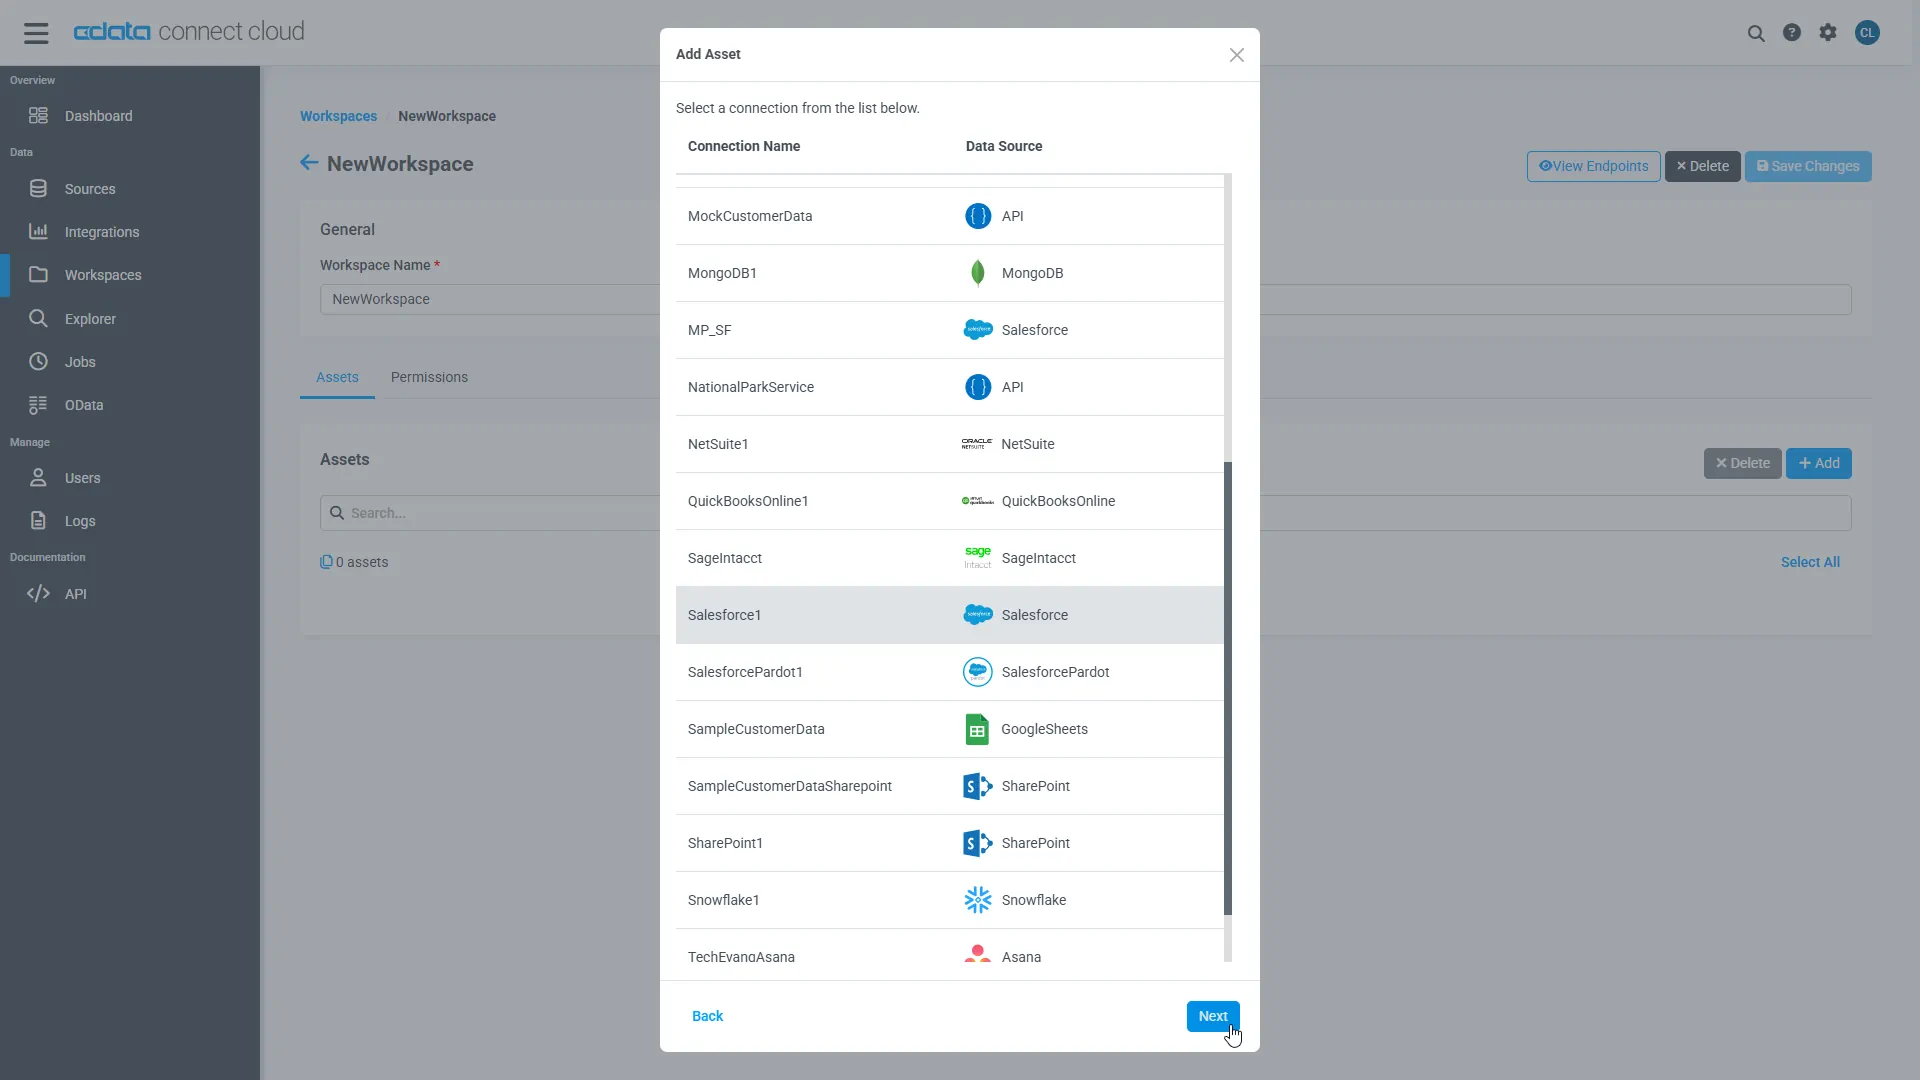
Select the JD Edwards connection (e.g. JDEdwards1) and click Next.
-
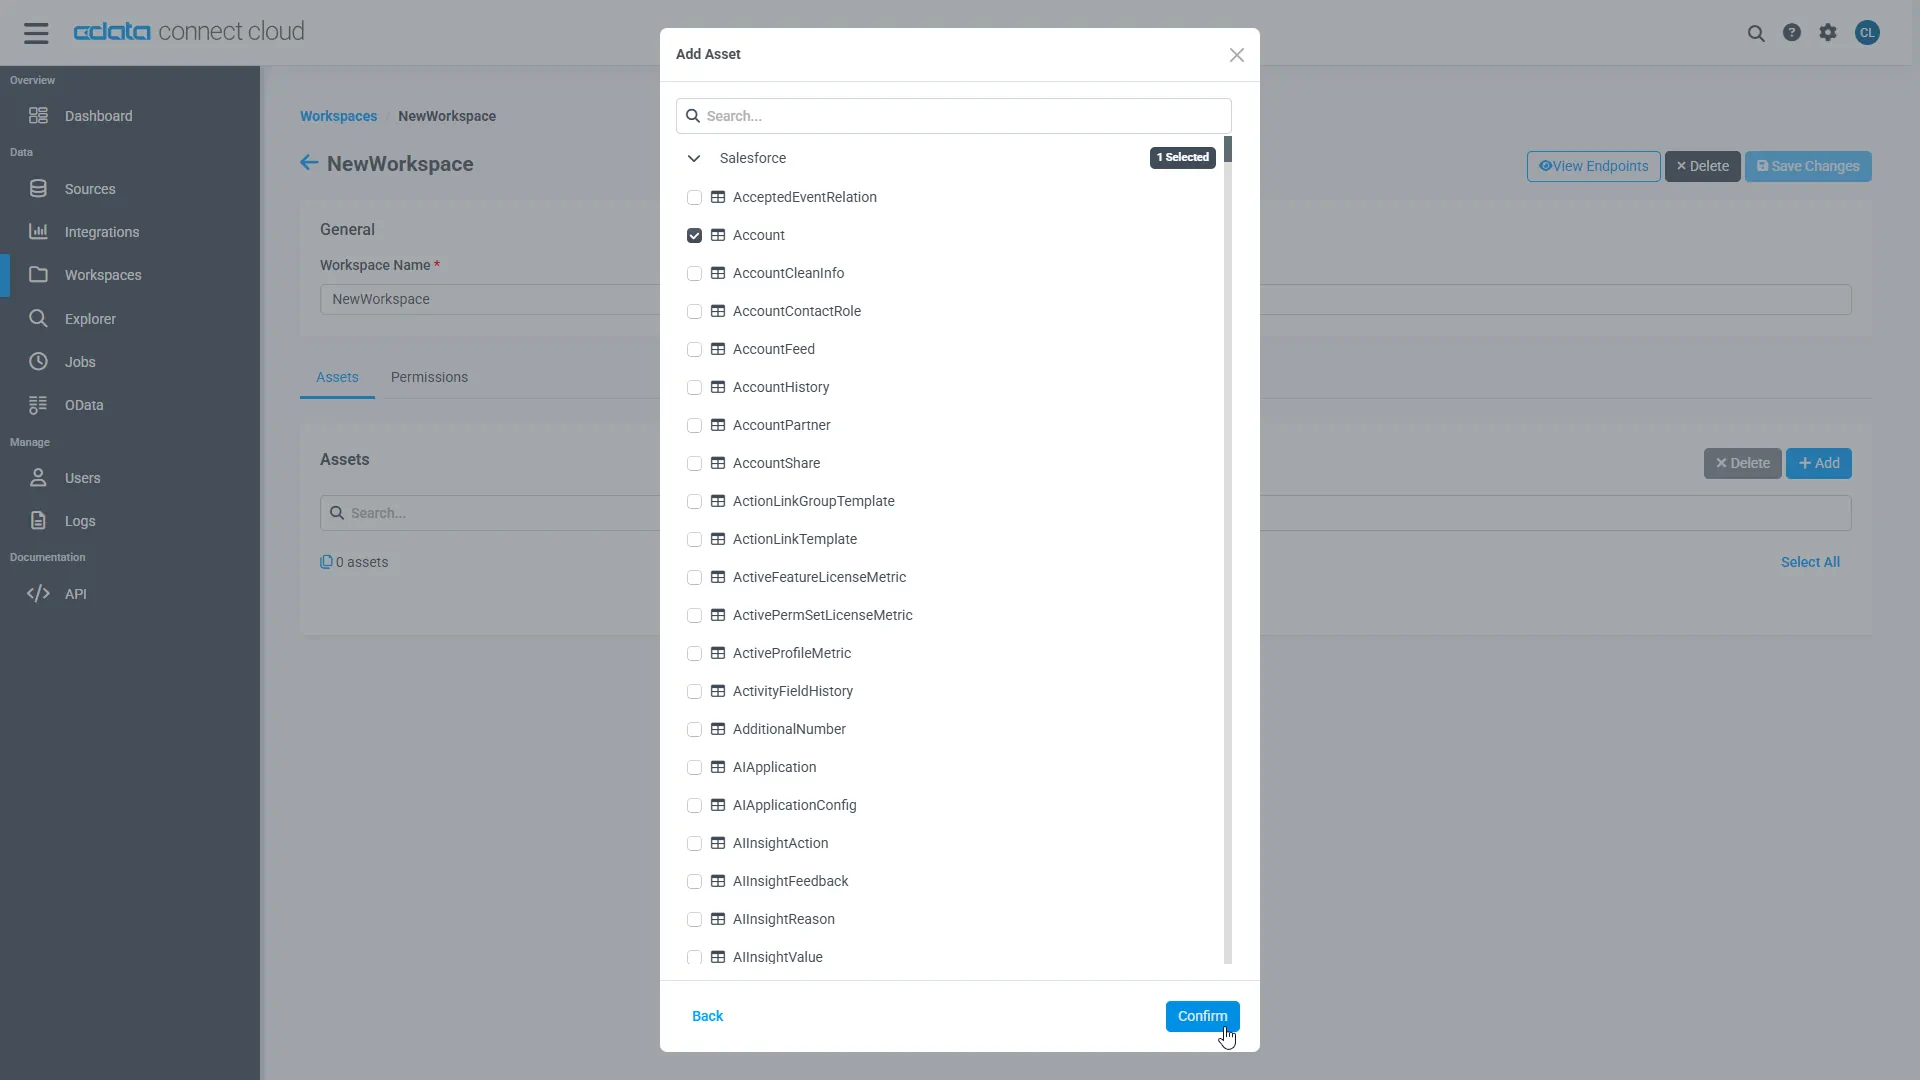
Select the table(s) you wish to work with and click Confirm.
- Make note of the OData Service URL for your workspace, e.g. https://cloud.cdata.com/api/odata/{workspace_name}
With the connection, PAT, and Workspace configured, you are ready to connect to JD Edwards data from Salesforce Connect.
Connect to JD Edwards Data as an External Data Sources
Follow the steps below to connect to the feed produced by Connect AI.
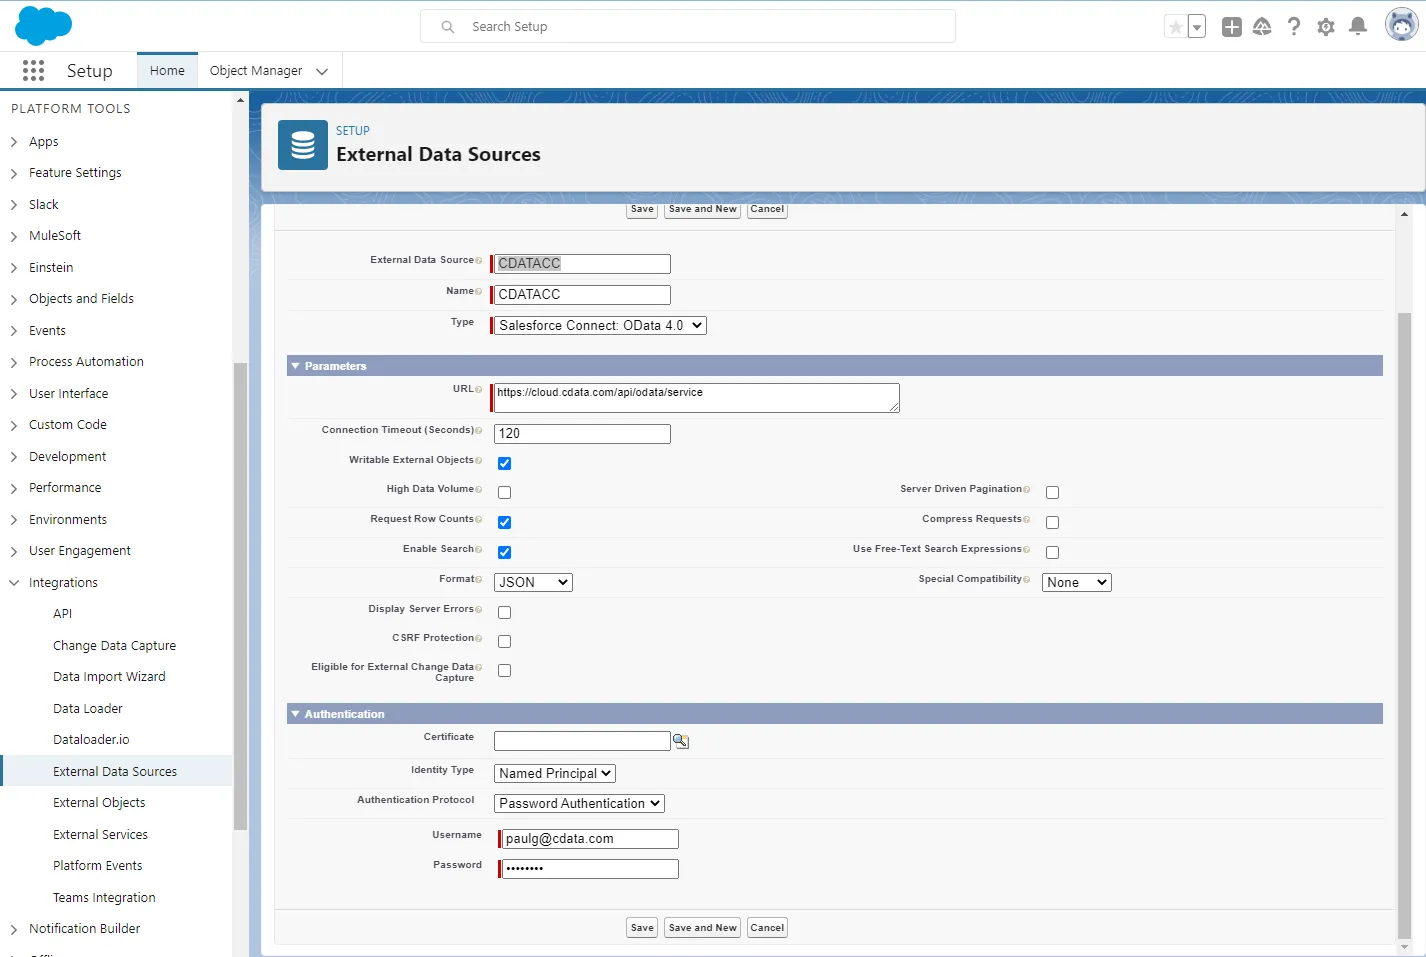
- Log into Salesforce and click Setup -> Integrations -> External Data Sources.
- Click Now External Data Sources.
- Enter values for the following properties:
- External Data Sources: Enter a label to be used in list views and reports.
- Name: Enter a unique identifier.
- Type: Select the option "Salesforce Connect: OData 4.0".
- URL: Enter the URL to the OData endpoint of Connect AI: https://cloud.cdata.com/api/odata/{workspace_name}
- Select JSON in the Format menu.
- In the Authentication section, set the following properties:
- Identity Type: If all members of your organization will use the same credentials to access Connect AI, select "Named Principal". If the members of your organization will connect with their own credentials, select "Per User".
- Authentication Protocol: Select Password Authentication to use basic authentication.
- Certificate: Enter or browse to the certificate to be used to encrypt and authenticate communications from Salesforce to your server.
- Username: Enter a CData Connect AI username (e.g. [email protected]).
- Password: Enter the user's PAT.
Synchronize JD Edwards Objects
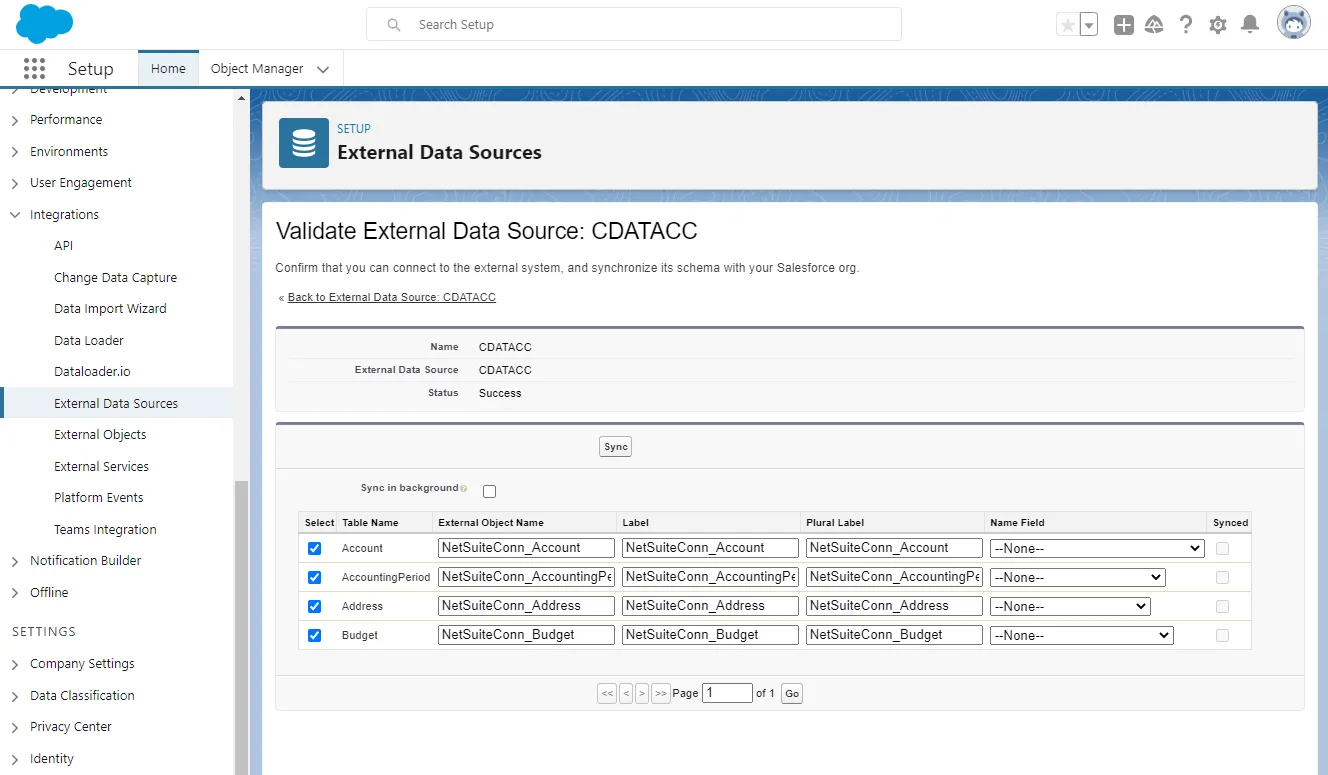
After you have created the external data source, follow the steps below to create JD Edwards external objects that reflect any changes in the data source. You will synchronize the definitions for the JD Edwards external objects with the definitions for JD Edwards tables.
- Click the link for the external data source you created.
- Click Validate and Scan.
- Select the JD Edwards tables you want to work with as external objects.
Access JD Edwards Data as Salesforce Objects
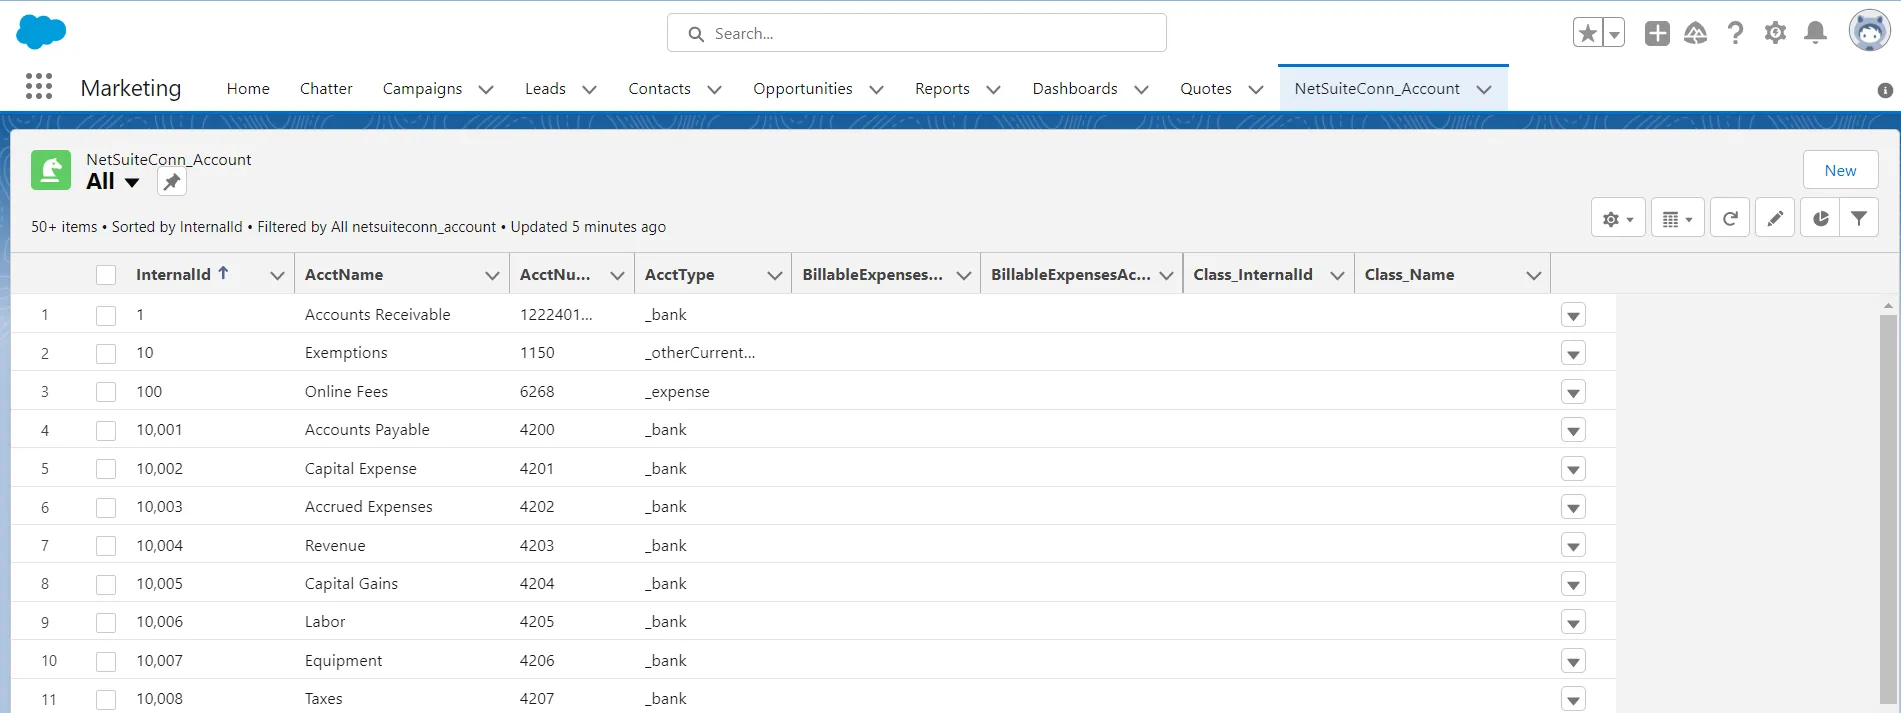
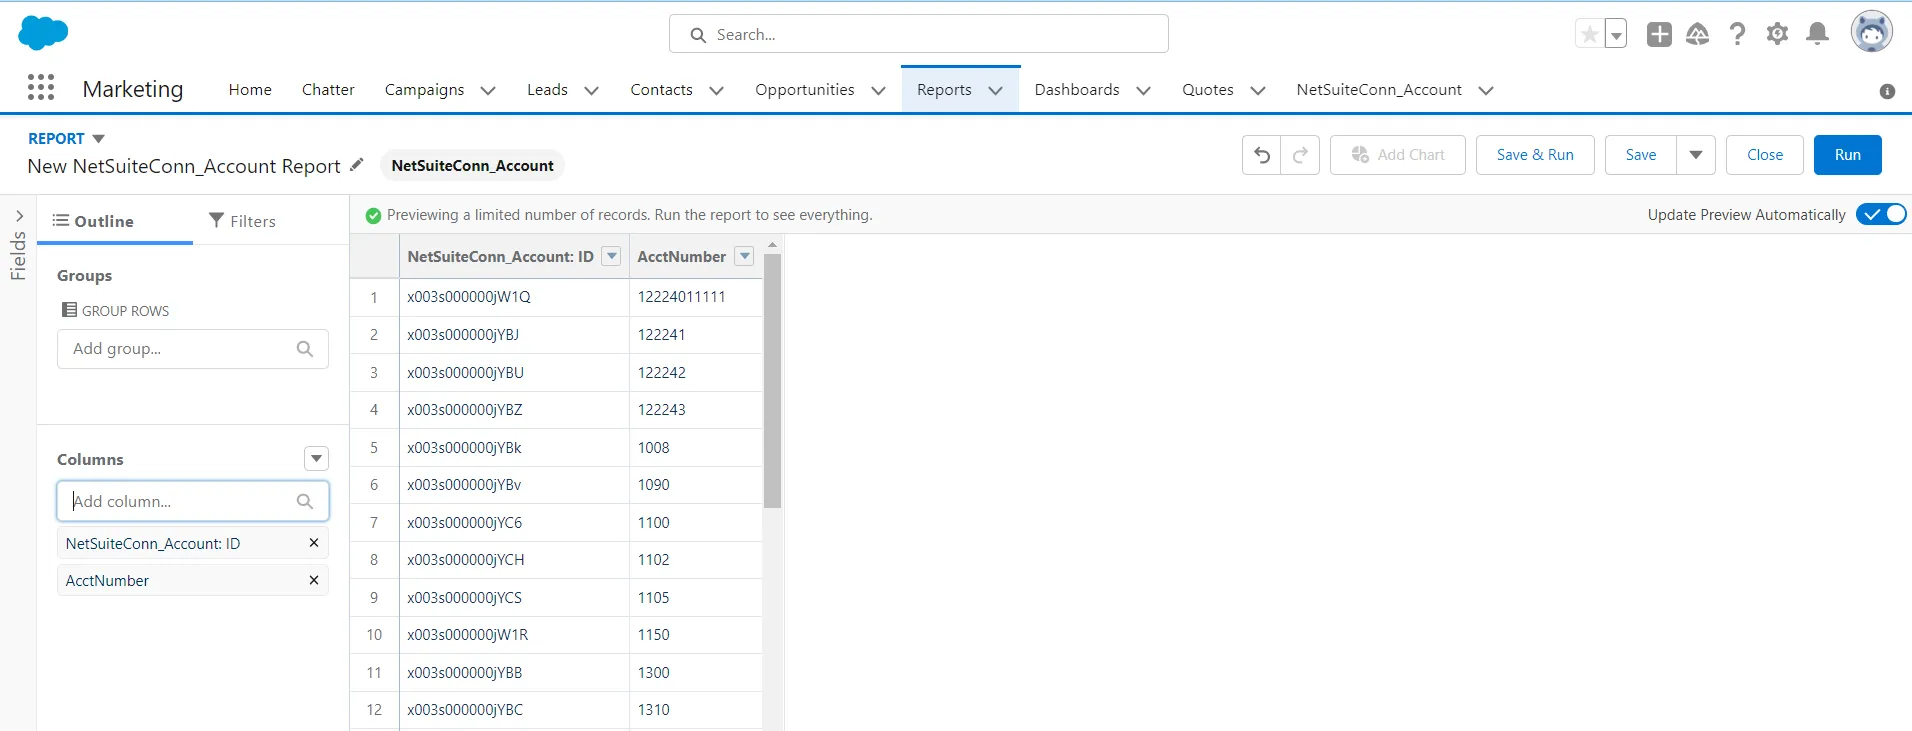
After adding JD Edwards data as an external data source and syncing JD Edwards tables as external objects, you can use the external JD Edwards objects just as you would standard Salesforce objects.
-
Create a new tab with a filter list view:
-
Create reports of external objects:
Simplified Access to JD Edwards Data from Cloud Applications
At this point, you have a direct, cloud-to-cloud connection to live JD Edwards data from Salesforce. For more information on gaining simplified access to data from more than 100 SaaS, Big Data, and NoSQL sources in cloud applications like Salesforce, refer to our Connect AI page.