




Integrate JD Edwards Data in Pentaho Data Integration

The CData JDBC Driver for JD Edwards enables access to live data from data pipelines. Pentaho Data Integration is an Extraction, Transformation, and Loading (ETL) engine that data, cleanses the data, and stores data using a uniform format that is accessible.This article shows how to connect to JD Edwards data as a JDBC data source and build jobs and transformations based on JD Edwards data in Pentaho Data Integration.
Configure to JD Edwards Connectivity
The driver connects to JD Edwards through your Application Interface Services (AIS) Server. Set the following connection properties:
- URL: The base HTTPS URL of your AIS Server (e.g., https://jde-ais.example.com:8300).
- User: Your JD Edwards username.
- Password: Your JD Edwards password.
- Environment (optional): The JD Edwards environment to use (e.g., PD920 for production or DV920 for development). If not specified, the AIS Server's default environment is used.
- Role (optional): The JD Edwards role for the session. If not specified, the AIS Server's default role is used.
- DeviceName (optional): An identifier for the connecting device or application, used for auditing and logging on the AIS Server.
- Jasserver (optional): The specific Java Application Server (JAS) instance to route requests through, useful in clustered environments.
Choosing Which Data Is Exposed
JD Edwards organizes tables and business views by System Code, and the driver exposes each System Code as its own schema. Use these properties to control which schemas are available:
- DataModel: One or more ERP modules (comma-separated) whose System Codes are exposed as schemas, or All to expose every System Code in the connected instance. Defaults to FinancialManagement.
- SystemCodes: A comma-separated list of additional System Codes to expose alongside those from DataModel (e.g., 42,43).
When you connect, the driver sends your credentials to the AIS Server to obtain a session token and caches it. The driver requests a new token automatically before the session expires.
Built-in Connection String Designer
For assistance in constructing the JDBC URL, use the connection string designer built into the JD Edwards JDBC Driver. Either double-click the JAR file or execute the jar file from the command-line.
java -jar cdata.jdbc.jdedwards.jar
Fill in the connection properties and copy the connection string to the clipboard.

When you configure the JDBC URL, you may also want to set the Max Rows connection property. This will limit the number of rows returned, which is especially helpful for improving performance when designing reports and visualizations.
Below is a typical JDBC URL:
jdbc:jdedwards:URL=https://your-jde-environment-app.example.com;User=admin;Password=myPassword;Save your connection string for use in Pentaho Data Integration.
Connect to JD Edwards from Pentaho DI
Open Pentaho Data Integration and select "Database Connection" to configure a connection to the CData JDBC Driver for JD Edwards
- Click "General"
- Set Connection name (e.g. JD Edwards Connection)
- Set Connection type to "Generic database"
- Set Access to "Native (JDBC)"
- Set Custom connection URL to your JD Edwards connection string (e.g.
jdbc:jdedwards:URL=https://your-jde-environment-app.example.com;User=admin;Password=myPassword; - Set Custom driver class name to "cdata.jdbc.jdedwards.JDEdwardsDriver"
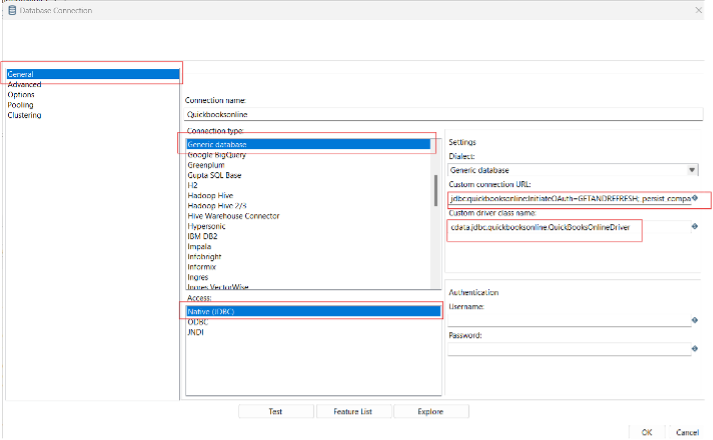
- Test the connection and click "OK" to save.
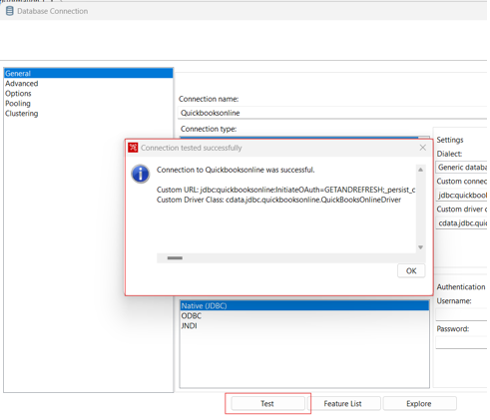
Create a Data Pipeline for JD Edwards
Once the connection to JD Edwards is configured using the CData JDBC Driver, you are ready to create a new transformation or job.
- Click "File" >> "New" >> "Transformation/job"
- Drag a "Table input" object into the workflow panel and select your JD Edwards connection.
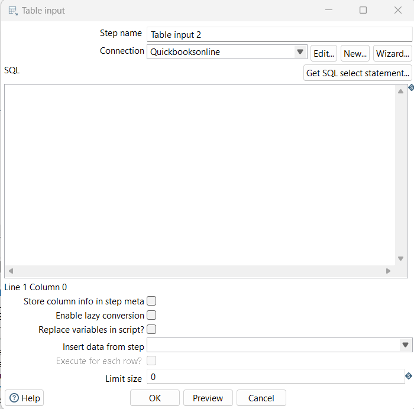
- Click "Get SQL select statement" and use the Database Explorer to view the available tables and views.
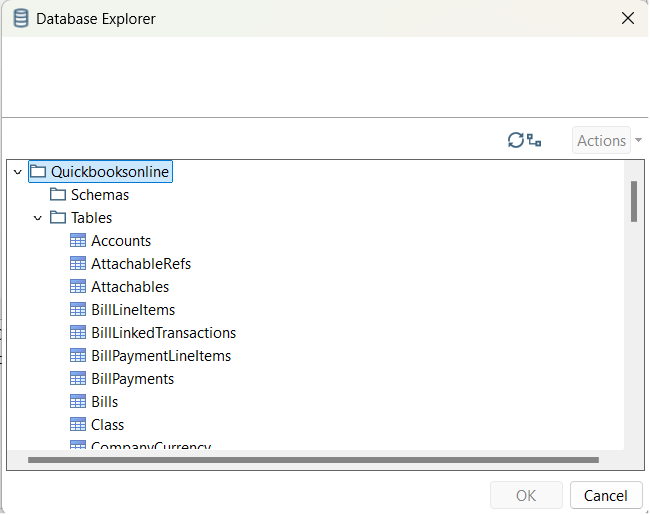
- Select a table and optionally preview the data for verification.
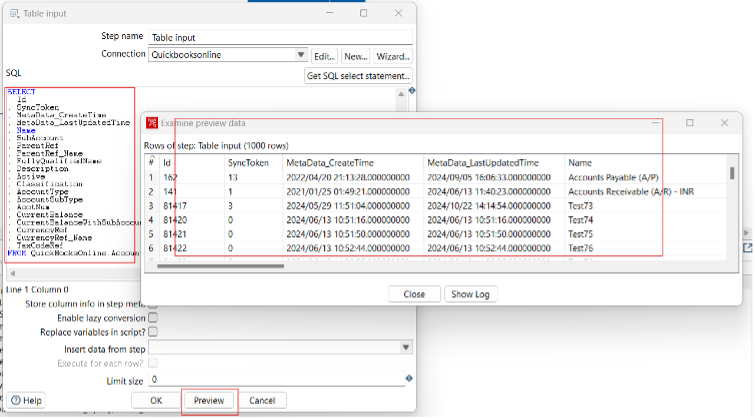
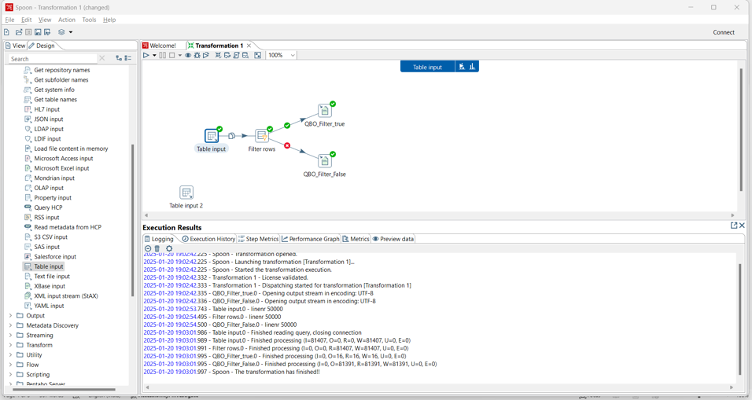
At this point, you can continue your transformation or jb by selecting a suitable destination and adding any transformations to modify, filter, or otherwise alter the data during replication.
Free Trial & More Information
Download a free, 30-day trial of the CData JDBC Driver for JD Edwards and start working with your live JD Edwards data in Pentaho Data Integration today.
Ready to get started?
Download a free trial of the JD Edwards Driver to get started:
Download NowLearn more:
 JD Edwards JDBC Driver
Rapidly create and deploy powerful Java applications that integrate with JD Edwards data including AccountLedger, ProposalofPayment, ContractRevenueSummary, EmployeeEnrollment, RentIncreaseAmounts, and more!