




Integrating JD Edwards Data in Talend Cloud Data Management Platform

Qlik's Talend Cloud Data Management Platform supports various data environments, enabling analytics for smarter decisions, operational data sharing, data and application modernization, and establishing data excellence for risk reduction. When paired with the CData JDBC Driver for JD Edwards, you can improve data integration, quality, and governance for your JD Edwards Data. This article shows how you can easily integrate to JD Edwards using a CData JDBC Driver in Talend Cloud Data Management, and then view the data for simultaneous use in your workflow.
Prerequisites
Before connecting the CData JDBC Driver to view and work with your data in Talend Cloud Data Management Platform, make sure to download and install the latest version of Talend Studio on your system. Also, ensure that you have the required prerequisites.
- A Talend Cloud Data Management account with appropriate permissions.
- The CData JDBC Driver for JD Edwards, which can be downloaded from the CData website.
Connect to JD Edwards in Talend as a JDBC data source
Access Talend Data Management Cloud
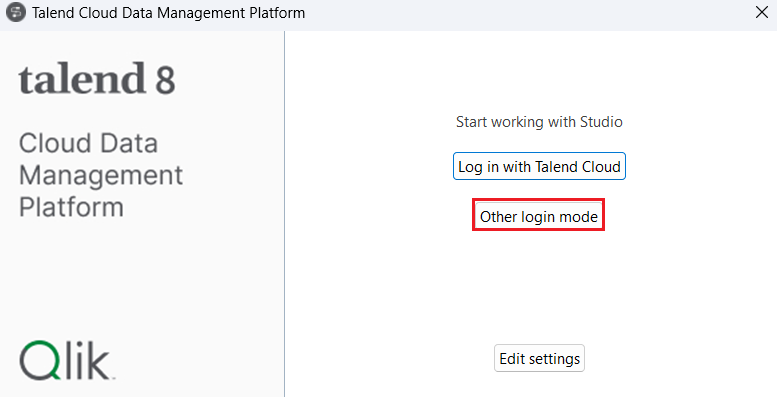
- Run the Talend Cloud Data Management Platform installed on your local system and click on Other Login Mode.
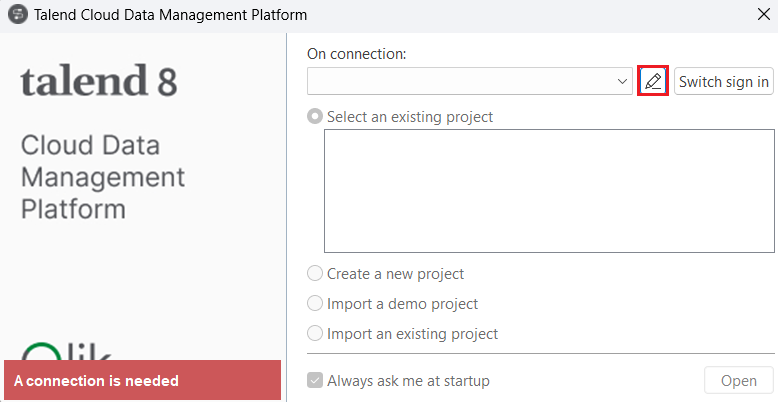
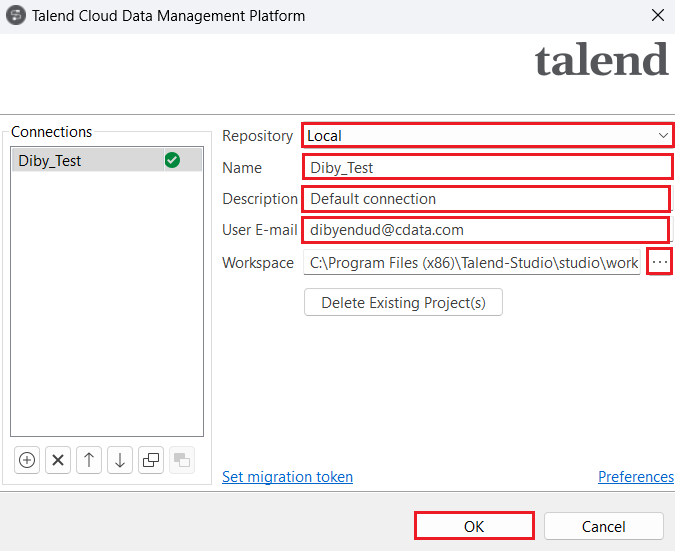
- Click on Manage Connections. Set Repository to "Local" and enter the Name, Description and User E-mail in the respective spaces. Set the Workspace path and click on OK.
- Now, select the Create a new project radio button to add a new project name and click on Create.
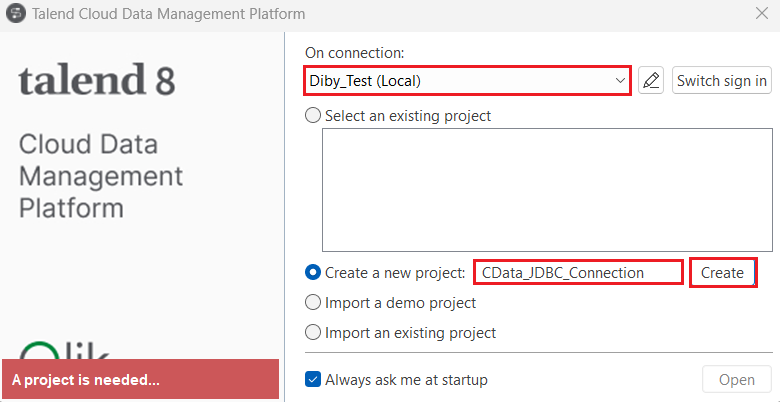
- The new project should appear under the Select an existing project section. Click on Open. The Talend Cloud Data Management Platform workspace opens up.
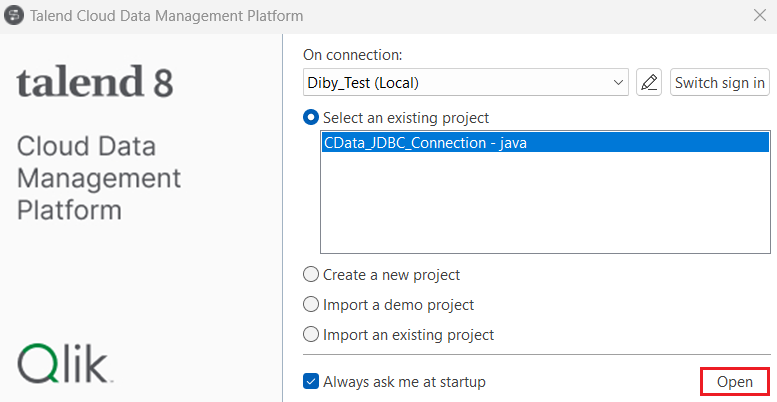
Create a new connection
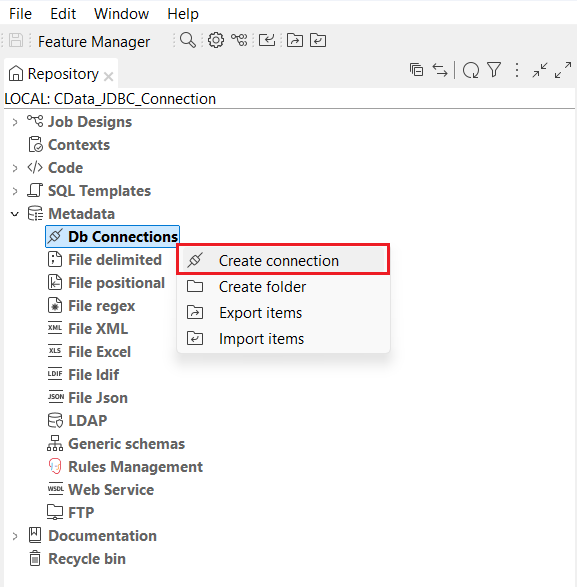
- In the navigation pane, locate and expand the Metadata dropdown. Right-click on Db Connections and select Create Connection.
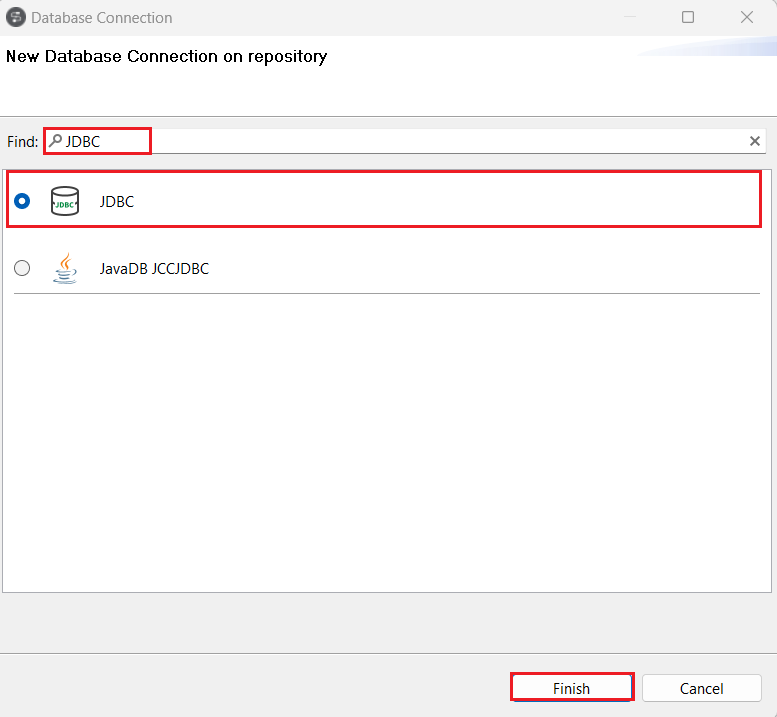
- Search for and select 'JDBC' in the Find section of the Database Connection window. Then, click on Finish.
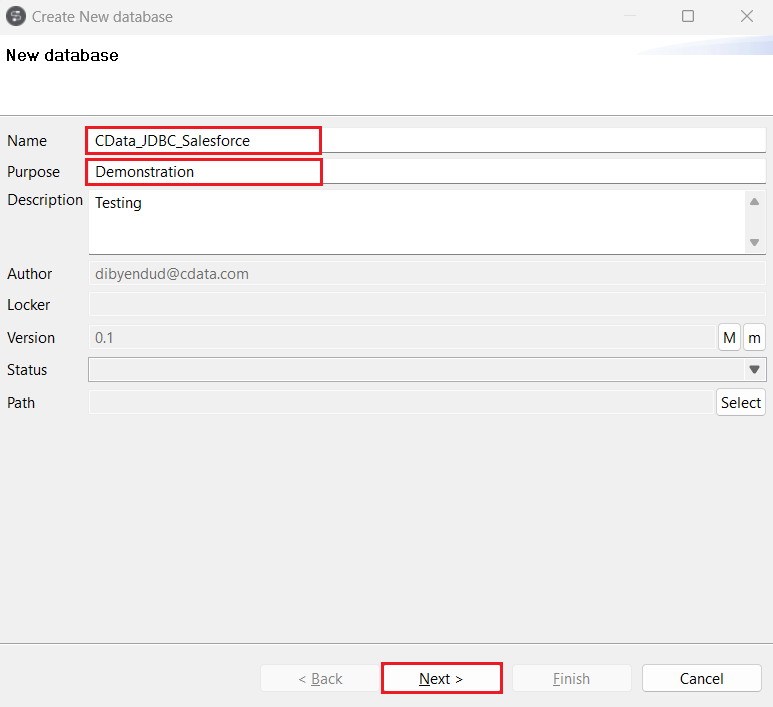
- Enter the Name, Purpose and Description of the new database in Talend where you need to load the JD Edwards data. Click on Next.
- Generate a JDBC URL for connecting to JD Edwards, beginning with jdbc:jdedwards: followed by a series of semicolon-separated connection string properties.
The driver connects to JD Edwards through your Application Interface Services (AIS) Server. Set the following connection properties:
- URL: The base HTTPS URL of your AIS Server (e.g., https://jde-ais.example.com:8300).
- User: Your JD Edwards username.
- Password: Your JD Edwards password.
- Environment (optional): The JD Edwards environment to use (e.g., PD920 for production or DV920 for development). If not specified, the AIS Server's default environment is used.
- Role (optional): The JD Edwards role for the session. If not specified, the AIS Server's default role is used.
- DeviceName (optional): An identifier for the connecting device or application, used for auditing and logging on the AIS Server.
- Jasserver (optional): The specific Java Application Server (JAS) instance to route requests through, useful in clustered environments.
Choosing Which Data Is Exposed
JD Edwards organizes tables and business views by System Code, and the driver exposes each System Code as its own schema. Use these properties to control which schemas are available:
- DataModel: One or more ERP modules (comma-separated) whose System Codes are exposed as schemas, or All to expose every System Code in the connected instance. Defaults to FinancialManagement.
- SystemCodes: A comma-separated list of additional System Codes to expose alongside those from DataModel (e.g., 42,43).
When you connect, the driver sends your credentials to the AIS Server to obtain a session token and caches it. The driver requests a new token automatically before the session expires.
Built-in Connection String Designer
For assistance in constructing the JDBC URL, use the connection string designer built into the JD Edwards JDBC Driver. Either double-click the JAR file or execute the jar file from the command-line.
java -jar cdata.jdbc.jdedwards.jarFill in the connection properties and copy the connection string to the clipboard.

A typical JDBC URL is below:
jdbc:jdedwards:URL=https://your-jde-environment-app.example.com;User=admin;Password=myPassword; Enter the JDBC URL copied from CData JDBC Driver for JD Edwards in Edit new database.

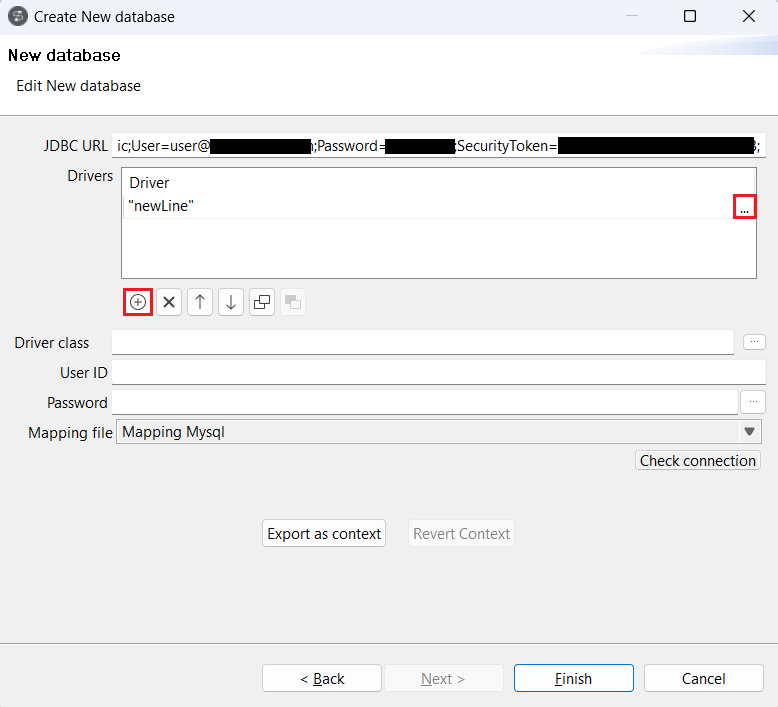
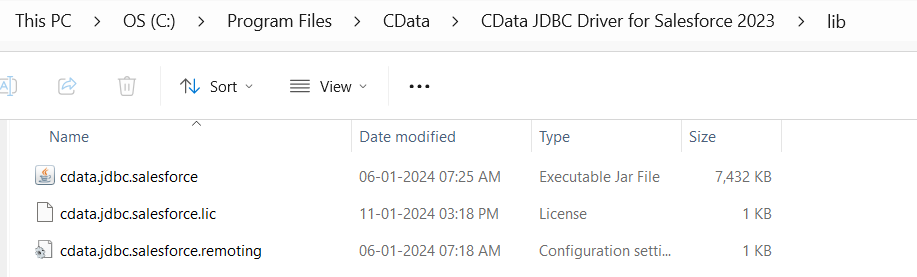
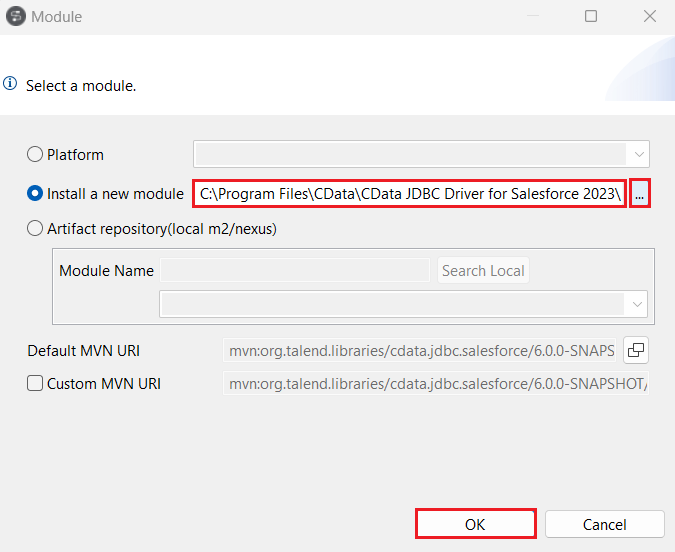
- Click on the "(+) Add" button under Drivers. A 'newLine' will appear in the Drivers board. Click on (...) at the end of the new line, select the Install a new module radio button, and click on (...) to add the path to the JAR file, located in the 'lib' subfolder of the installation directory. Click on OK.
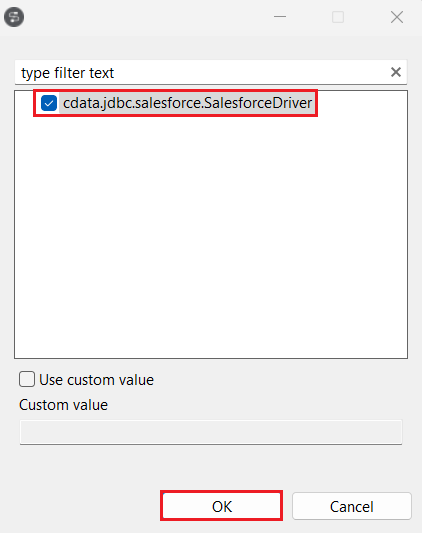
- Select the Driver Class as cdata.jdbc.jdedwards (JAR file obtained from your installation directory given in the previous step).
Test the new connection
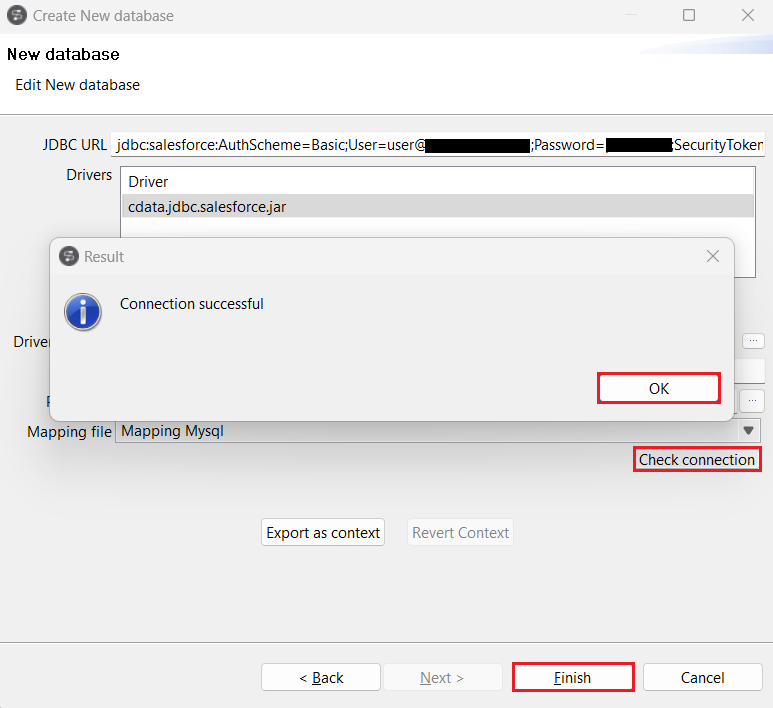
- Click on Check Connection. If the entered details are correct, a "Connection successful" confirmation prompt will appear. Click on "OK" and "Finish".
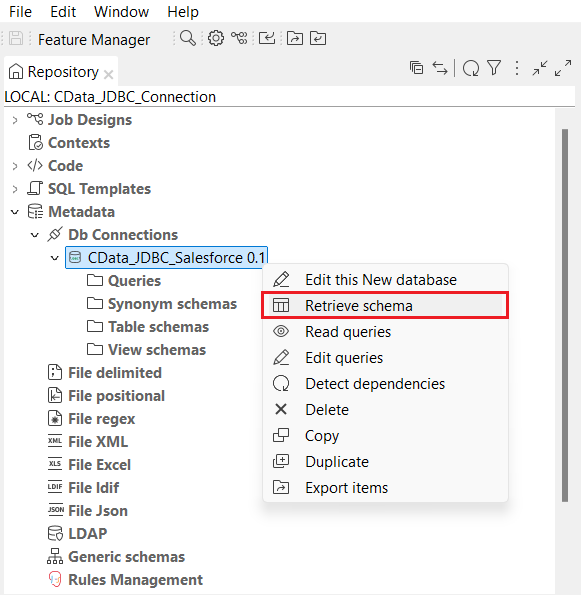
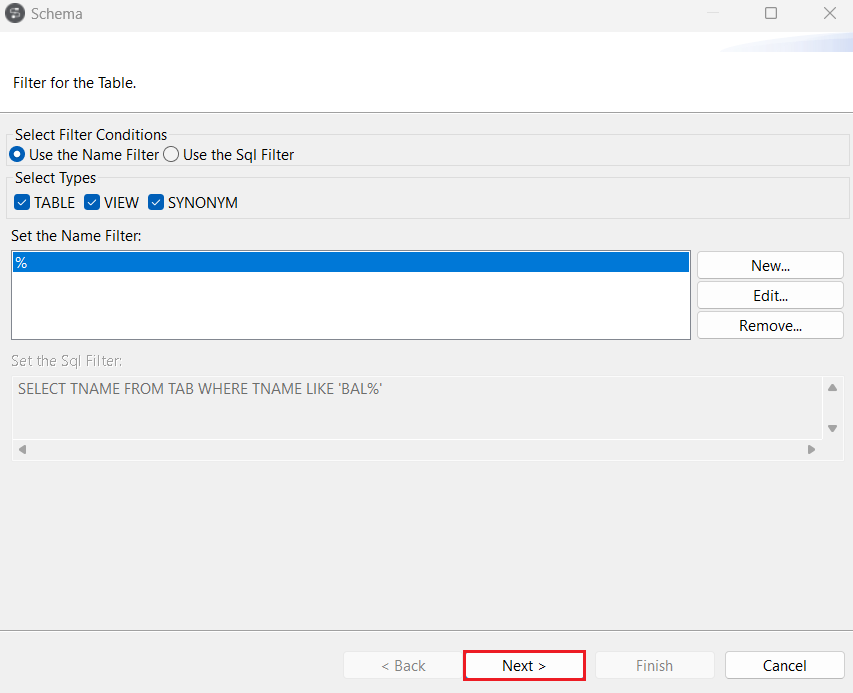
- Once the connection is established, right-click on the newly created connection and select Retrieve Schema. You can use the filters as well to retrieve the data as per your requirements. Click on Next.
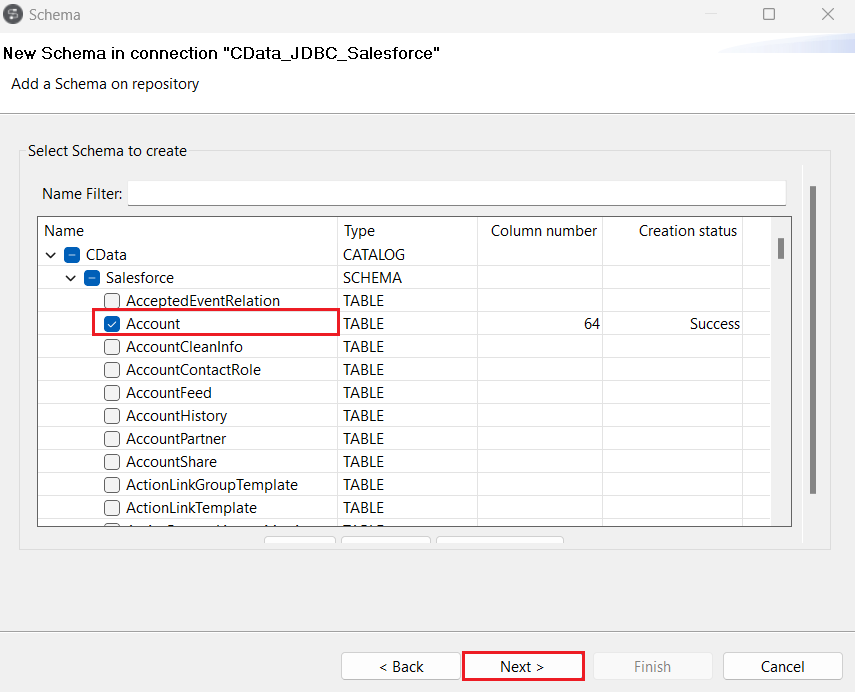
- Expand the "CData" catalog in the Schema window and select the tables you want to import from the JD Edwards schema. Click on Next.
- In the next step, select the columns you want to view from the table and click on Finish.
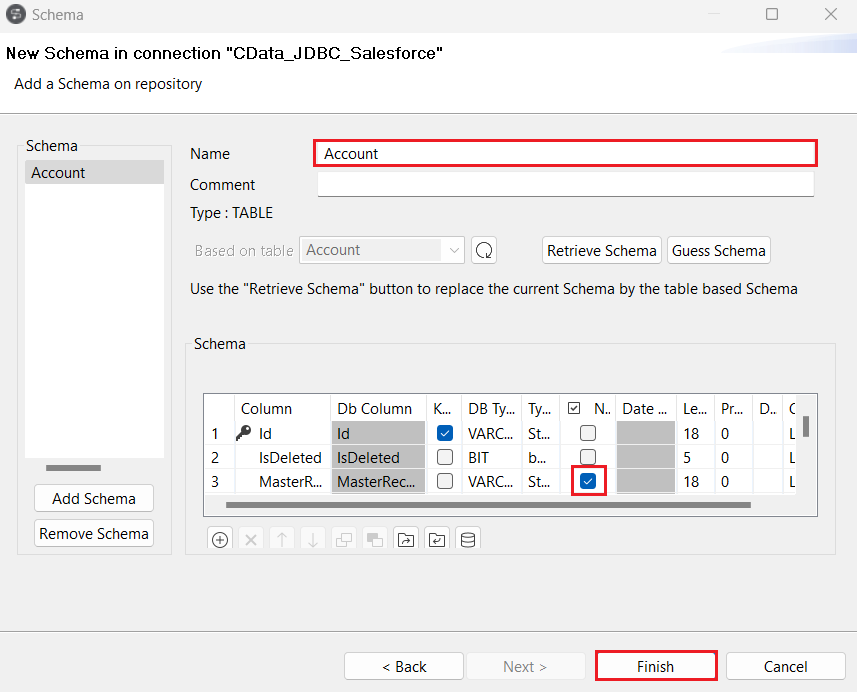
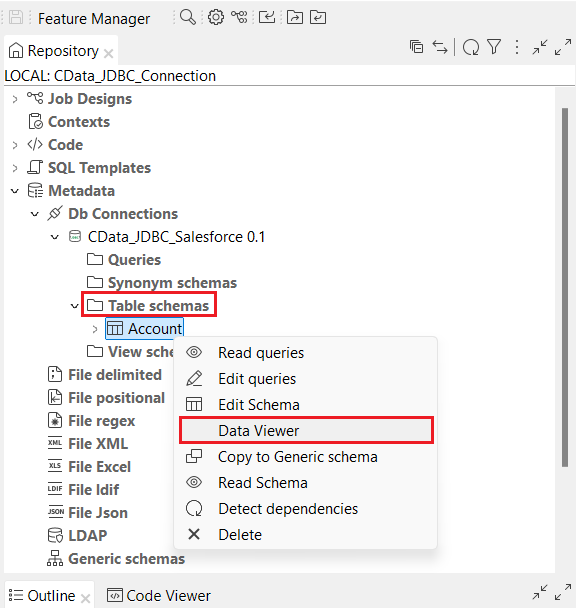
- All the selected tables from the JD Edwards schema are now populated under the Table Schemas section of the JDBC connection.
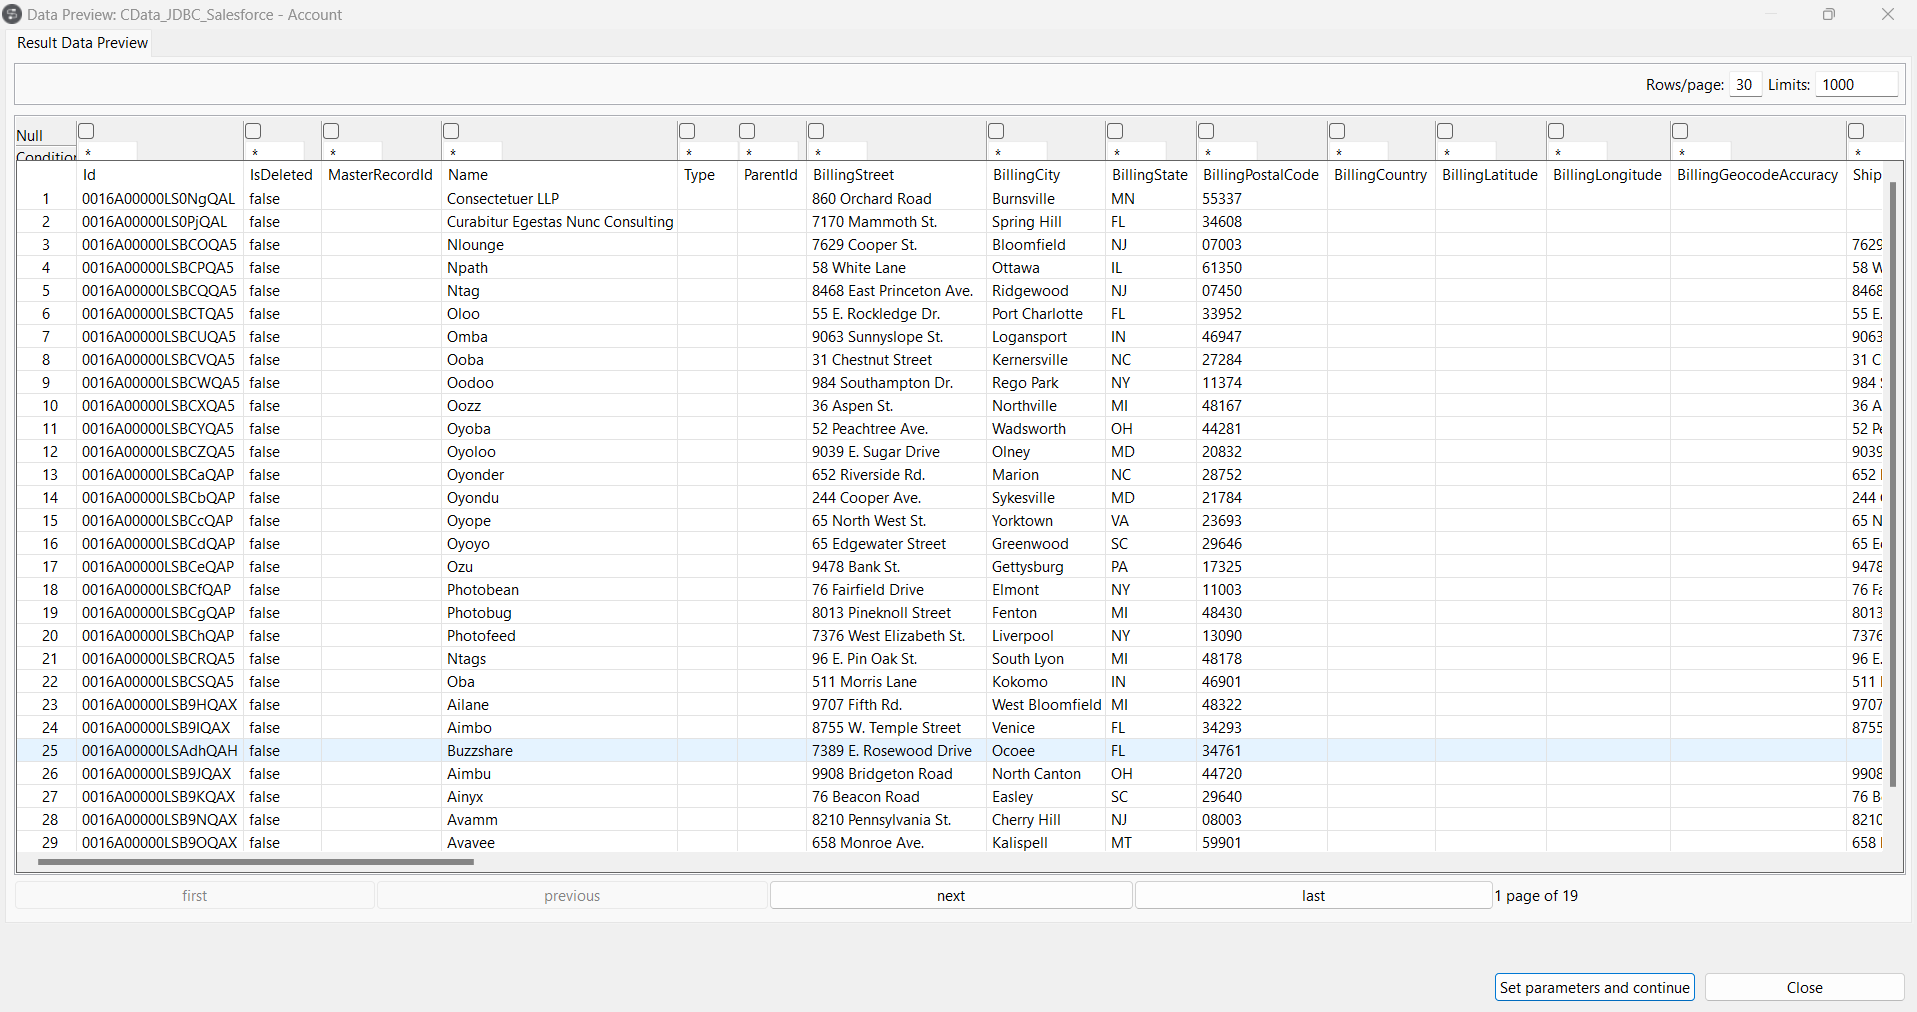
- Right-click on any of the selected tables and click on Data Viewer to preview the data from the data source.
Get Started Today
Download a free, 30-day trial of the CData JDBC Driver for JD Edwards and integrate JD Edwards data into Talend Cloud Data Management Platform. Reach out to our Support Team if you have any questions.
Ready to get started?
Download a free trial of the JD Edwards Driver to get started:
Download NowLearn more:
 JD Edwards JDBC Driver
Rapidly create and deploy powerful Java applications that integrate with JD Edwards data including AccountLedger, ProposalofPayment, ContractRevenueSummary, EmployeeEnrollment, RentIncreaseAmounts, and more!