




Connect to JD Edwards Data in Claris FileMaker Pro

Claris FileMaker is a low-code database application development tool that allows users to create custom apps for managing and organizing data. It combines a powerful relational database engine with an intuitive interface, enabling both technical and non-technical users to design and deploy applications across desktop, web, and mobile platforms.
In this article, we'll explore how to use the CData ODBC Driver for JD Edwards in FileMaker to connect to JD Edwards data.
Create an ODBC Data Source for JD Edwards
If you have not already, first specify connection properties in an ODBC DSN (data source name). This is the last step of the driver installation. You can use the Microsoft ODBC Data Source Administrator to create and configure ODBC DSNs.
The driver connects to JD Edwards through your Application Interface Services (AIS) Server. Set the following connection properties:
- URL: The base HTTPS URL of your AIS Server (e.g., https://jde-ais.example.com:8300).
- User: Your JD Edwards username.
- Password: Your JD Edwards password.
- Environment (optional): The JD Edwards environment to use (e.g., PD920 for production or DV920 for development). If not specified, the AIS Server's default environment is used.
- Role (optional): The JD Edwards role for the session. If not specified, the AIS Server's default role is used.
- DeviceName (optional): An identifier for the connecting device or application, used for auditing and logging on the AIS Server.
- Jasserver (optional): The specific Java Application Server (JAS) instance to route requests through, useful in clustered environments.
Choosing Which Data Is Exposed
JD Edwards organizes tables and business views by System Code, and the driver exposes each System Code as its own schema. Use these properties to control which schemas are available:
- DataModel: One or more ERP modules (comma-separated) whose System Codes are exposed as schemas, or All to expose every System Code in the connected instance. Defaults to FinancialManagement.
- SystemCodes: A comma-separated list of additional System Codes to expose alongside those from DataModel (e.g., 42,43).
When you connect, the driver sends your credentials to the AIS Server to obtain a session token and caches it. The driver requests a new token automatically before the session expires.
When you configure the DSN, you may also want to set the Max Rows connection property. This will limit the number of rows returned, which is especially helpful for improving performance when designing reports and visualizations.
Connect and sync JD Edwards data with FileMaker using the CData ODBC Driver for JD Edwards
Once you configure the CData ODBC Driver for JD Edwards, you can connect to live JD Edwards data in FileMaker and use it in your applications. In this section, we'll walk through the steps to connect live JD Edwards data to FileMaker.
You can download and install the latest version of FileMaker Pro for your Mac/Windows/Linux systems here: https://www.claris.com/resources/downloads/.
Importing JD Edwards data using FileMaker's ODBC Import Function
Follow the steps below to easily import JD Edwards data using the ODBC import feature:
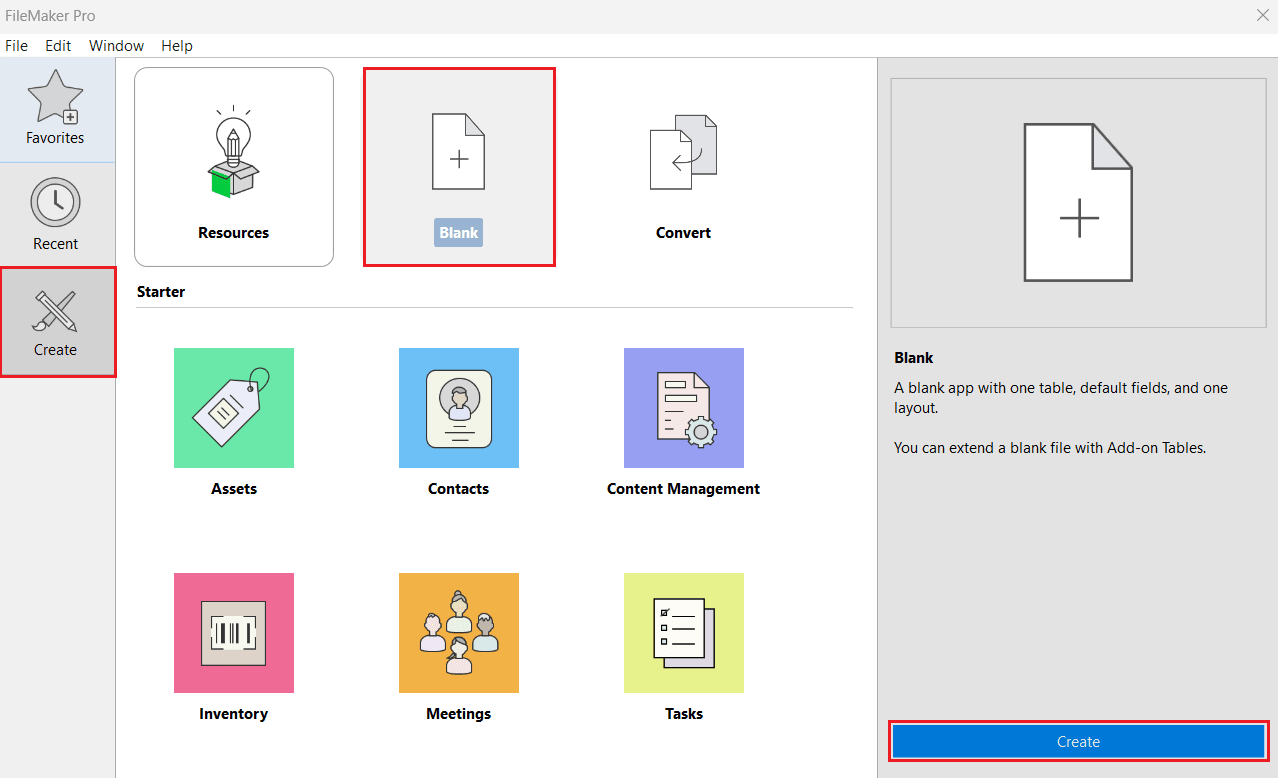
- Open FileMaker Pro. Navigate to Create from the left panel and select Blank > Create.
- Enter a desired filename and click Save.
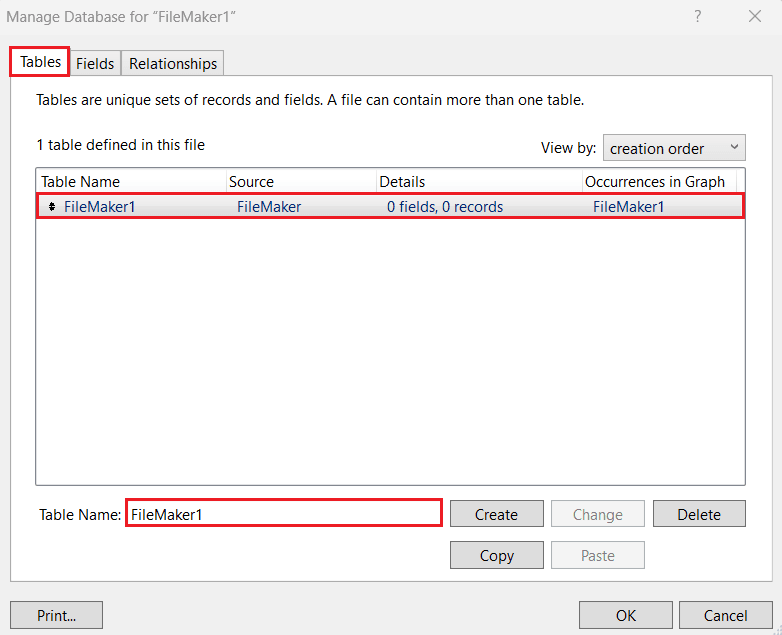
- In the Manage Database window, go to the Tables tab and create or rename the table where you want to display JD Edwards data.
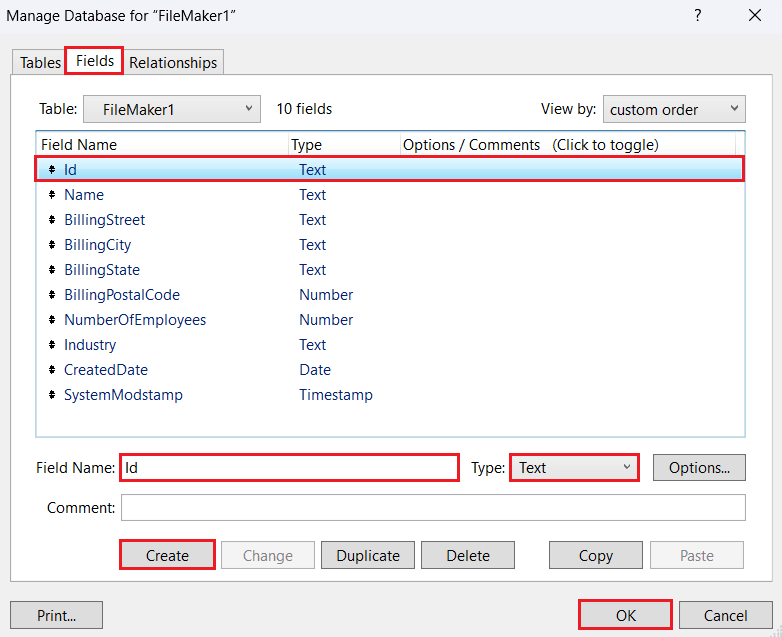
- In the Fields tab, add the required fields to the table.
- In the Relationships tab, define table relationships if your database has multiple tables, then click OK.
- To reopen and modify the table structure later, go to File > Manage > Database.
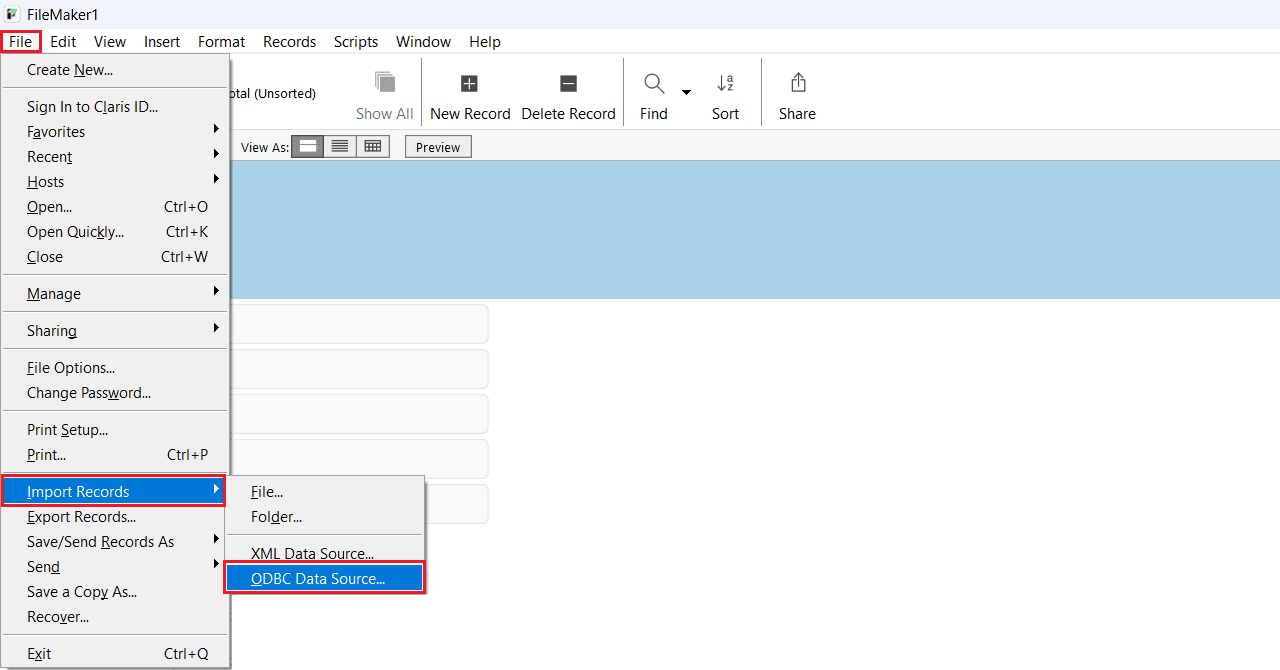
- To import JD Edwards data via the CData ODBC Driver for JD Edwards, navigate to File > Import Records > ODBC Data Source.
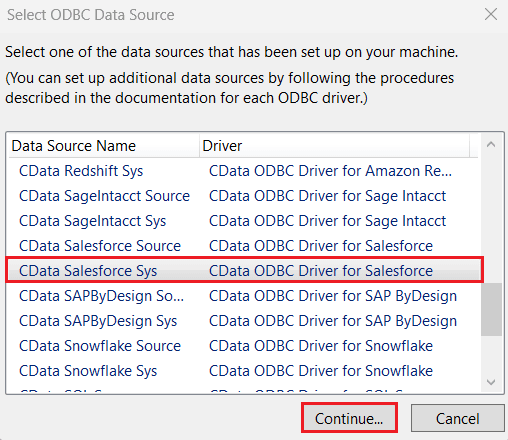
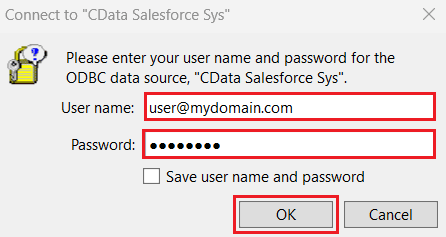
- In the Select ODBC Data Source window, choose CData ODBC Driver for JD Edwards and click Create. Enter your JD Edwards username and password, then click OK.
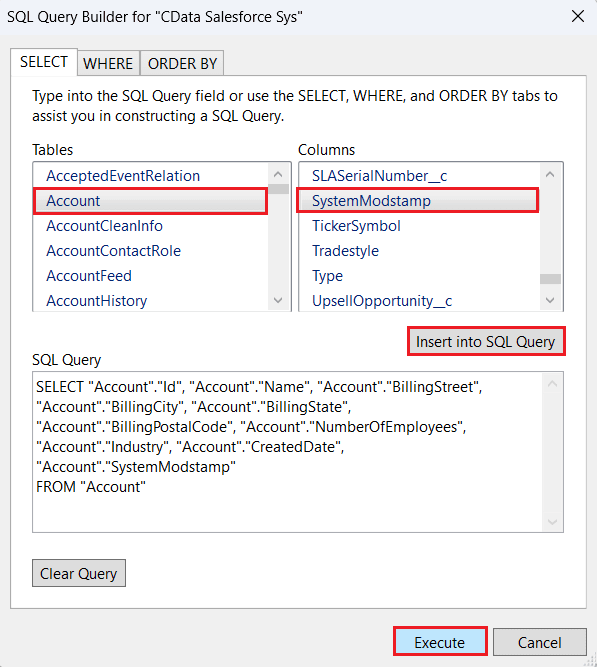
- In the SQL Query Builder window, select the desired table from the Tables section and choose the relevant columns from the Columns section. Click Insert into SQL Query after each selection to automatically generate a query that retrieves data from JD Edwards. You can also manually edit the query using WHERE and ORDER BY clauses or use the tabs provided in the SQL Query Builder. Click Execute to run the query.
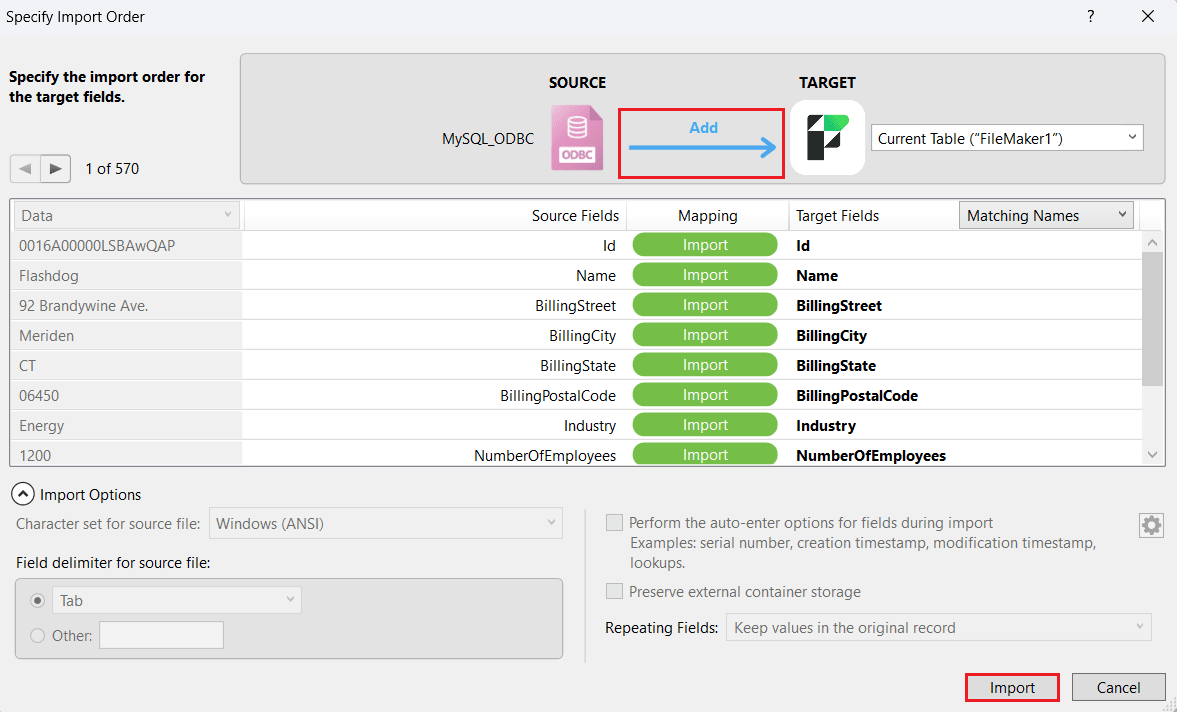
- In the Specify Import Order window, define the import order for the target fields. Select Add between source and target to add new records to the target table from the selected fields. Click Import.
You have now successfully imported JD Edwards data into FileMaker Pro using the CData ODBC Driver for JD Edwards. To perform incremental updates, change the import order to "Update" or use "Replace" based on your use case.
Process JD Edwards data at design time
You can sort and aggregate data, as well as calculate summary functions while browsing tables. To manipulate the view of data at design time, complete the following steps:
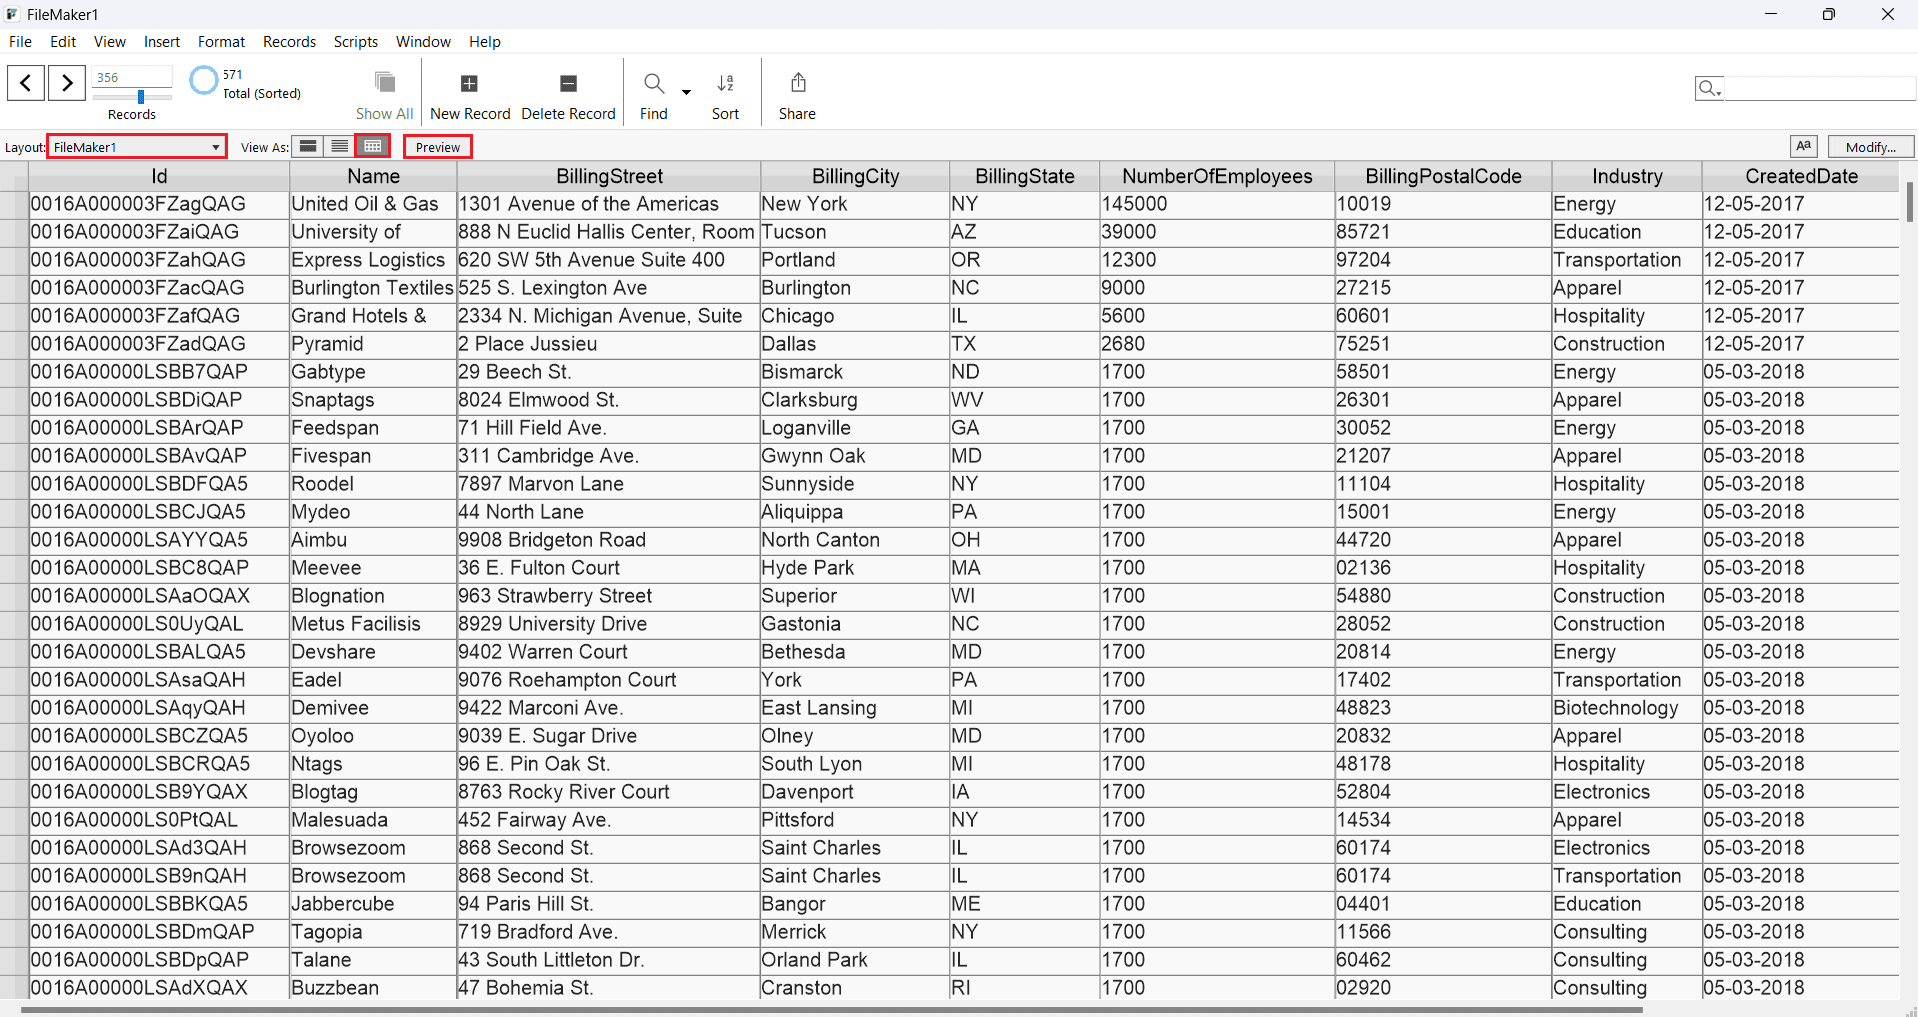
- Switch to Preview Mode: Click the Preview at the top to check how the JD Edwards data with look before you print it.
- Switch to Table View: Click the table icon in the View As menu in the main toolbar of the application.
Aggregate and summarize
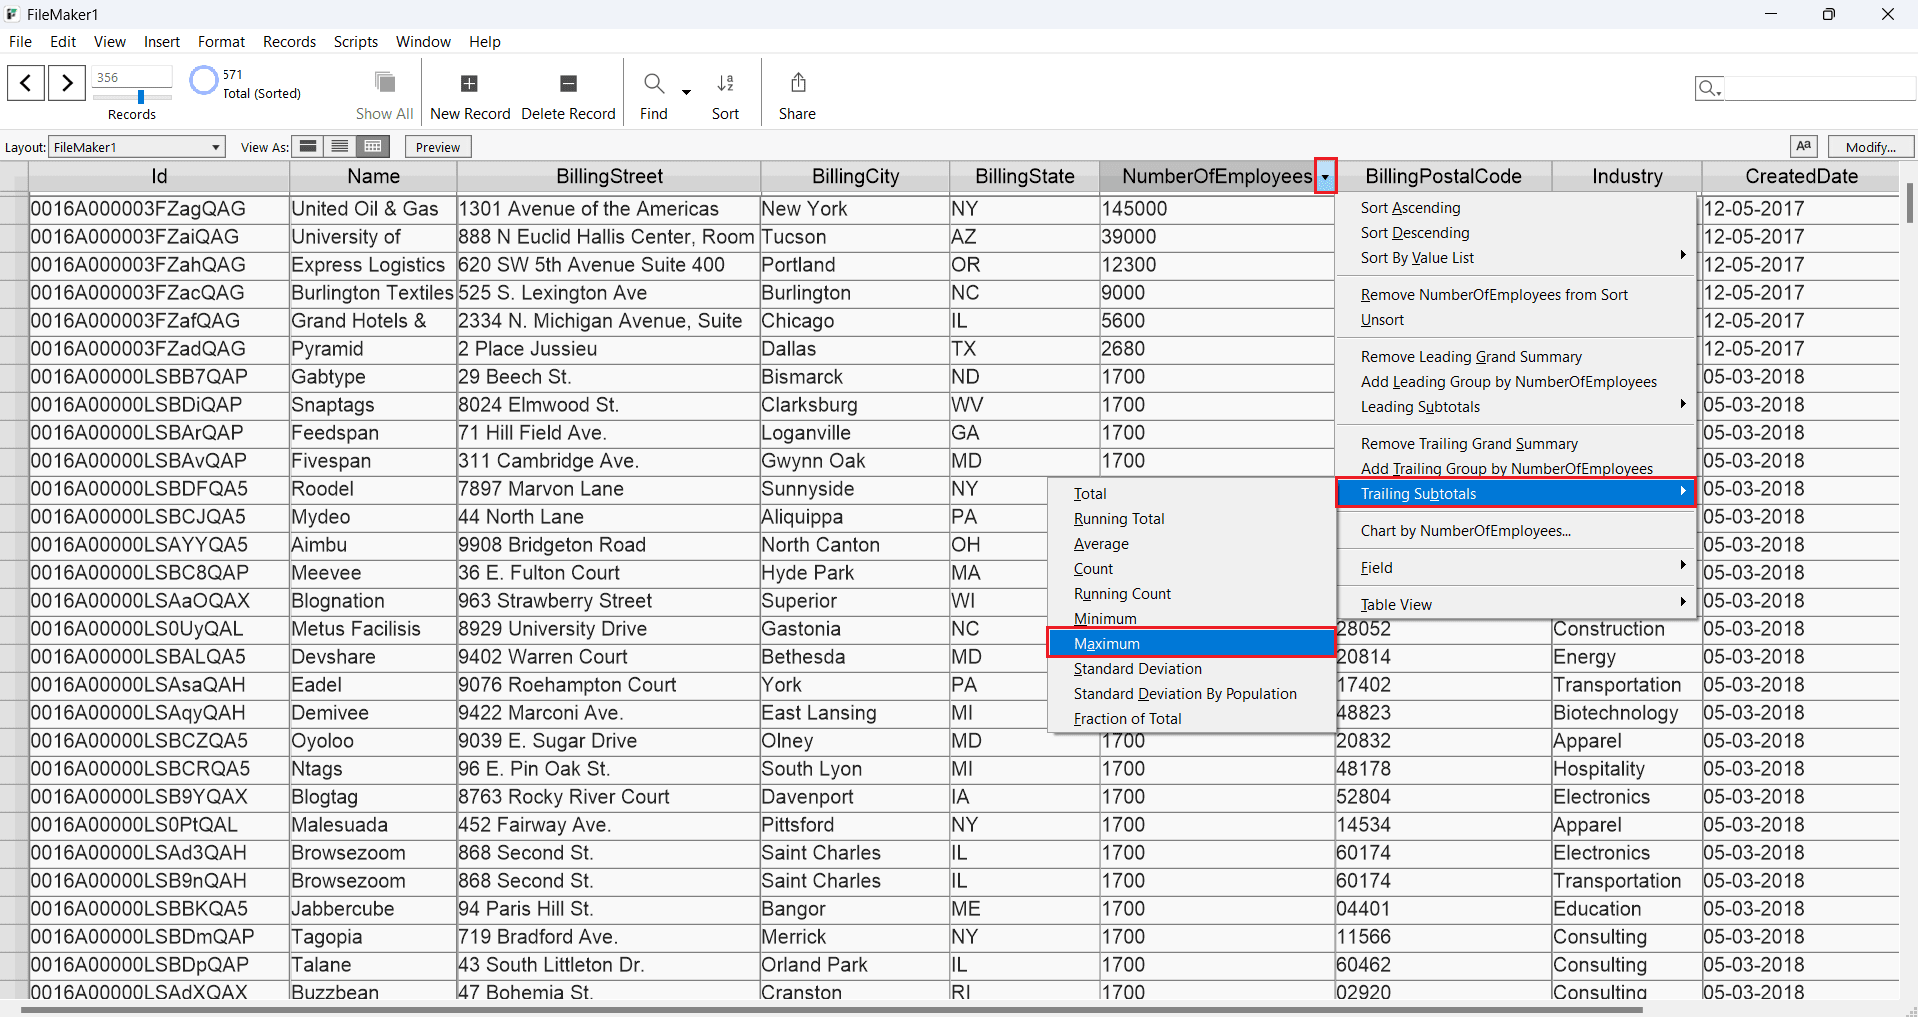
Follow the steps below to group column values and display summaries, as shown in the screenshot:
- Sort: Click the arrow in the NumberOfEmployees column header and choose Sort Ascending from the menu.
- Group: In the same menu, click Add Trailing Group by Industry to group the values and insert a summary row. Alternatively, click Add Leading Group to add a summary row at the beginning.
- Summarize: Select a summary option from the Trailing Subtotals menu for a grouped column.
Create a bar chart
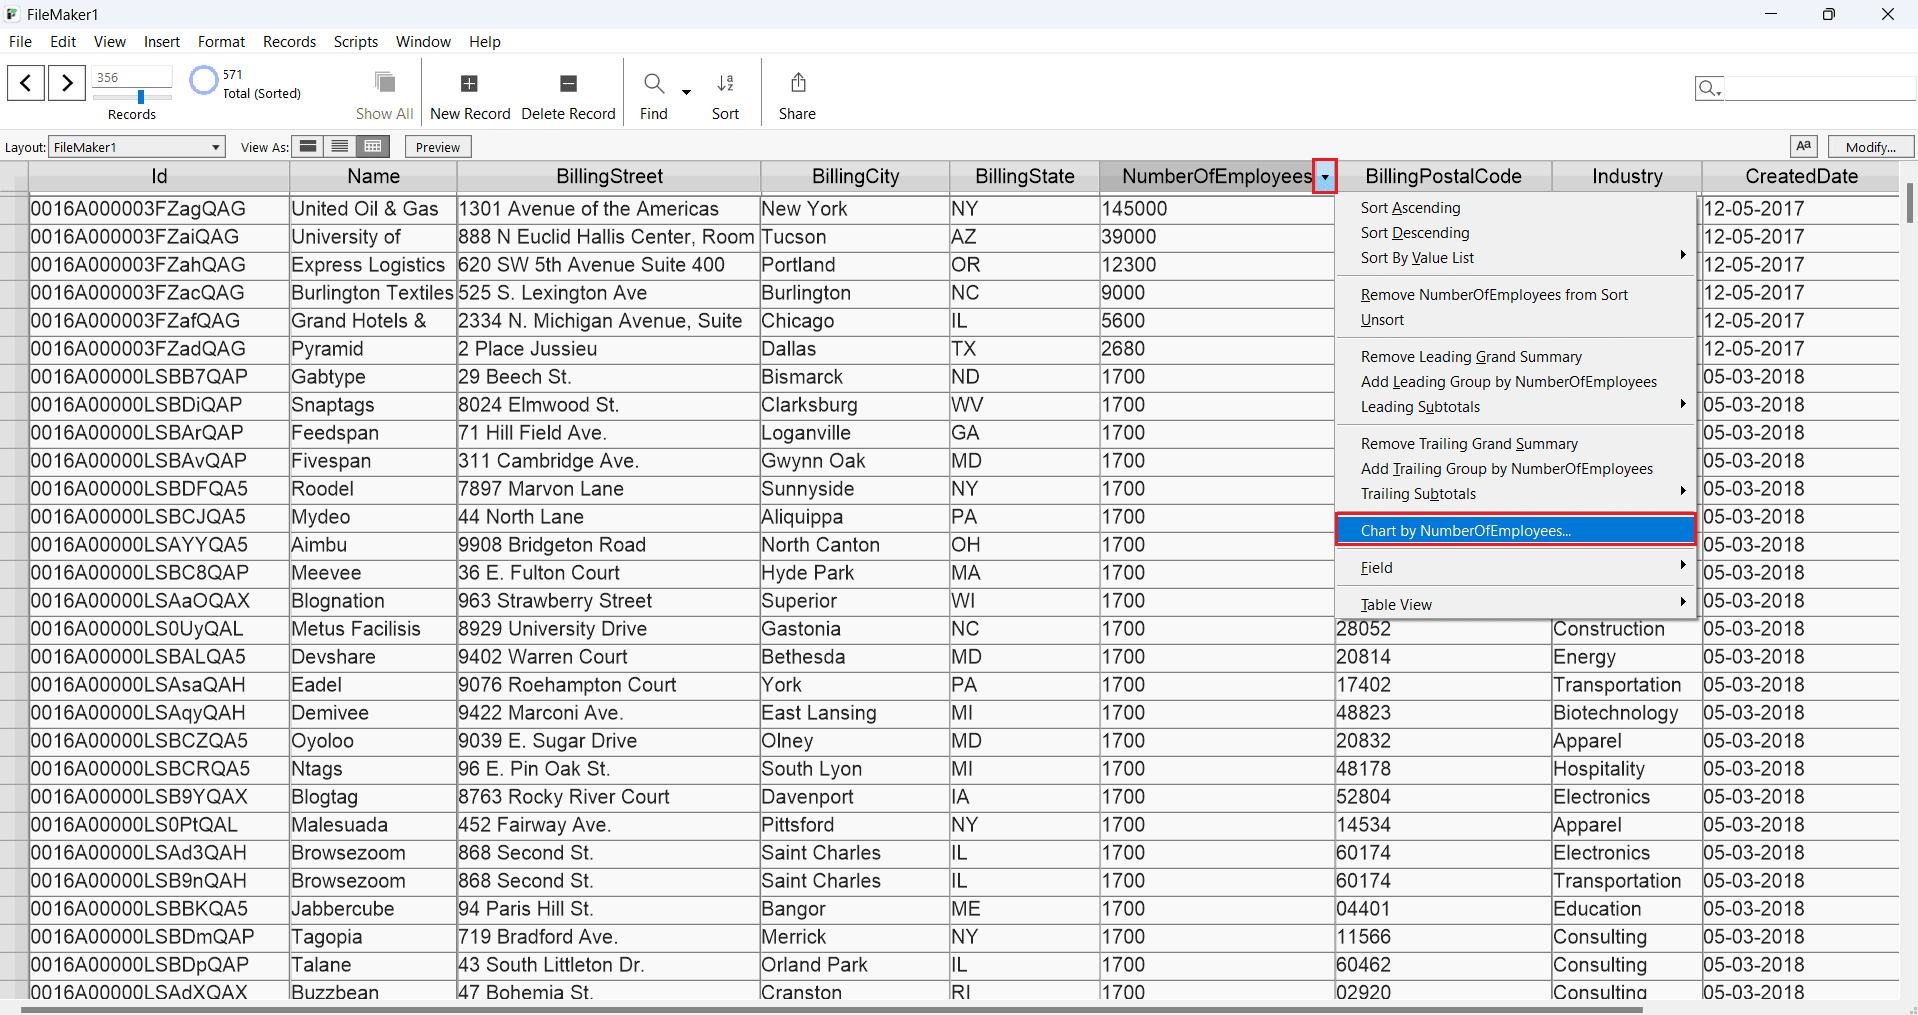
Use the following steps to create a simple bar chart showing the total NumberOfEmployees for each Industry:
- Click the arrow in the NumberOfEmployees column header and select Chart by NumberOfEmployees.
- If you've already grouped the table by a column (e.g., Industry), you can chart NumberOfEmployees by that column.
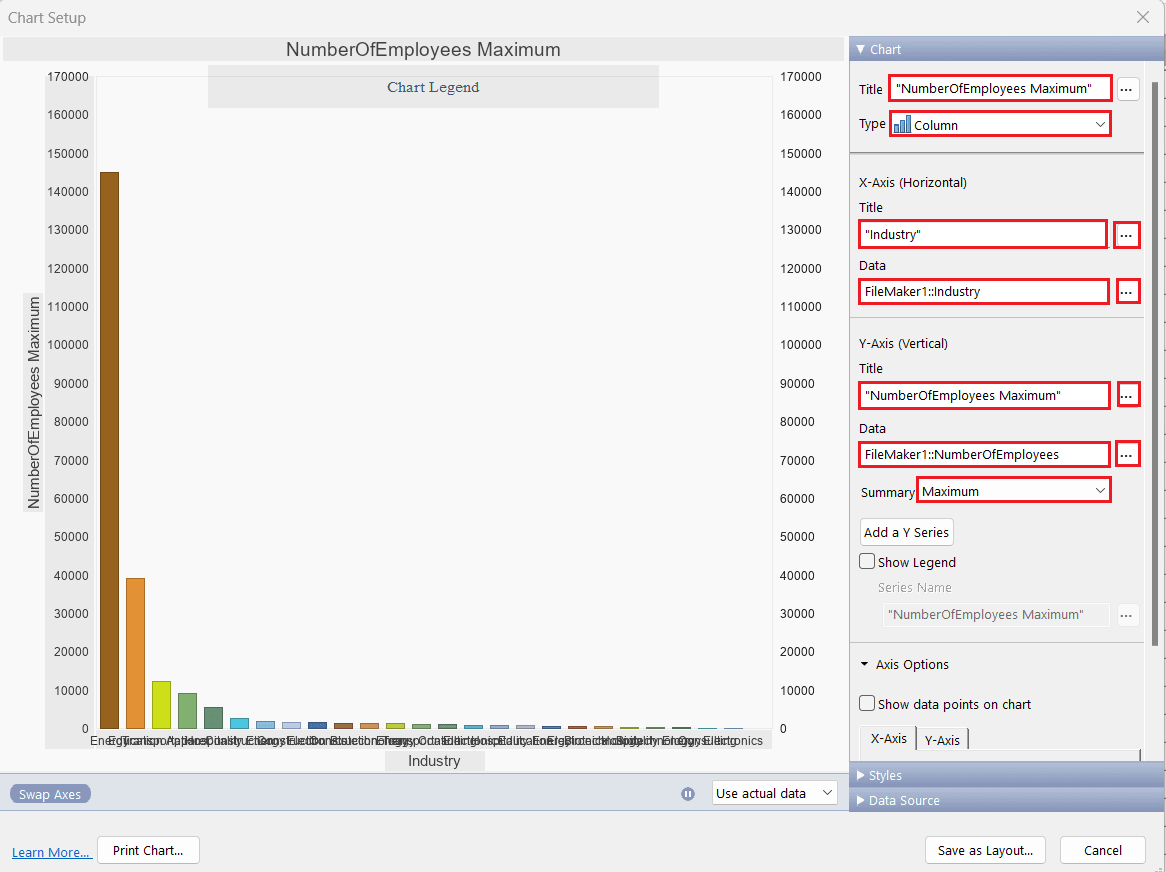
- In the Chart Setup window:
- Click the button next to the Data box to add the x-axis column.
- Choose the appropriate column in the dialog that appears.
- For the y-axis, select a summary option from the Summary menu.
Get Started Today
Download a free 30-day trial of the CData ODBC Driver for JD Edwards to integrate JD Edwards data into Claris FileMaker and work with JD Edwards data in your FileMaker applications.
Reach out to our Support Team if you have any questions.
Ready to get started?
Download a free trial of the JD Edwards ODBC Driver to get started:
Download NowLearn more:
 JD Edwards ODBC Driver
The JD Edwards ODBC Driver is a powerful tool that allows you to connect with live data from JD Edwards, directly from any applications that support ODBC connectivity.
Access JD Edwards data like you would a database - read JD Edwards AccountLedger, ProposalofPayment, ContractRevenueSummary, EmployeeEnrollment, RentIncreaseAmounts, etc. through a standard ODBC Driver interface.