




Getting Started with the CData SSIS Components for JD Edwards
This guide explains everything you need to get started with the CData SSIS Components for JD Edwards. You'll learn how to install the components, activate your license, configure your first SSIS connection manager, and build a data flow task to move and transform JD Edwards data in your SQL Server Integration Services workflows.
Installation & Licensing
System Requirements
- Windows: Windows 10/11 or Windows Server 2016+
- Visual Studio: Visual Studio 2015 or later
- SQL Server: SQL Server 2014, 2016, 2017, 2019, or 2022
Installing the SSIS Components
- Download the SSIS Components installer for JD Edwards from your CData account or the evaluation download page
- Run the installer and follow the installation wizard
- The installer automatically registers the Connection Manager, Source, and Destination components with Visual Studio
- When prompted, activate your license using the product key sent to you by the CData Orders Team:
XXXX-XXXX-XXXX-XXXX-XXXX- Note: To run a trial, choose the Trial Key option.
Enabling SSIS in Visual Studio 2022
If you are using Visual Studio 2022, the SQL Server Integration Services Projects extension must be installed.
- In Visual Studio, select Extensions > Manage Extensions
- Search for SQL Server Integration Services Projects 2022
- Click Install
- Close Visual Studio and run the downloaded Microsoft.DataTools.IntegrationServices.exe installer
- Reopen Visual Studio. The Integration Services Project template will now appear when creating a new project
Activating Your License
During installation, you are prompted to activate the SSIS Component license. If you need to update or change activation:
License Activation
The installer automatically prompts you to add your license. During installation, you can choose to:
- Use your existing subscription license key, or
- Enter your trial license
To activate a full subscription license, contact the CData Orders Team and request your product key at [email protected].
Enter the license key in the installer when prompted. Once activated, the components will be licensed and ready to use inside Visual Studio without any additional steps.
Runtime Licensing
When deploying SSIS packages, a Runtime Key (RTK) can also be used:
- Set the RTK property in the Connection Manager before deployment
Common Licensing Questions
Can I use my license on multiple machines?
Yes, depending on your subscription tier. Contact [email protected] for details.
I lost my license key. How do I retrieve it?
Email [email protected] with your order number, and we'll resend your license key.
How do I transfer my license to another machine?
Yes. When transferring the license to a different machine, you will need to submit a License Transfer Request on our site linked below:
https://www.cdata.com/lic/transfer/After the License Transfer Request is submitted and successfully processed, an activation will be added to your Product Key and you will be able to activate the full license on the other machine. Once this process is finished, the license on the previous machine will be invalid.
You may also view and upgrade licenses in the self-service portal at portal.cdata.com.
Connection Configuration
Once the components are installed and licensed, you can configure a connection to JD Edwards using an SSIS Connection Manager. This Connection Manager stores all authentication and connection properties used by the Source and Destination components.
Creating a Connection Manager
- In the bottom Connection Managers panel of your SSIS package, right-click and select New Connection
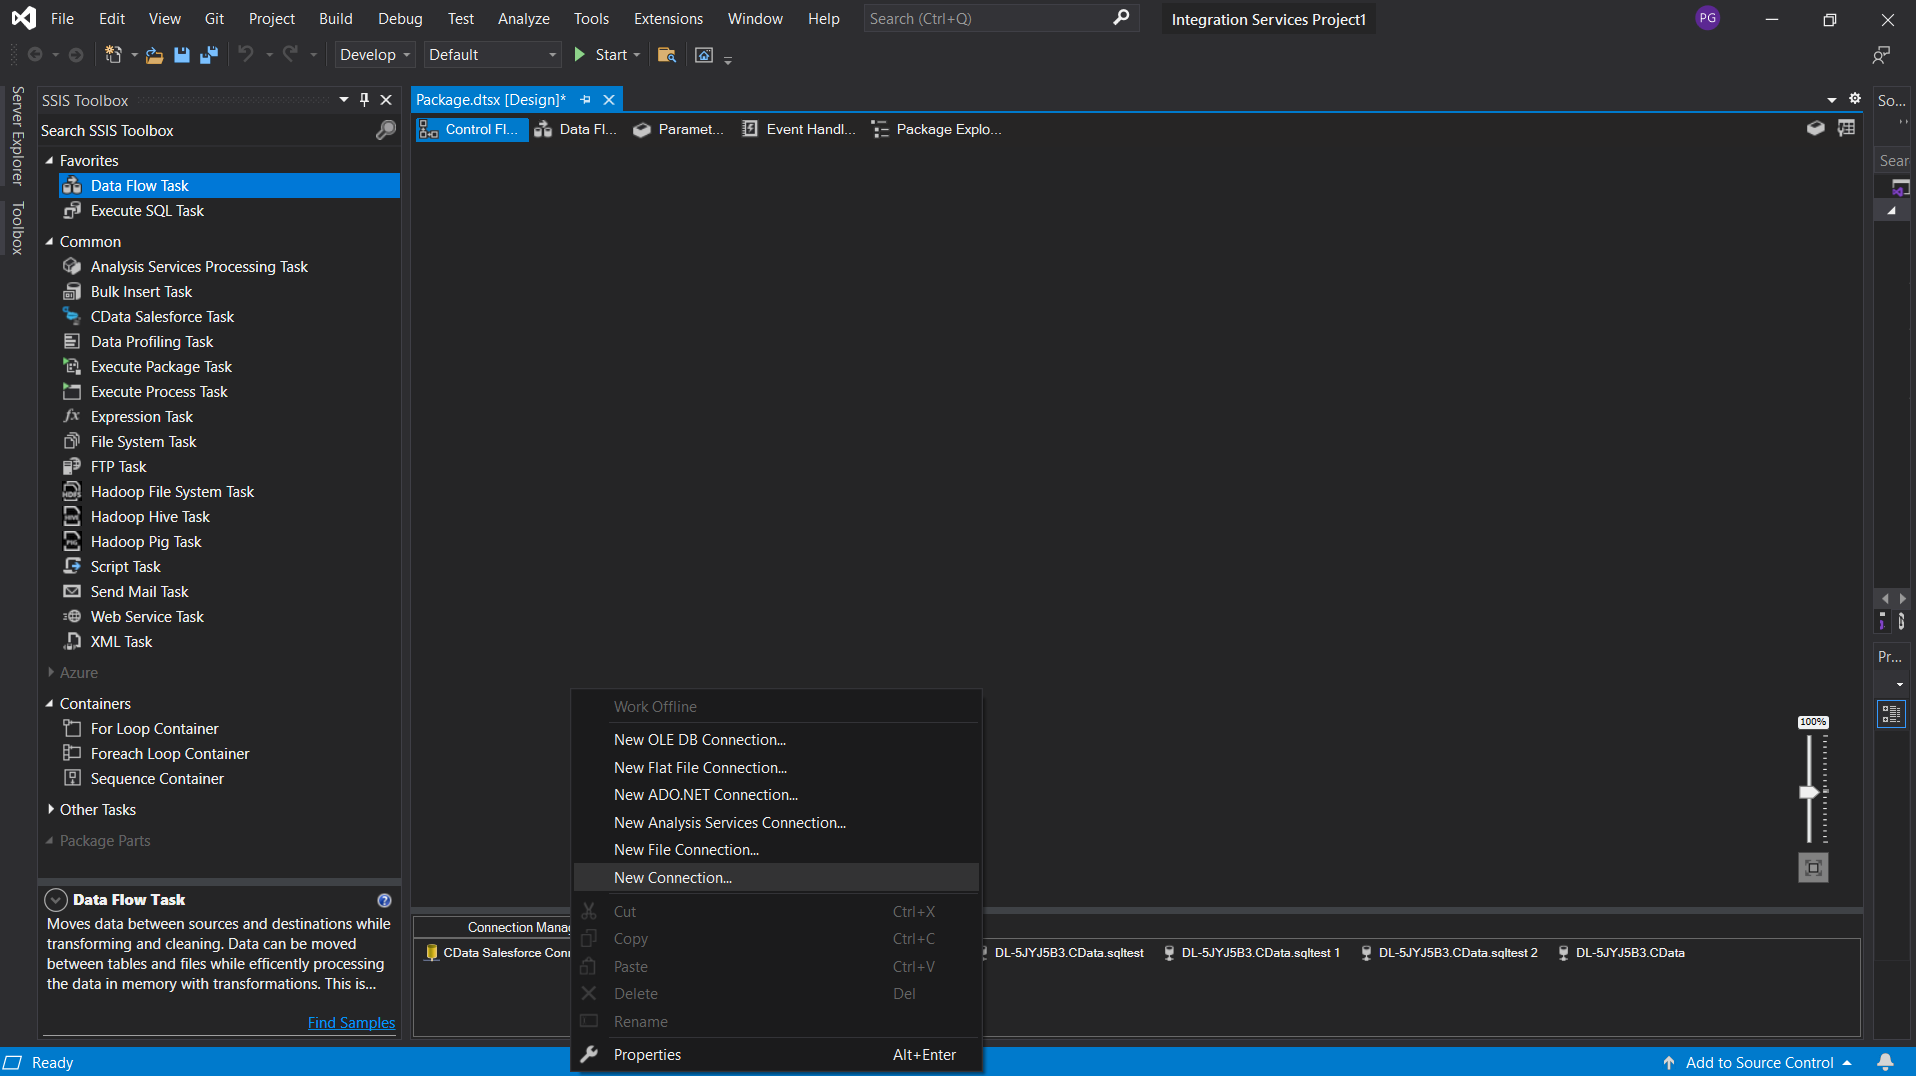
- Select CData SSIS Components for JD Edwards from the list
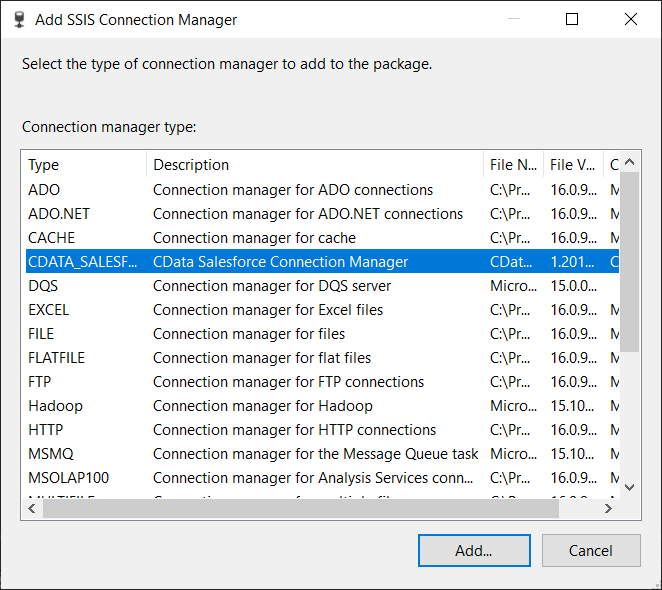
- Click Add to open the Connection Manager UI
- Enter the required authentication properties (OAuth, API token, client credentials, etc.) depending on your JD Edwards
- URL: The base HTTPS URL of your AIS Server (e.g., https://jde-ais.example.com:8300).
- User: Your JD Edwards username.
- Password: Your JD Edwards password.
- Environment (optional): The JD Edwards environment to use (e.g., PD920 for production or DV920 for development). If not specified, the AIS Server's default environment is used.
- Role (optional): The JD Edwards role for the session. If not specified, the AIS Server's default role is used.
- DeviceName (optional): An identifier for the connecting device or application, used for auditing and logging on the AIS Server.
- Jasserver (optional): The specific Java Application Server (JAS) instance to route requests through, useful in clustered environments.
- DataModel: One or more ERP modules (comma-separated) whose System Codes are exposed as schemas, or All to expose every System Code in the connected instance. Defaults to FinancialManagement.
- SystemCodes: A comma-separated list of additional System Codes to expose alongside those from DataModel (e.g., 42,43).
- Click Test Connection to confirm connectivity
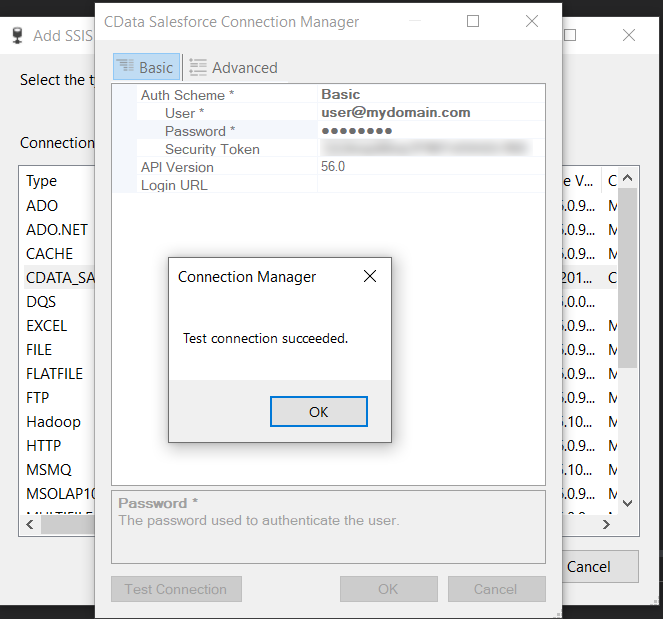
Configuring Connection Properties
The driver connects to JD Edwards through your Application Interface Services (AIS) Server. Set the following connection properties:
Choosing Which Data Is Exposed
JD Edwards organizes tables and business views by System Code, and the driver exposes each System Code as its own schema. Use these properties to control which schemas are available:
When you connect, the driver sends your credentials to the AIS Server to obtain a session token and caches it. The driver requests a new token automatically before the session expires.
Building an SSIS Data Flow
With a Connection Manager created, you can now pull data from JD Edwards or push data into it using SSIS data flow tasks.
Creating a Data Flow Task
- In the Control Flow tab, drag a Data Flow Task onto the design surface
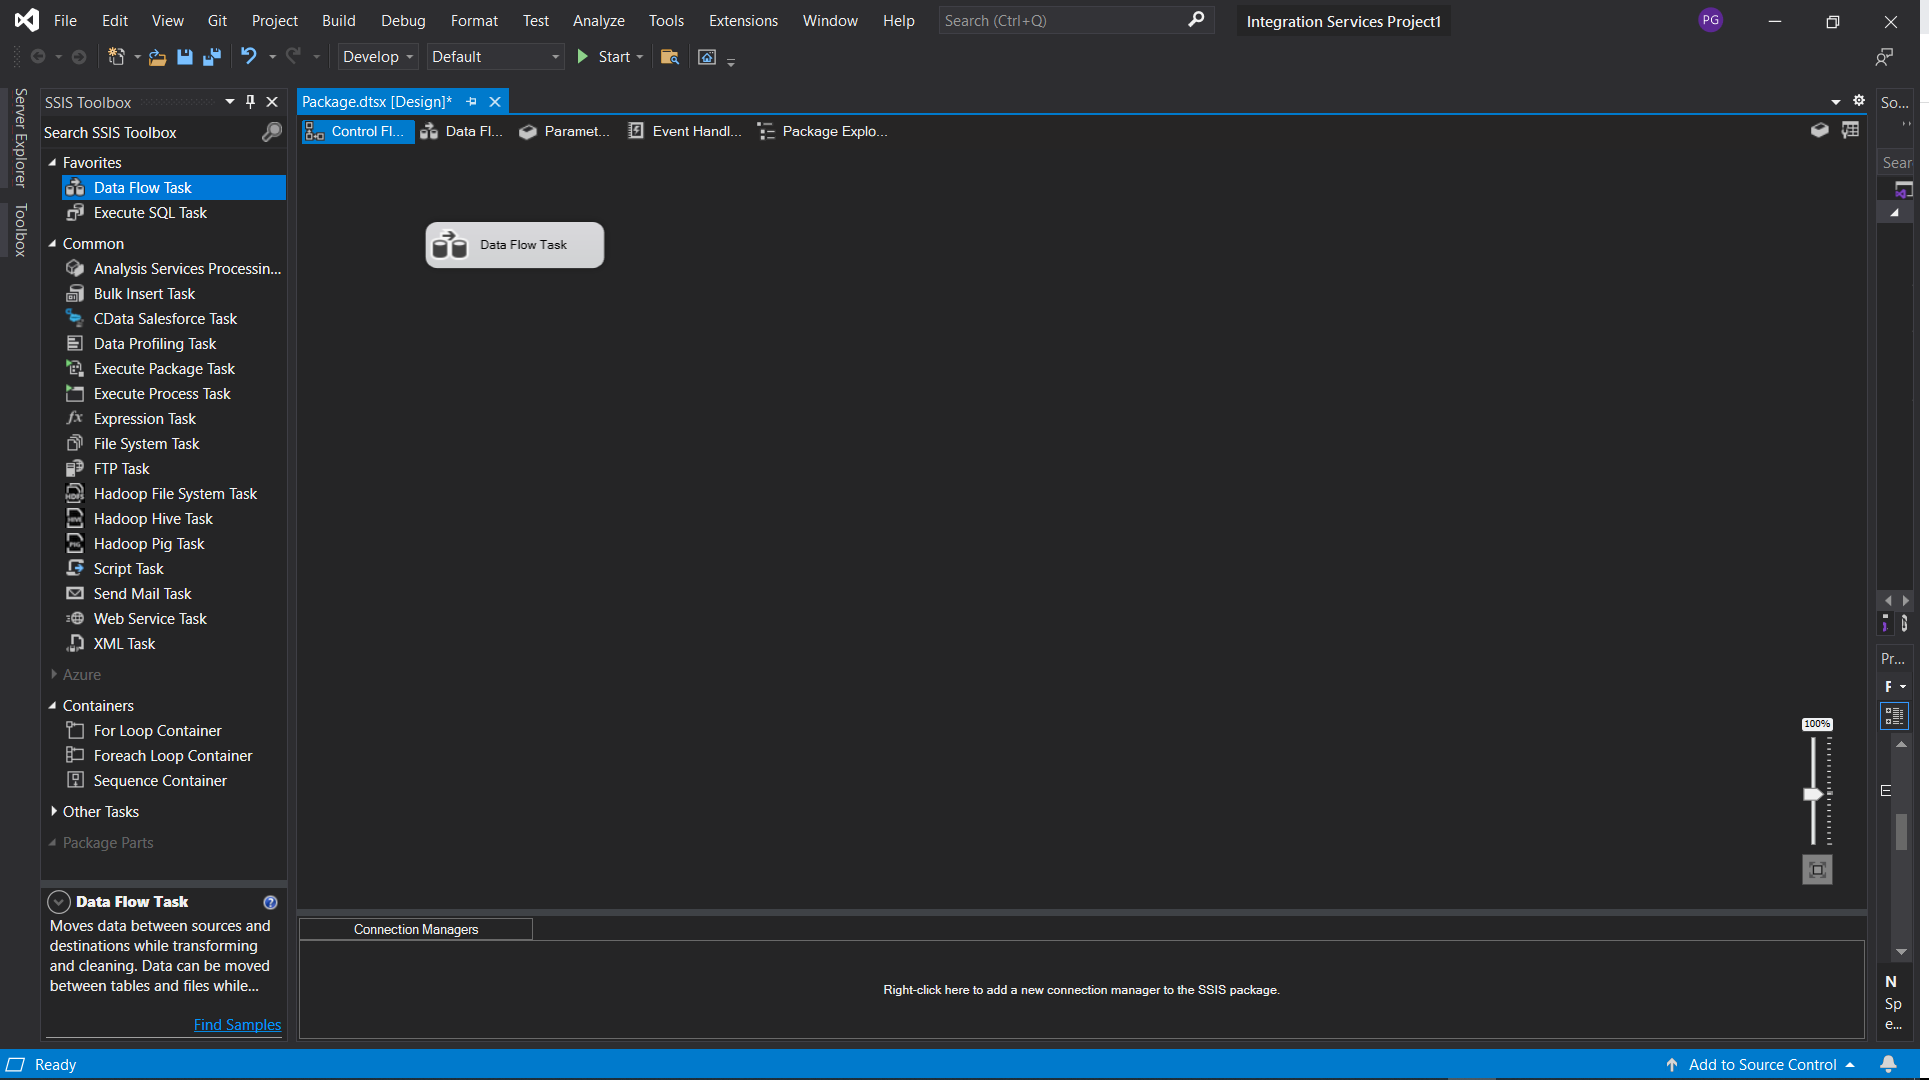
- Double-click the task to open the Data Flow workspace
Using the Source Component
- In the SSIS Toolbox, drag the CData JD Edwards Source component into the Data Flow
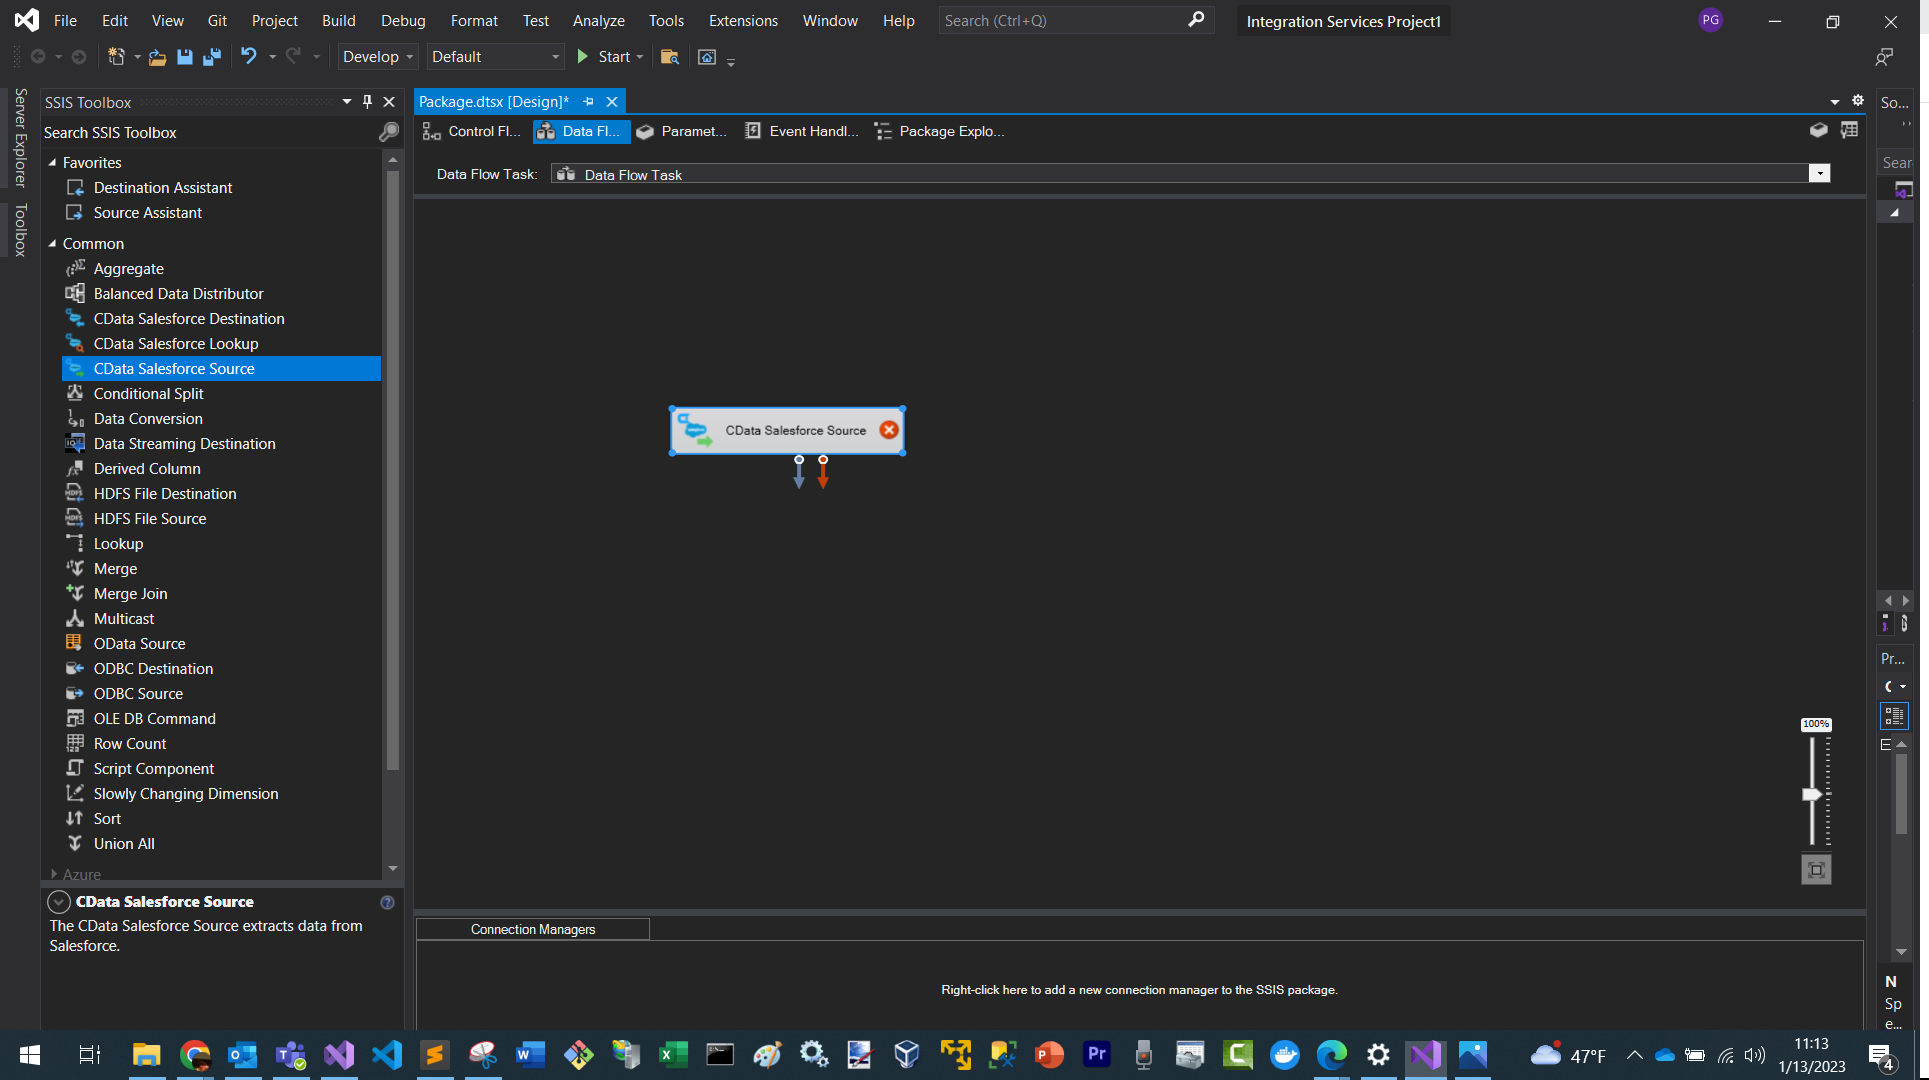
- Double-click it to open the Source Editor
- Select the CData JD Edwards Connection Manager you created
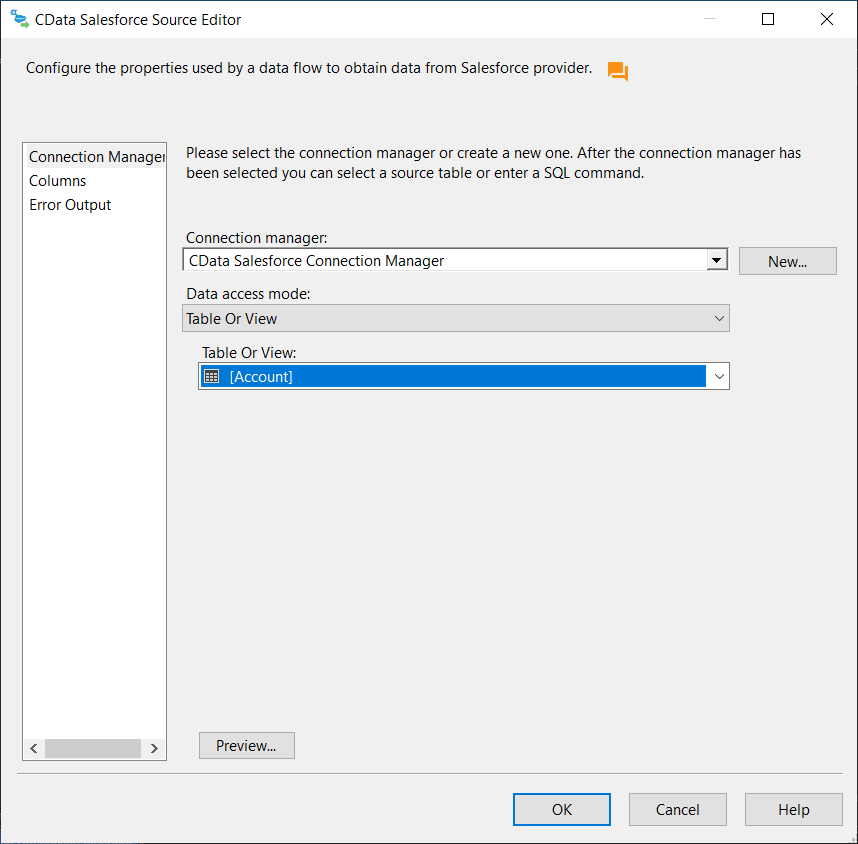
- Choose a table or view to extract records from
- Click OK to save your configuration
Using the Destination Component
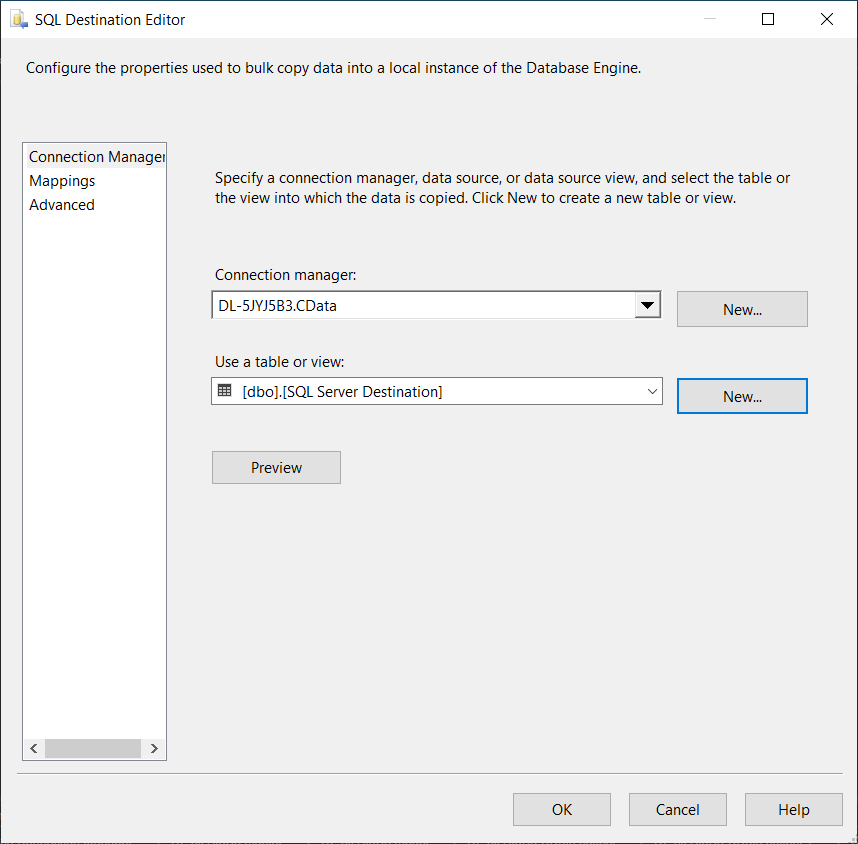
- Drag a SQL Server Destination onto the canvas
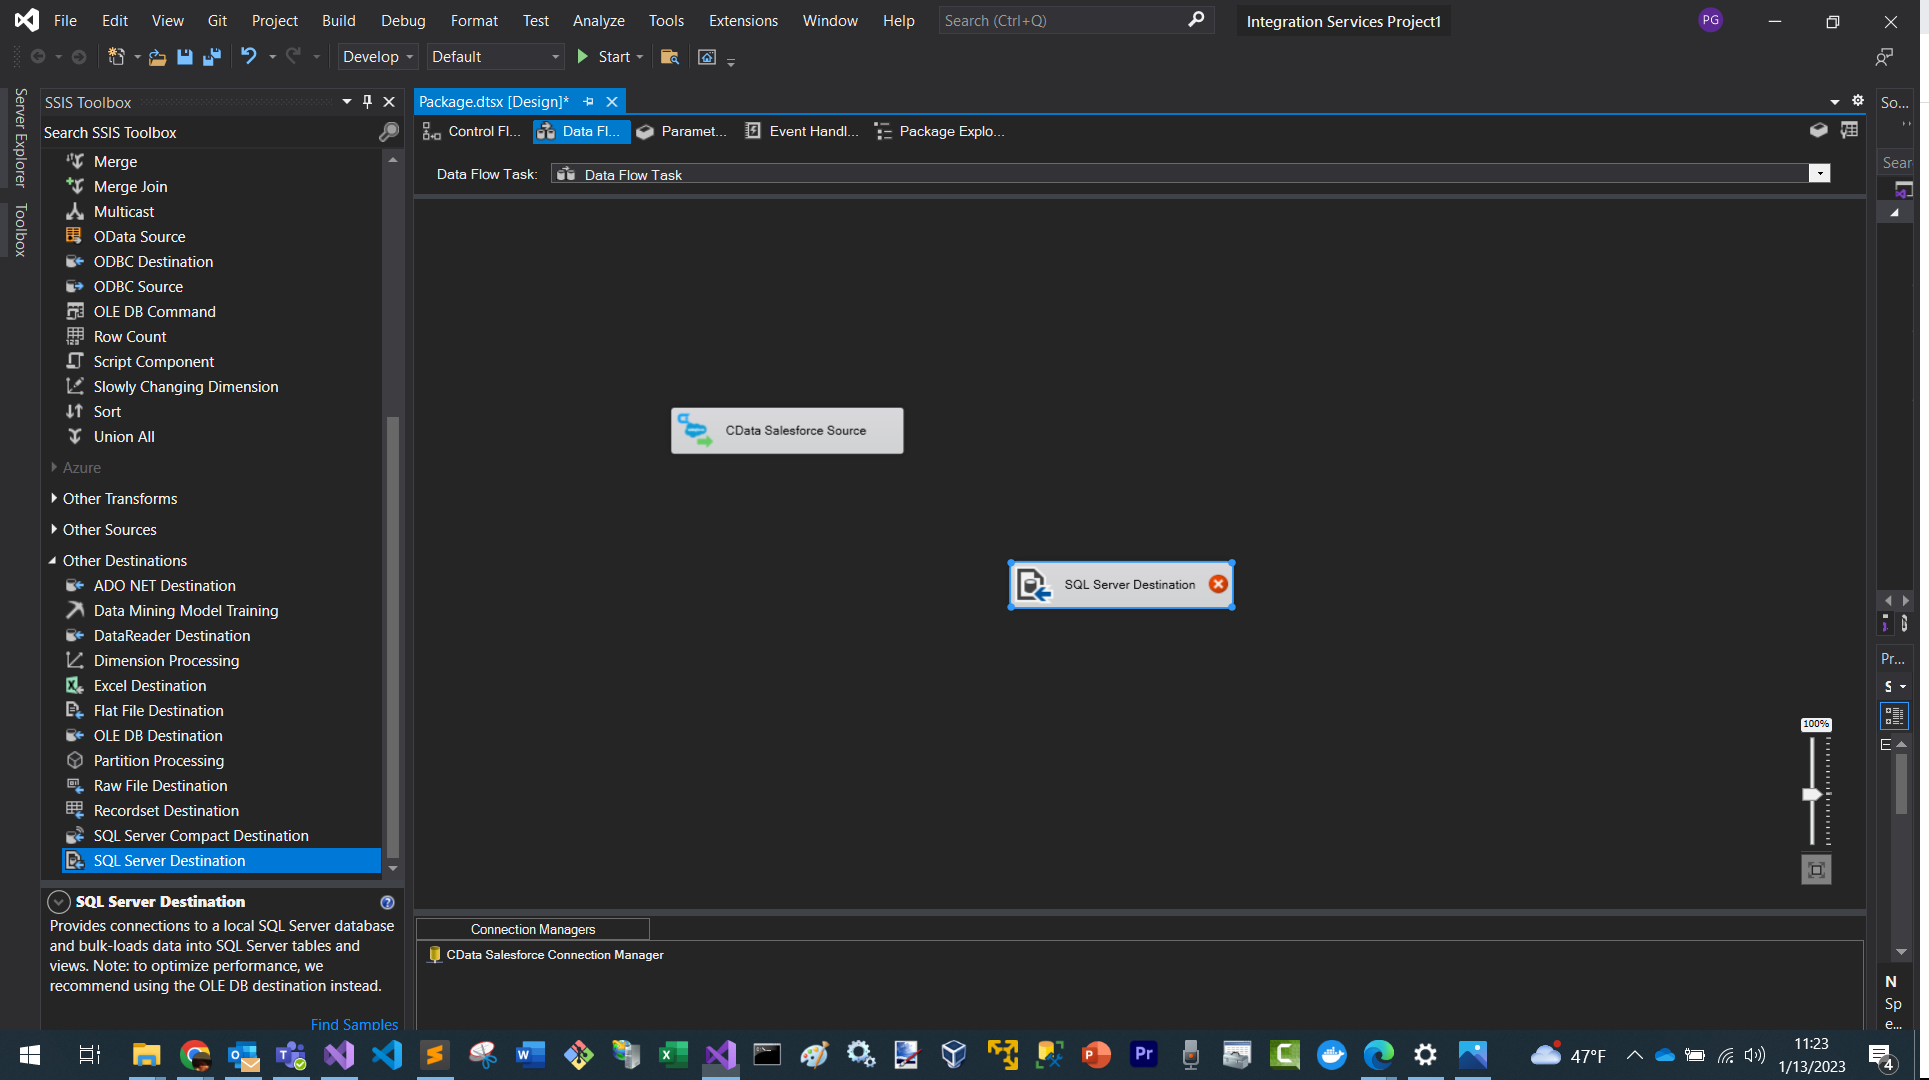
- Double-click it to open the Destination Editor
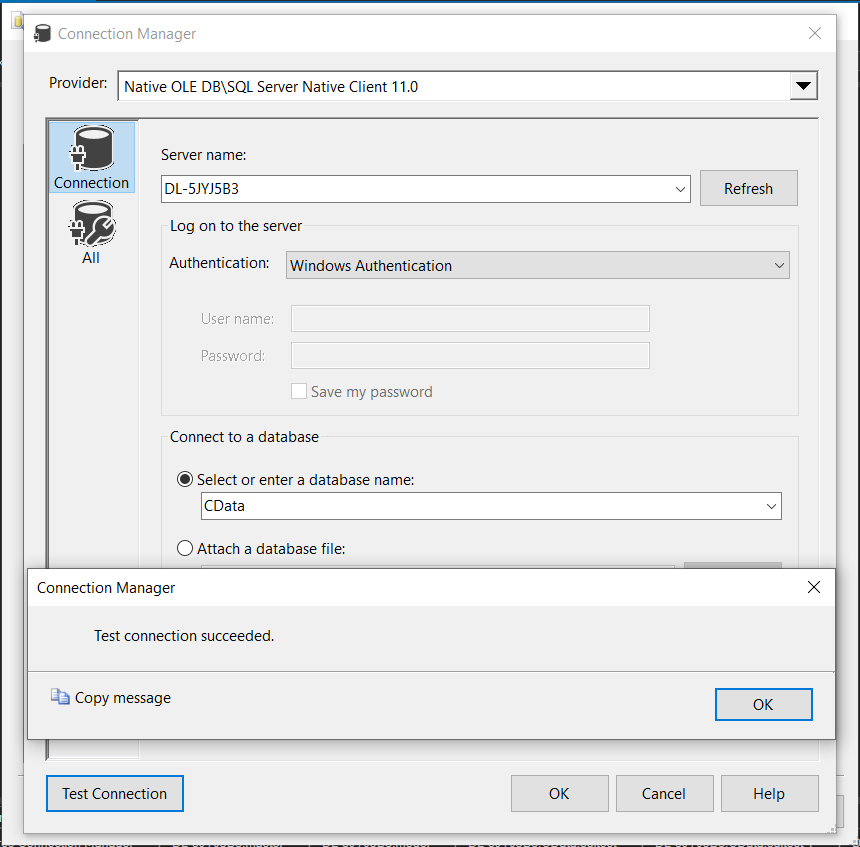
- Select an existing table or click New to auto-generate a table based on the Source schema
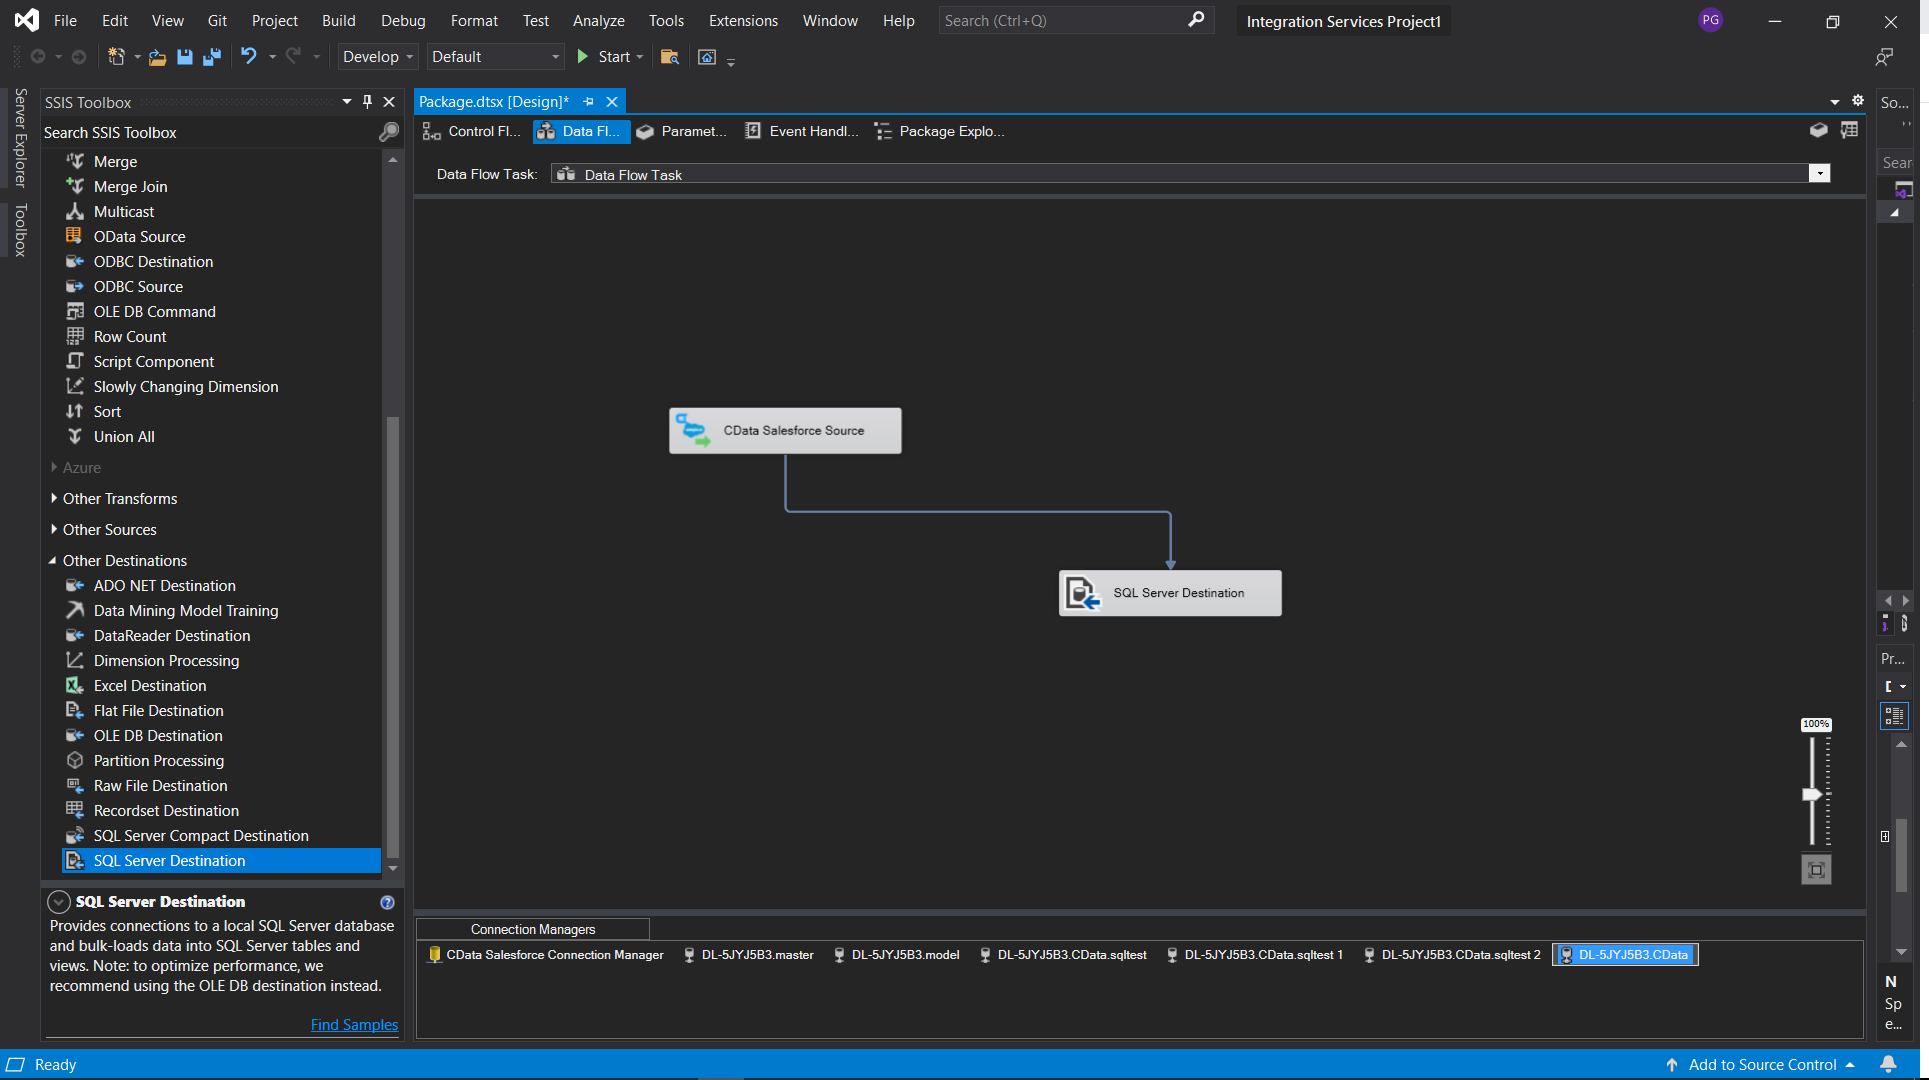
- Connect the Source output to the Destination input and map the columns as needed
- At this point you have created a data flow task for replicating your JD Edwards data to a SQL Server database
Testing Your Data Flow
- Return to the Control Flow tab
- Click Start Debugging
- Monitor the progress indicators
- Review row counts and ensure data is loading as expected
Common Connection Issues
Authentication Failed
Solution: Verify OAuth settings, client IDs, secrets, or token permissions for your JD Edwards. Contact [email protected] for OAuth troubleshooting.
Cannot Reach Server
Solution: Check firewall, proxy, and VPN configurations. Contact [email protected] for specific port requirements.
Table Not Found
Solution: Confirm you selected the correct schema or database when querying JD Edwards.
What's Next
Now that you have installed, licensed, and configured the SSIS Components, here are scenarios you can use to explore our SSIS tools:
| SSIS Component | Article Title |
|---|---|
| BIML | Use Biml to Build SSIS Tasks to Replicate JD Edwards to SQL Server |
| SSIS Import | Import JD Edwards Data into SQL Server using SSIS |
Get Support
If you need assistance at any point:
- Technical Support: [email protected]
- Community Forum: CData Community Site
- Help Documentation: Installed locally and available online
FAQs
Installation & Licensing
- Do I need administrator rights to install the SSIS Components?
Yes, administrator rights are required to install components for use across Visual Studio. - Do I need an RTK to deploy to Azure Data Factory?
Yes. Set the RTK property in the Connection Manager before publishing.
Connecting
- Can I use multiple JD Edwards accounts?
Create separate Connection Managers for each account. - Can I connect through a proxy?
Yes. Configure proxy settings in the Connection Manager properties. - How do I test my connection?
Click Test Connection in the Connection Manager UI.
Performance & Troubleshooting
- Why is my data flow slow?
Add filters, limit rows, and ensure batching settings are configured in the Source component. - How do I enable logging?
Add the following to your connection manager:- Logfile: /path/to/logfile.log
- Verbosity: 3
Be prepared to securely upload the log file upon request when reaching out to [email protected] for troubleshooting analysis.
For questions not covered in this FAQ, contact [email protected].
Ready to get started?
Download a free trial of the JD Edwards SSIS Component to get started:
Download NowLearn more:
 JD Edwards SSIS Components
Powerful SSIS Source Components that allow you to easily connect SQL Server with JD Edwards through SSIS Workflows.
Use the JD Edwards Data Flow Components to synchronize with JD Edwards AccountLedger, ProposalofPayment, ContractRevenueSummary, EmployeeEnrollment, RentIncreaseAmounts, and more. Perfect for data synchronization, local back-ups, workflow automation, and more!