




Build MVC Applications with Connectivity to Linear Data

In this article, we will guide you through the process of utilizing wizards within Visual Studio to seamlessly integrate the CData ADO.NET Provider for Linear into a basic MVC (Model, View, Controller) project.
Create the Entity Framework Model
Follow the steps below to save connection properties and map tables to entities in the data model.
- Create a new MVC project in Visual Studio. In this example, the project name is MvcLinearApp.
If you are using Entity Framework 6, you will need to take the preliminary step of registering the Linear Entity Framework provider for your project. See the "LINQ and Entity Framework" chapter in the help documentation for a guide.
Note that MVC 3 scaffolding and MVC 4 scaffolding do not support Entity Framework 6. You can use your scaffolding with Entity Framework 6 by upgrading to the latest version of MVC.- To add the .edmx file from the designer, right-click your Models folder and click Add New Item. Select ADO.NET Entity Data Model, name the model, and click Add. In this example, the name of the model is LinearModel.
- In the Entity Data Model wizard, select the option 'EF Designer from database'. The Entity Data Model wizard is displayed.
- Click New Connection. Select CData Linear Data Source in the dialog that is displayed.
Specify the required connection string properties.
You can authenticate to Linear with a personal API key or with OAuth 2.0. The API key is the simplest option for connecting with your own Linear account.
Authenticating with an API Key
Set the following connection properties:
- AuthScheme: Set this to APIKey.
- APIKey: A Linear personal API key.
To create a personal API key, log in to Linear, open Settings > Security & access > Personal API keys, select New API key, and create it. Copy the key immediately, because Linear shows it only once.
Authenticating with OAuth
OAuth requires a custom OAuth application registered in Linear (Settings > API > OAuth applications), which provides the OAuthClientId and OAuthClientSecret. Two flows are supported:
- Authorization code: Set AuthScheme to OAuth, InitiateOAuth to GETANDREFRESH, and provide OAuthClientId, OAuthClientSecret, and the CallbackURL defined in your application (e.g., http://localhost:33333). The driver opens Linear in your browser so you can grant access.
- Client credentials: Set AuthScheme to OAuthClient and provide OAuthClientId and OAuthClientSecret. This authenticates the application itself, with no browser interaction, and suits machine-to-machine integrations.
By default, the driver requests the read,write scopes. The driver refreshes the access token automatically when it expires.
A typical connection string is below:
AuthScheme=APIKey;APIKey=myAPIKey;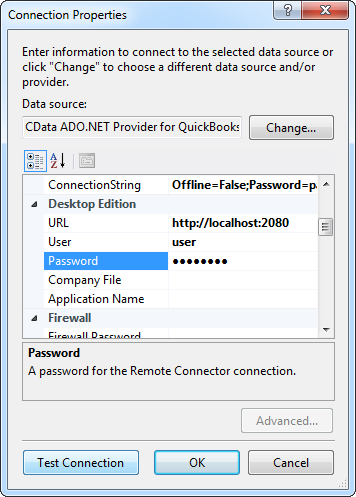
Name the connection and select whether to include sensitive information, such as connection credentials, in the connection string. For simplicity, this example saves sensitive information in Web.config. The connection settings are saved as LinearEntities.
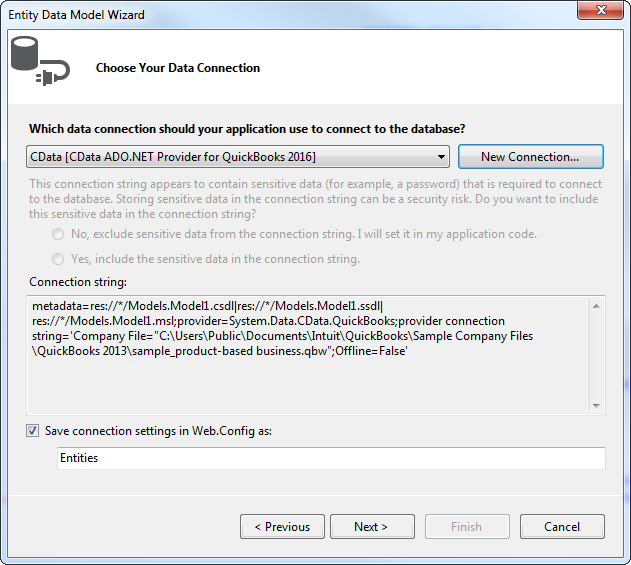
- Select the views you need. In this example, Team is imported. Also, the option to pluralize object names is deselected in this example. Click Finish to create the .edmx file.
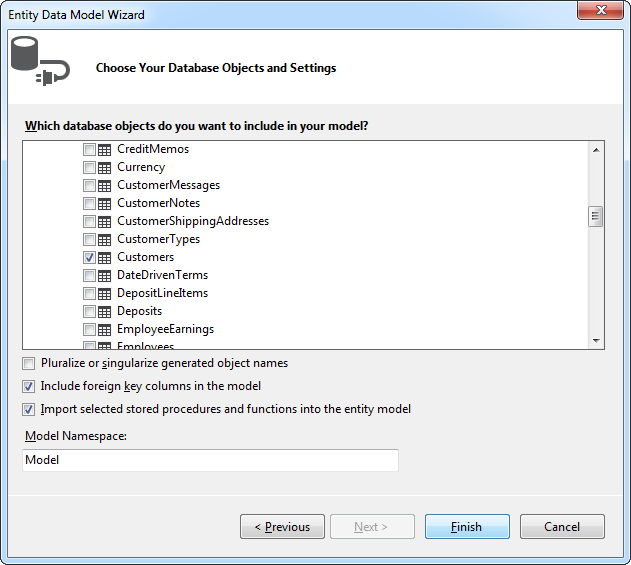
- Build your project to complete this step.
Scaffold the Controller and Views
Once you've established the model and completed the project build, you can employ ASP.NET Scaffolding wizards to generate both the controller and the views.
- In Solution Explorer, right-click the controllers folder and click Add -> Controller. Select MVC 5 Controller with views, using Entity Framework.
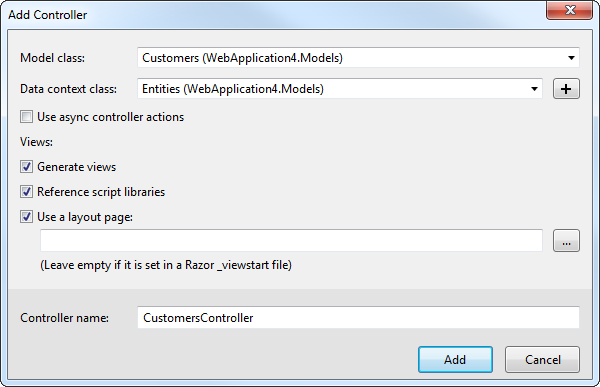
- In the Add Controller dialog that is then displayed, select the following options:
- Model class: Select a table you imported; for example, Team.
- Data context class: Select your context class.
-
Leave the default values for the other fields.
Ready to get started?
Download a free trial of the Linear Data Provider to get started:
Download NowLearn more:
 Linear ADO.NET Provider
Rapidly create and deploy powerful .NET applications that integrate with Linear data including AgentSession, Comment, Customer, Cycle, Initiative, Integration, Issue, ProjectStatus, Release, Team, User, and more!