




Use CData Connect AI to Access Linear Data in Microsoft Power Pivot

This article will explain how to use CData Connect AI to present Linear data as OData services and then consume the data in Microsoft Excel's Power Pivot business intelligence tool. Follow the steps below to retrieve Linear data in Power Pivot.
Connect to Linear from Power Pivot
To work with Linear data from Power Pivot, we need to connect to Linear from Connect AI, provide user access to the connection, and create a Workspace for the Linear data.
Connect to Linear from Connect AI
CData Connect AI uses a straightforward, point-and-click interface to connect to data sources.
- Log into Connect AI, click Sources, and then click Add Connection
- Select "Linear" from the Add Connection panel
-
Enter the necessary authentication properties to connect to Linear.
You can authenticate to Linear with a personal API key or with OAuth 2.0. The API key is the simplest option for connecting with your own Linear account.
Authenticating with an API Key
Set the following connection properties:
- AuthScheme: Set this to APIKey.
- APIKey: A Linear personal API key.
To create a personal API key, log in to Linear, open Settings > Security & access > Personal API keys, select New API key, and create it. Copy the key immediately, because Linear shows it only once.
Authenticating with OAuth
OAuth requires a custom OAuth application registered in Linear (Settings > API > OAuth applications), which provides the OAuthClientId and OAuthClientSecret. Two flows are supported:
- Authorization code: Set AuthScheme to OAuth, InitiateOAuth to GETANDREFRESH, and provide OAuthClientId, OAuthClientSecret, and the CallbackURL defined in your application (e.g., http://localhost:33333). The driver opens Linear in your browser so you can grant access.
- Client credentials: Set AuthScheme to OAuthClient and provide OAuthClientId and OAuthClientSecret. This authenticates the application itself, with no browser interaction, and suits machine-to-machine integrations.
By default, the driver requests the read,write scopes. The driver refreshes the access token automatically when it expires.

- Click Save & Test
-
Navigate to the Permissions tab in the Add Linear Connection page and update the User-based permissions.



Add a Personal Access Token
When connecting to Connect AI through the REST API, the OData API, or the Virtual SQL Server, a Personal Access Token (PAT) is used to authenticate the connection to Connect AI. It is best practice to create a separate PAT for each service to maintain granularity of access.
- Click on the Gear icon () at the top right of the Connect AI app to open the settings page.
- On the Settings page, go to the Access Tokens section and click Create PAT.
-
Give the PAT a name and click Create.

- The personal access token is only visible at creation, so be sure to copy it and store it securely for future use.
Configure Linear Endpoints for Power Pivot
After connecting to Linear, create a workspace for your desired table(s).
-
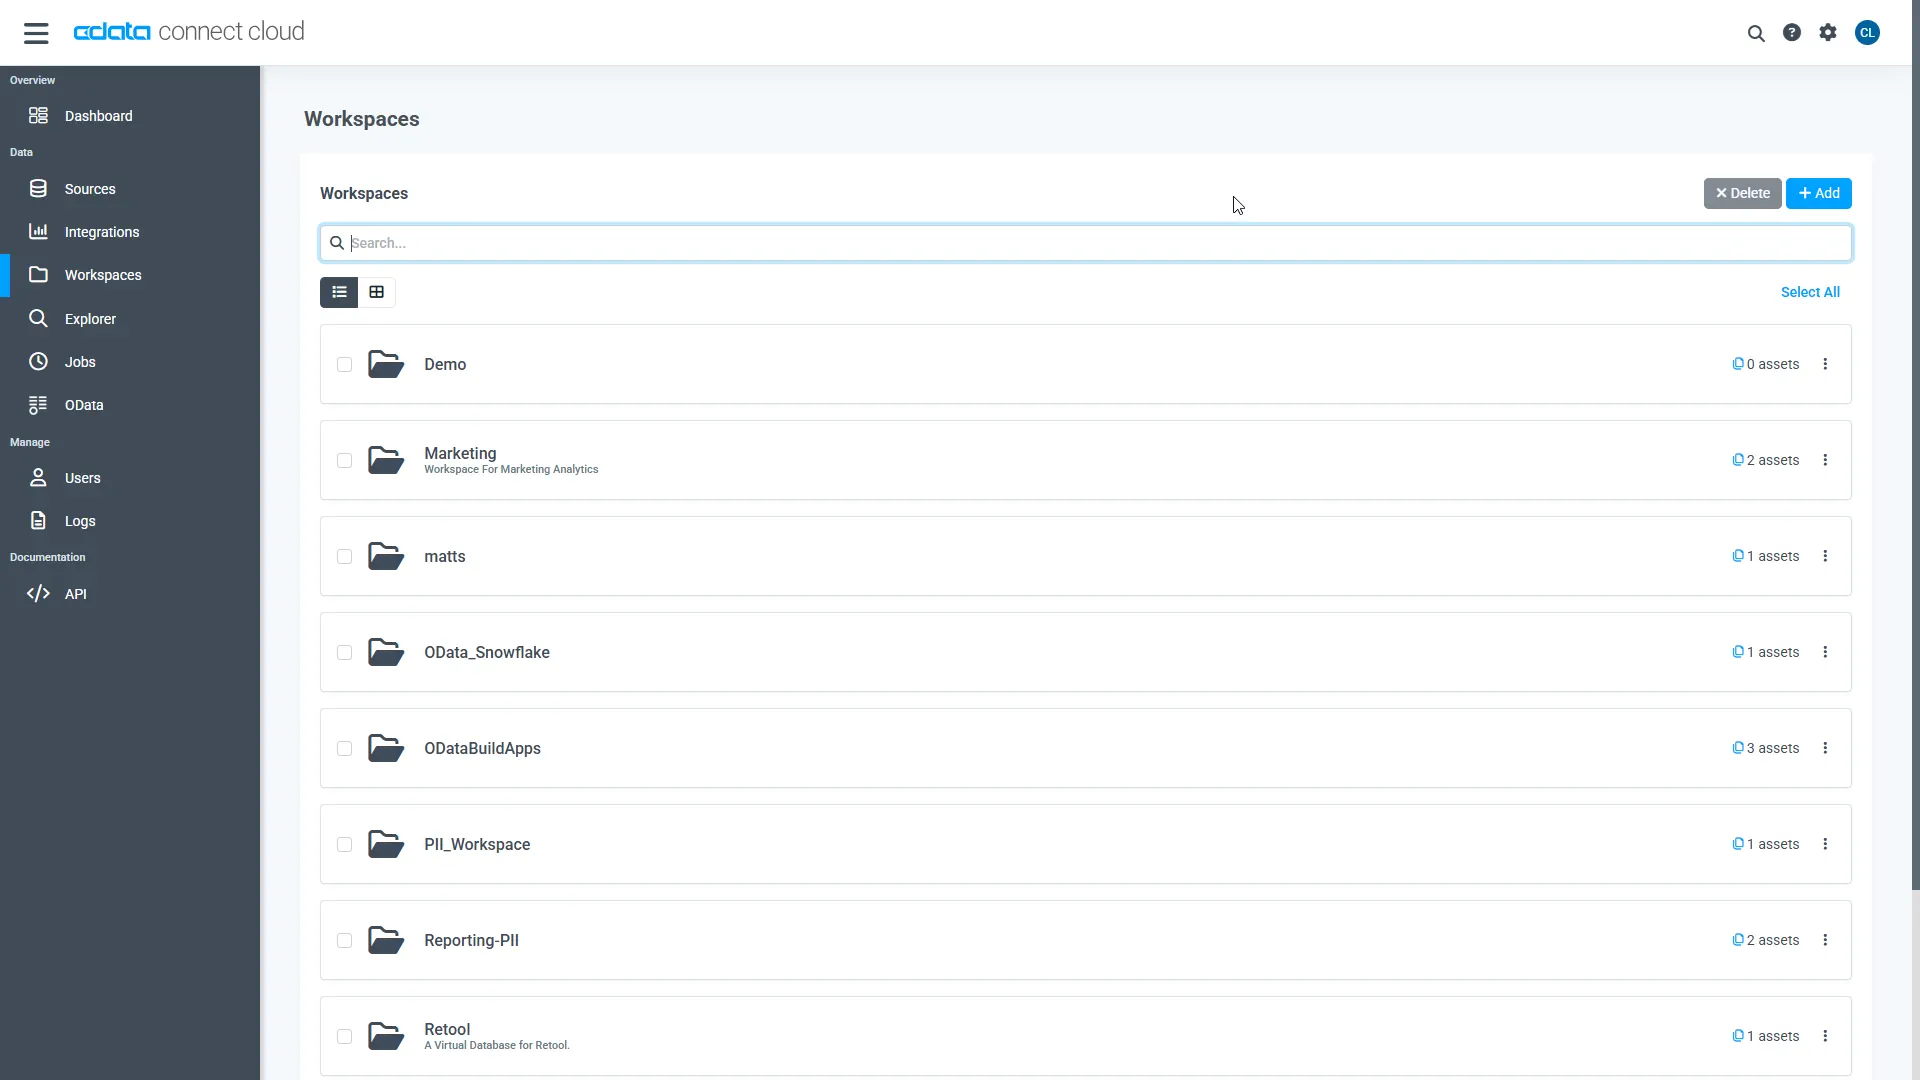
Navigate to the Workspaces page and click Add to create a new Workspace (or select an existing workspace).
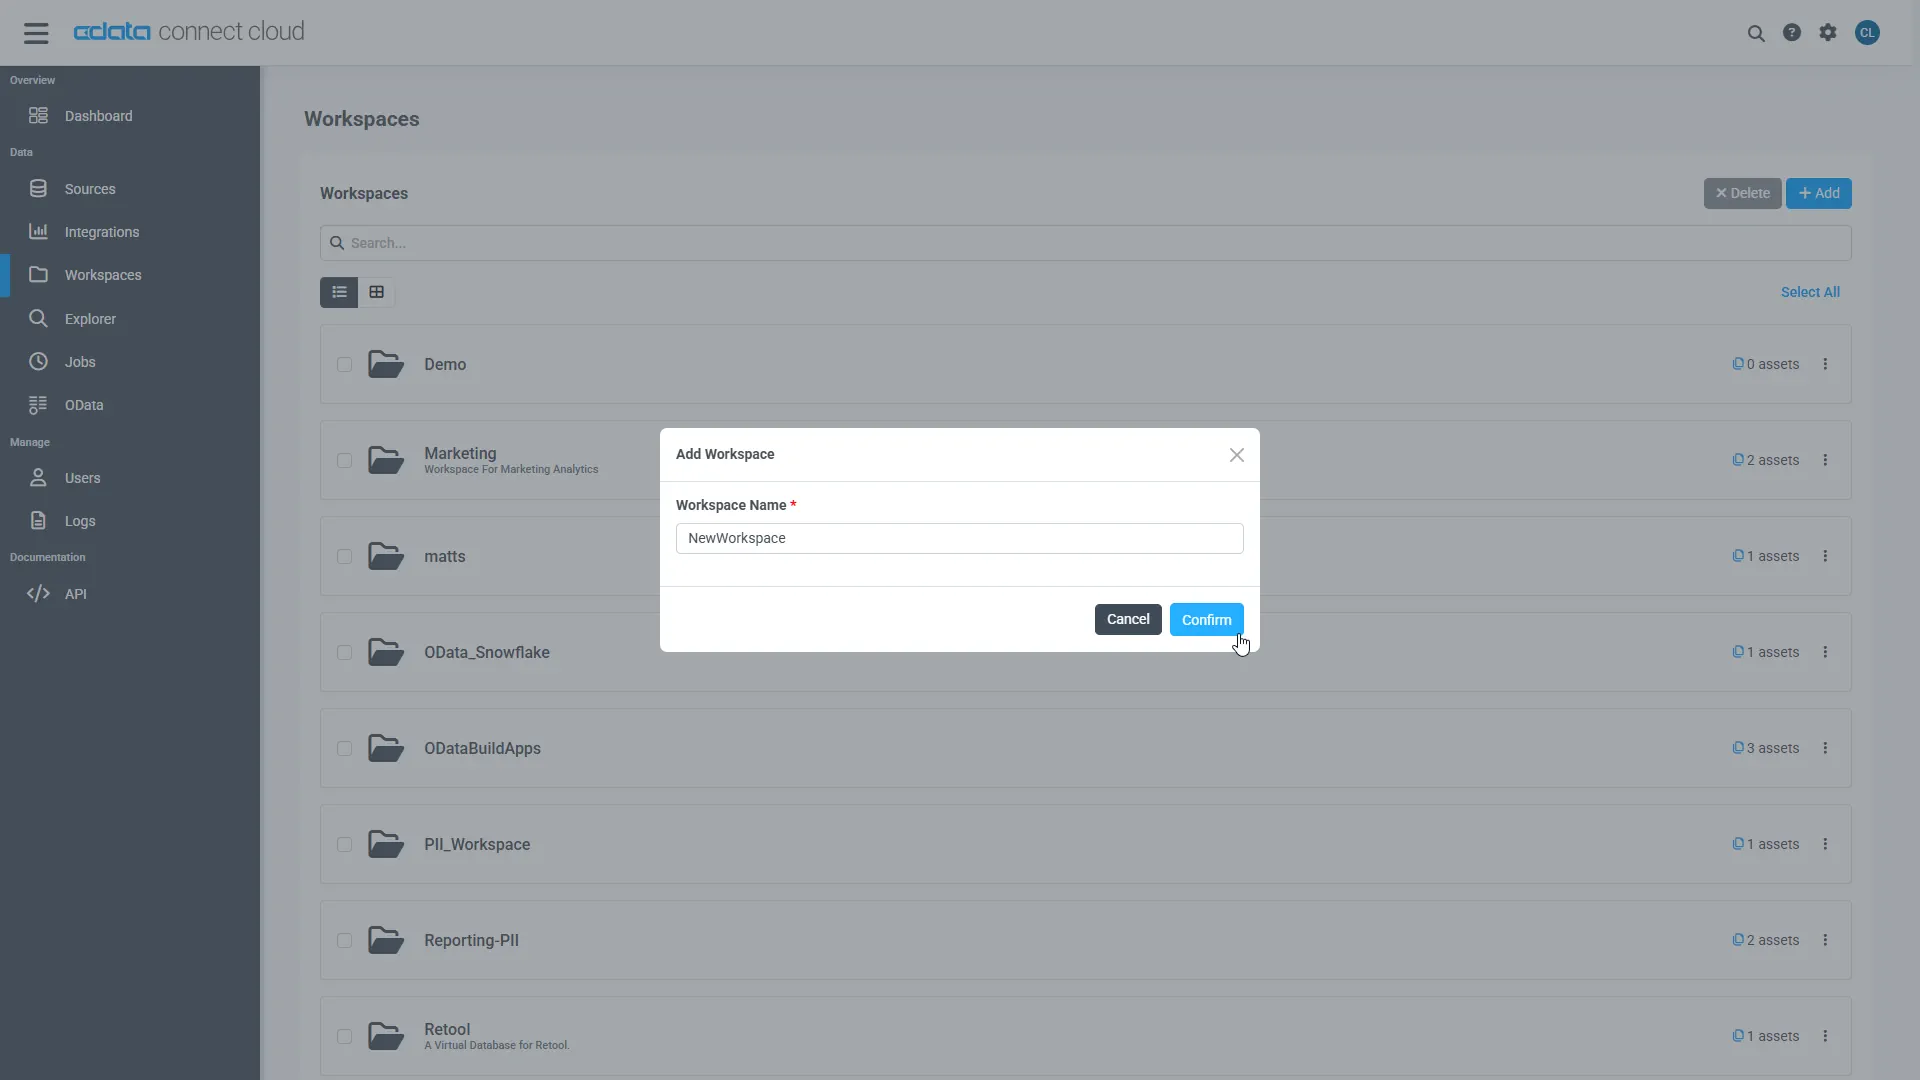
- Click Add to add new assets to the Workspace.
-
Select the Linear connection (e.g. Linear1) and click Next.
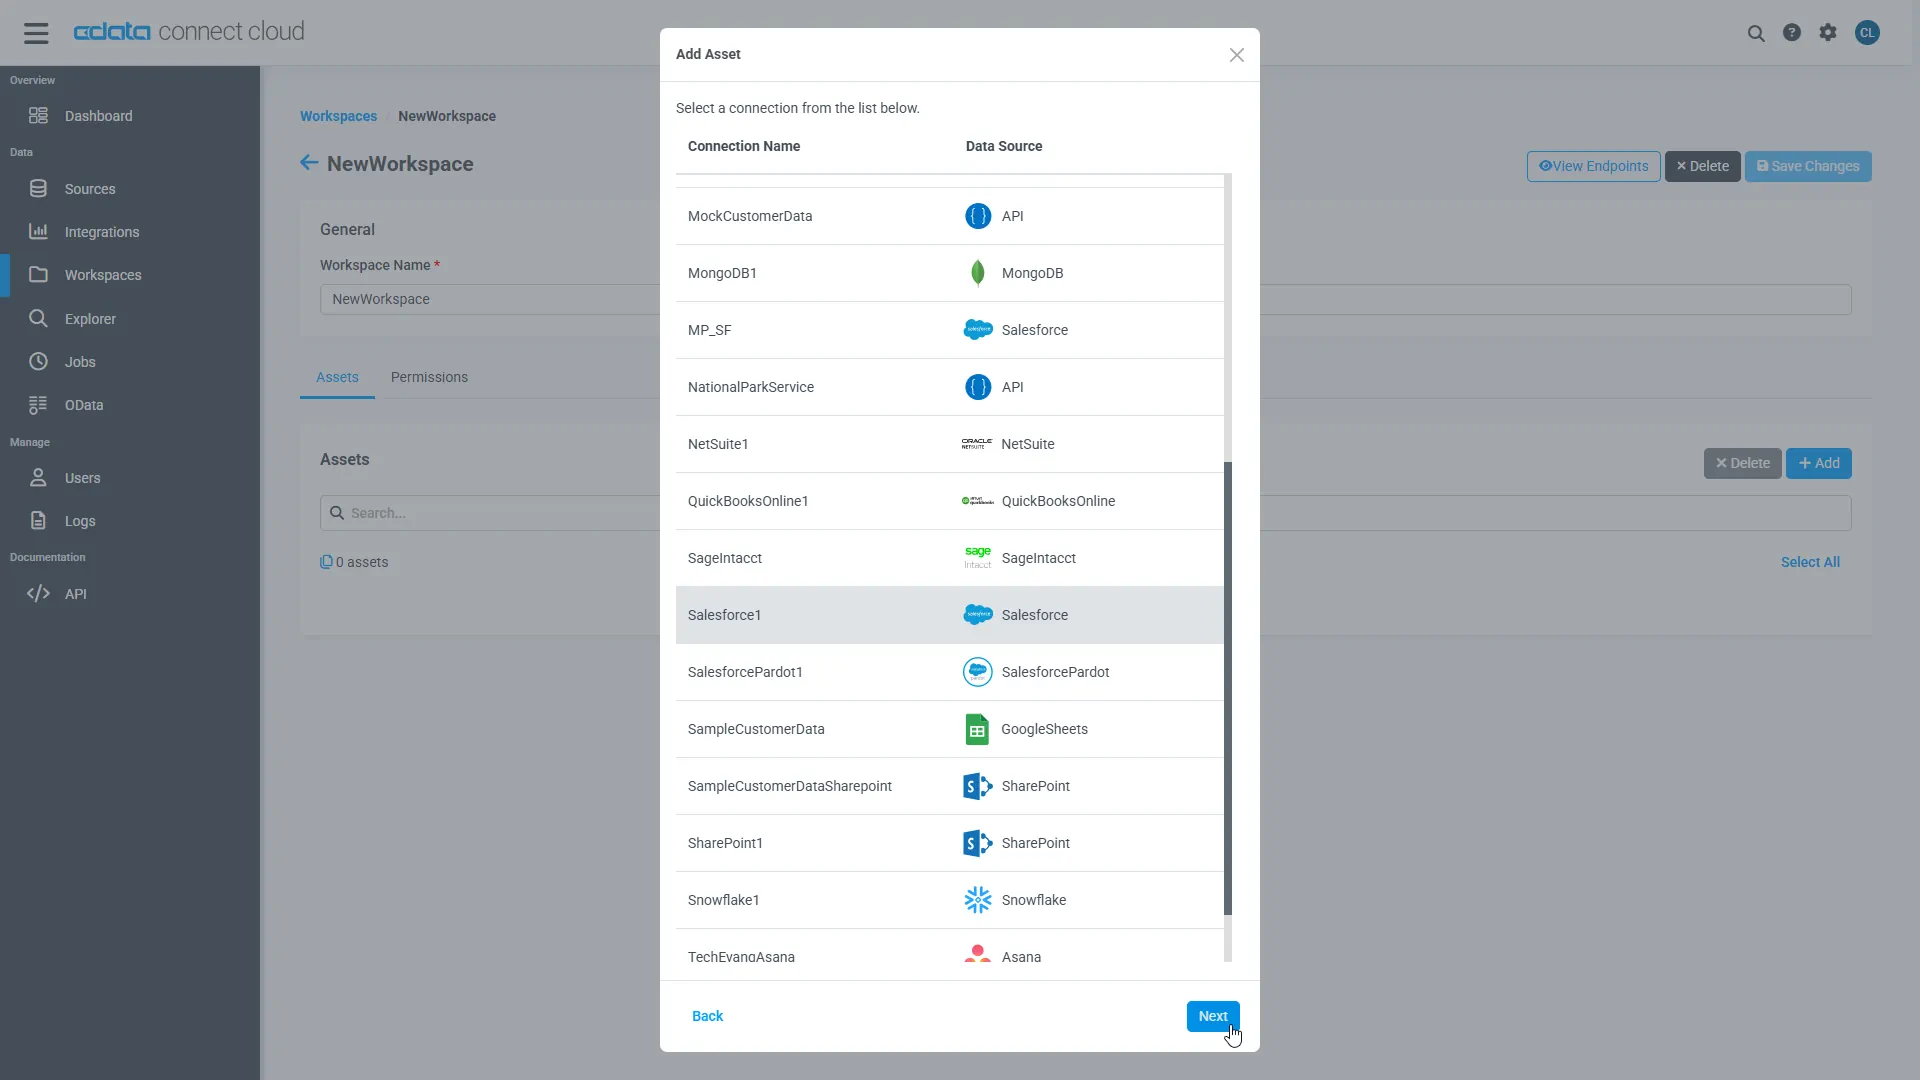
-
Select the table(s) you wish to work with and click Confirm.
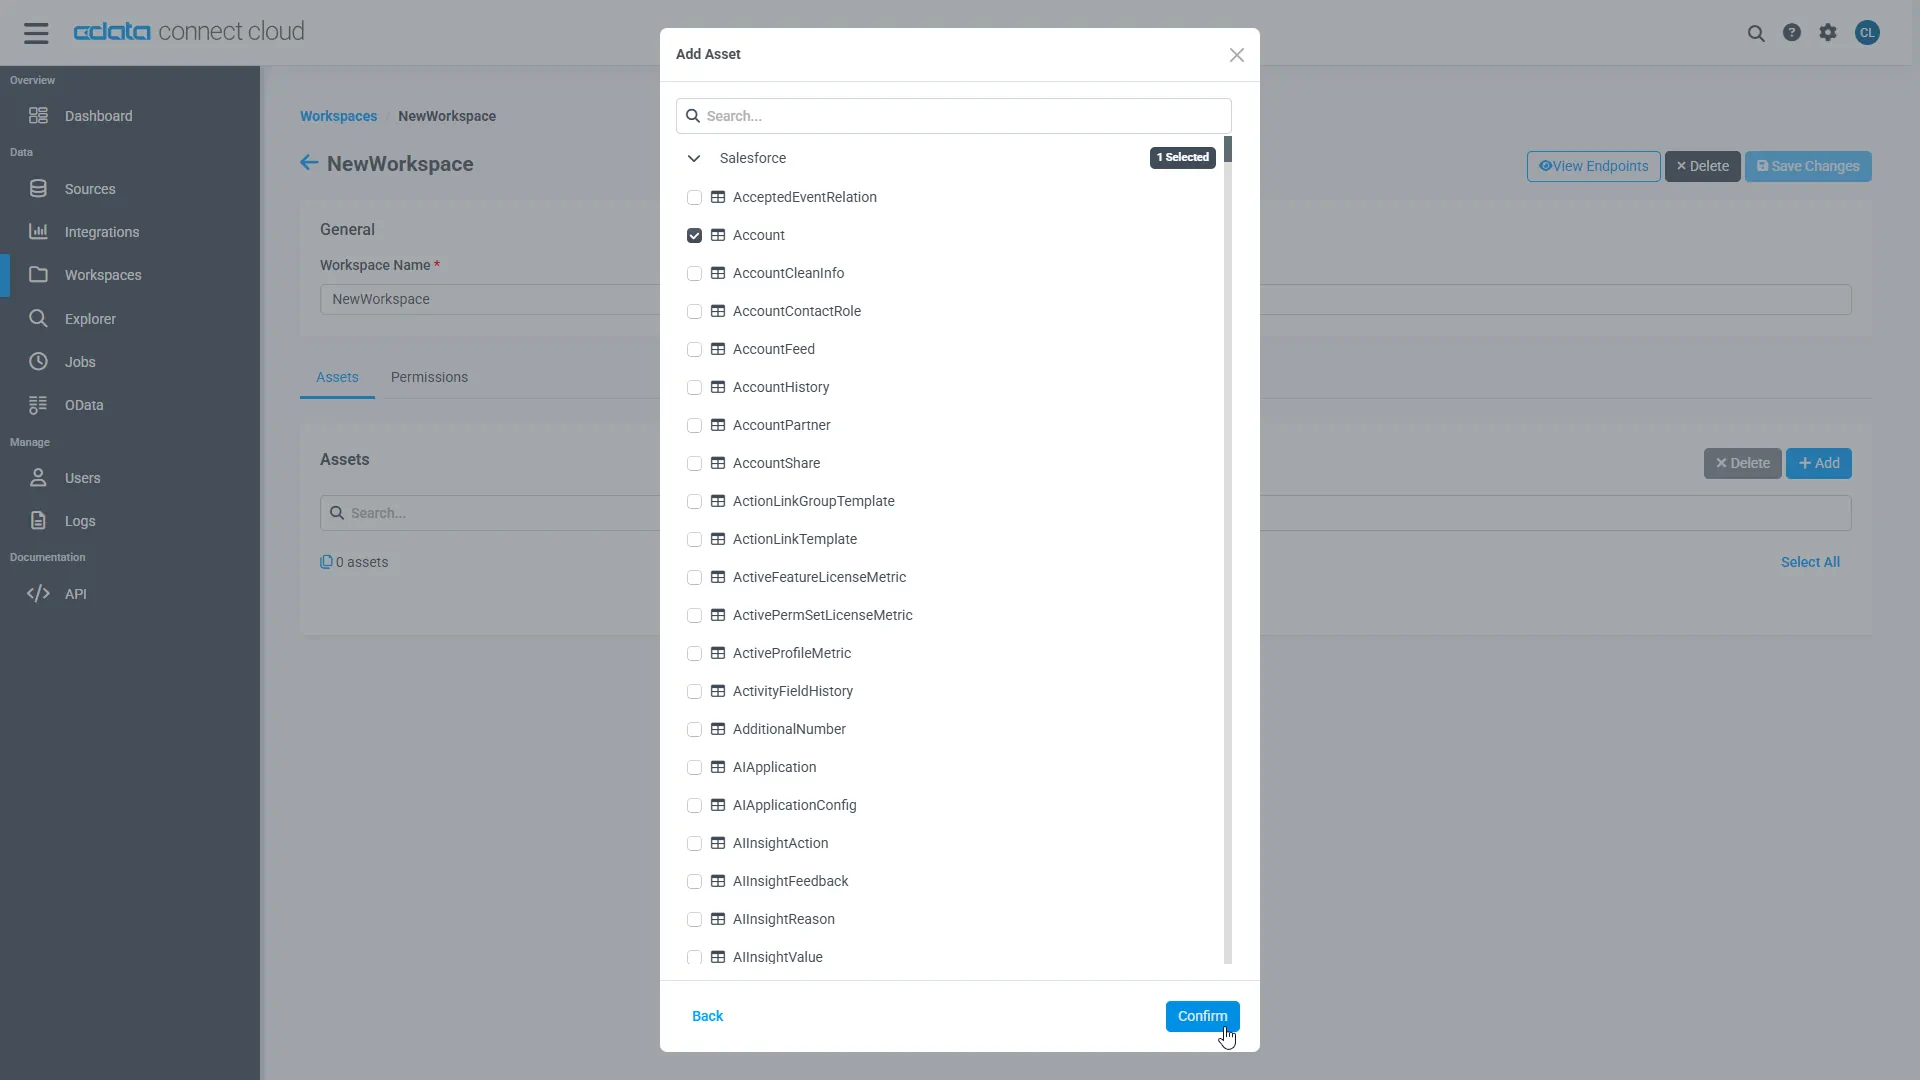
- Make note of the OData Service URL for your workspace, e.g. https://cloud.cdata.com/api/odata/{workspace_name}
With the connection, PAT, and Workspace configured, you are ready to connect to Linear data from Power Pivot.
Import Linear Tables in Power Pivot
Follow the steps below to import tables that can be refreshed on demand:
-
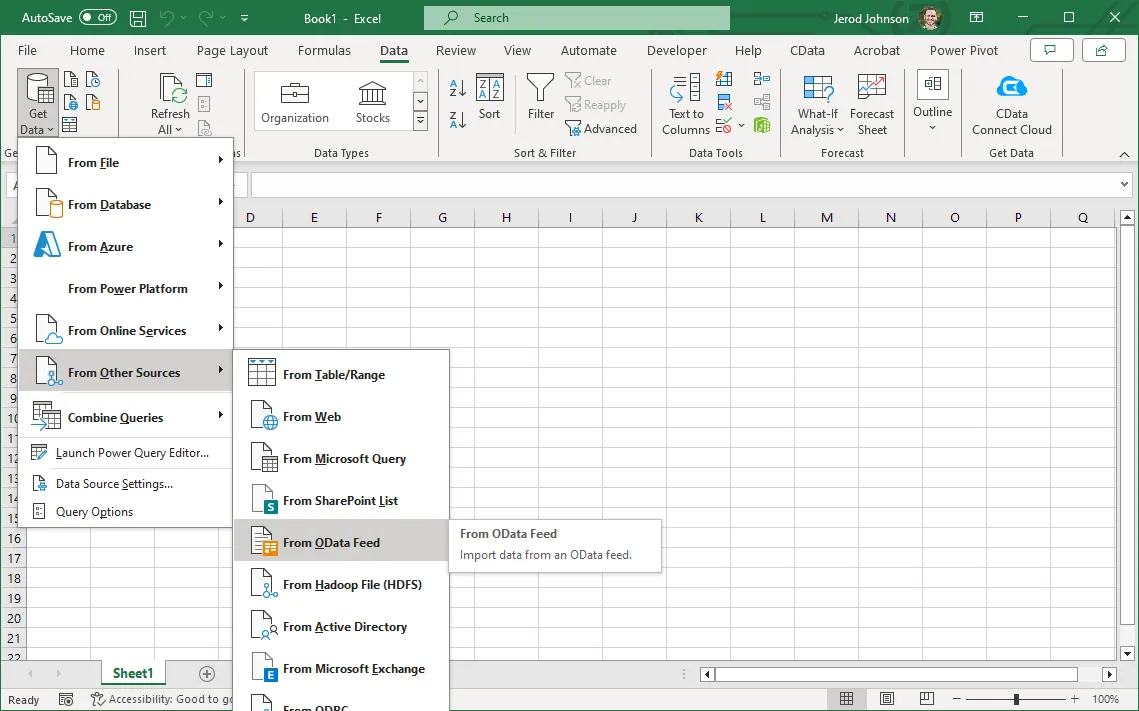
In Excel, click Data -> Get Data -> From Other Sources -> From OData Feed
-
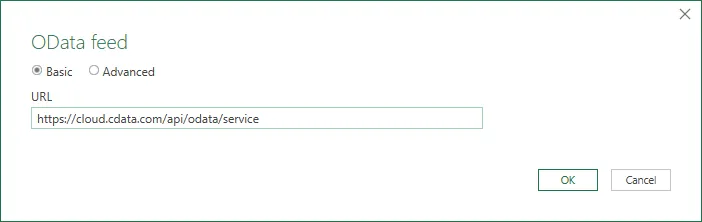
Fill out the OData feed URL (e.g. https://cloud.cdata.com/api/odata/{workspace_name})
-
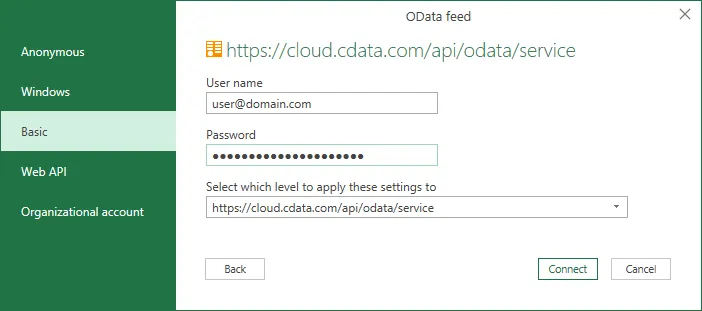
On the next screen, select Basic and configure the username and password. Password will be your PAT.
-
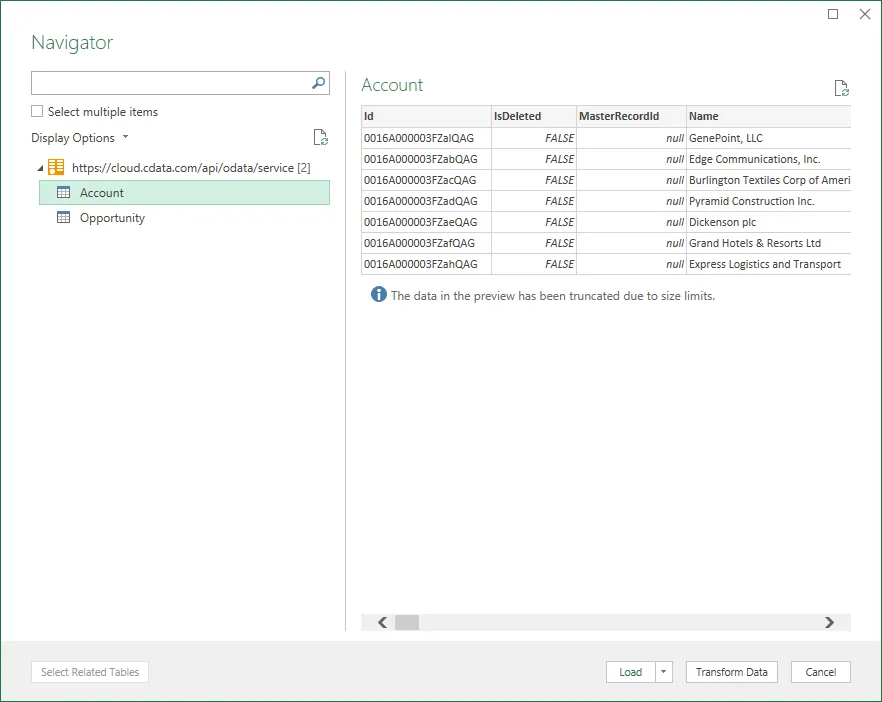
Select the tables that you would like to import into Excel
-
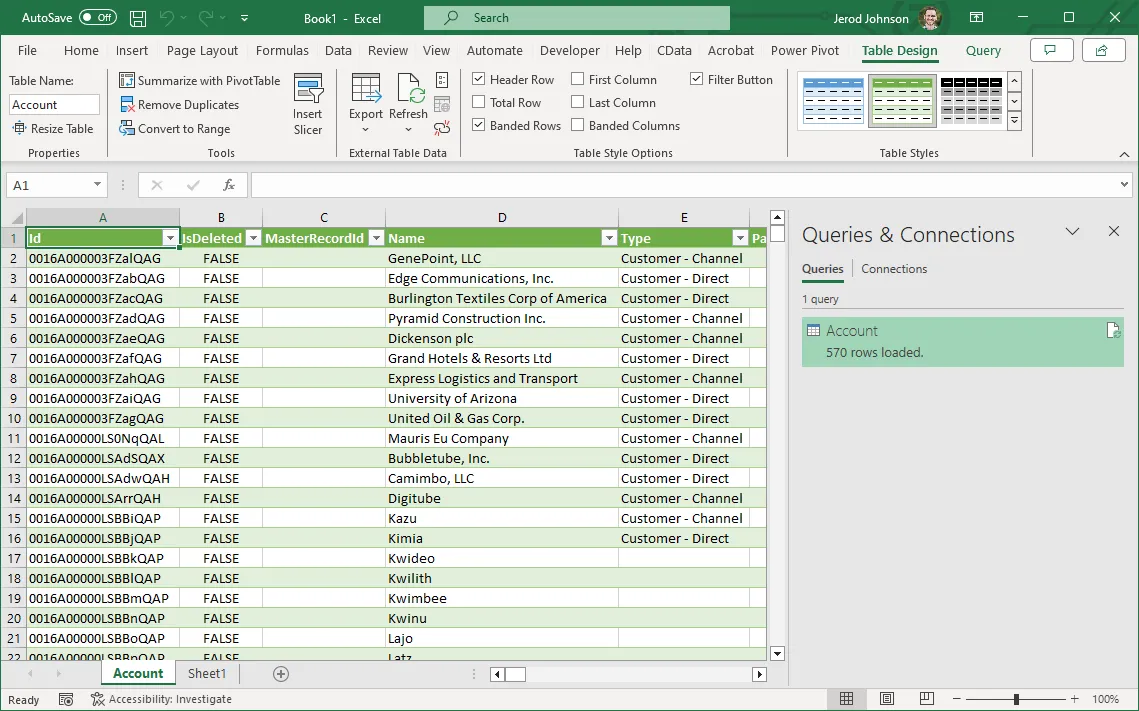
After selecting your table(s) and clicking Load, you should see the data appear in an Excel spreadsheet
-
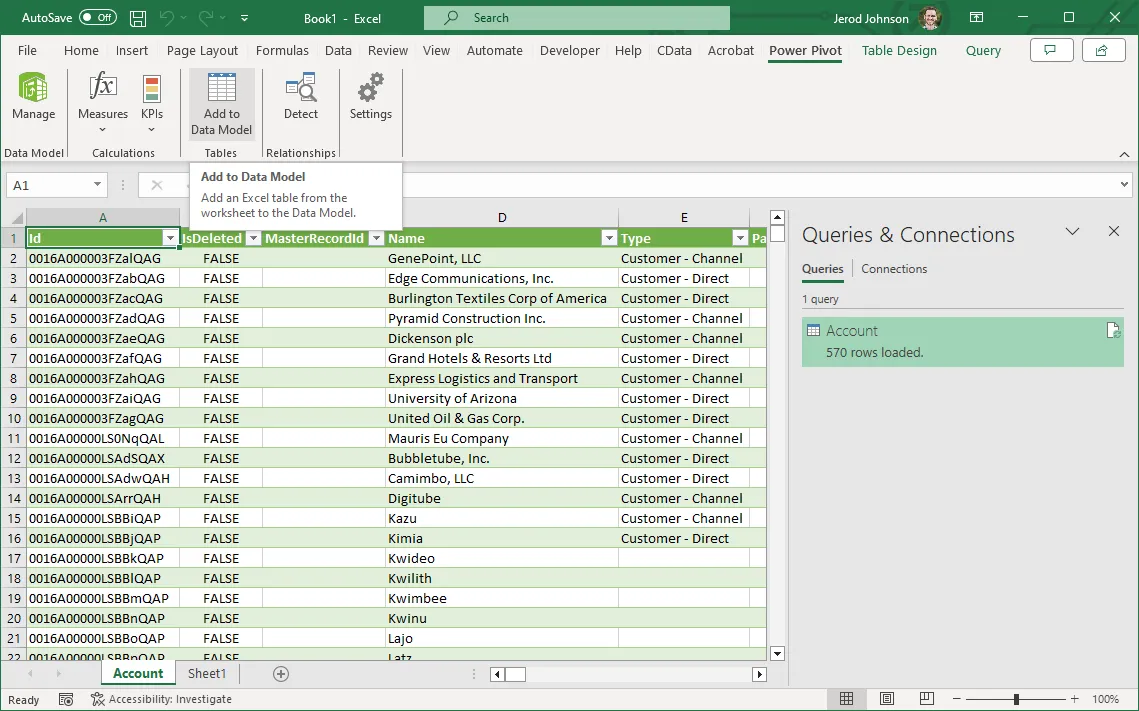
Now, click the Power Pivot tab on the ribbon, and then select Add to Data Model.
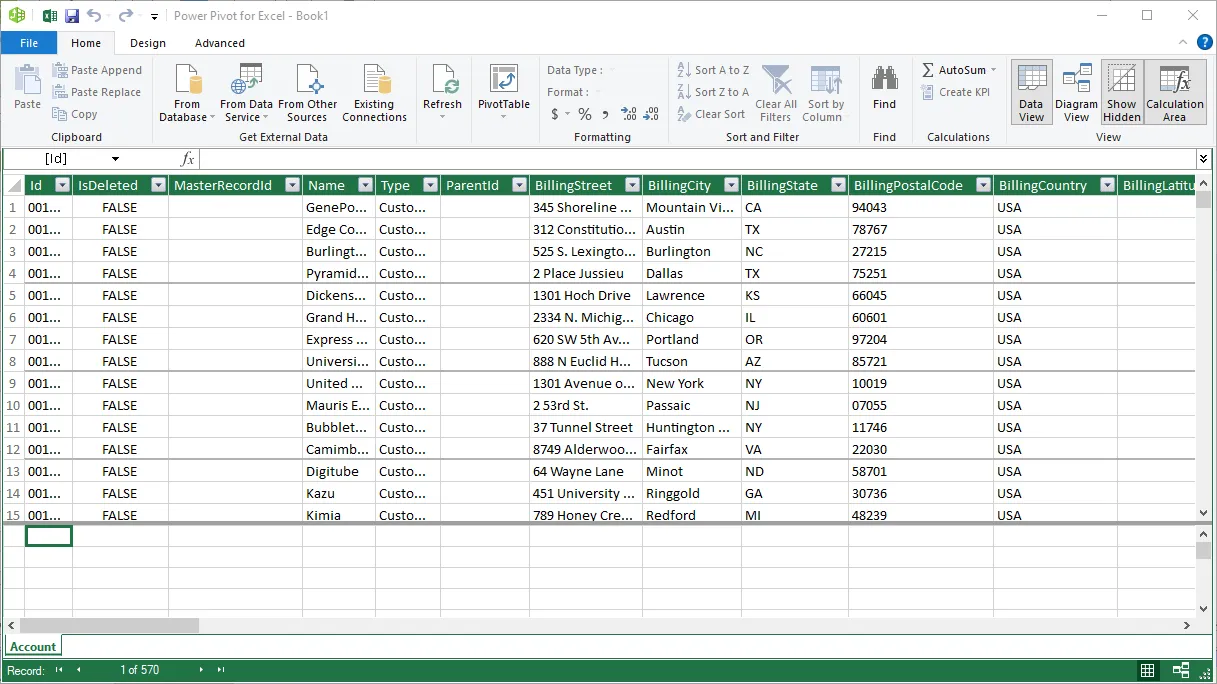
 This can now work with your Linear data in Power Pivot.
Free Trial & More Information
If you are interested in connecting to your Linear data (or data from any of our other supported data sources) from Power Pivot, sign up for a free trial of CData Connect AI today! For more information on Connect AI and to see what other data sources we support, refer to our CData Connect AI page.