




Integrate Live Linear Data into Blue Prism for Intelligent Robotic Process Automation (RPA)

Blue Prism is a robotic process automation (RPA) tool that helps businesses automate repetitive tasks, allowing employees to focus on more complex, value-added activities. Blue Prism's platform enables users to automate workflows using configurable "processes" and "objects." Its reusable Visual Business Objects (VBOs) offer templates and presets that simplify connections to applications, files, and services.
Some VBOs can connect to databases via ODBC, and when combined with the CData ODBC driver, they allow seamless integration with various data sources supported by CData. This article demonstrates how easily you can integrate Linear with Blue Prism using the VBO for ODBC and the CData ODBC Driver for Linear to create automated business workflows as needed.
Create an ODBC Data Source for Linear
If you have not already, first specify connection properties in an ODBC DSN (data source name). This is the last step of the driver installation. You can use the Microsoft ODBC Data Source Administrator to create and configure ODBC DSNs.
You can authenticate to Linear with a personal API key or with OAuth 2.0. The API key is the simplest option for connecting with your own Linear account.
Authenticating with an API Key
Set the following connection properties:
- AuthScheme: Set this to APIKey.
- APIKey: A Linear personal API key.
To create a personal API key, log in to Linear, open Settings > Security & access > Personal API keys, select New API key, and create it. Copy the key immediately, because Linear shows it only once.
Authenticating with OAuth
OAuth requires a custom OAuth application registered in Linear (Settings > API > OAuth applications), which provides the OAuthClientId and OAuthClientSecret. Two flows are supported:
- Authorization code: Set AuthScheme to OAuth, InitiateOAuth to GETANDREFRESH, and provide OAuthClientId, OAuthClientSecret, and the CallbackURL defined in your application (e.g., http://localhost:33333). The driver opens Linear in your browser so you can grant access.
- Client credentials: Set AuthScheme to OAuthClient and provide OAuthClientId and OAuthClientSecret. This authenticates the application itself, with no browser interaction, and suits machine-to-machine integrations.
By default, the driver requests the read,write scopes. The driver refreshes the access token automatically when it expires.
When you configure the DSN, you may also want to set the Max Rows connection property. This will limit the number of rows returned, which is especially helpful for improving performance when designing reports and visualizations.
Connect with Linear data and create an automation flow in Blue Prism
In this section, we'll go through the steps to connect live Linear data and create an automation flow in Blue Prism to load the Linear data into an Excel sheet.
Add VBOs for ODBC
To get started, download, and add the VBO for ODBC to Blue Prism by following these steps:
- Download the Connector for ODBC Utility Blue Prism file from the provided URL.
- A file named "Data - ODBC vx.x.x" with a ".bprelease" extension will be downloaded. Rename the file as "Data - ODBC". Make the necessary modifications and save the file with a ".bpobject" extension.
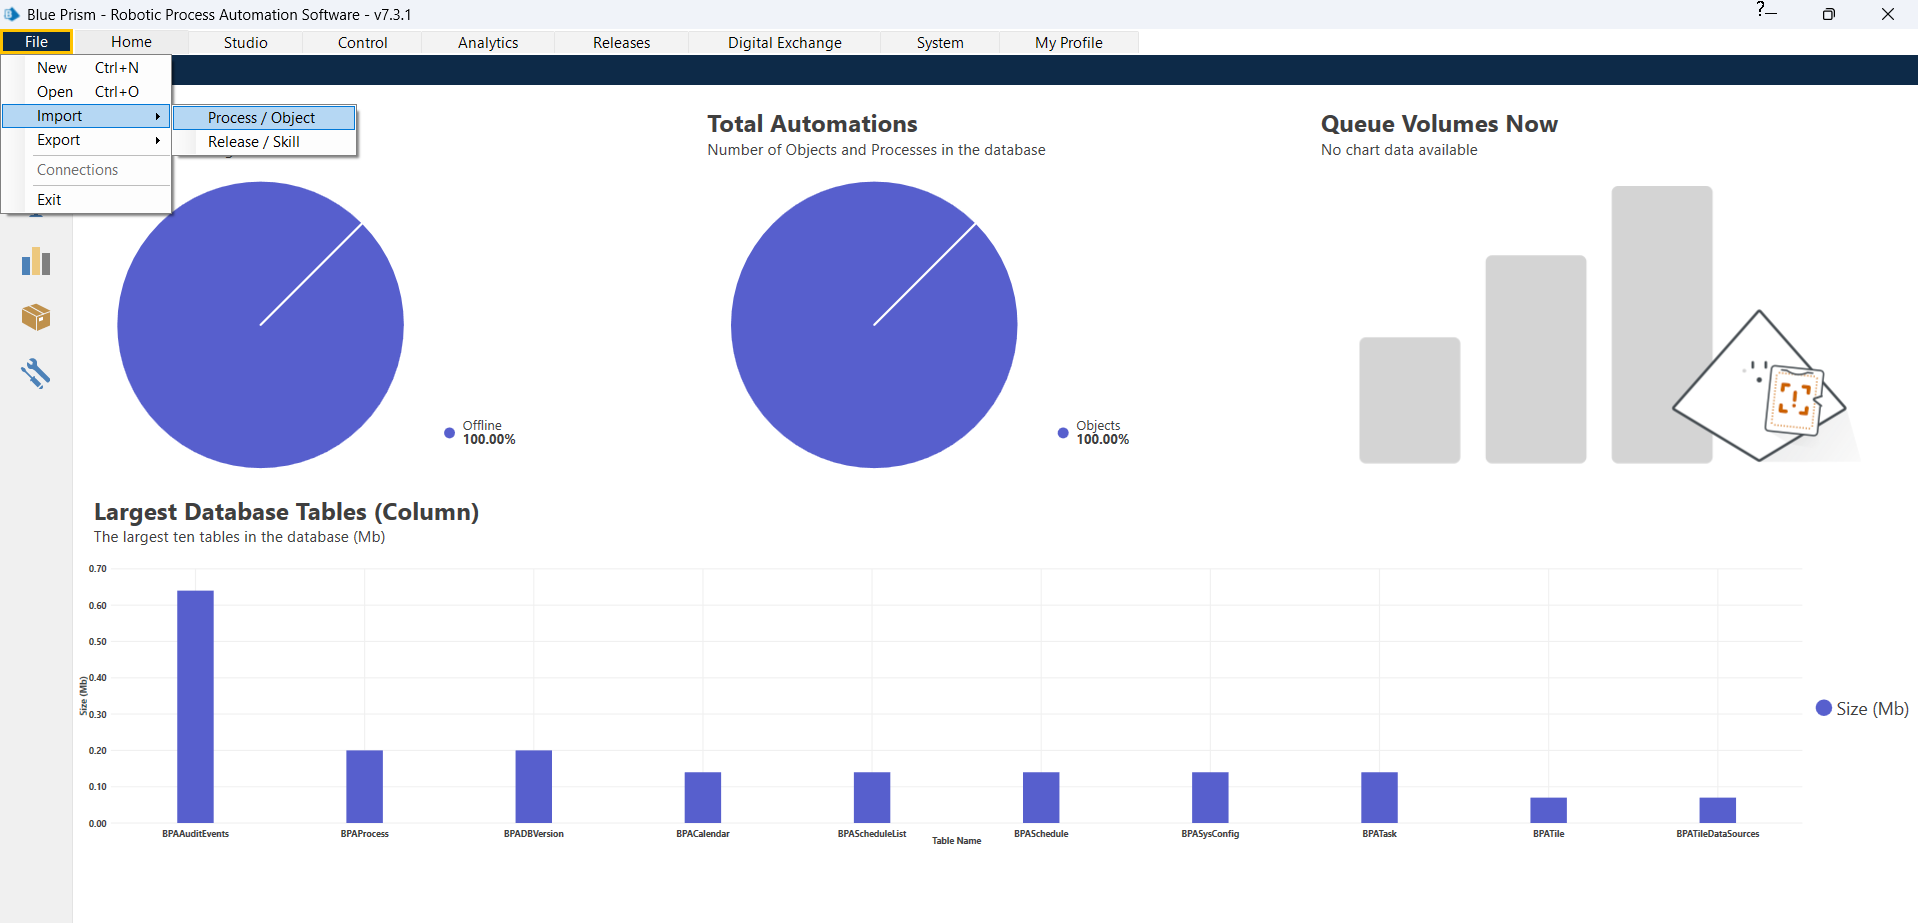
- Open Blue Prism and navigate to File > Import > Process/Object. Click Browse, select the modified file as an object, and then click Next.
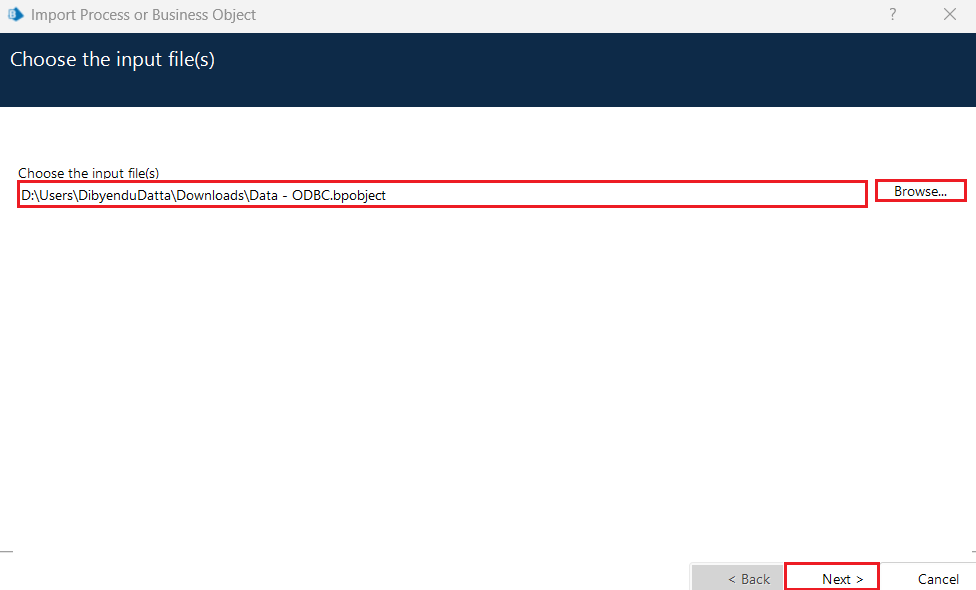
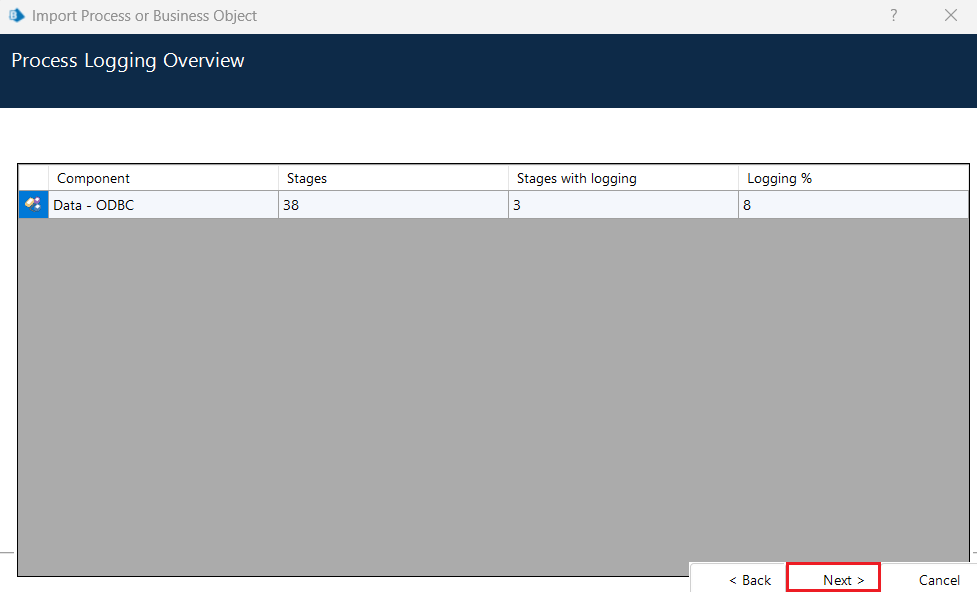
- Click on Next in the Process Logging Overview screen. The import is now successful. Click on Next again to complete the process.
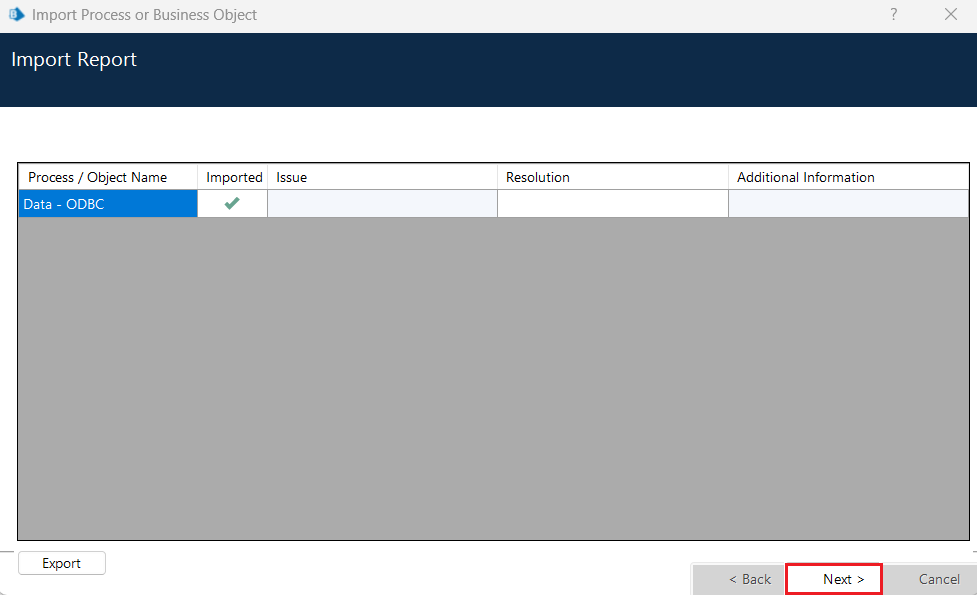
- Once the import is complete, "Data - ODBC" will be added to the object list as shown below.
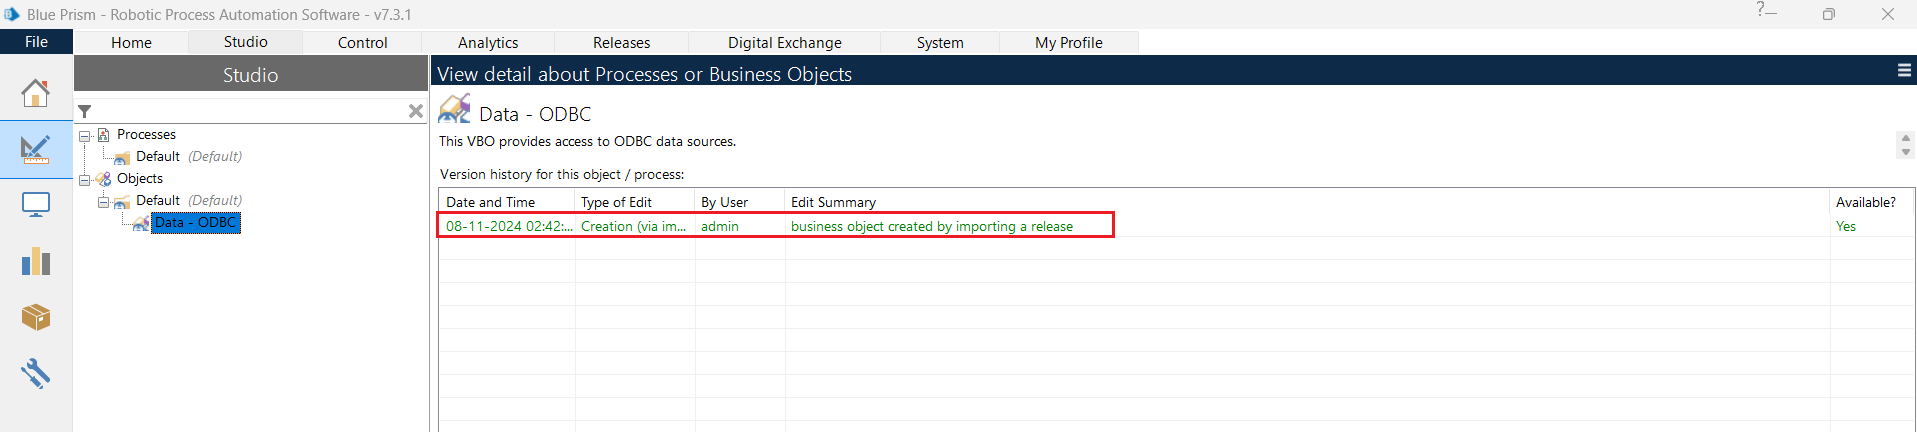
Now, you can easily connect to the CData ODBC Driver for Linear from Blue Prism and create the necessary automation workflows.
Create a new automation process
After configuring the CData ODBC driver and adding the VBO for ODBC to Blue Prism, we can create a new automation process or flow using the following steps:
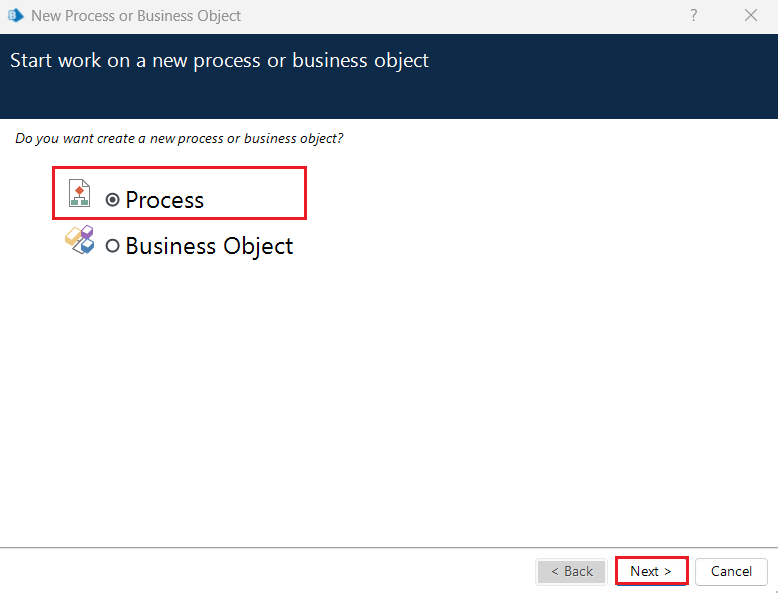
- Go to File > New. Select Process from the New Process or Business Object window and click Next.
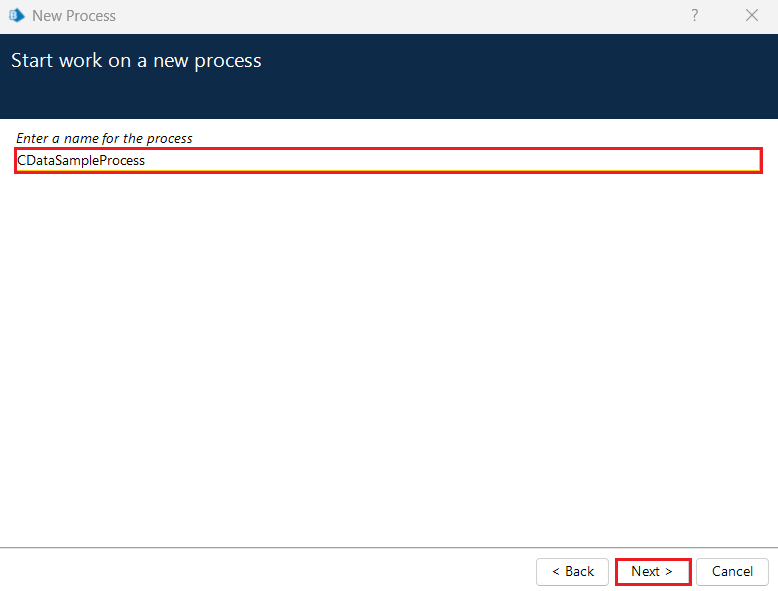
- Enter a new process name in the New Process window.
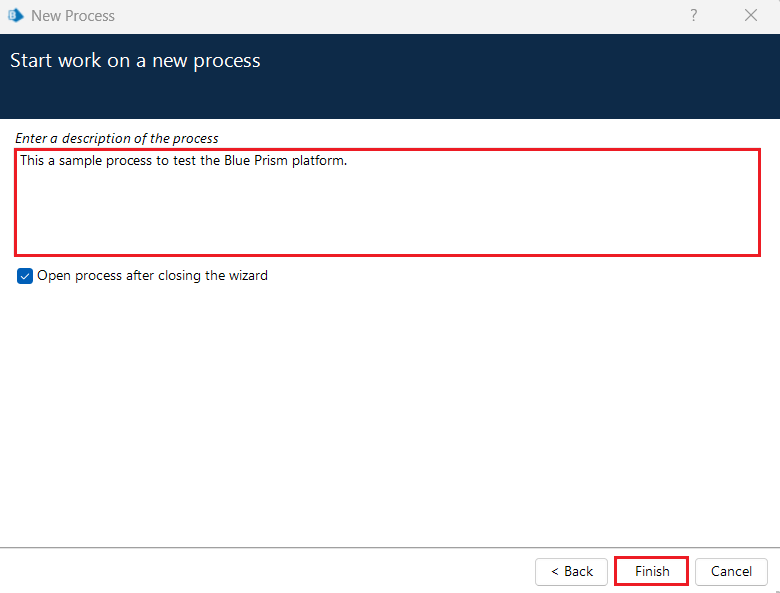
- Specify a process description if you want and click Finish.
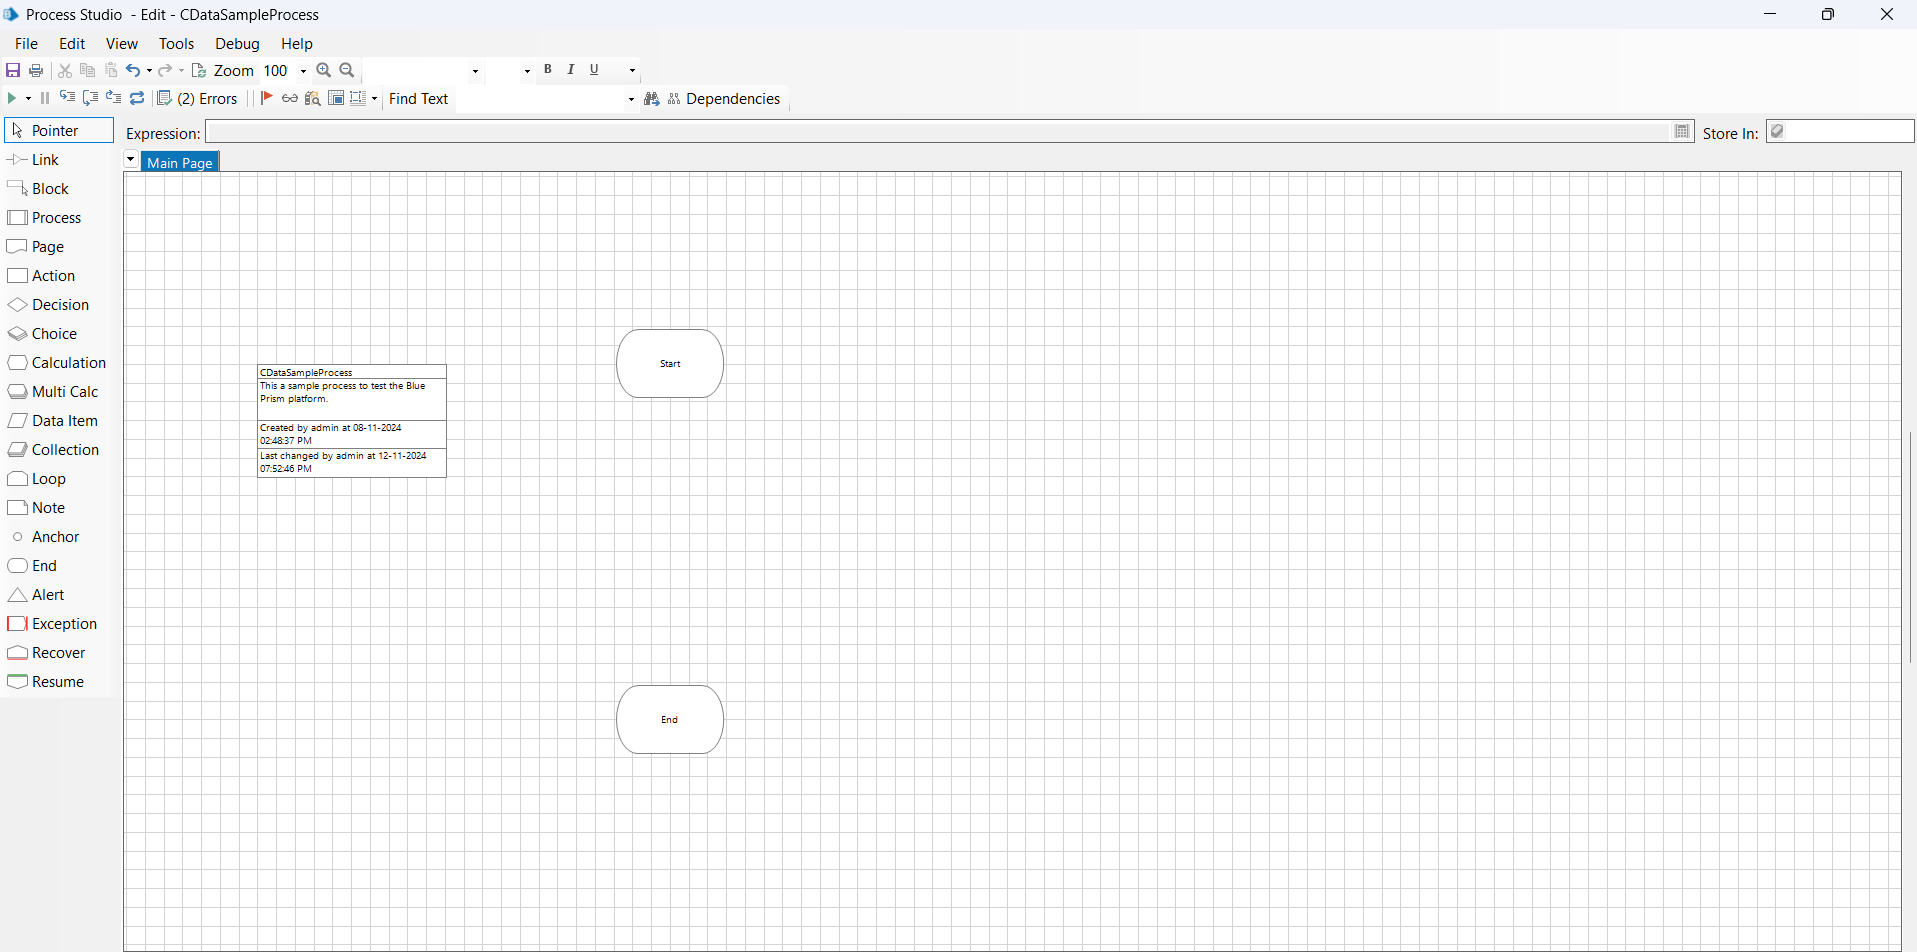
- This will launch a process initialized as follows:
Add ODBC to the process
Processing the ODBC connection involves three main stages. While the middle stage handles the actual data operations, preparatory and concluding steps are also necessary to create a complete flow in Blue Prism.
- Open process: Establishes a new connection.
- Execute process (ExecuteNonQuery): Executes SQL commands or INSERT statements.
- Close process: Terminates the connection.
Add a process to open ODBC
First, add an open process for ODBC to use the connection already made on CData ODBC Driver for Linear.
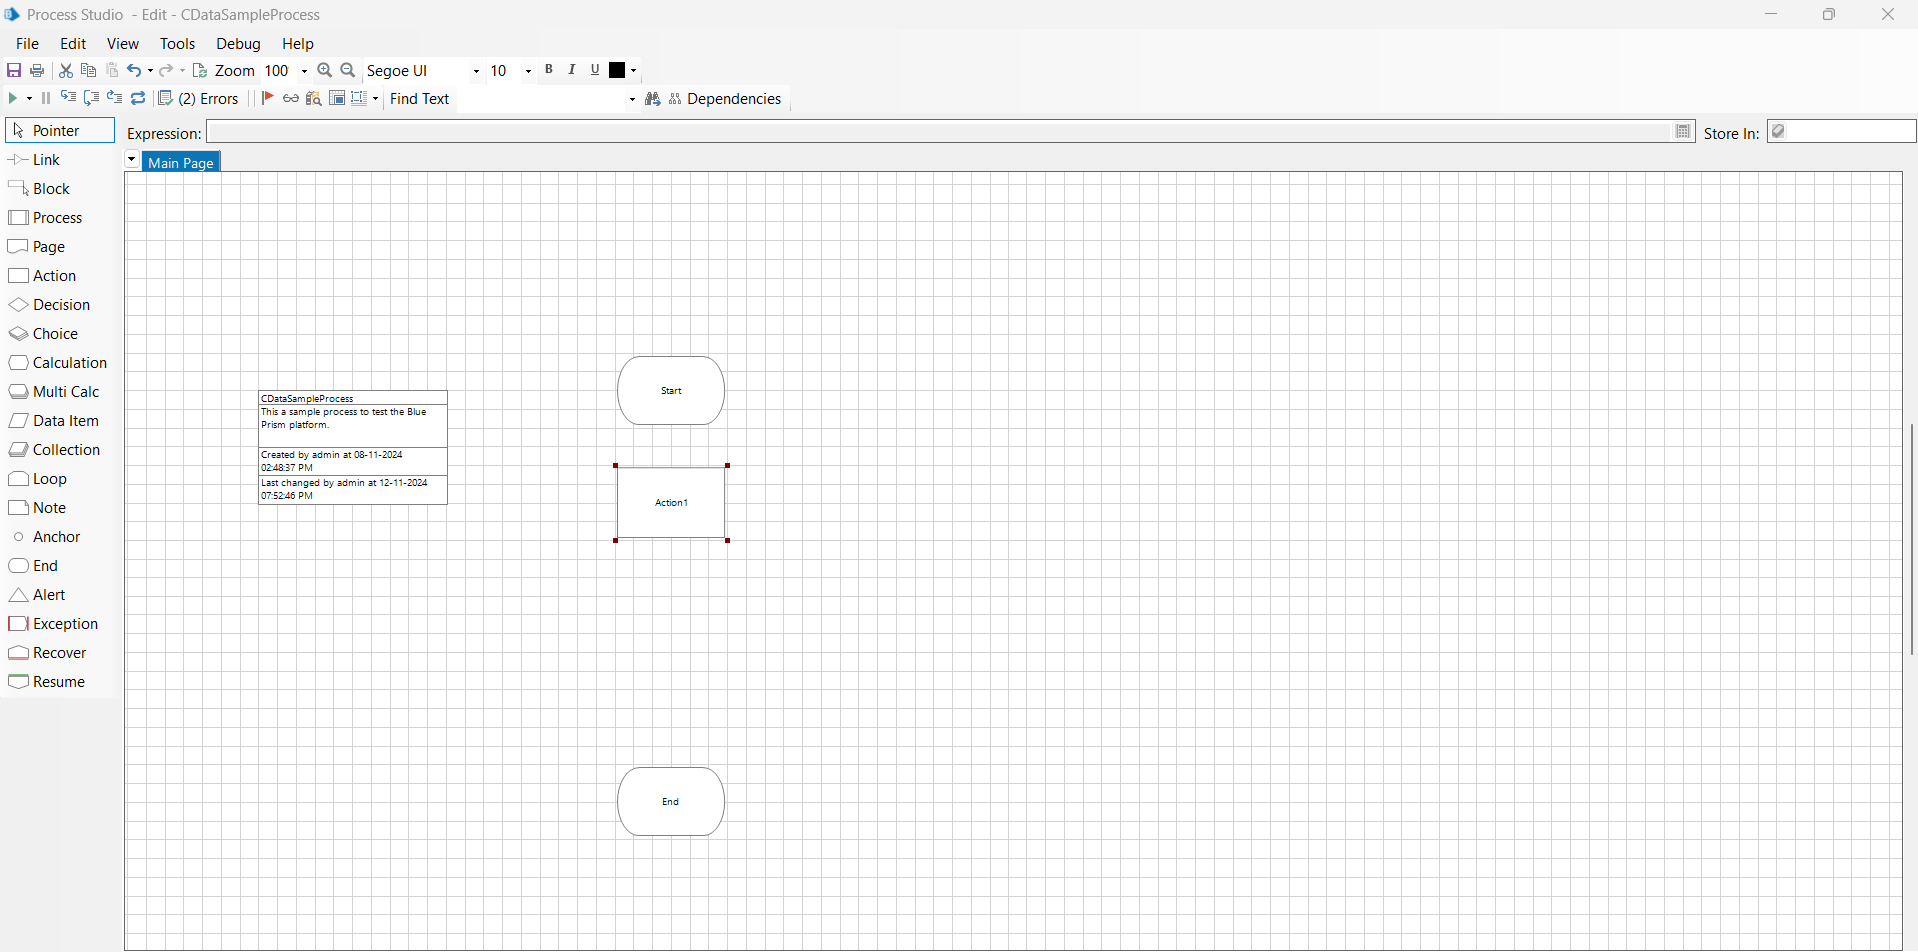
- Place Action decision block on the Blue Prism canvas from the left panel and double-click on it to open the settings screen.
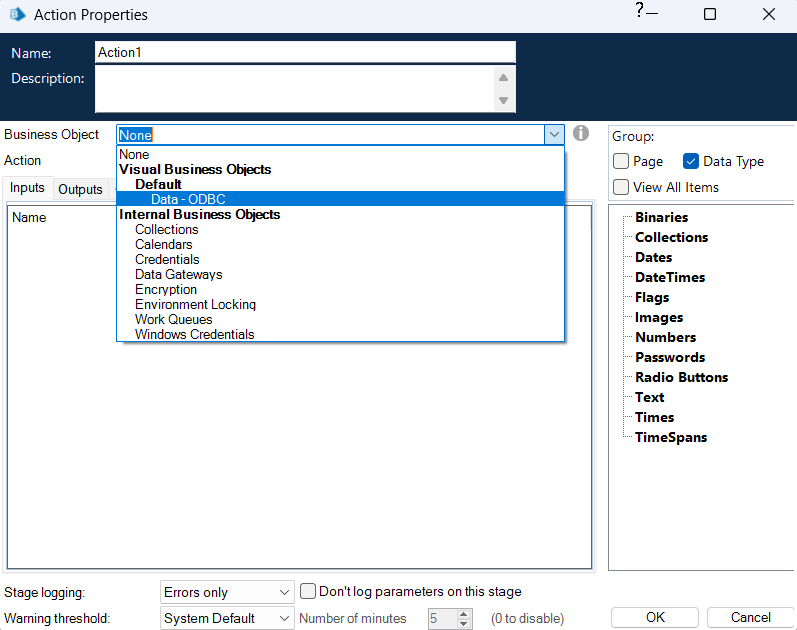
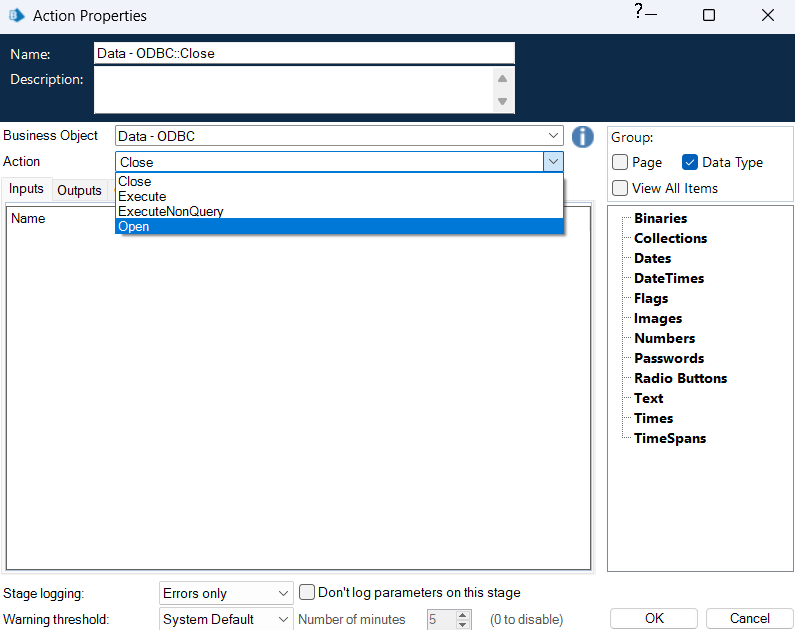
- From the list of business objects, select the "Data - ODBC" object you just imported, then choose "Open" from the list of actions.
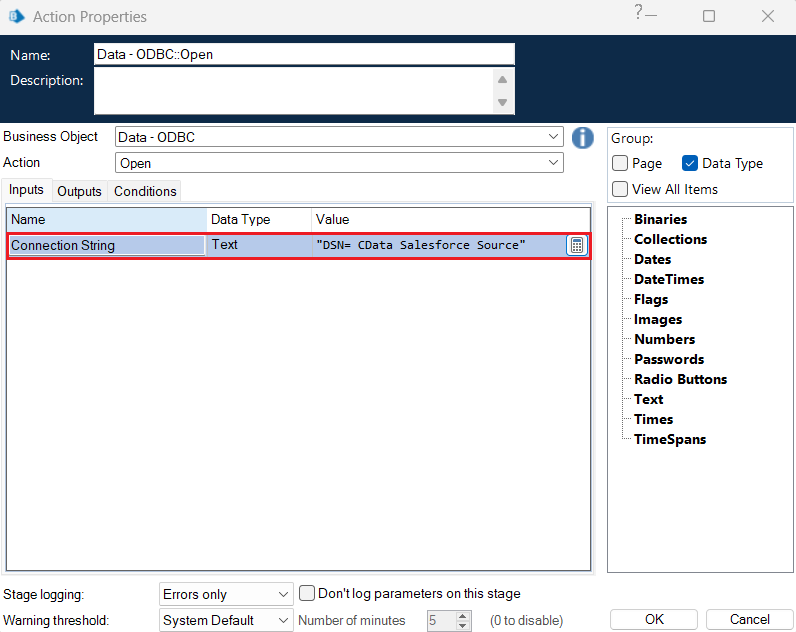
 The Open action requires a Connection String as an input parameter in the Inputs tab. Enter the DSN name of the CData ODBC driver you configured, using the format: "DSN=CData Linear Source".
Note: Click the Expression Editor button on the right, then click Validate to check if the added expression is correct. Use the same method to check all the expressions used in this article.
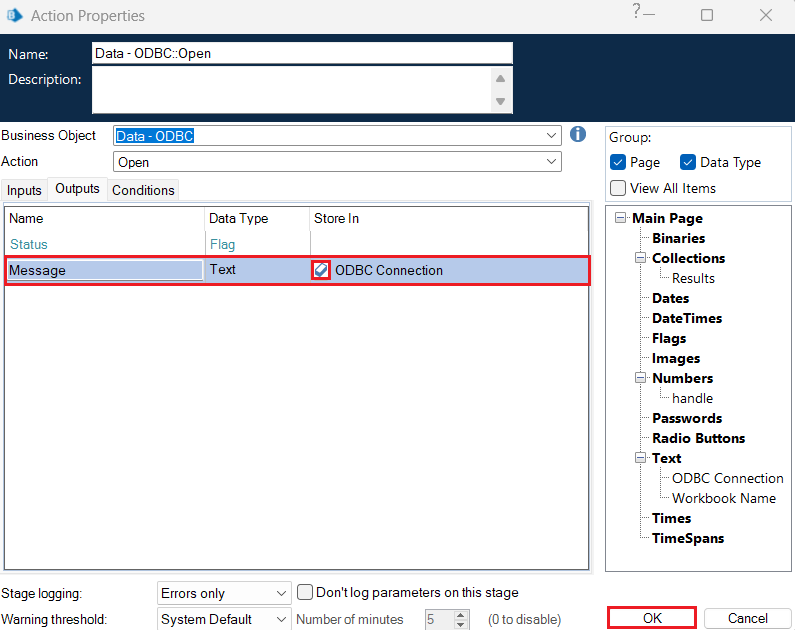
- Click on the Outputs tab and edit the output message as "ODBC Connection". Click OK to save the process.
Add a process to retrieve data via ODBC
Next, let's add a process to retrieve data from Linear.
- Place another Action block on the canvas below the previous one.
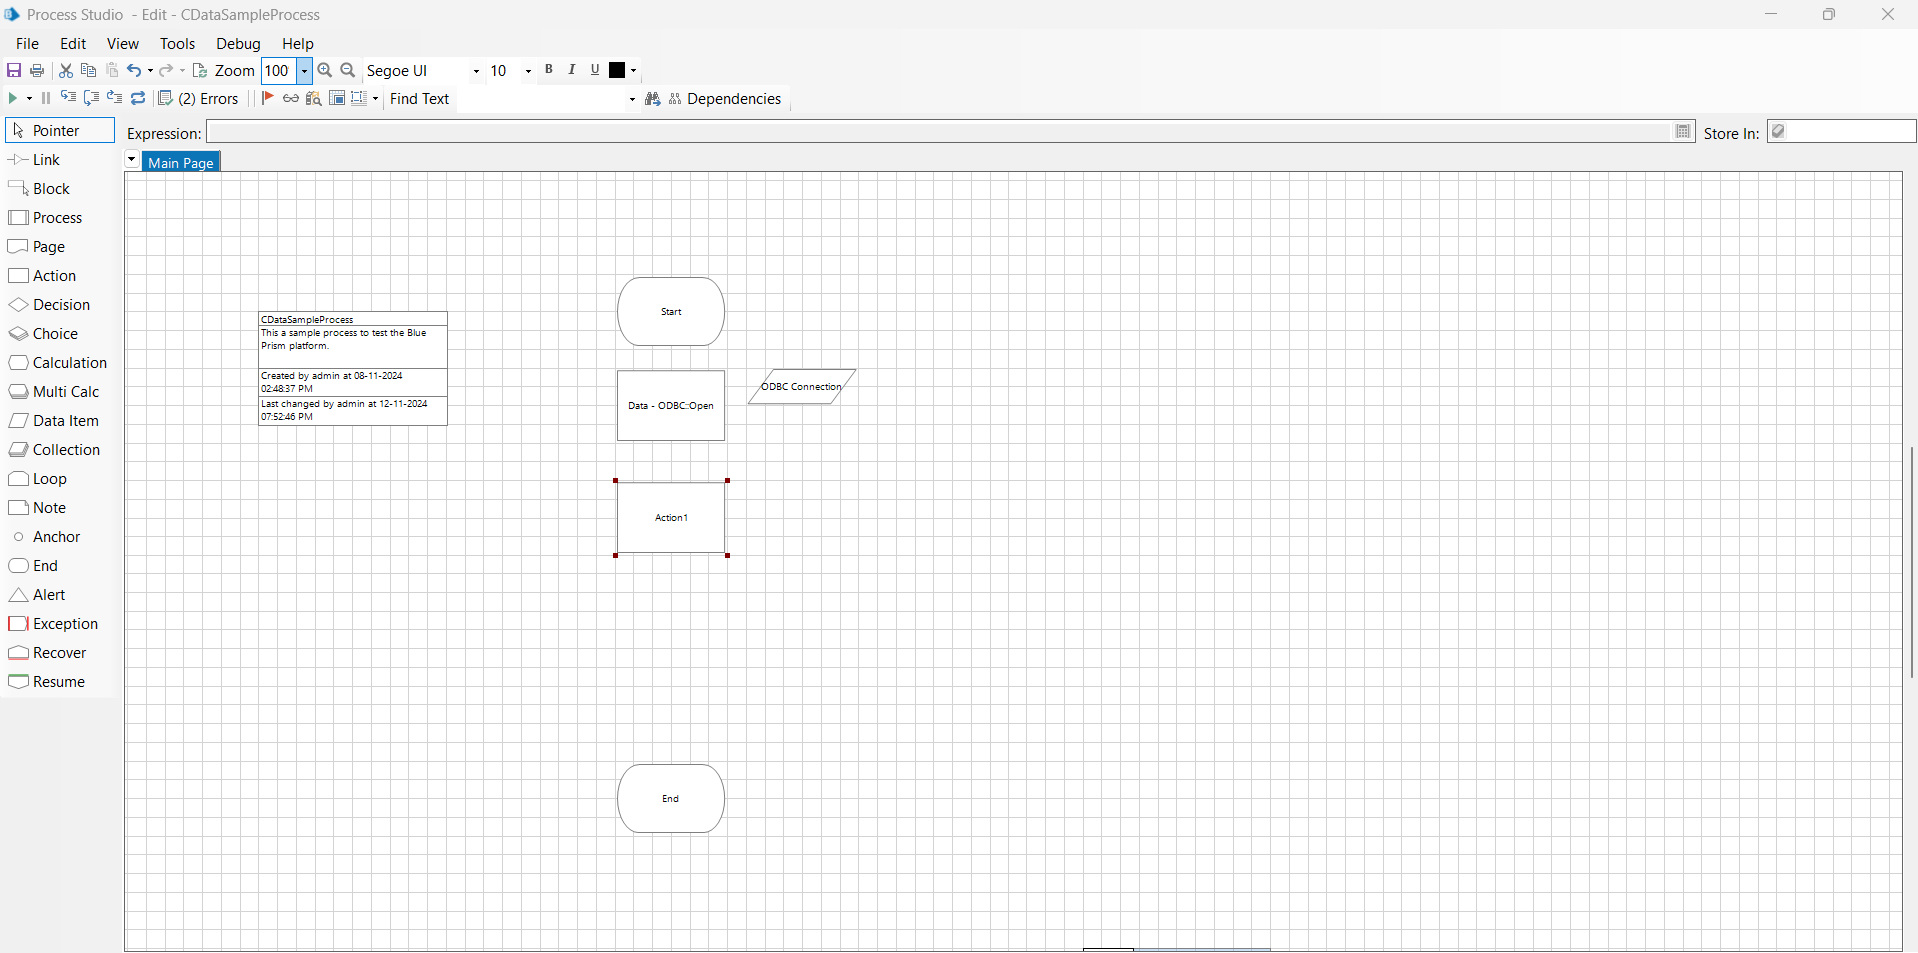
- Select "Data - ODBC" from the list of business objects, then choose "Execute" from the list of actions. By selecting "Execute", you can specify SQL commands to retrieve data.
- In the Inputs tab, enter a SQL query within double quotes in the Query String section to retrieve data from Linear. For example:
SELECT * FROM [Linear].[Team]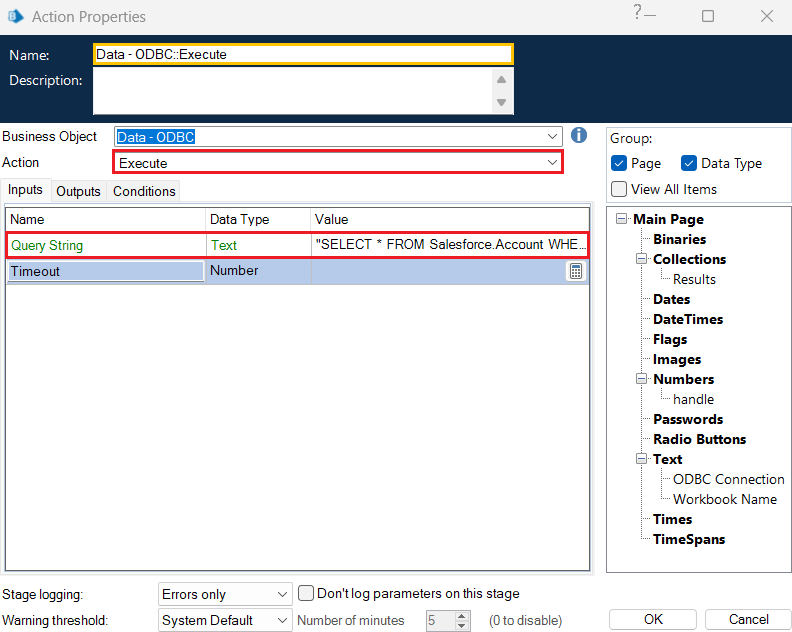
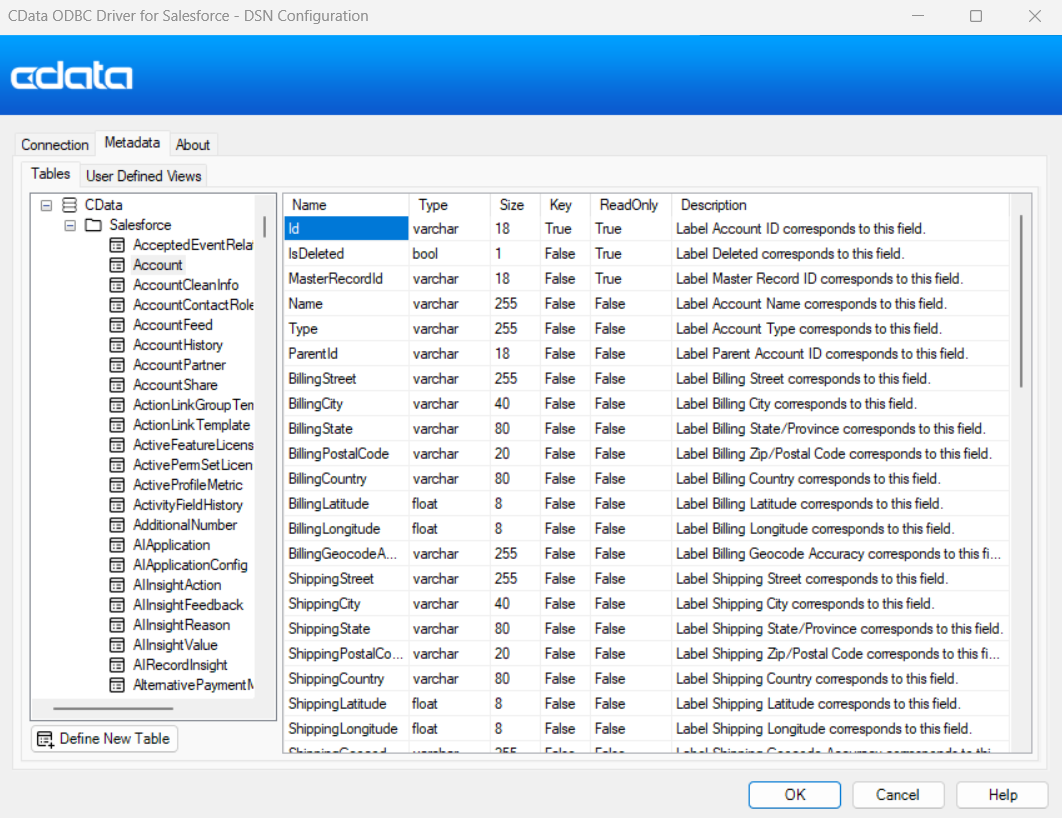
NOTE: The information about the tables and columns used in the SELECT statement can be found in the "Tables" tab of the ODBC DSN.
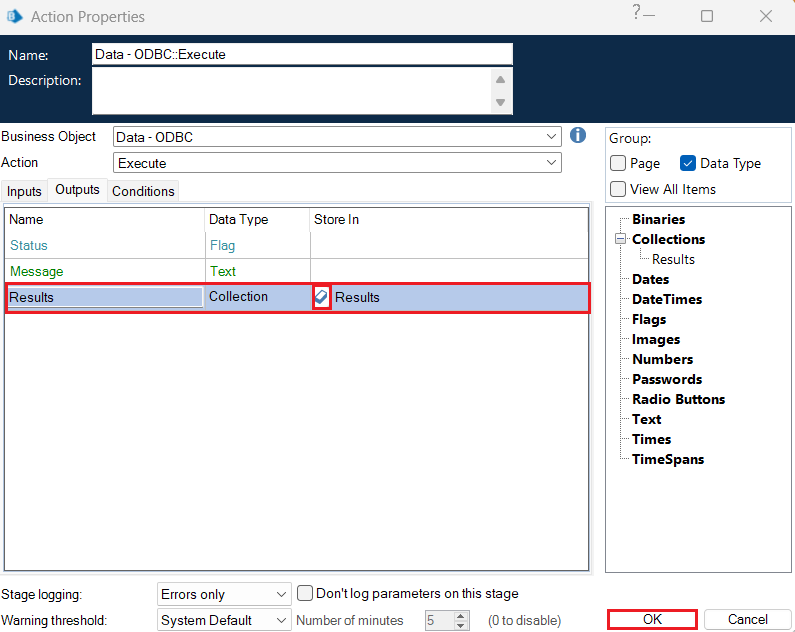
- Additionally, the processing results are stored in variables to effectively manage the outcomes in Blue Prism. To create an output variable, click the Results variable icon in the Output tab and then click OK.
Add a process to close ODBC
Finally, add a close routine to terminate the ODBC processing and release the connection.
- Place an Action block on the canvas again.
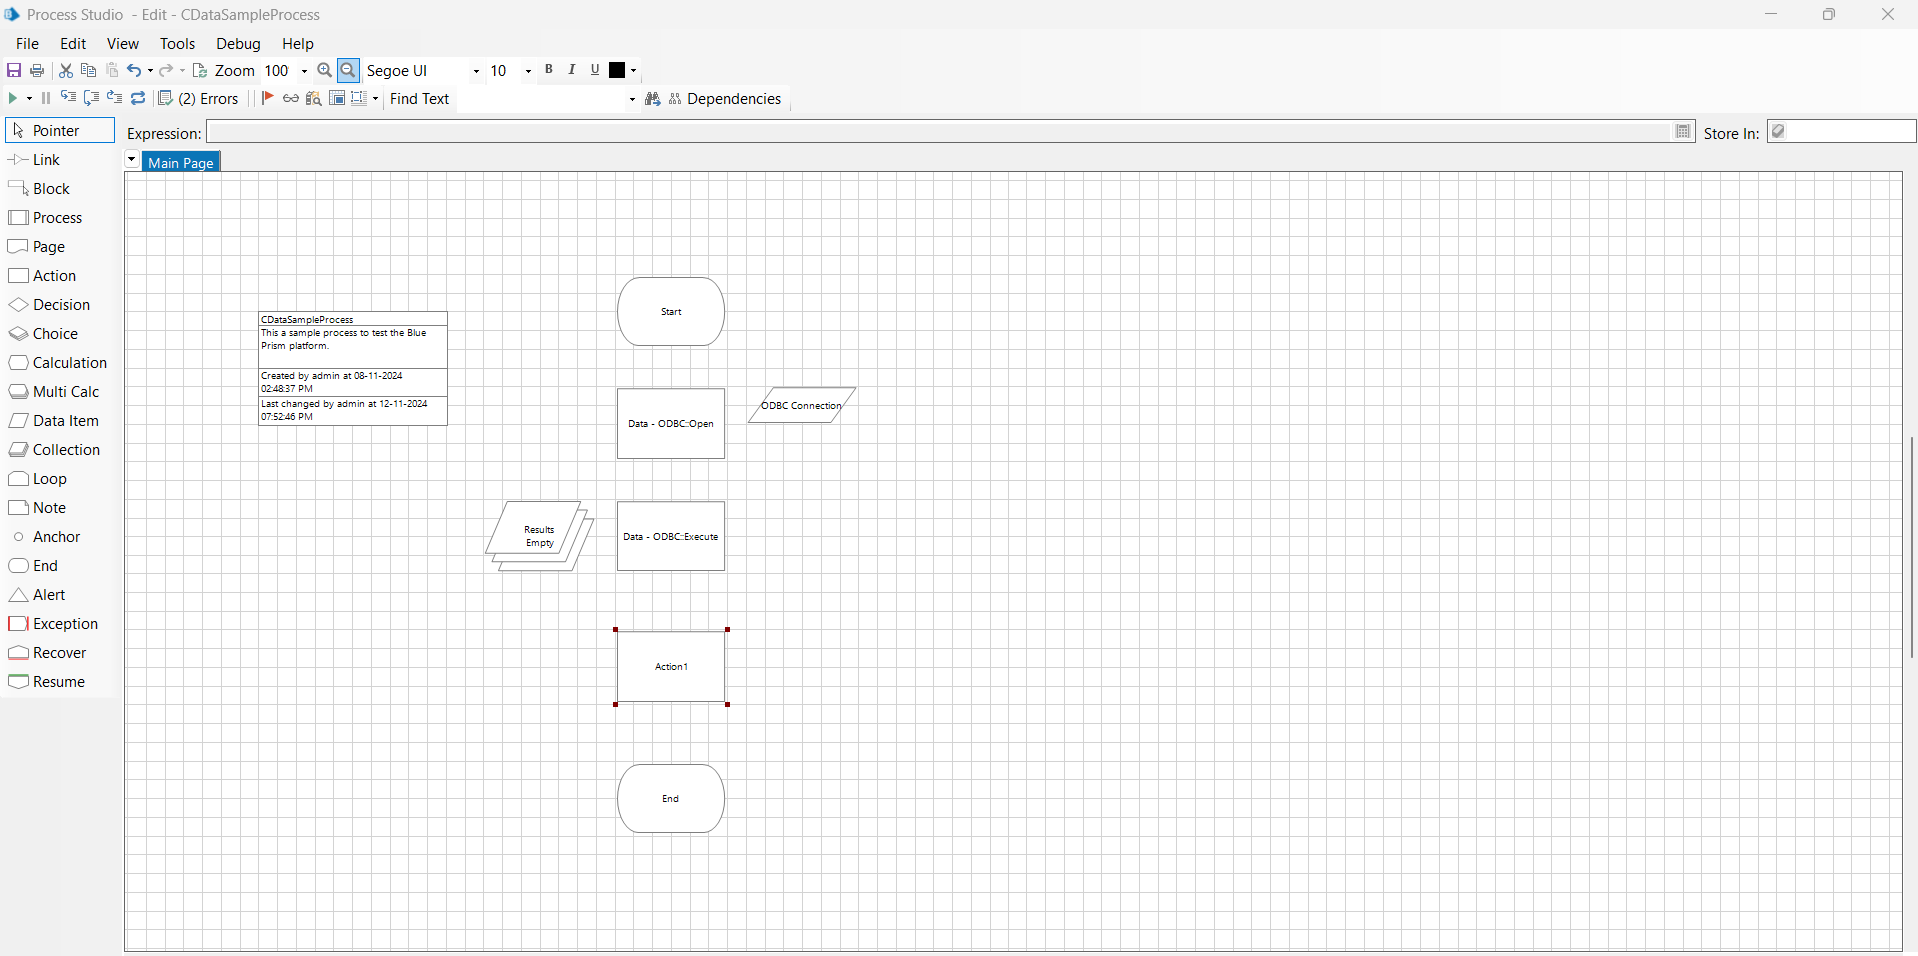
- Select "Data - ODBC" from the list of business objects and "Close" from the list of actions. There are no specific parameters to configure for Close.
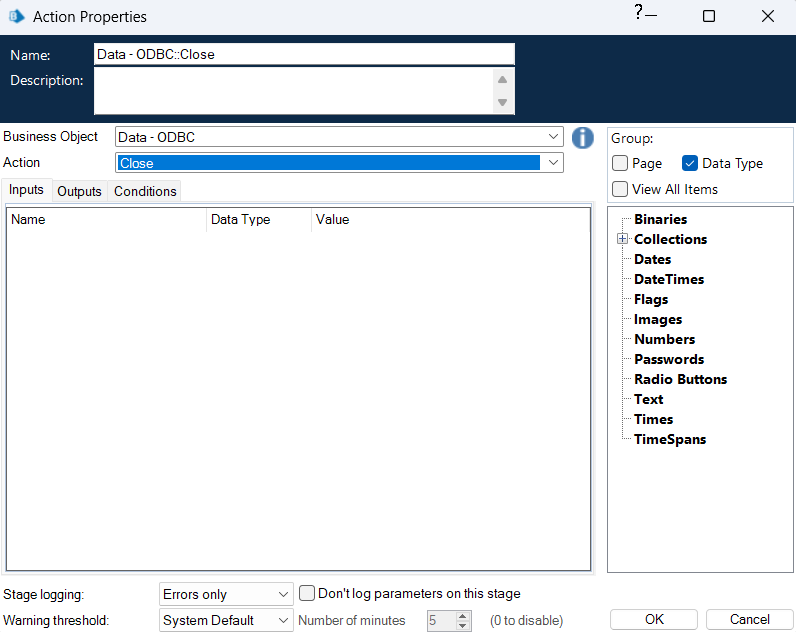
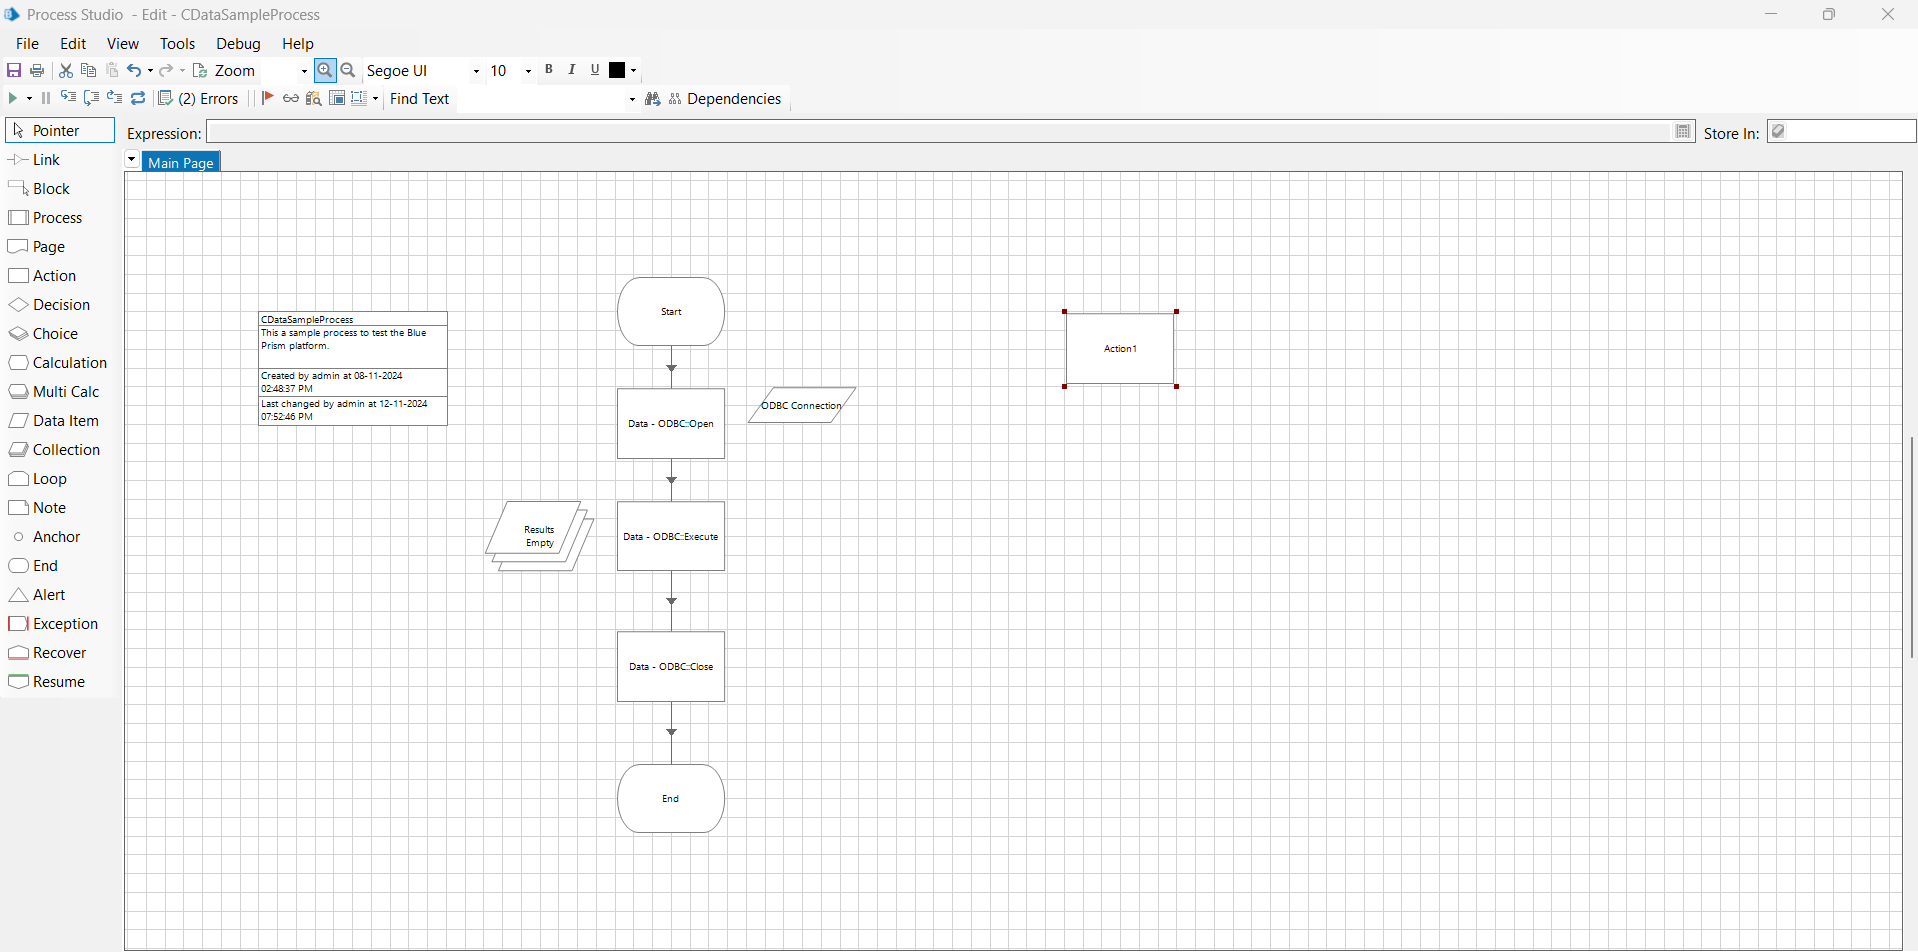
- Finally, connect the "links" from the left panel to create a process like this:
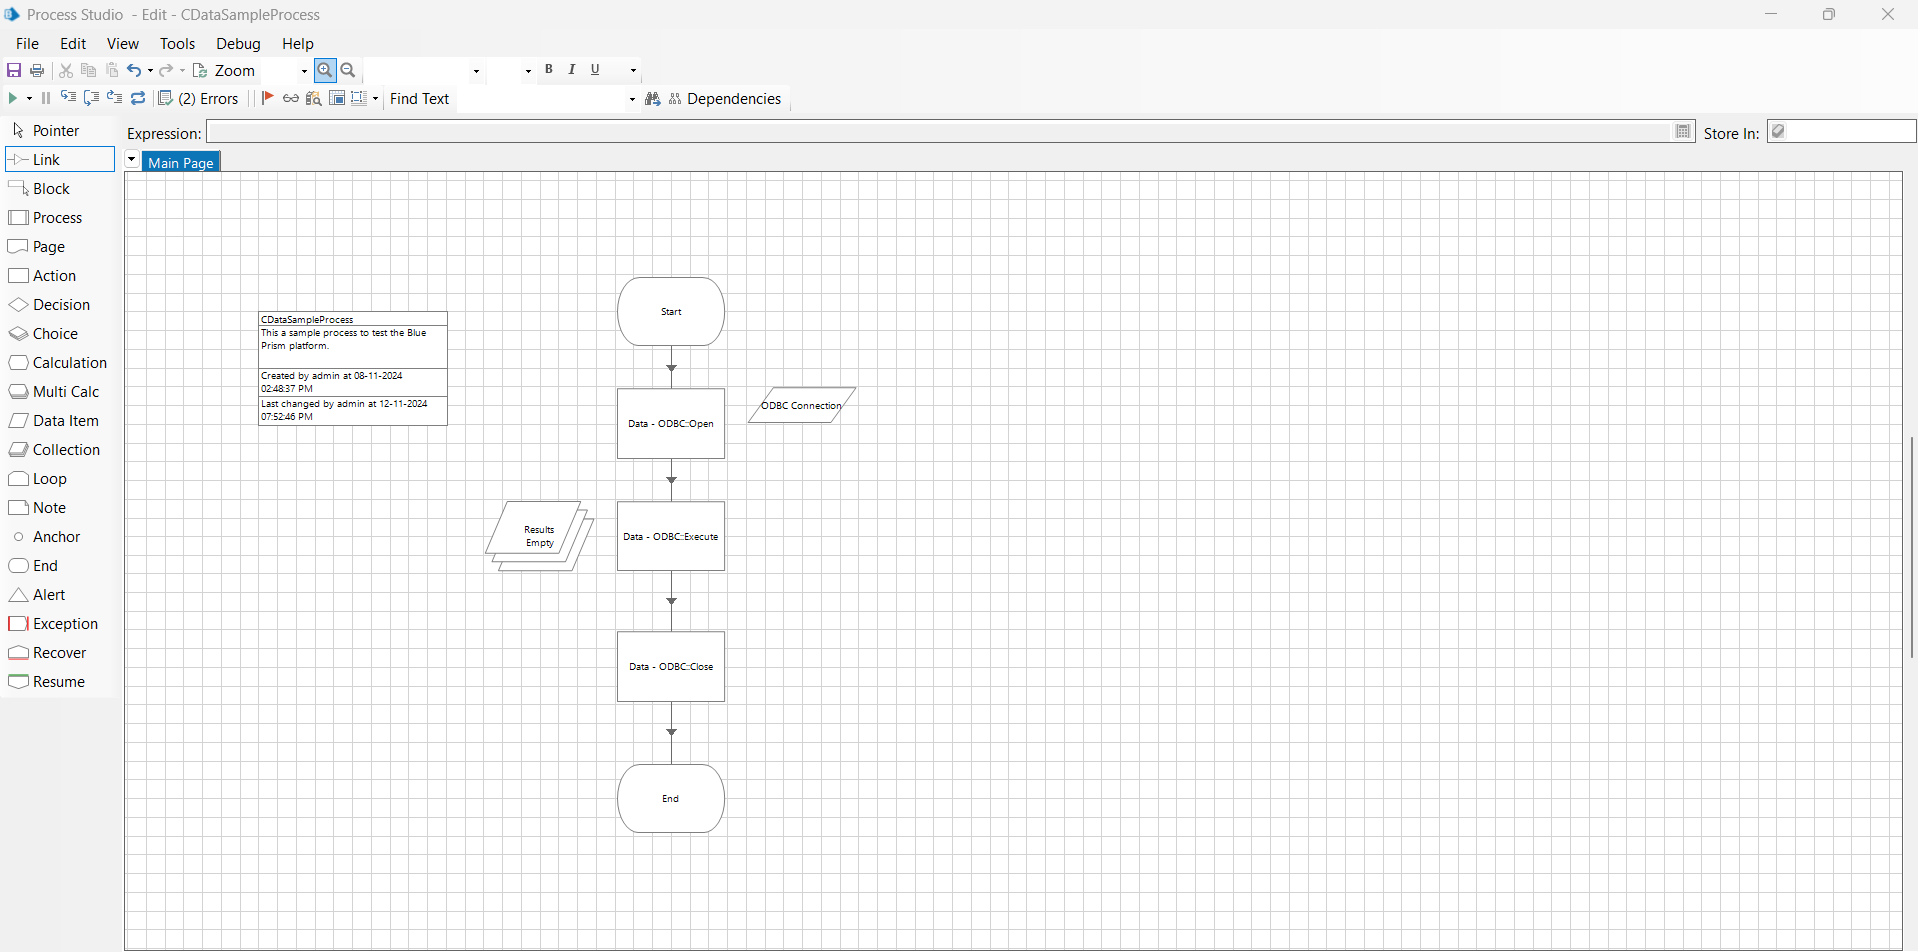
Add a process to save live Linear data to Excel
The processes demonstrated above do not retrieve the data independently, so let's proceed to write it into an Excel file. We will use the Excel VBO to create the next flow.
- Download and add an Excel VBO object in Blue Prism by following a process similar to the one described in the article's Add VBOs for ODBC section.
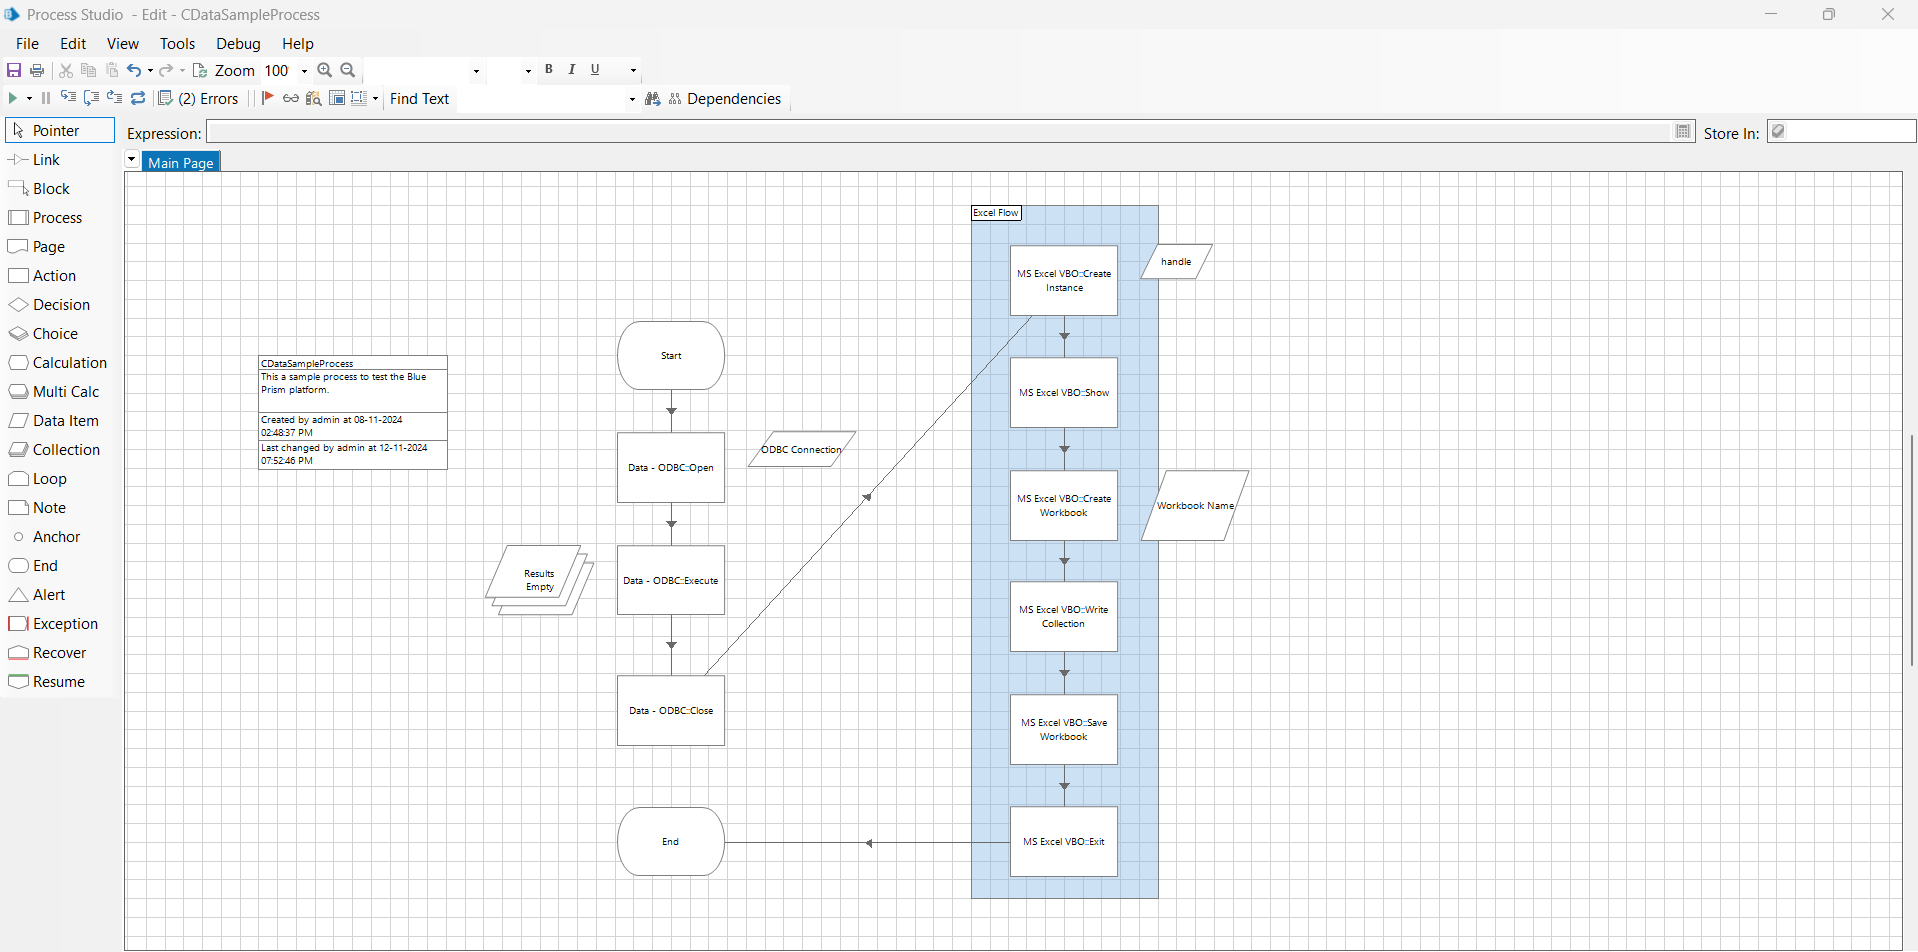
- In this process, place six Action blocks one after the other to complete all the follow-up steps for creating the MS Excel process flow.
- In the first Action block, select "MS Excel VBO" from the list of business objects and "Create Instance" from the list of actions. This step is used to create a new instance of Microsoft Excel.
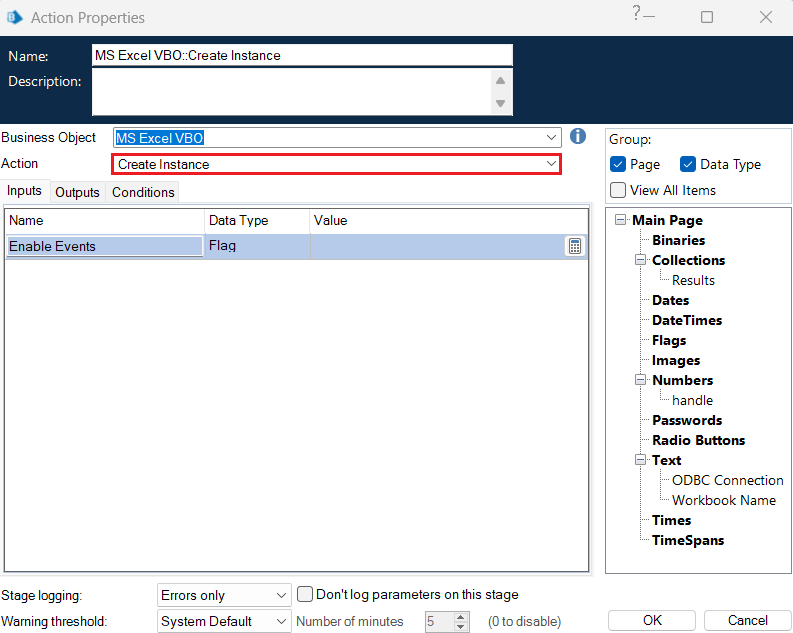
In the Outputs tab, add a handle name.

- In the next block, select "MS Excel VBO" from the list of business objects and "Show" from the list of actions. This action makes the Excel application visible on the screen.
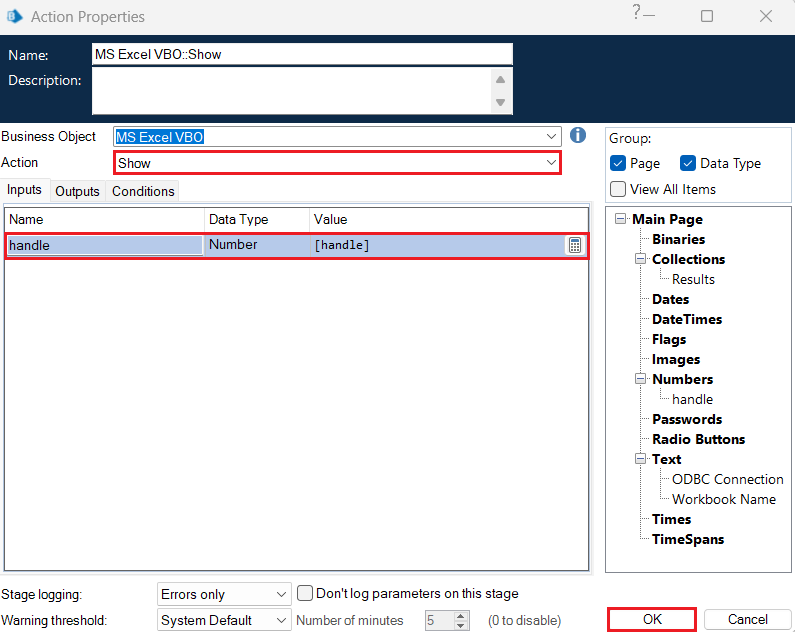
In the Inputs tab, add "[handle]" as the handle value.
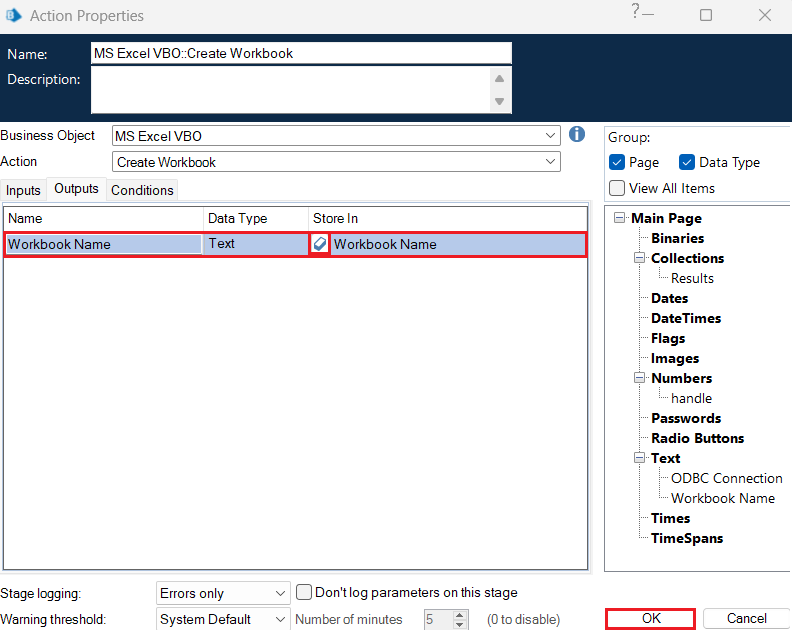
- Again, select "MS Excel VBO" from the list of business objects and "Create Workbook" from the list of actions for the consecutive block. This creates a new workbook to store the incoming Linear data.
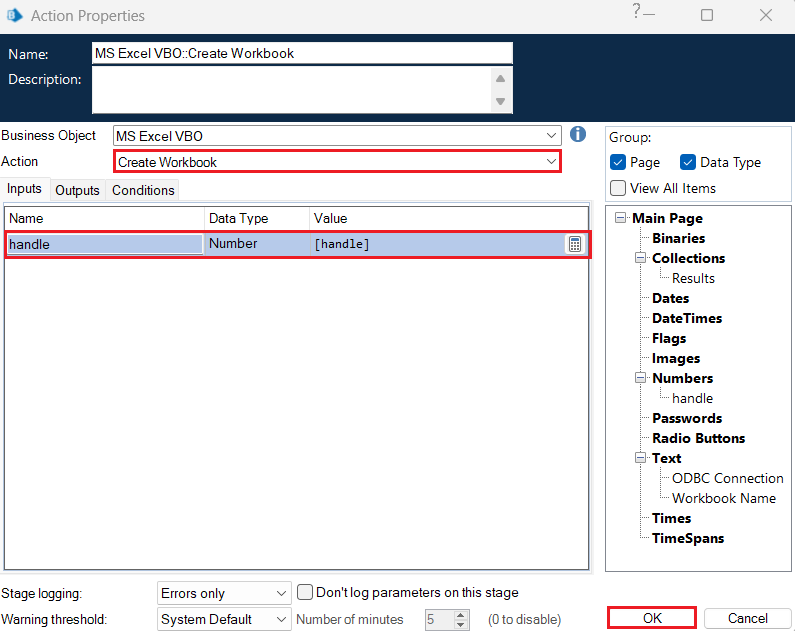
In the Inputs tab, enter handle value as "[handle]" and in the Outputs tab, set a new Workbook Name.
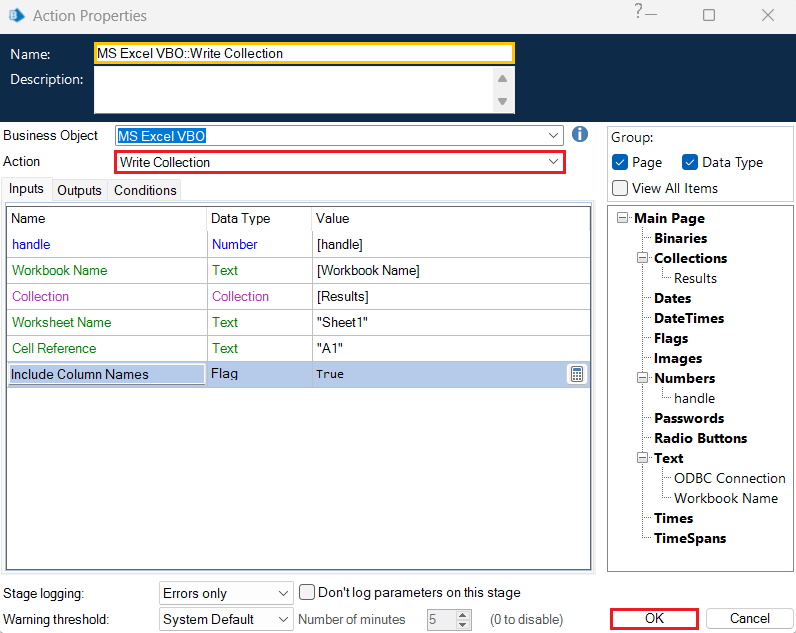
- For the next action, select "MS Excel VBO" from the list of business objects and "Write Collection" from the list of actions. It writes the "Results" obtained via ODBC to the input parameter "Collection". Enter the following parameters in the Input tab:
- handle: [handle]
- Workbook Name: [Workbook Name]
- Collection: [Results]
- Worksheet Name: "Sheet1"
- Cell Reference: "A1"
- Include Column Names: True
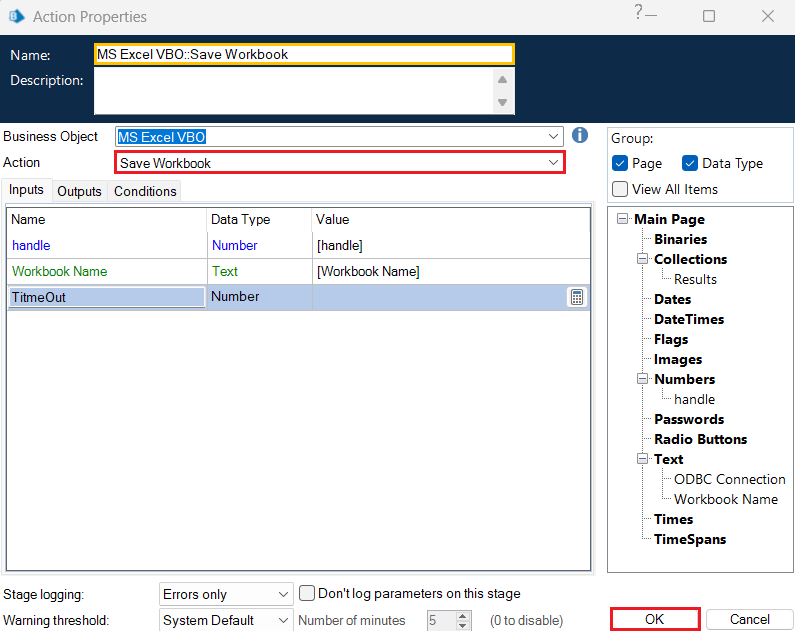
- Next, select "MS Excel VBO" from the list of business objects and "Save Workbook" from the list of actions to save the workbook. In the Inputs tab, assign the following values:
- handle: [handle]
- Workbook Name: [Workbook Name]
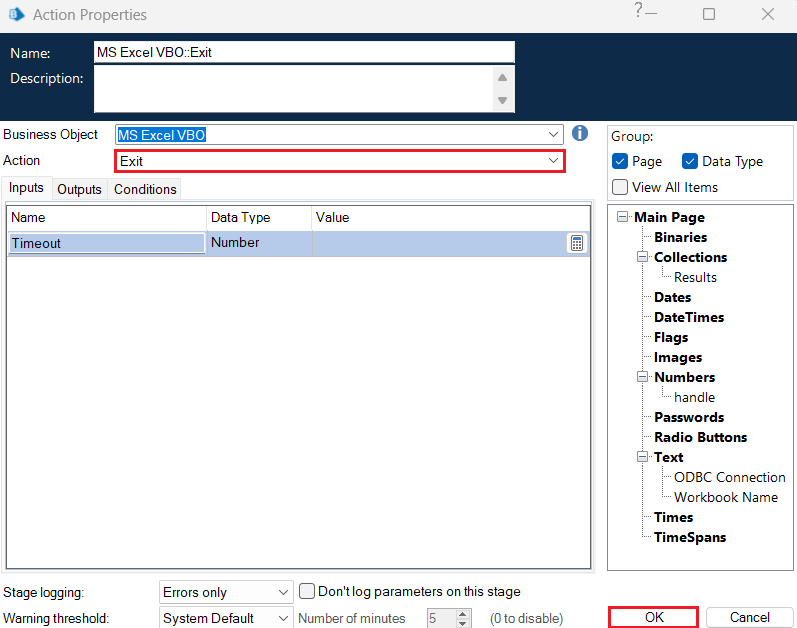
- In the final action, select "MS Excel VBO" from the list of business objects and "Exit" from the list of actions. This action will finally close the workbook.
- Connect the action blocks with the "links" to get the final Excel process flow.
Run the process to check the operations
Once the process is complete, click the Run button to see it in action.
- Click the Run button at the top left of the screen (as shown).

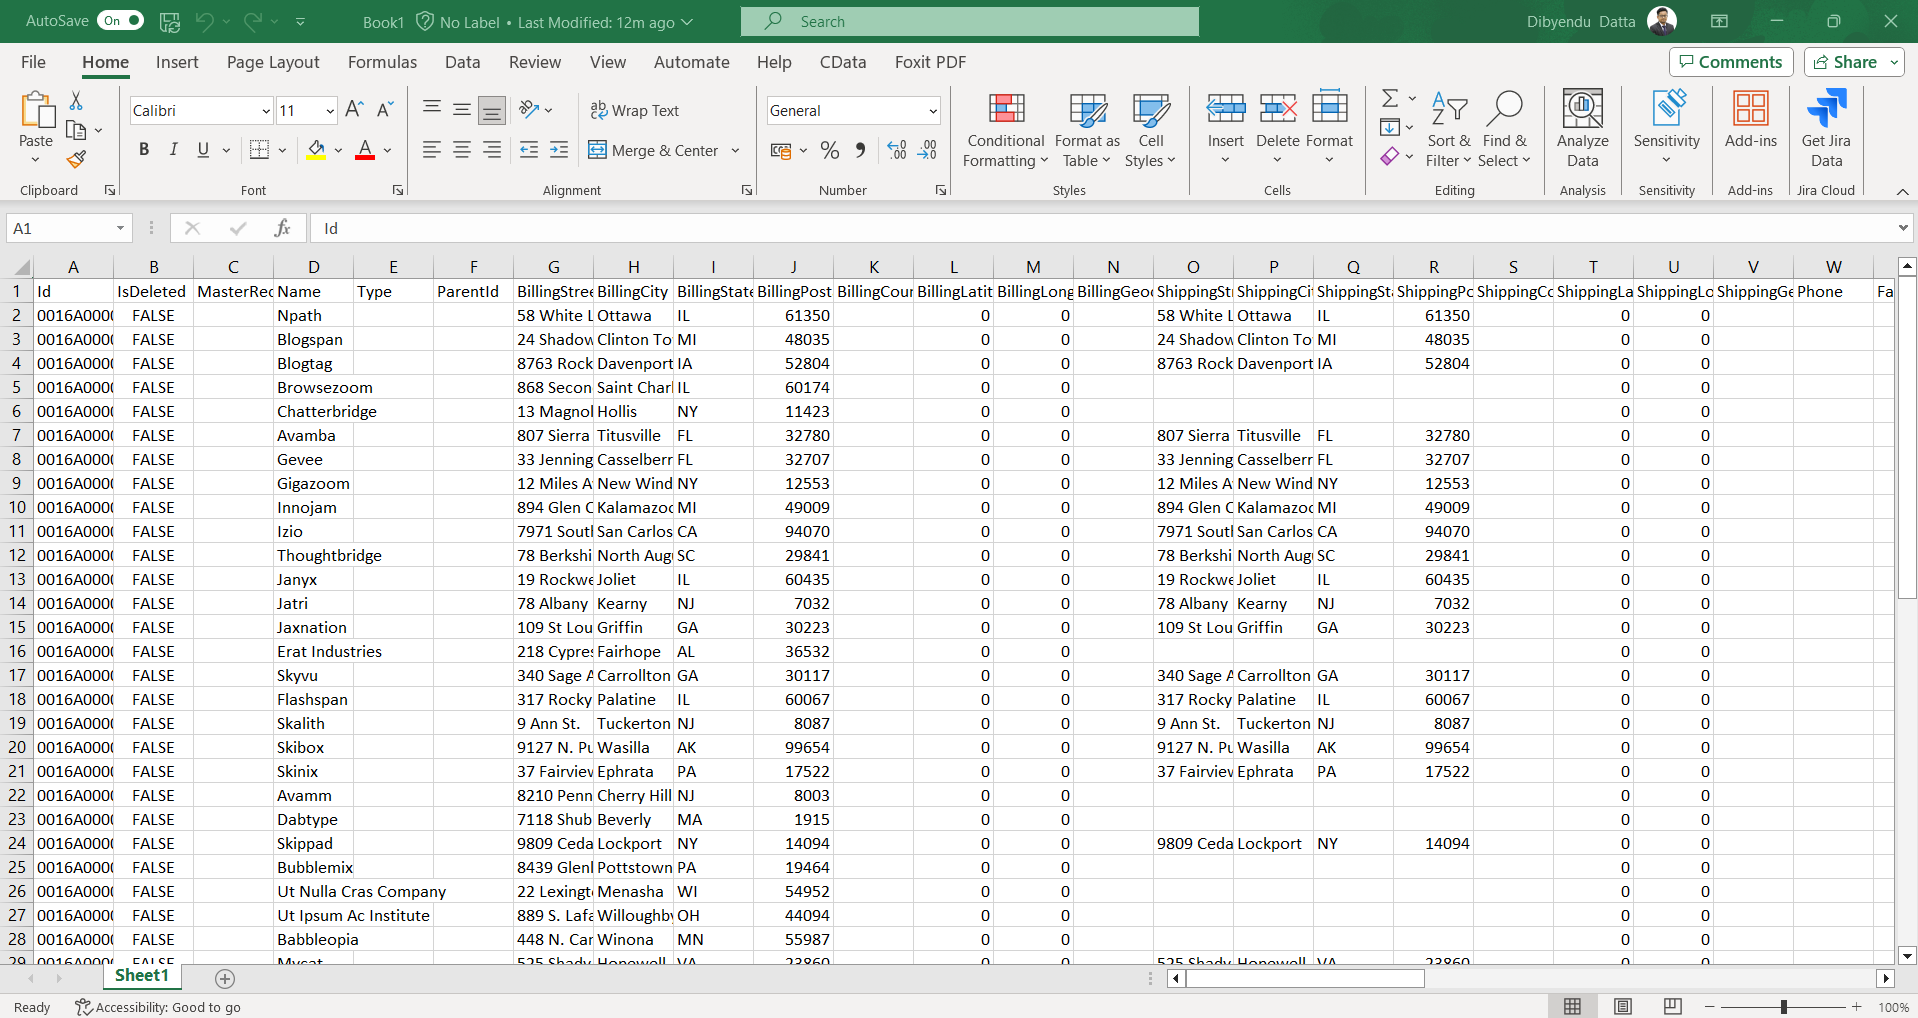
- If the Linear data is finally written to an Excel file like the one below, consider the entire process to be working successfully.
Get Started Today
Download a free, 30-day trial of the CData ODBC Driver for Linear and integrate Linear data into Blue Prism to create automated business workflows.
Reach out to our Support Team if you have any questions.
Ready to get started?
Download a free trial of the Linear ODBC Driver to get started:
Download NowLearn more:
 Linear ODBC Driver
The Linear ODBC Driver is a powerful tool that allows you to connect with live data from Linear, directly from any applications that support ODBC connectivity.
Access Linear data like you would a database - read Linear AgentSession, Comment, Customer, Cycle, Initiative, Integration, Issue, ProjectStatus, Release, Team, User, etc. through a standard ODBC Driver interface.