




Use the CData ODBC Driver for Linear from SharePoint Excel Services

The CData ODBC Driver for Linear can be accessed using the built-in data access tools in Excel. This article demonstrates how to use the CData ODBC Driver for Linear to connect to Linear data from Excel spreadsheets in on-premises editions of SharePoint.
Connect to Linear as an ODBC Data Source
If you have not already, first specify connection properties in an ODBC DSN (data source name). This is the last step of the driver installation. You can use the Microsoft ODBC Data Source Administrator to create and configure ODBC DSNs.
You can authenticate to Linear with a personal API key or with OAuth 2.0. The API key is the simplest option for connecting with your own Linear account.
Authenticating with an API Key
Set the following connection properties:
- AuthScheme: Set this to APIKey.
- APIKey: A Linear personal API key.
To create a personal API key, log in to Linear, open Settings > Security & access > Personal API keys, select New API key, and create it. Copy the key immediately, because Linear shows it only once.
Authenticating with OAuth
OAuth requires a custom OAuth application registered in Linear (Settings > API > OAuth applications), which provides the OAuthClientId and OAuthClientSecret. Two flows are supported:
- Authorization code: Set AuthScheme to OAuth, InitiateOAuth to GETANDREFRESH, and provide OAuthClientId, OAuthClientSecret, and the CallbackURL defined in your application (e.g., http://localhost:33333). The driver opens Linear in your browser so you can grant access.
- Client credentials: Set AuthScheme to OAuthClient and provide OAuthClientId and OAuthClientSecret. This authenticates the application itself, with no browser interaction, and suits machine-to-machine integrations.
By default, the driver requests the read,write scopes. The driver refreshes the access token automatically when it expires.
Configure Excel Services
Once the ODBC DSN is configured, you can configure Excel Services to use the DSN to connect. To do this, you will need to set up the OLE DB provider as a trusted data source. You will also want to decide if you want to use a Secure Store Service to enable single sign-on functionality with the ODBC driver. If you prefer, you can use the Excel Services Unattended account and skip to step 3 below.
- First, set up a secure store application to use single sign-on. In SharePoint Central Administration, go to Application Management -> Manage Service Applications. Select your secure store service application or create a new one. Click Manage on the Edit menu to begin editing the application.
- Create a new target application. You will be able to set the list of users who have access to this application. After the application is created, you will need to set the credentials on the application so that you can use this later for single sign-on.
- Navigate to Application Management -> Manage Service Applications in SharePoint Central Administration. Select the Excel Services application used by your organization or create one if it does not already exist. Click Manage. If you create a new app, check the option to add the service application's proxy to the farm's default proxy list.
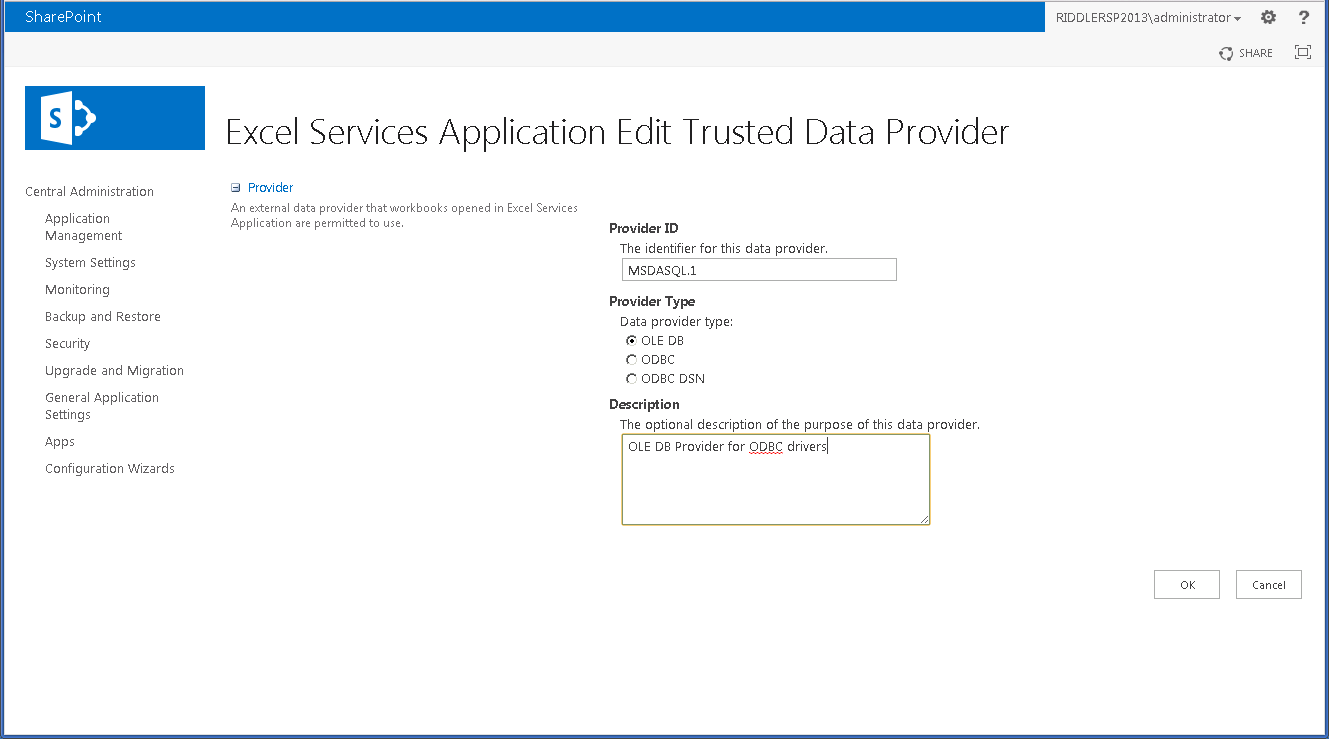
- Click on Trusted Data Providers and add a new trusted provider. Set 'MSDASQL.1' for the Provider ID and leave the type as 'OLE DB'. Click OK to add this new provider to the list of trusted providers.
Connect to and Import Linear Data in Excel
After you have enabled and secured access to the DSN, you can access the data source from the ribbon in Excel.
- In an Excel spreadsheet, open the Data tab and click From Other Sources -> From Data Connection Wizard.
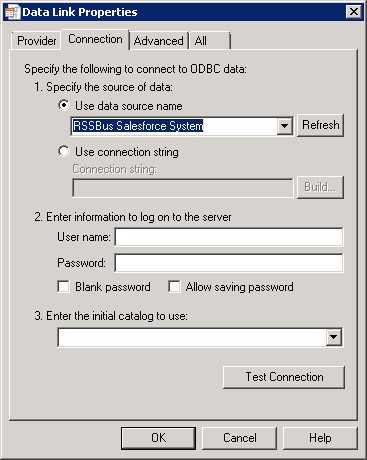
- Select 'Other/Advanced' for the type and on the next screen, select the 'Microsoft OLE DB Provider for ODBC Drivers'. On the Connection tab, select CData Linear Sys, the system DSN. The driver installation automatically creates matching user and system DSNs: The system DSN is needed to connect from SharePoint.
- Select the table you would like to connect to.
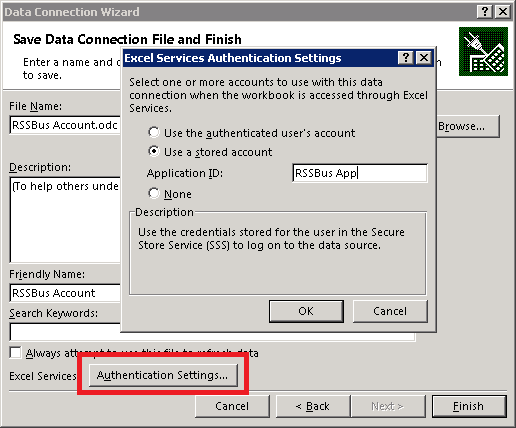
- On the last step of the wizard, click the 'Authentication Settings' button. Select the 'Use a stored account' and enter the name of the secure store target application you created earlier. Or, if you want to use the Unattended Service Account, select None.
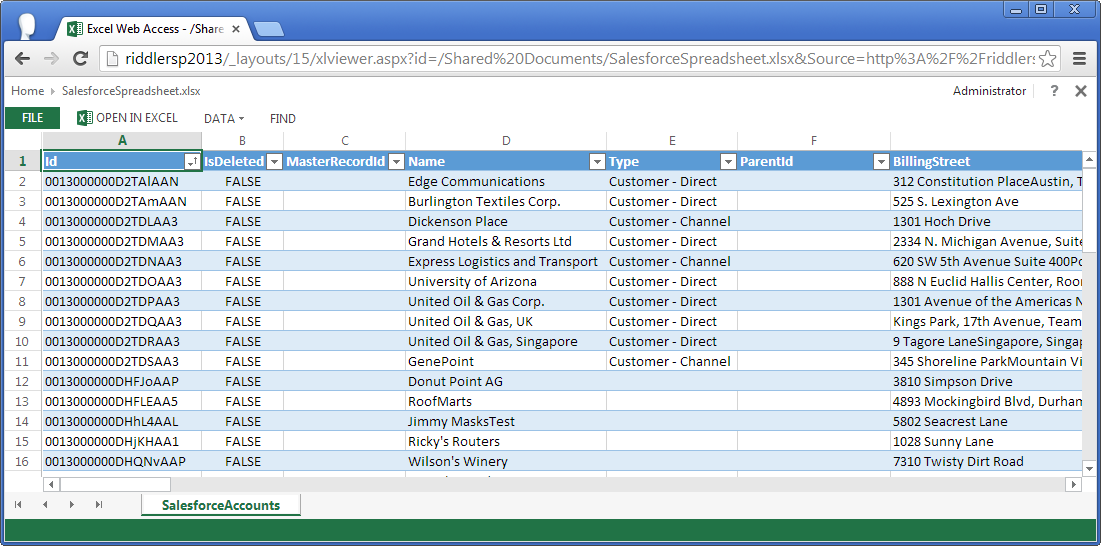
- After you finish the wizard, the data is imported into the spreadsheet. You can now update and save Linear data directly in SharePoint.
Ready to get started?
Download a free trial of the Linear ODBC Driver to get started:
Download NowLearn more:
 Linear ODBC Driver
The Linear ODBC Driver is a powerful tool that allows you to connect with live data from Linear, directly from any applications that support ODBC connectivity.
Access Linear data like you would a database - read Linear AgentSession, Comment, Customer, Cycle, Initiative, Integration, Issue, ProjectStatus, Release, Team, User, etc. through a standard ODBC Driver interface.