




Replicate Linear Data in Heroku for Use in Salesforce Connect

CData Sync is a standalone application that supports a wide range of replication scenarios, including replicating both sandbox and production instances into your database. By replicating Linear data to a PostgreSQL database in Heroku, you can access Linear external objects (via Salesforce Connect) alongside standard Salesforce objects.
Requirements
For this replication example, you need the following:
- CData Sync (trial or licensed), along with a license (full or trial) for Linear replication.
- A Heroku app with the Heroku Postgres and Heroku Connect add-ons provisioned.
- A Salesforce account.
Configure the Replication Destination
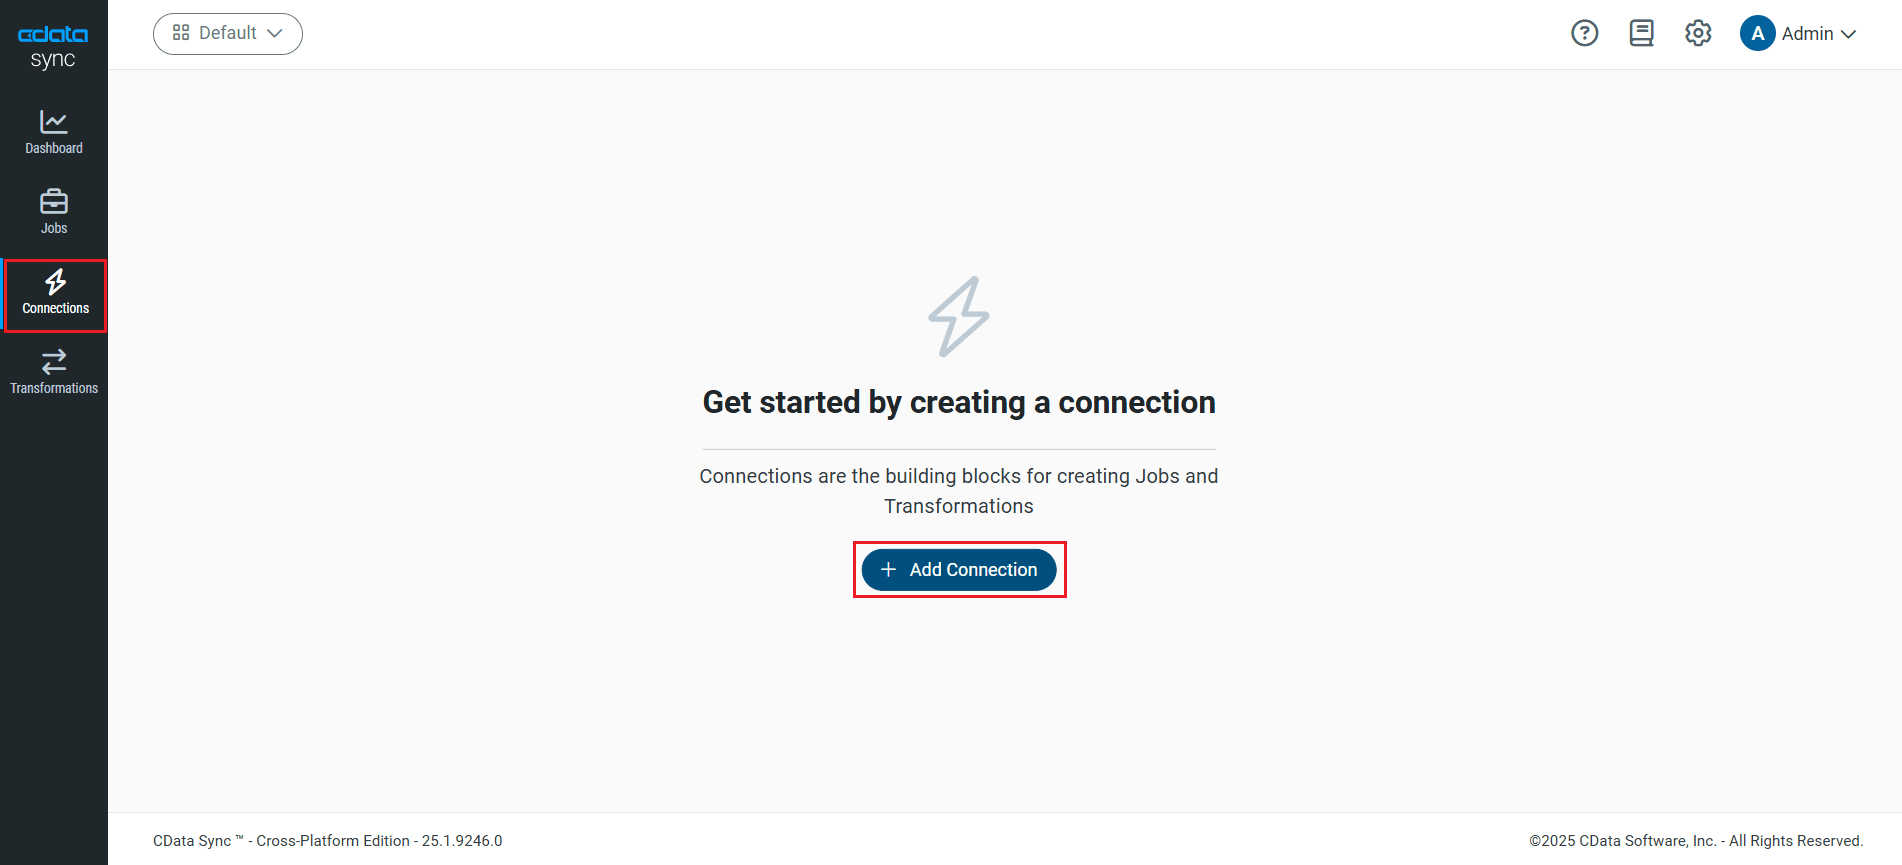
Using CData Sync, you can easily replicate data from Linear data to a PostgreSQL database on Heroku. For this article, you will need an existing PostgreSQL database on Heroku. To add your PostgreSQL database as a replication destination, navigate to the Connections tab.
- Click Add Connection.
- Select the Destinations tab and locate the PostgreSQL connector.
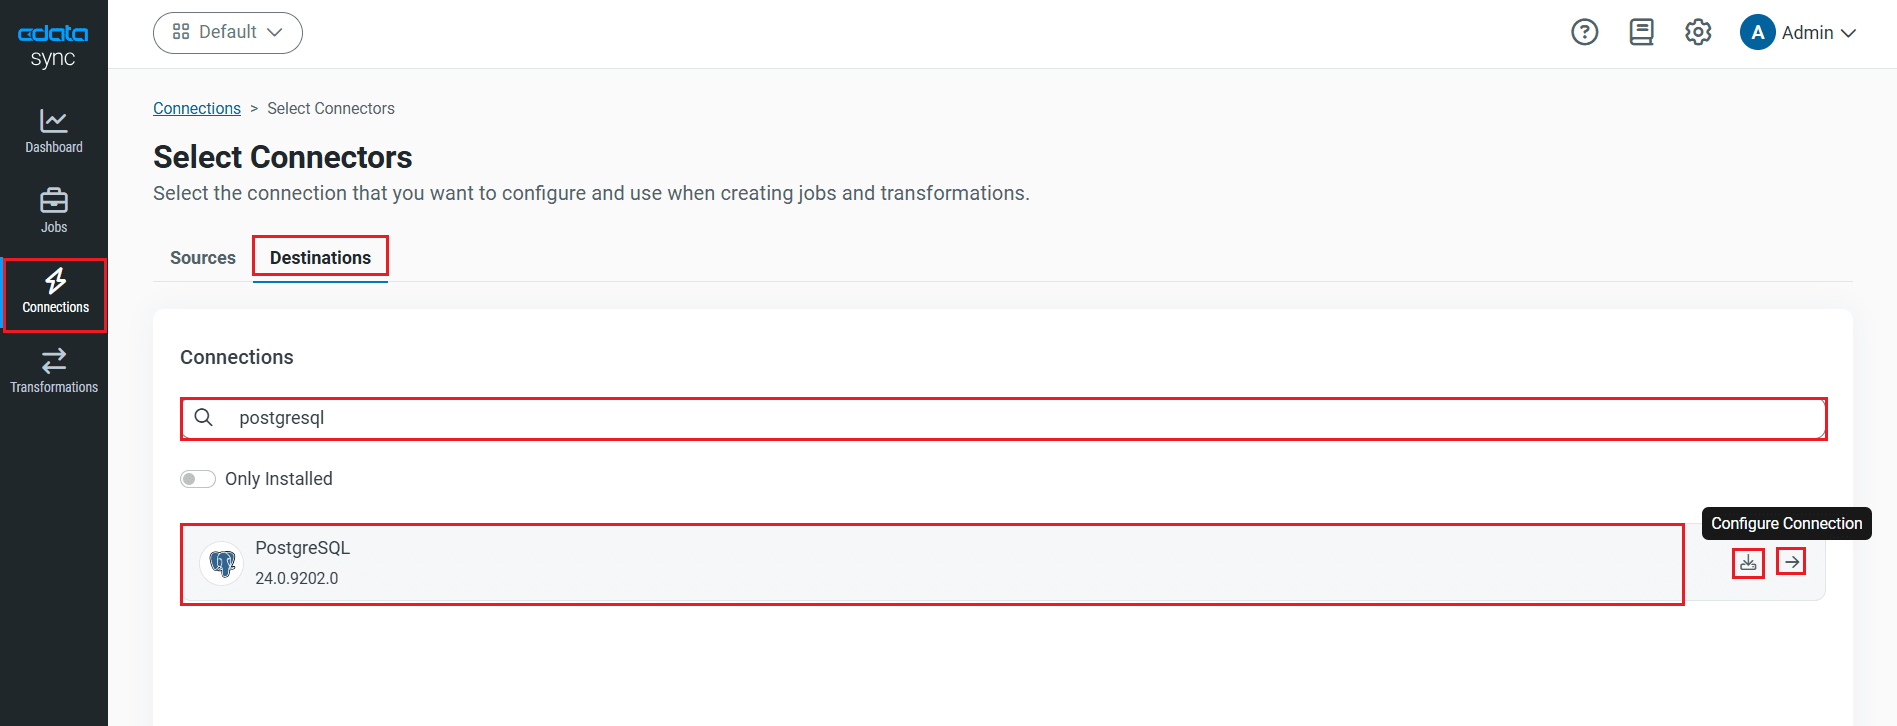
- Click the Configure Connection icon at the end of that row to open the New Connection page. If the Configure Connection icon is not available, click the Download Connector icon to install the PostgreSQL connector. For more information about installing new connectors, see Connections in the Help documentation.
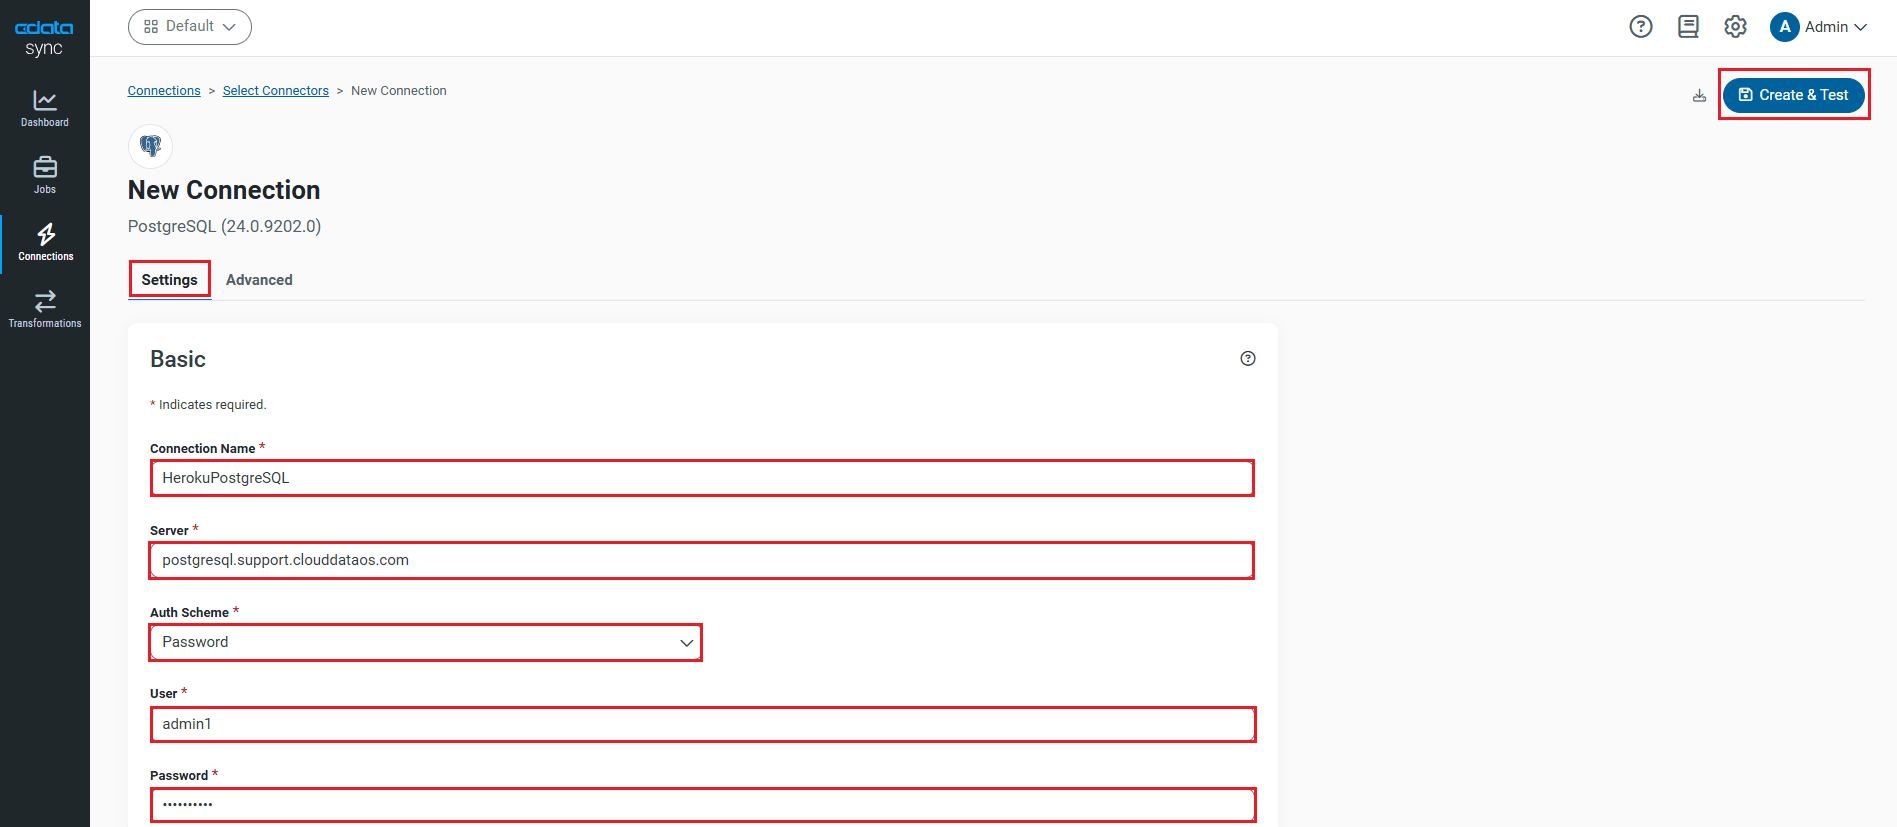
- To connect to PostgreSQL, set the following connection properties:
- Connection Name: Enter a connection name of your choice for the PostgreSQL connection.
- Server: Enter the host name or IP of the server that hosts the PostgreSQL database. The default server value is localhost.
- Auth Scheme: Select the authentication scheme. The default auth scheme is Password.
- Port: Enter the port number of the server that hosts the PostgreSQL database. The default port value is 5432.
- User: Enter the user ID provided for authentication with the PostgreSQL database.
- Password: Enter the password provided for authentication with the PostgreSQL database.
- Database: Enter the name of the database. If not specified, use the default database.
- Once connected, click Create & Test to create, test and save the connection.
You are now connected to PostgreSQL and can use it as both a source and a destination.
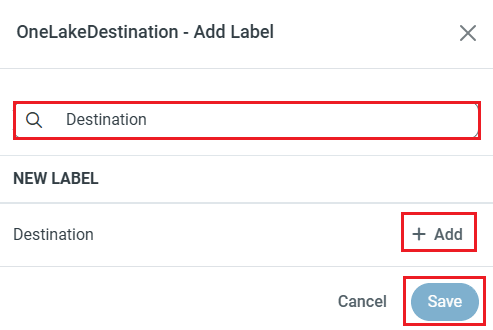
NOTE: You can use the Label feature to add a label for a source or a destination.
Configure the Linear Connection
You can configure a connection to Linear from the Connections tab. To add a connection to your Linear account, navigate to the Connections tab.
- Click Add Connection.
- Select a source (Linear).
- Configure the connection properties.
You can authenticate to Linear with a personal API key or with OAuth 2.0. The API key is the simplest option for connecting with your own Linear account.
Authenticating with an API Key
Set the following connection properties:
- AuthScheme: Set this to APIKey.
- APIKey: A Linear personal API key.
To create a personal API key, log in to Linear, open Settings > Security & access > Personal API keys, select New API key, and create it. Copy the key immediately, because Linear shows it only once.
Authenticating with OAuth
OAuth requires a custom OAuth application registered in Linear (Settings > API > OAuth applications), which provides the OAuthClientId and OAuthClientSecret. Two flows are supported:
- Authorization code: Set AuthScheme to OAuth, InitiateOAuth to GETANDREFRESH, and provide OAuthClientId, OAuthClientSecret, and the CallbackURL defined in your application (e.g., http://localhost:33333). The driver opens Linear in your browser so you can grant access.
- Client credentials: Set AuthScheme to OAuthClient and provide OAuthClientId and OAuthClientSecret. This authenticates the application itself, with no browser interaction, and suits machine-to-machine integrations.
By default, the driver requests the read,write scopes. The driver refreshes the access token automatically when it expires.
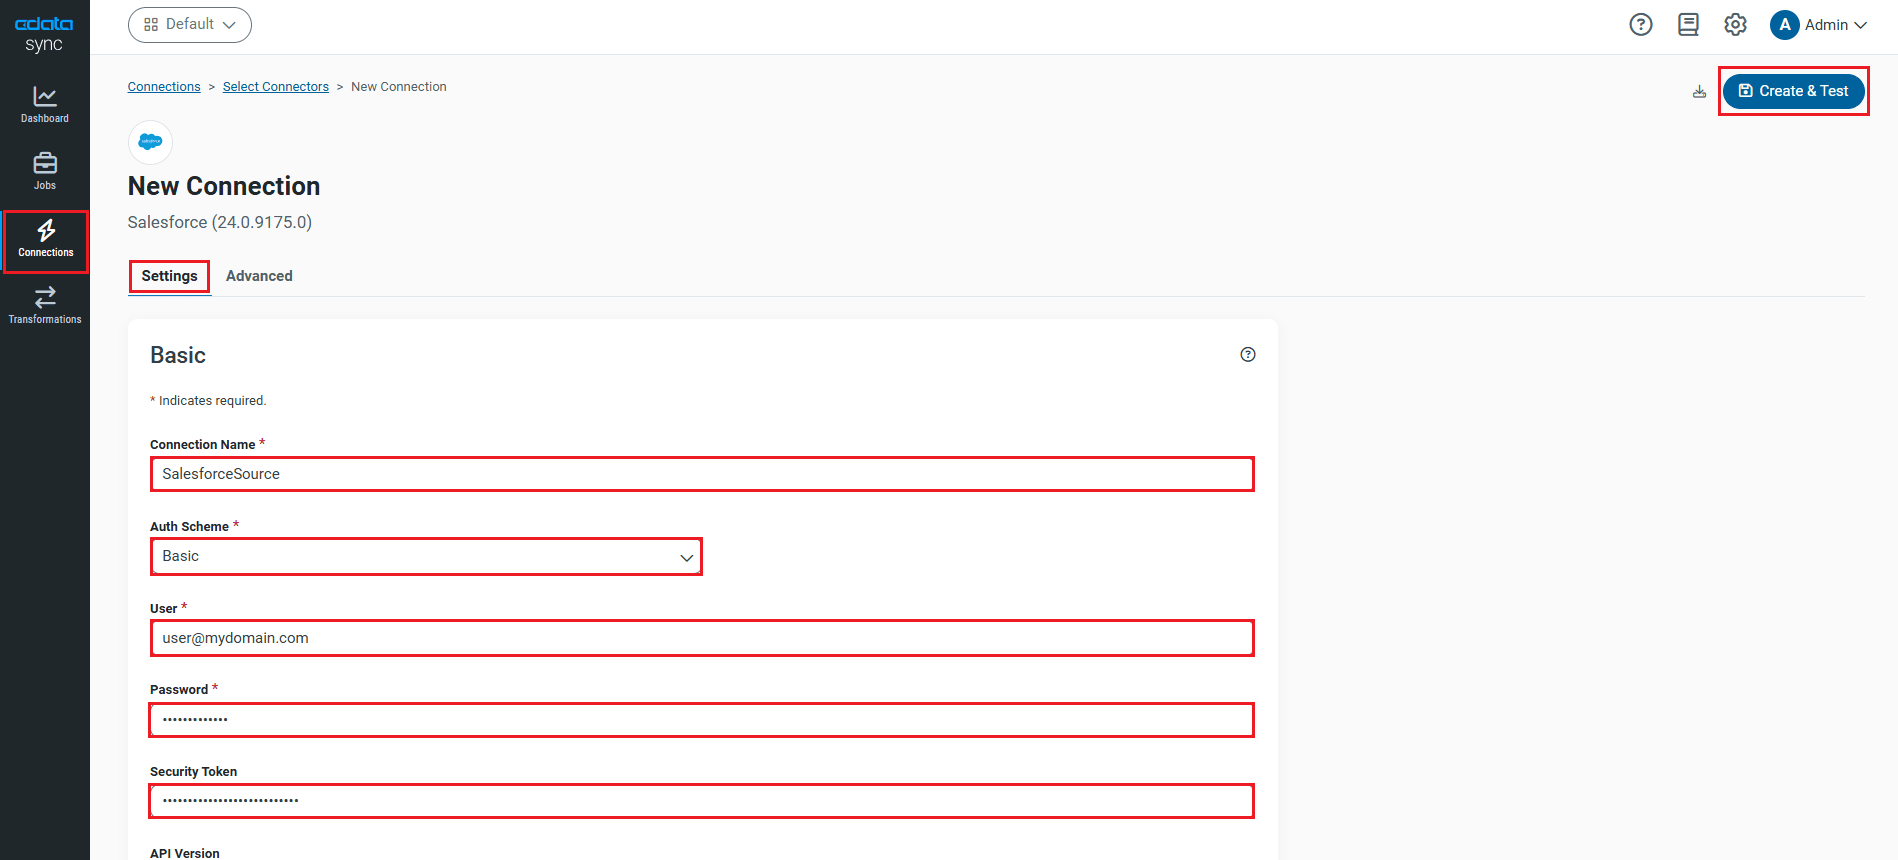
- Click Connect to Linear to ensure that the connection is configured properly.
- Click Save & Test to save the changes.
Configure Queries for Each Linear Instance
CData Sync enables you to control replication with a point-and-click interface and with SQL queries. For each replication you wish to configure, navigate to the Jobs tab and click Add Job. Select the Source and Destination for your replication.
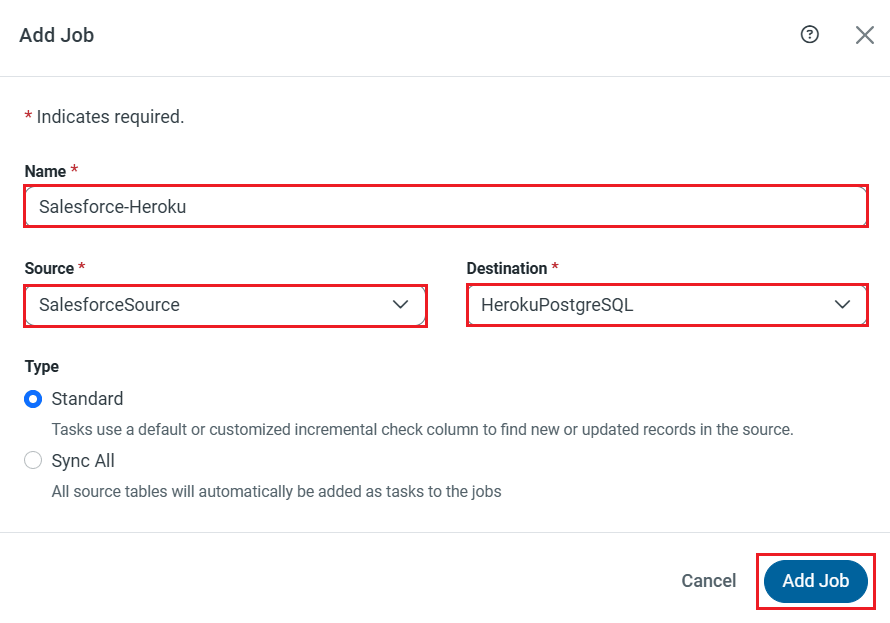
Replicate Entire Tables
To replicate an entire table, navigate to the Task tab in the Job, click Add Tasks, choose the table(s) from the list of Linear tables you wish to replicate into PostgreSQL, and click Add Tasks again.
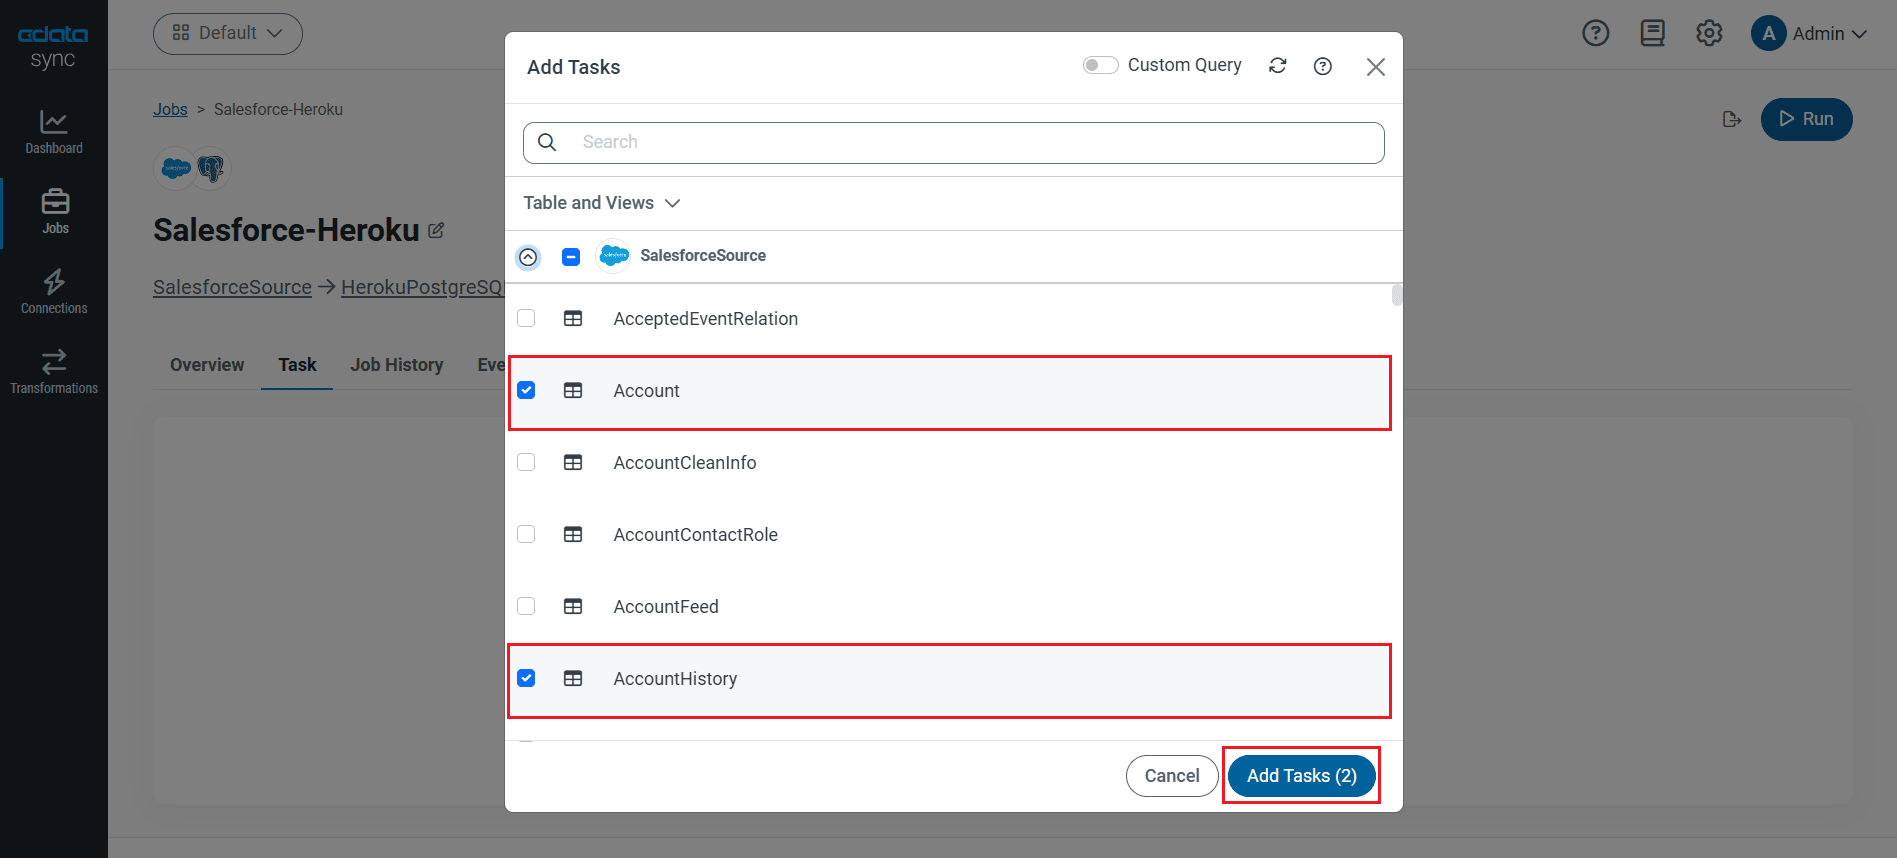
Customize Your Replication
You can use the Columns and Query tabs of a task to customize your replication. The Columns tab allows you to specify which columns to replicate, rename the columns at the destination, and even perform operations on the source data before replicating. The Query tab allows you to add filters, grouping, and sorting to the replication with the help of SQL queries.
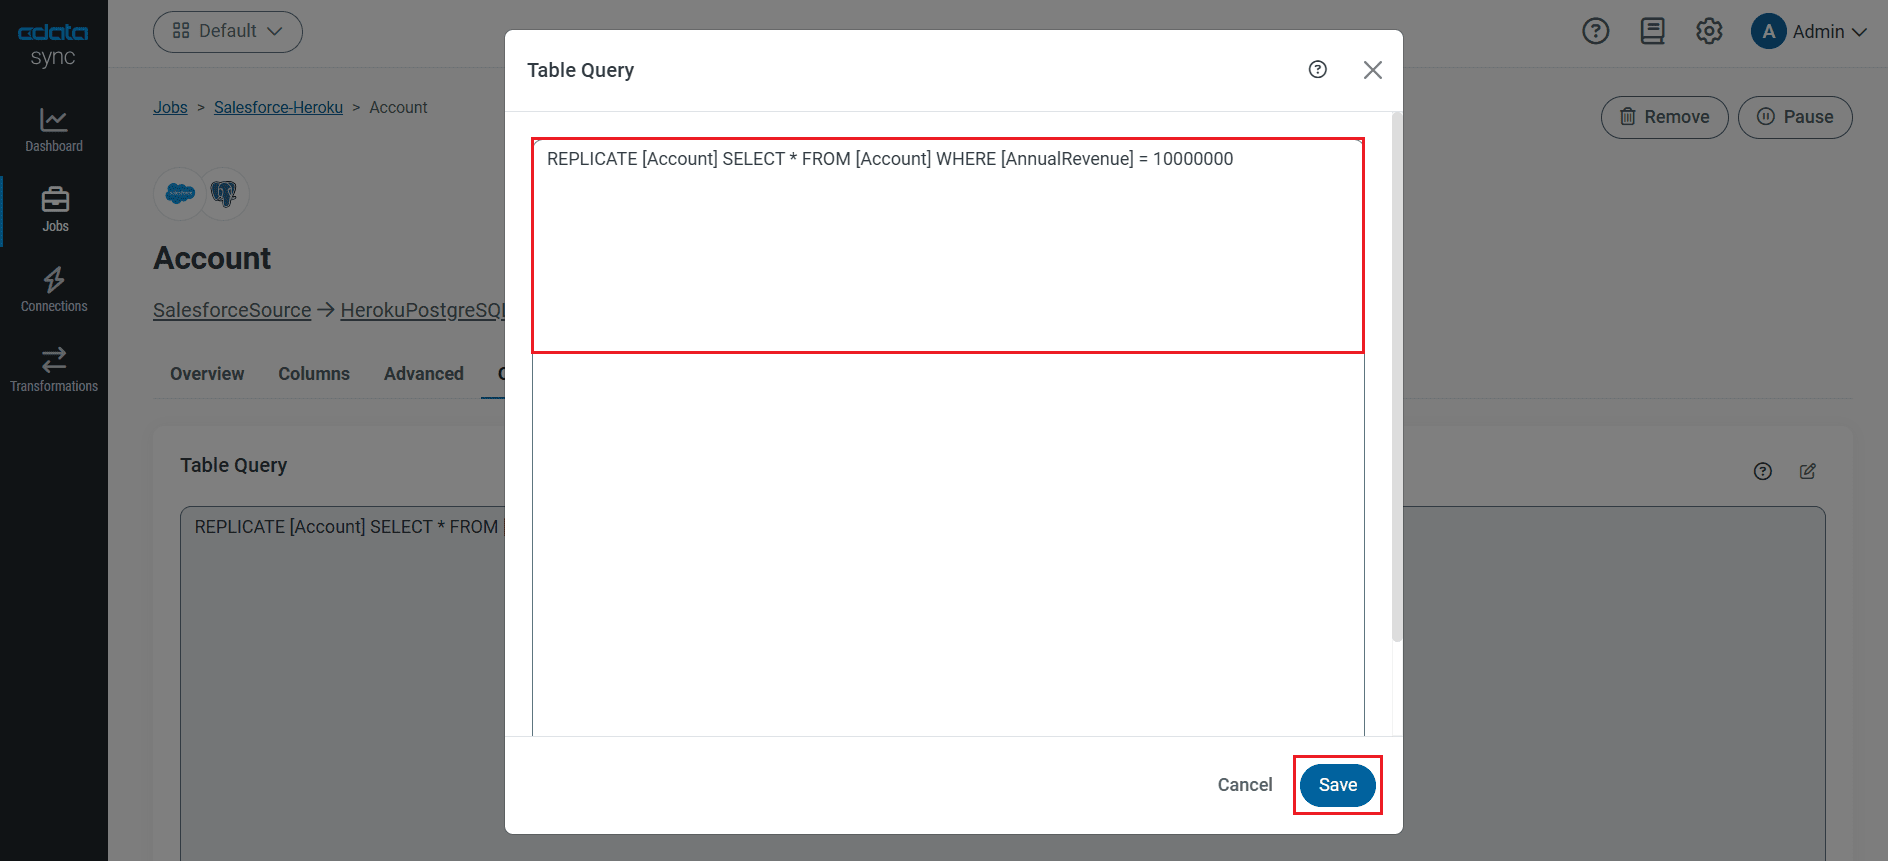
As you make changes using the interface, the SQL query used for the replication changes, going from something simple, like this:
REPLICATE [Team]
to something customized and more complex, like this:
REPLICATE [Team] SELECT [id], [name] FROM [Team] WHERE [key] = ENG
Schedule Your Replication
Select the Overview tab in the Job, and click Configure under Schedule. You can schedule a job to run automatically by configuring it to run at specified intervals, ranging from once every 10 minutes to once every month.
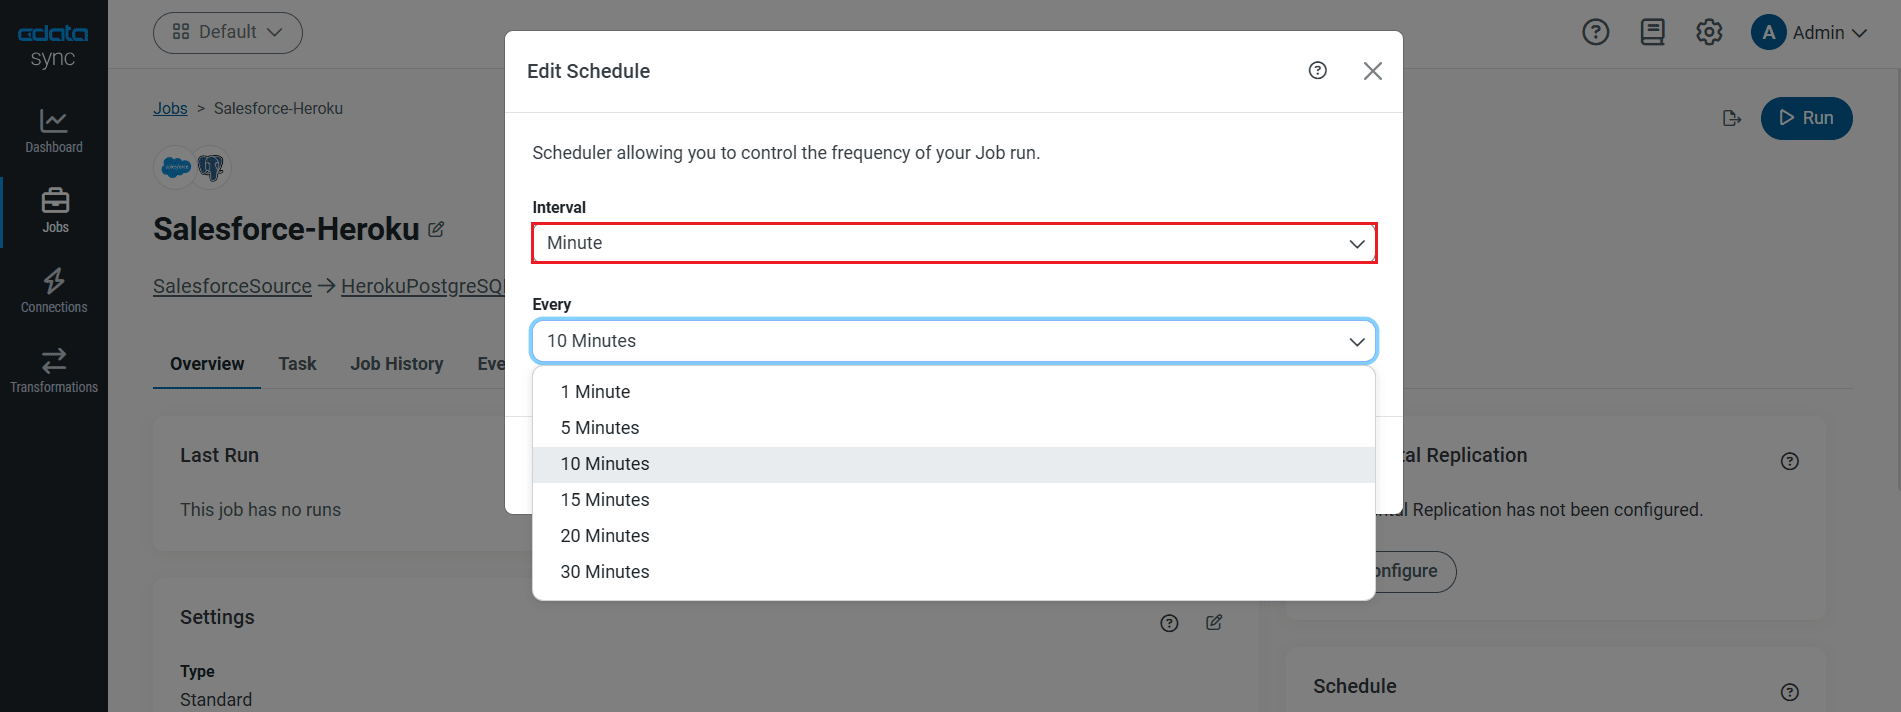
Once you have configured the replication job, click Save Changes. You can configure any number of jobs to manage the replication of your Linear data to PostgreSQL.
Run the Replication Job
Once all the required configurations are made for the job, select the Linear table you wish to replicate and click Run. After the replication completes successfully, a notification appears, showing the time taken to run the job and the number of rows replicated.
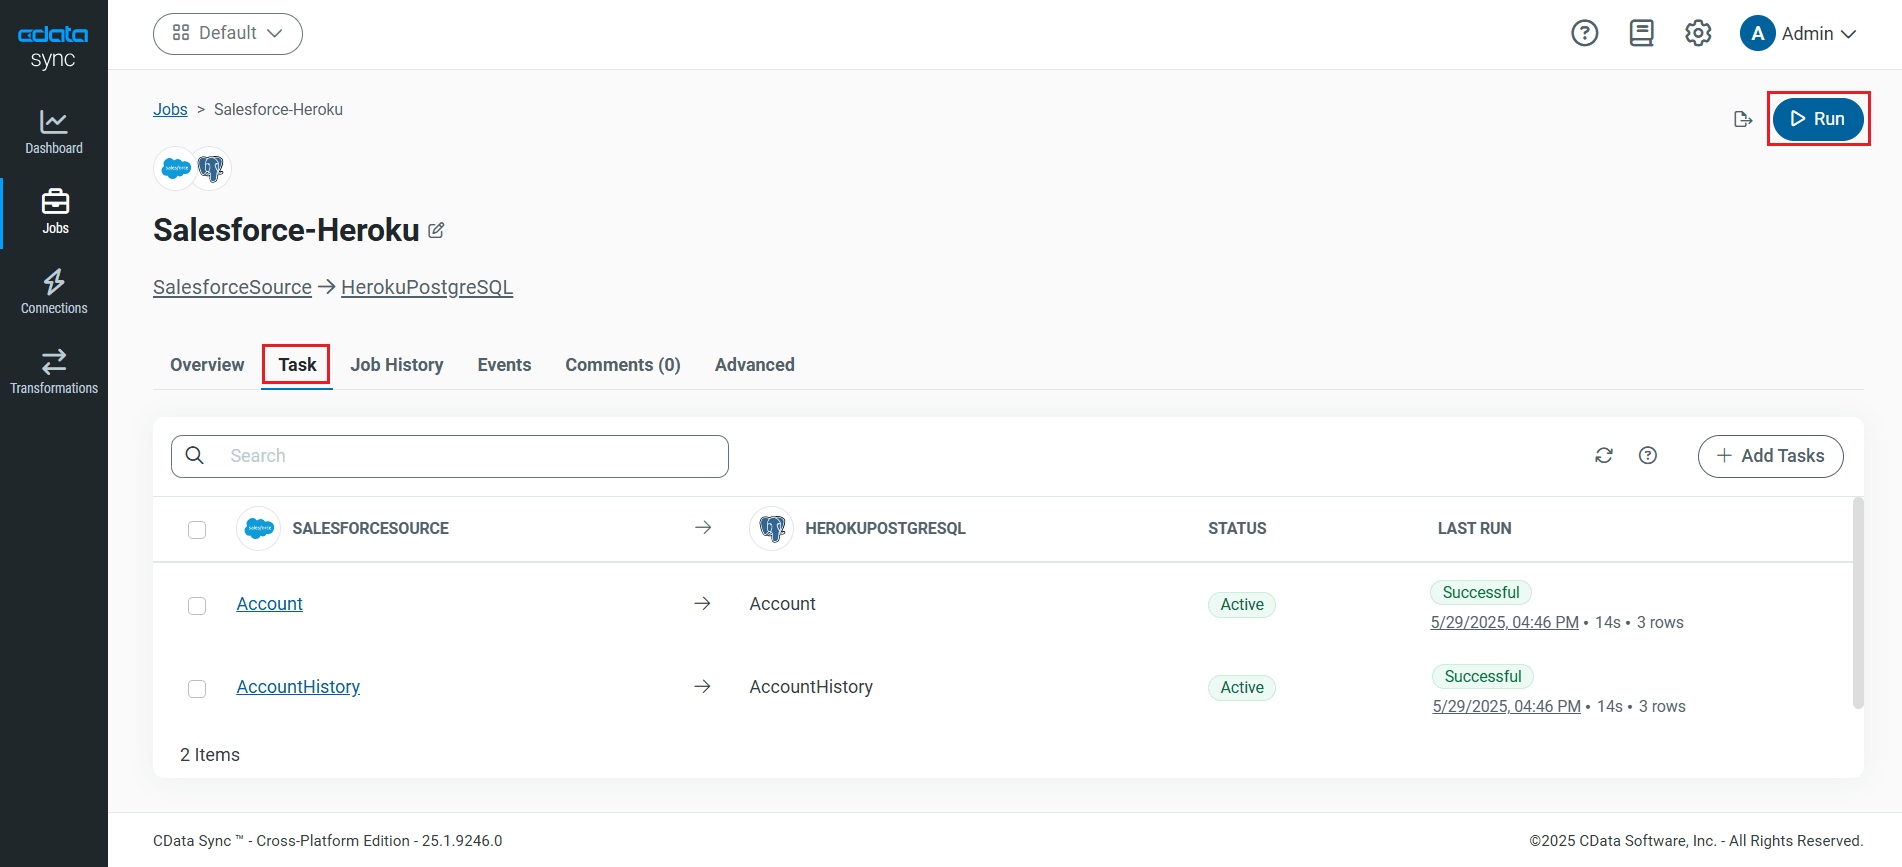
The Linear data tables are now replicated in Heroku PostgreSQL database.
Connect to Your Replicated Linear Data as an External Data Source
Once your Linear data is replicated to the PostgreSQL database on Heroku, configure the OData interface for Heroku and connect to the database as an external data source via Salesforce Connect.
Configure the OData Service for Heroku
The first part of connecting to Linear data replicated to a PostgreSQL database on Heroku is configuring the Heroku External Objects for the database.
- In your Heroku dashboard, click the Heroku Connect Add-On.
- Select External Objects. (If this is the first time using Heroku External Object, you will be prompted to create the OData service's login credentials)
- View the OData service URL and credentials (noting the URL and credentials to be used later from Salesforce Connect).
- In Data Sources, select which replicated tables to share.
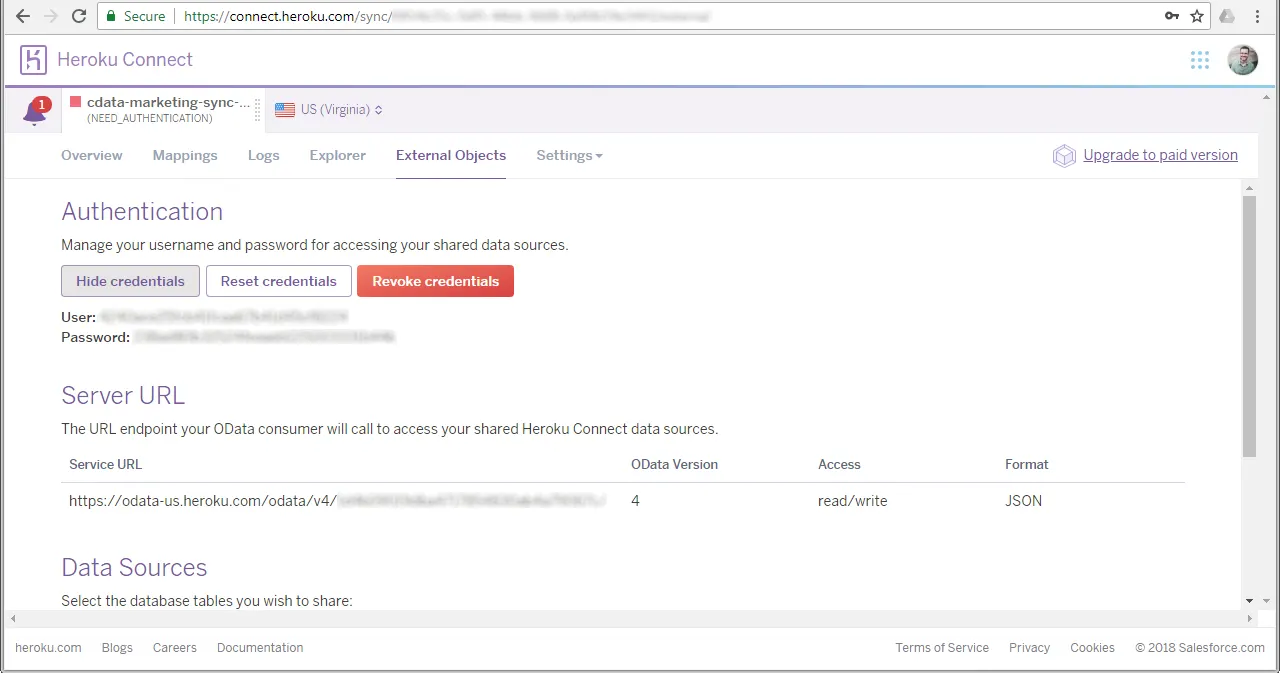
Refer to the Heroku documentation for more detailed instructions.
Configure an External Data Source in Salesforce
After the OData service for Heroku is configured, we can connect to the replicated Linear data as an external data source from Salesforce Connect.
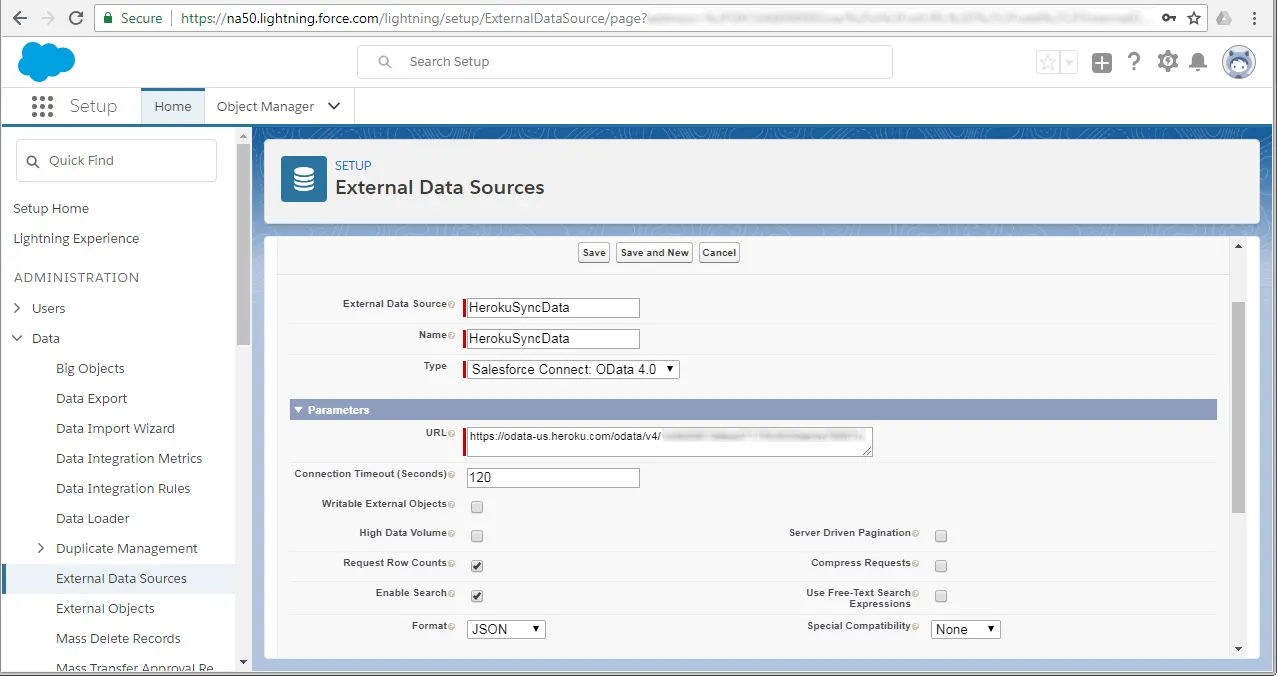
- In Salesforce, click Setup
- In the Administration section, click Data -> External Data Sources
- Set the data source parameter properties:
- External Data Source: the name you wish to display in the Salesforce user interface
- Name: a unique identifier for the API
- Type: Salesforce Connect: OData 4.0
- URL: Enter the OData endpoint from Heroku Connect (above)
- Format: JSON
- Set Authentication:
- Identity Type: Named Principal
- Authentication Protocol: Password Authentication
- Username: the Heroku Connect username
- Password: the Heroku Connect password
- Click Save.
Synchronize Linear Objects
After you have created the external data source in Salesforce, follow the steps below to create Linear external objects that reflect any changes in the data source. You will synchronize the definitions for the Linear external objects with the definitions for Linear tables.
- Click the link for the external data source you created.
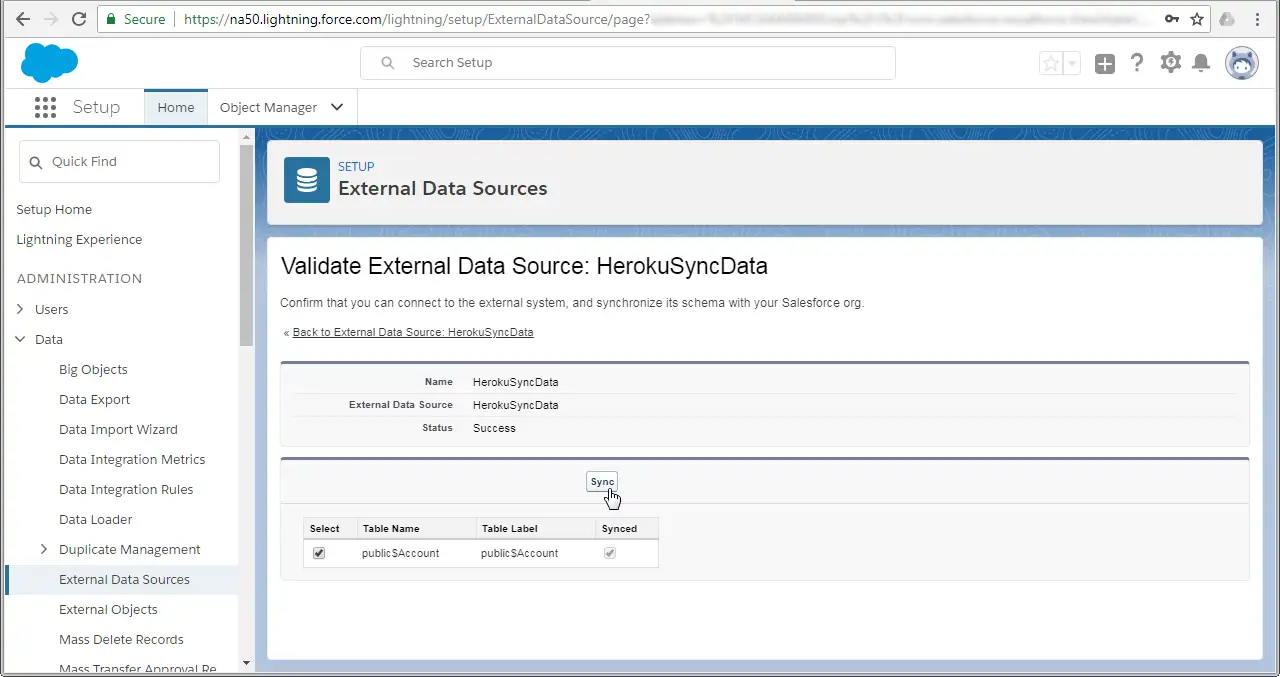
- Click Validate and Sync.
- Select the Linear tables you want to work with as external objects and click Sync.
Access Linear Data as Salesforce Objects
At this point, you will be able to connect to and work with your replicated Linear entities as external objects just as you would with standard Salesforce objects, whether you are simply viewing the data or building related lists of external Linear data alongside standard Salesforce objects.
Download a 30-day free trial of CData Sync and replicate your Linear data for use with Salesforce Connect today!