




Design BIRT Reports on Pushover Data

The CData JDBC Driver for Pushover integrates connectivity to Pushover APIs into your data-driven Java applications. You can use the CData JDBC Driver for Pushover with the BIRT (Business Intelligence Reporting Tools) platform to create BIRT reports that reflect changes to your data in real time.
- If you have not already done so, install the BIRT Framework plugin and the Database Development plugin for Eclipse.
- Click File -> New -> Report. The Report Design perspective is opened.
- In the Data Explorer, right-click Data Sources and click New Data Source.
- Select the Create from a Data Source Type in the Following List option and select JDBC Data Source.
- Click Manage Drivers and add the driver JAR, located in the lib subfolder of the installation folder.
- In the Database URL box, enter the JDBC URL containing the connection string.
Start by setting the Profile connection property to the location of the Pushover Profile on disk (e.g. C:\profiles\Pushover.apip). Next, set the ProfileSettings connection property to the connection string for Pushover (see below).
Pushover API Profile Settings
Pushover uses API Key authentication. Your Pushover Application API Token is used to authenticate all requests. You can create and manage API tokens in the Pushover dashboard at pushover.net by registering an application under Settings > Your Applications.
After setting the following connection properties, you are ready to connect:
- AuthScheme: Set this to APIKey.
- APIKey: Set this to your 30-character Pushover Application API Token.
Built-in Connection String Designer
For assistance in constructing the JDBC URL, use the connection string designer built into the Pushover JDBC Driver. Either double-click the JAR file or execute the jar file from the command-line.
java -jar cdata.jdbc.api.jarFill in the connection properties and copy the connection string to the clipboard.

When you configure the JDBC URL, you may also want to set the Max Rows connection property. This will limit the number of rows returned, which is especially helpful for improving performance when designing reports and visualizations.
A typical JDBC URL is below:
jdbc:api:Profile=C:\profiles\Pushover.apip;AuthScheme=APIKey;ProfileSettings='APIKey=your_application_token'; - Right-click the Data Sets folder and select the JDBC data source for Pushover.
- In the resulting dialog, build the SELECT query to be used to retrieve the data for the report. This article uses the following query:
SELECT User, Memo FROM GroupMembers WHERE GroupKey = 'your_group_key' - In the Palette, drag a Chart onto the editor. The chart wizard is displayed.
- After selecting the chart type, drag columns onto the chart fields on the Select Data tab.
- Click Run -> View Report -> In Web Viewer to view the report.
Your BIRT reports can now pick up any updates to Pushover data.
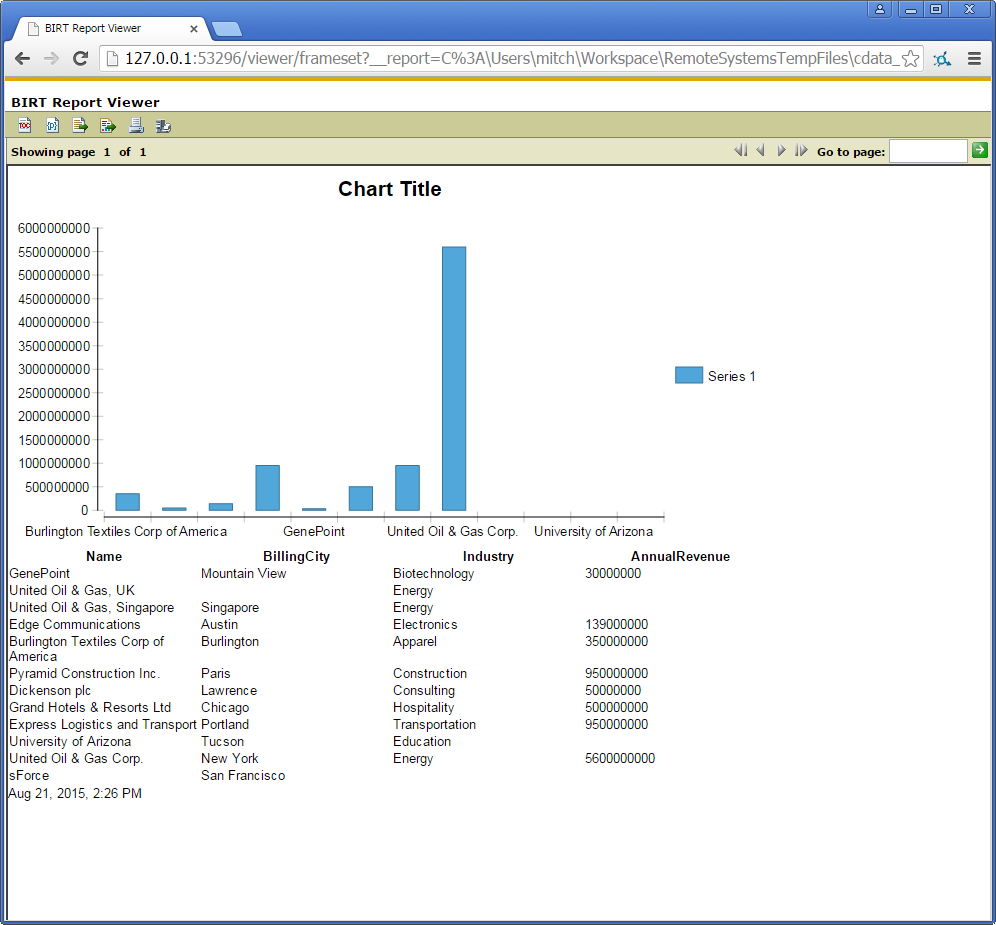
To publish the report to your application server, add the driver JAR to the BIRT Viewer's classpath. For more information, see the CData KB for guides to deploying the JDBC Driver on Java application servers.