




Query Respond.io Data in DataGrip

DataGrip is a database IDE that allows SQL developers to query, create, and manage databases. When paired with the CData API Driver for JDBC, DataGrip can work with live Respond.io data. This article shows how to establish a connection to Respond.io data in DataGrip.
Create a New Driver Definition for Respond.io
The steps below describe how to create a new Data Source in DataGrip for Respond.io.
- In DataGrip, click File -> New > Project and name the project
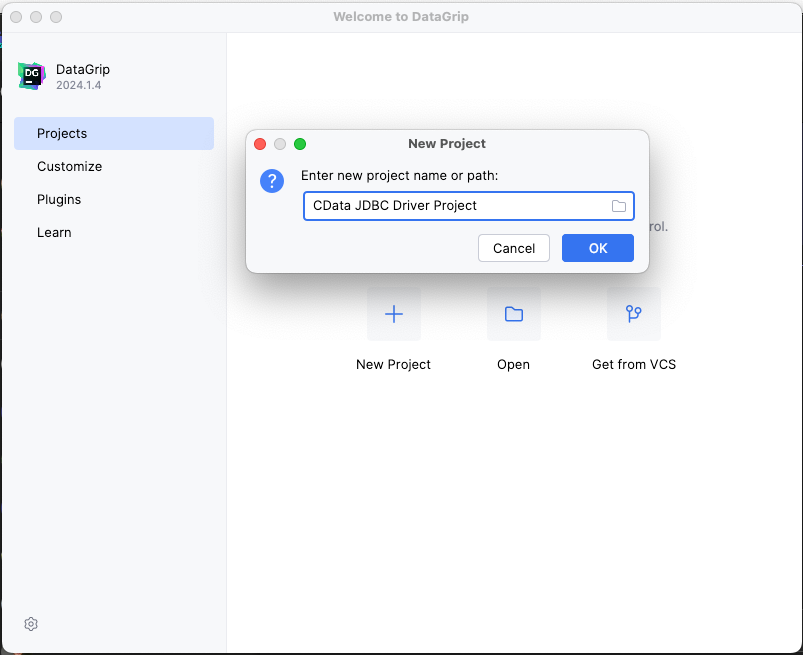
- In the Database Explorer, click the plus icon () and select Driver.
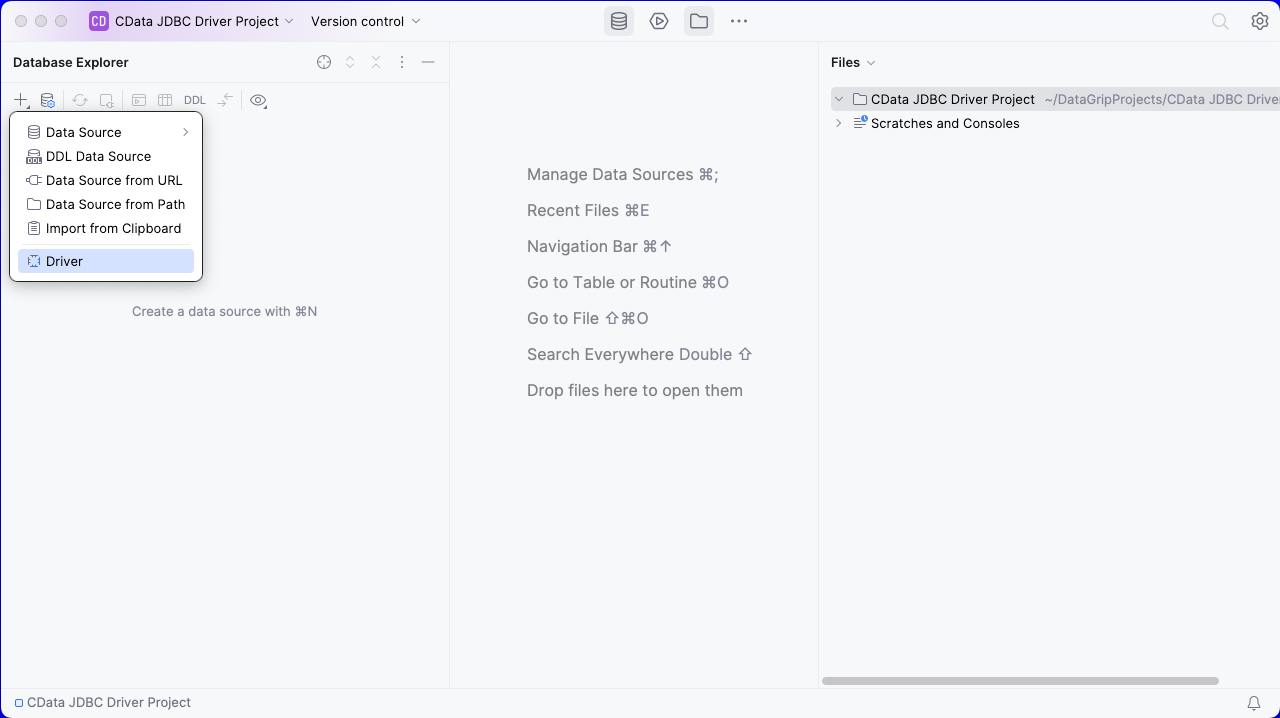
- In the Driver tab:
- Set Name to a user-friendly name (e.g. "CData Respond.io Driver")
- Set Driver Files to the appropriate JAR file. To add the file, click the plus (), select "Add Files," navigate to the "lib" folder in the driver's installation directory and select the JAR file (e.g. cdata.jdbc.api.jar).
- Set Class to cdata.jdbc.api.API.jar
Additionally, in the advanced tab you can change driver properties and some other settings like VM Options, VM environment, VM home path, DBMS, etc - For most cases, change the DBMS type to "Unknown" in Expert options to avoid native SQL Server queries (Transact-SQL), which might result in an invalid function error
- Click "Apply" then "OK" to save the Connection
Configure a Connection to Respond.io
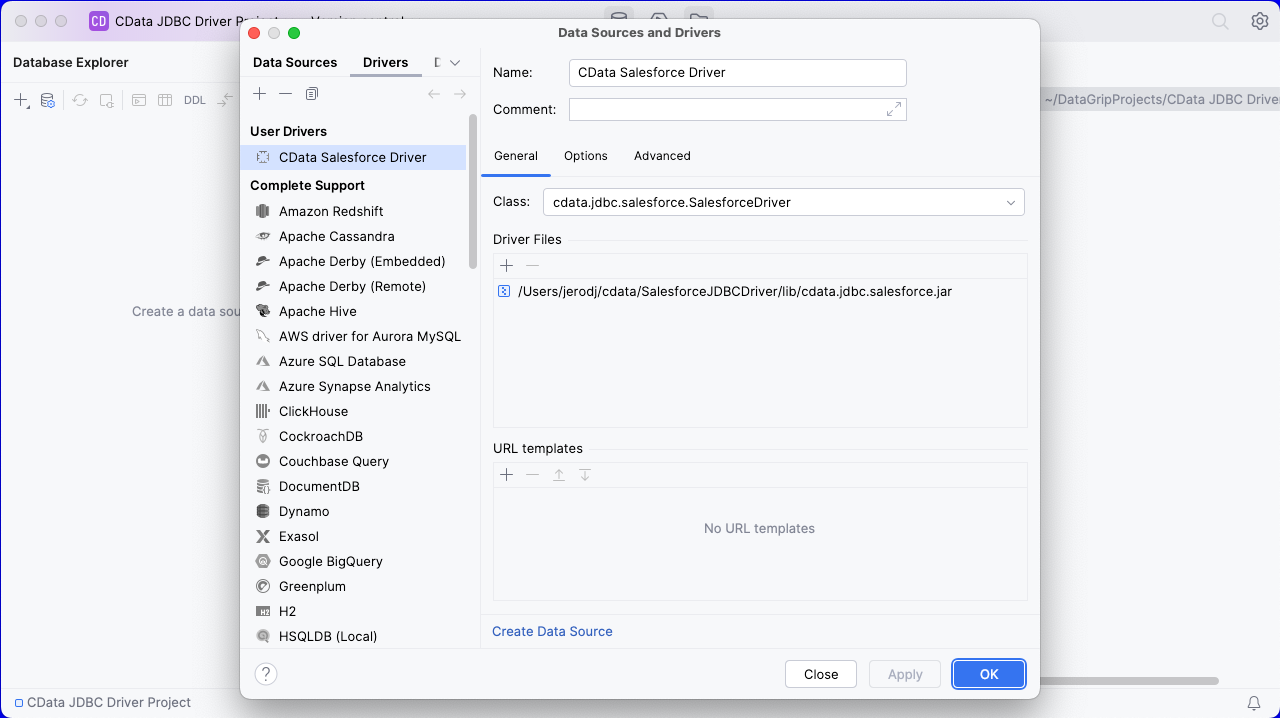
- Once the connection is saved, click the plus (), then "Data Source" then "CData Respond.io Driver" to create a new Respond.io Data Source.
- In the new window, configure the connection to Respond.io with a JDBC URL.
Built-in Connection String Designer
For assistance in constructing the JDBC URL, use the connection string designer built into the Respond.io JDBC Driver. Either double-click the JAR file or execute the jar file from the command-line.
java -jar cdata.jdbc.api.jarFill in the connection properties and copy the connection string to the clipboard.
Start by setting the Profile connection property to the location of the Respondio Profile on disk (e.g. C:\profiles\Respondio.apip). Next, set the ProfileSettings connection property to the connection string for Respondio (see below).
Respondio API Profile Settings
Respond.io uses API key authentication. To obtain an API key:
- Log in to your Respond.io account.
- Navigate to Settings in your workspace.
- Select Developer under the Integrations section.
- Copy the API key displayed on the page.
After obtaining your API key, set the following connection properties:
- AuthScheme: Set this to APIKey.
Set the following in the ProfileSettings connection property:
- APIKey: Set this to your Respond.io API key.

- Set URL to the connection string, e.g.,
jdbc:api:Profile=C:\profiles\Respondio.apip;AuthScheme=APIKey;ProfileSettings='APIKey=your_api_key'; - Click "Apply" and "OK" to save the connection string
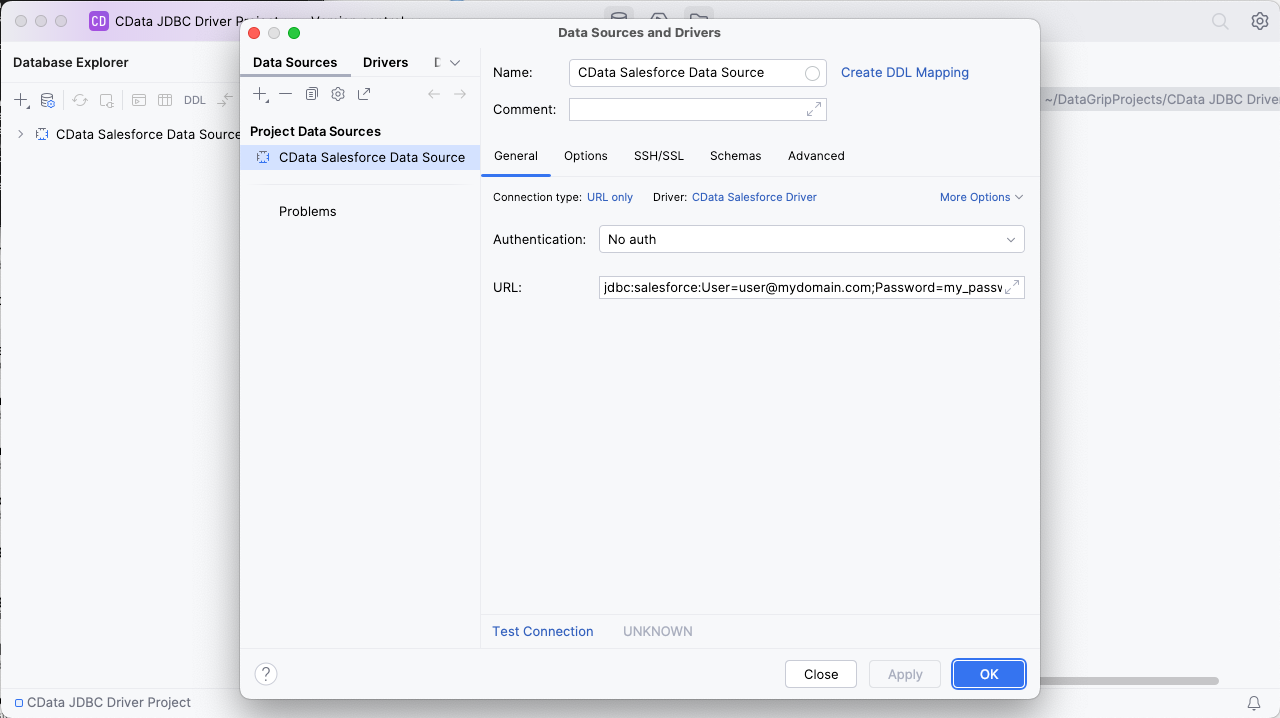
At this point, you will see the data source in the Data Explorer.
Execute SQL Queries Against Respond.io
To browse through the Respond.io entities (available as tables) accessible through the JDBC Driver, expand the Data Source.
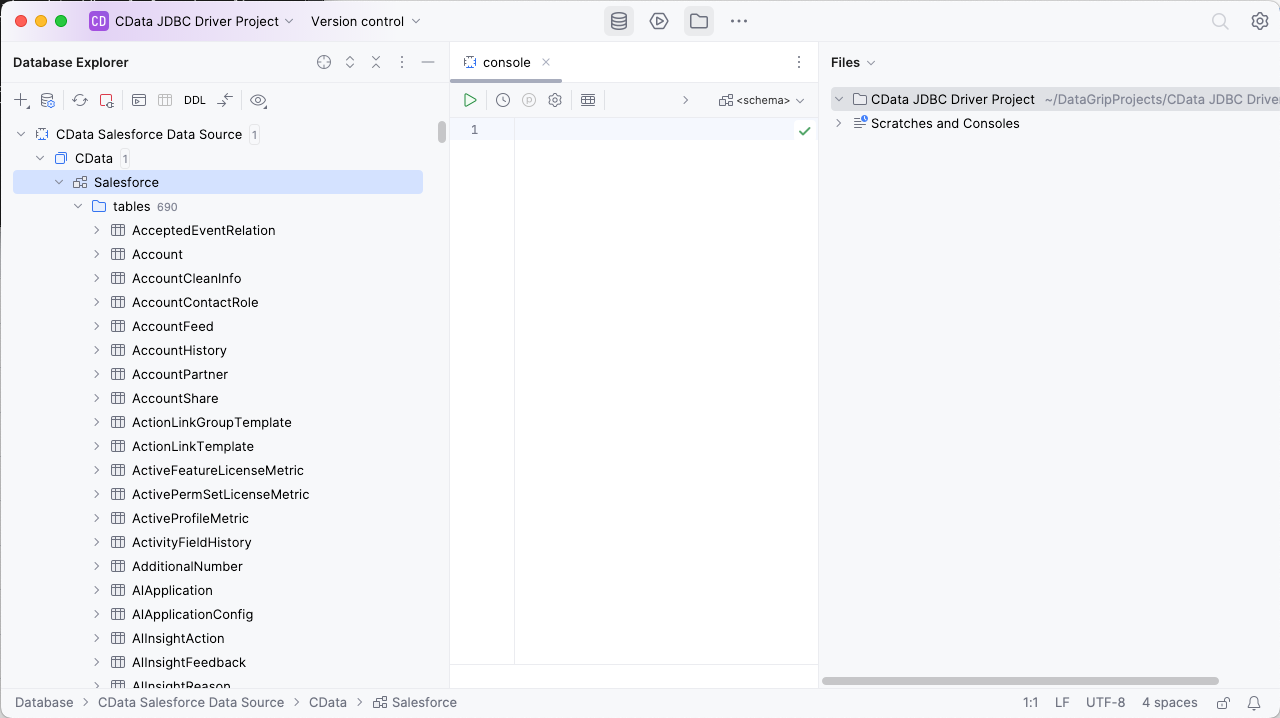
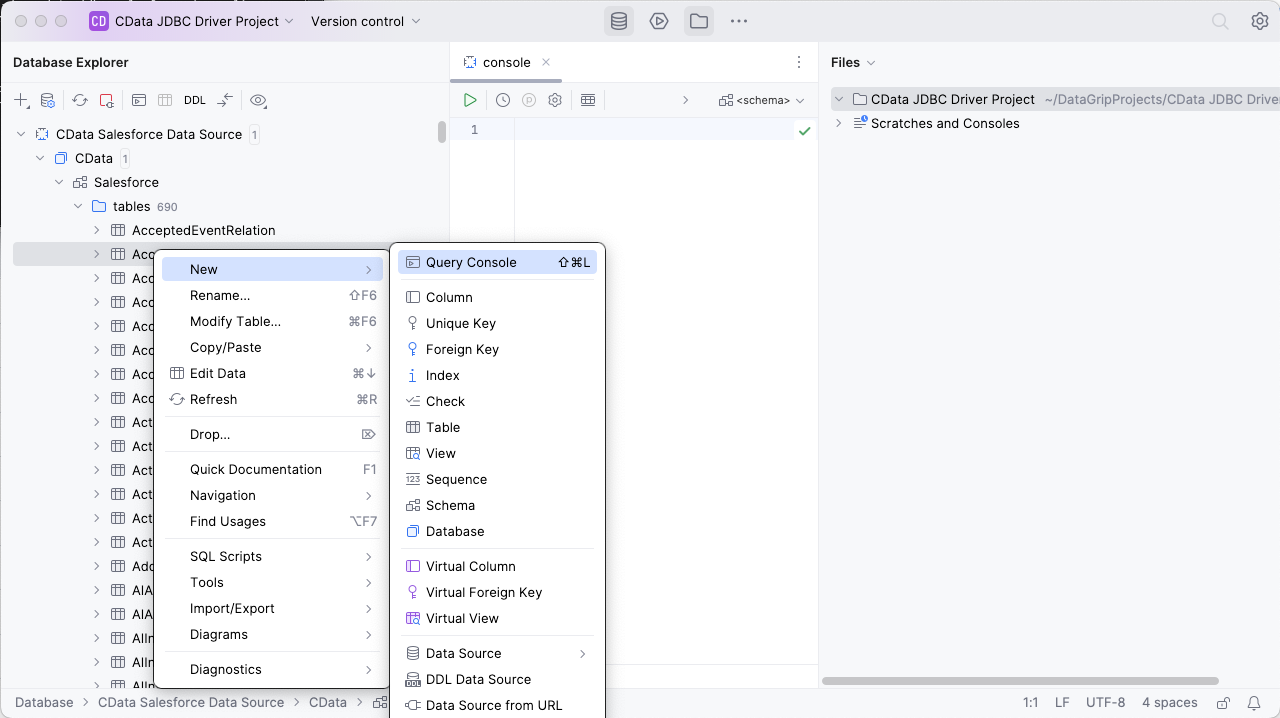
To execute queries, right click on any table and select "New" -> "Query Console."
In the Console, write the SQL query you wish to execute. For example:
SELECT Id, Email FROM Contacts WHERE Identifier = 'id:438180634'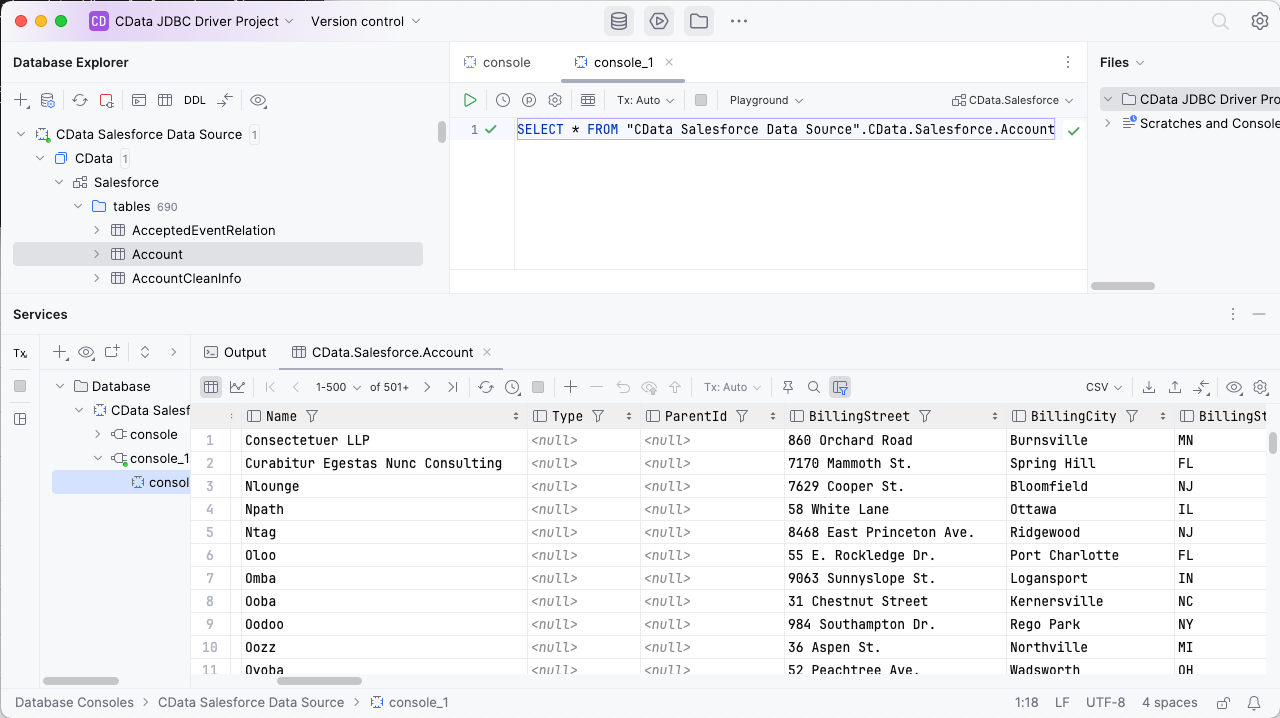
Download a free, 30-day trial of the CData API Driver for JDBC and start working with your live Respond.io data in DataGrip. Reach out to our Support Team if you have any questions.