




Interact with Live Sage X3 Cloud Data in Meta Muse via CData Connect AI
Muse is Meta's personal AI agent for iOS, Android, and the web, built on the Muse Spark models. It connects to remote model context protocol (MCP) servers, so you can point Muse at a governed data source and let it discover and call live data tools.
Connect Muse to CData Connect AI through its Remote MCP Server, and Muse gains governed, real-time access to live Sage X3 Cloud data. You can explore data, fetch records, and interact with objects using natural language prompts, with every request running against authorized sources.
This article shows you how to configure Sage X3 Cloud connectivity in Connect AI, generate a personal access token, create a custom connector to the Connect AI Remote MCP Server in Muse, and interact with live Sage X3 Cloud data from Muse.
Step 1: Configure Sage X3 Cloud connectivity for Meta Muse
Connectivity to Sage X3 Cloud from Muse is made possible through Connect AI's Remote MCP Server. To interact with Sage X3 Cloud data from Muse, start by creating and configuring a Sage X3 Cloud connection in Connect AI.
- Log into Connect AI, click Sources, and then click Add Connection
- Select Sage X3 Cloud from the Add Connection panel
-
Enter the necessary authentication properties to connect to Sage X3 Cloud.
Sage X3 Cloud uses the OAuth 2.0 Client Credentials flow, and an X-API-Key is also required for API access. Set AuthScheme to OAuth and specify the following connection properties:
- URL: The base URL of your Sage X3 Cloud instance.
- OAuthAccessTokenUrl: The OAuth token endpoint (e.g., https://your-auth-domain/oauth/token).
- OAuthClientId: Your OAuth application client ID.
- OAuthClientSecret: Your OAuth application client secret.
- Audience: The API audience value for the token request.
- XAPIKey: The X-API-Key provided by your Sage X3 Cloud administrator.
- Folder: The Sage X3 folder name (e.g., SEED). This folder is used as the default schema.
- Folders (optional): A comma-separated list of Sage X3 folders (e.g., SEED,PERF). Each folder is exposed as a separate schema, so you can query across folders with the Schema.Table syntax.
The driver obtains an access token with the Client Credentials flow and sends it with the X-API-Key on every API request. With InitiateOAuth set to GETANDREFRESH (the default), the driver acquires and refreshes the token automatically.

- Click Save & Test
- Navigate to the Permissions tab and update user-based permissions



Add a Personal Access Token
A Personal Access Token (PAT) is used to authenticate the connection to Connect AI from Muse. It is best practice to create a separate PAT for each integration to maintain granular access control.
- Click the gear icon () at the top right of the Connect AI app to open Settings
- On the Settings page, go to the Access Tokens section and click Create PAT
- Give the PAT a descriptive name and click Create
- Copy the token when displayed and store it securely. It will not be shown again

With the Sage X3 Cloud connection configured and a PAT generated, Muse can now connect to Sage X3 Cloud data through Connect AI.
Step 2: Create a custom connector to the Connect AI MCP Server in Meta Muse
Muse has no manual "add MCP server" form. Instead, you ask Muse in plain language to build a custom connector that points at the Connect AI Remote MCP Server, a hosted, public HTTPS endpoint that speaks streamable HTTP. Muse builds the connector on its secure VM using the official MCP SDK, then discovers and calls the available Connect AI data tools.
- Open Muse on iOS, Android, or the web and start a new chat
-
Ask Muse to build a custom connector to the Connect AI Remote MCP Server, giving it the server URL and noting that the endpoint is a hosted MCP server over streamable HTTP, for example:
Create a custom connector to CData Connect AI. It is a hosted MCP server over streamable HTTP at https://mcp.cloud.cdata.com/mcp and it requires an Authorization header.
-
When Muse prompts for credentials, it opens a secure entry flow, separate from the chat, that saves the value in its Secure Credentials Store. Enter the Authorization header value in the format Basic your_base64_encoded_email_PAT
Note: For the Authorization value, base64 encode email:PAT and prefix it with Basic. Enter it only in Muse's secure credential prompt, never in the chat.
-
Muse connects to the Connect AI MCP Server and lists the available data tools. Review the custom connector confirmation, then click Continue. When Muse offers to save the integration as a skill, choose yes so the connector is available in every future chat
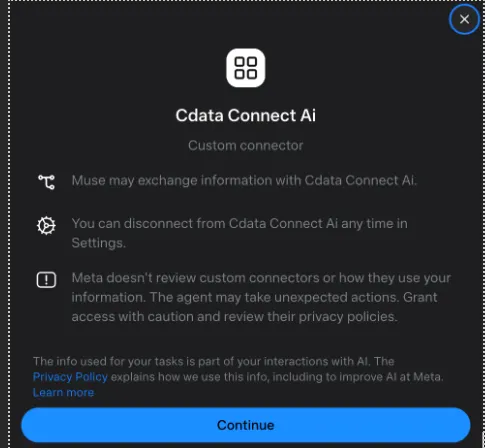
With the custom connector saved, the Connect AI tools are available to Muse in any chat.
Step 3: Interact with live Sage X3 Cloud data from Meta Muse
With the integration complete, interact with live Sage X3 Cloud data directly from Muse through natural language prompts.
-
In a Muse chat, type a prompt that uses the Connect AI connector, for example:
- Use the CData Connect AI connector to list all available connections
- Show the available objects and fields for Sage X3 Cloud
- Fetch the top 5 records from Sage X3 Cloud
- Approve the tool call in the Sentinel dialog when prompted
-
Muse calls the Connect AI MCP Server and returns live results from Sage X3 Cloud data
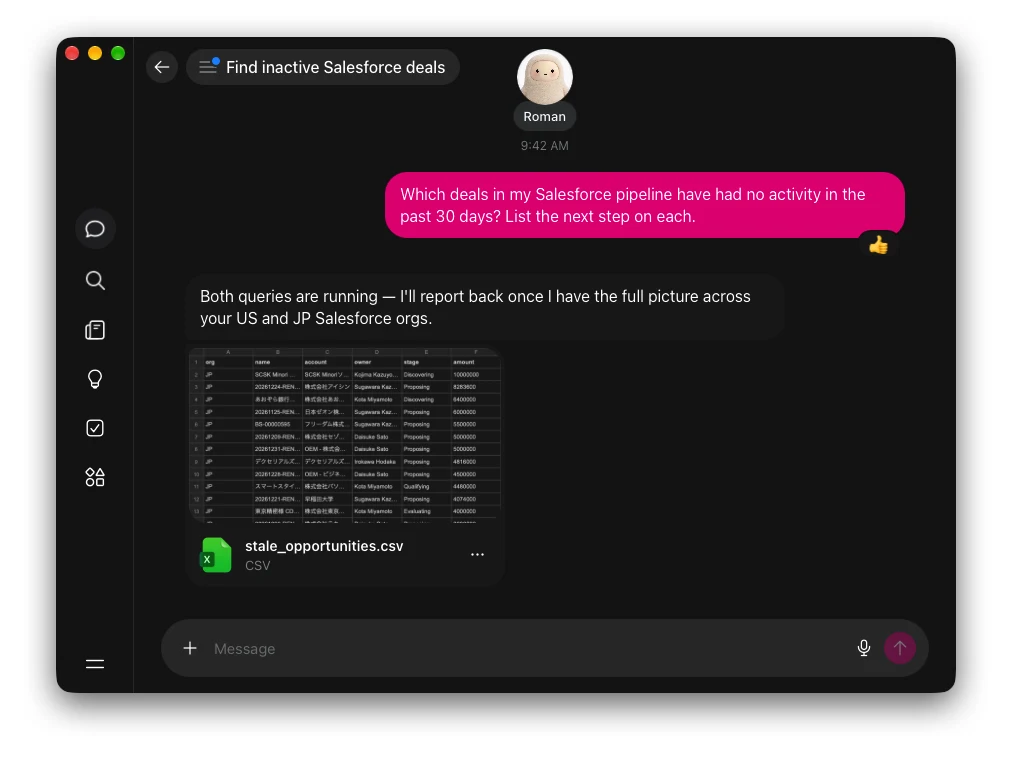
At this point, Muse communicates with the Connect AI MCP Server and retrieves live Sage X3 Cloud data through remote MCP tools directly from your chats.
Get started with CData Connect AI
With CData Connect AI, interact with hundreds of SaaS, big data, and NoSQL sources directly from your AI agents, models, and cloud applications. To explore more download a free 14-day trial today. Our Support Team is available to help with any questions you have.