




How to connect to Sage X3 Cloud Data in DBVisualizer

The CData JDBC Driver for Sage X3 Cloud implements JDBC standards to provide connectivity to Sage X3 Cloud data in applications ranging from business intelligence tools to IDEs. This article shows how to establish a connection to Sage X3 Cloud data in DBVisualizer and use the table editor to load Sage X3 Cloud data.
Create a New Driver Definition for Sage X3 Cloud Data
Follow the steps below to use the Driver Manager to provide connectivity to Sage X3 Cloud data from DBVisualizer tools.
- In DBVisualizer, click Tools -> Driver Manager.
- Click the plus sign "" to create a new driver.
- Select "Custom" as the template.
- On the Driver Settings tab:
- Set Name to a user-friendly name (e.g. "CData Sage X3 Cloud Driver")
- Set URL Format to jdbc:sagex3cloud:
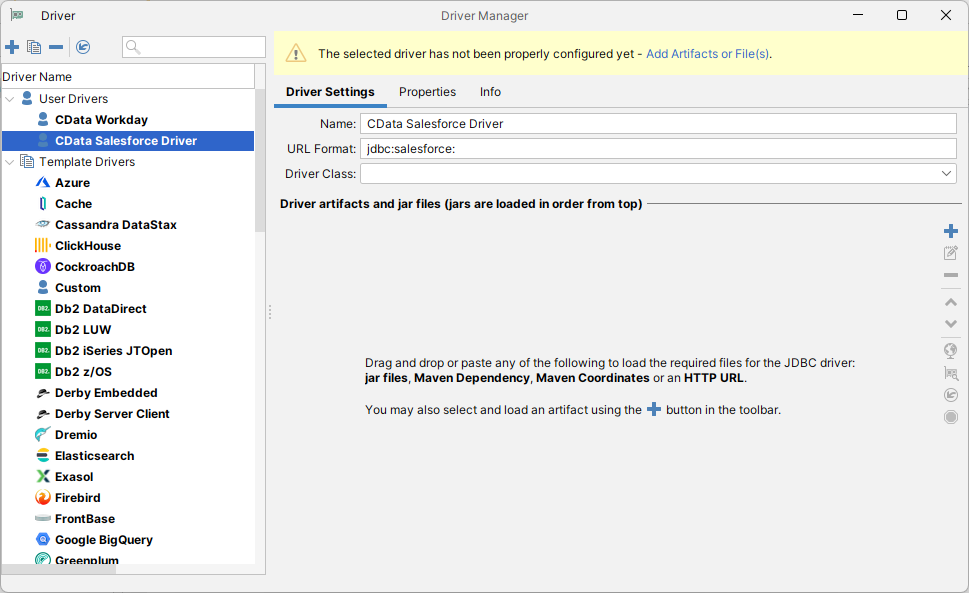
- In Driver artifacts and jar files (jars are loaded in order from top):
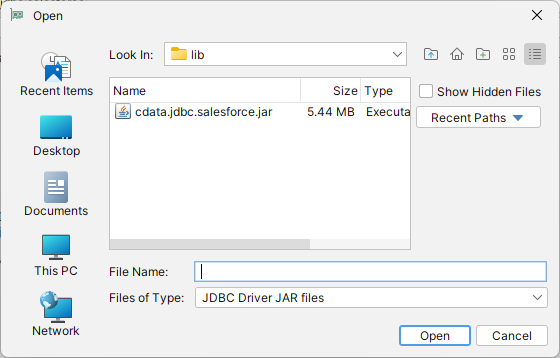
- Click the plus sign "" -> "Add Files"
- Navigate to the "lib" folder in the installation directory (C:\Program Files\CData JDBC Driver for Sage X3 Cloud XXXX\)
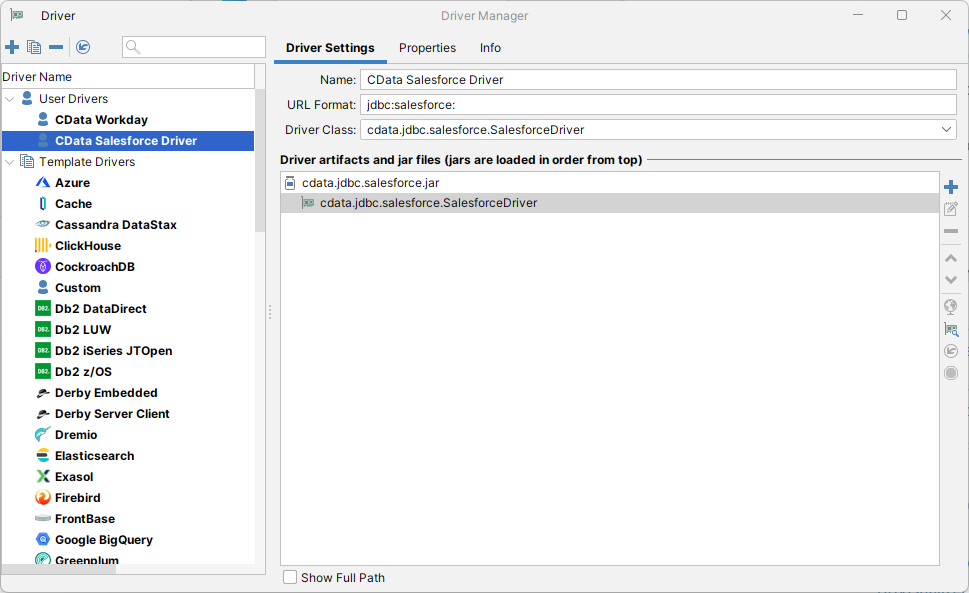
- Select the JAR file (cdata.jdbc.SageX3Cloud.jar) and click "Open"
- The Driver Class should populate automatically. If not, select class (cdata.jdbc.sagex3cloud.SageX3CloudDriver).
Define the Connection to the JDBC Data Source
Close the "Driver Manager" and follow the steps below to save connection properties in the JDBC URL.
- In the "Databases" tab, click the plus sign "" and select the driver you just created.
In the "Connection" section, set the following options:
- Database Type: If you selected the wizard option, the database type is automatically detected. If you selected the "No Wizard" option, select the Generic or Auto Detect option in the Database Type menu.
- Driver Type: Select the driver you just created.
Database URL: Enter the full JDBC URL. The syntax of the JDBC URL is jdbc:sagex3cloud: followed by the connection properties in a semicolon-separated list of name-value pairs.
Sage X3 Cloud uses the OAuth 2.0 Client Credentials flow, and an X-API-Key is also required for API access. Set AuthScheme to OAuth and specify the following connection properties:
- URL: The base URL of your Sage X3 Cloud instance.
- OAuthAccessTokenUrl: The OAuth token endpoint (e.g., https://your-auth-domain/oauth/token).
- OAuthClientId: Your OAuth application client ID.
- OAuthClientSecret: Your OAuth application client secret.
- Audience: The API audience value for the token request.
- XAPIKey: The X-API-Key provided by your Sage X3 Cloud administrator.
- Folder: The Sage X3 folder name (e.g., SEED). This folder is used as the default schema.
- Folders (optional): A comma-separated list of Sage X3 folders (e.g., SEED,PERF). Each folder is exposed as a separate schema, so you can query across folders with the Schema.Table syntax.
The driver obtains an access token with the Client Credentials flow and sends it with the X-API-Key on every API request. With InitiateOAuth set to GETANDREFRESH (the default), the driver acquires and refreshes the token automatically.
Built-in Connection String Designer
For assistance in constructing the JDBC URL, use the connection string designer built into the Sage X3 Cloud JDBC Driver. Either double-click the JAR file or execute the jar file from the command-line.
java -jar cdata.jdbc.sagex3cloud.jarFill in the connection properties and copy the connection string to the clipboard.

When you configure the JDBC URL, you may also want to set the Max Rows connection property. This will limit the number of rows returned, which is especially helpful for improving performance when designing reports and visualizations.
A typical connection string is below:
jdbc:sagex3cloud:AuthScheme=OAuth;URL=https://x3server/;OAuthAccessTokenUrl=https://auth-domain/oauth/token;OAuthClientId=your_client_id;OAuthClientSecret=your_client_secret;Audience=https://api-audience;XAPIKey=your_api_key;Folder=SEED;- NOTE: Since Sage X3 Cloud does not require a User or Password to authenticate, you may use whatever values you wish for Database Userid and Database Password.
- On the Connection tab, click Connect.
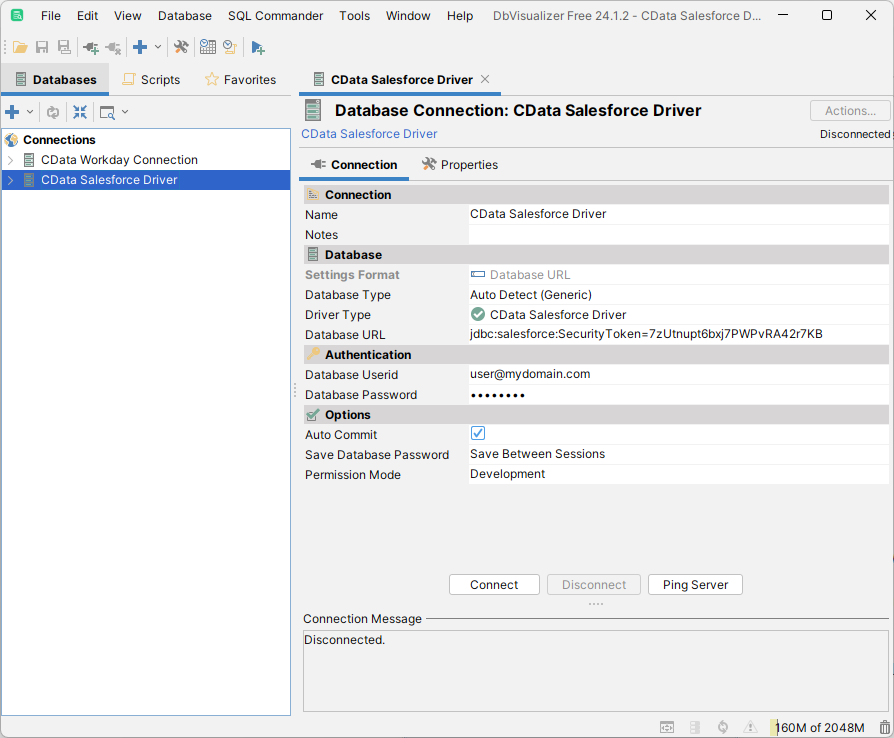
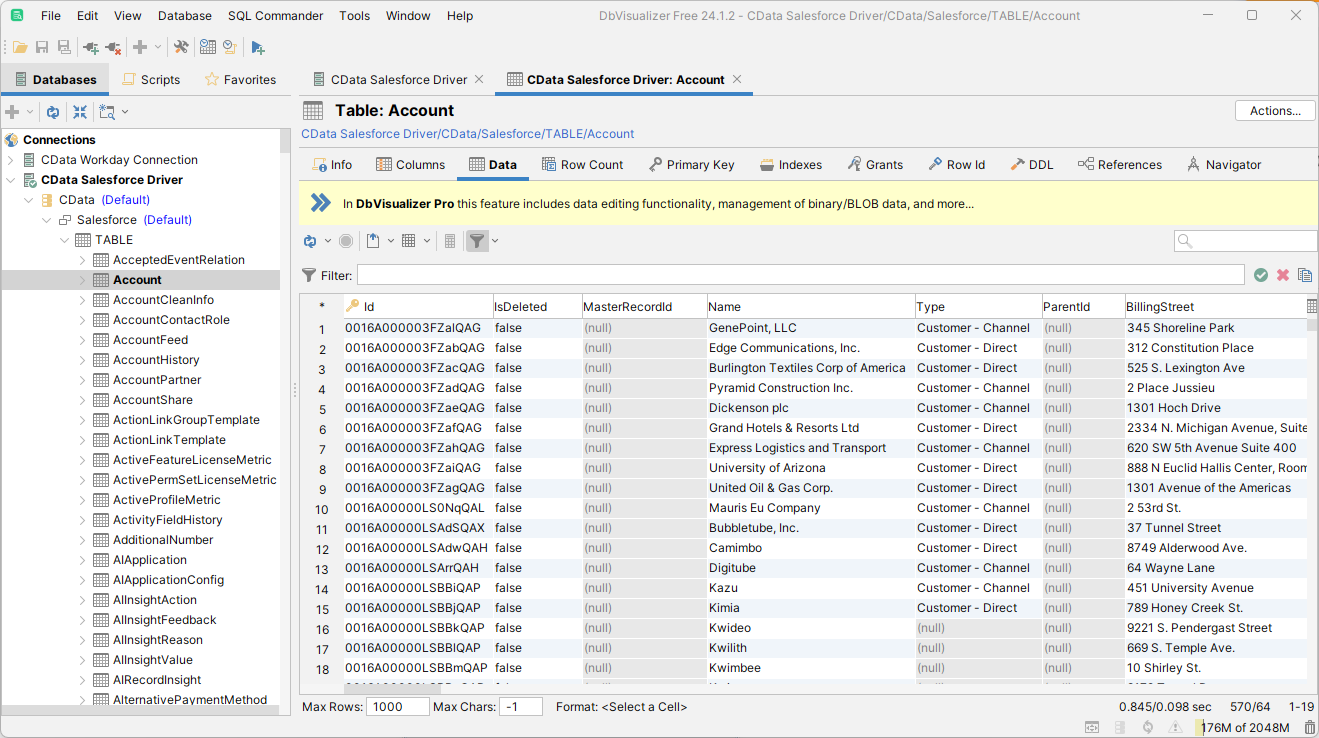
To browse through tables exposed by the Sage X3 Cloud JDBC Driver, right-click a table and click "Open in New Tab."
To execute SQL queries, use the SQL Commander tool: Click SQL Commander -> New SQL Commander. Select the Database Connection, Database, and Schema from the available menus.
See the "Supported SQL" chapter in the help documentation for more information on the supported SQL. See the "Data Model" chapter for table-specific information.
More Information & Free Trial
Download a free, 30-day trial of the CData JDBC Driver for Sage X3 Cloud and start working with your live Sage X3 Cloud data in DbVisualizer. Join the CData Community or reach out to our Support Team if you have any questions.Ready to get started?
Download a free trial of the Sage X3 Cloud Driver to get started:
Download NowLearn more:
 Sage X3 Cloud JDBC Driver
Rapidly create and deploy powerful Java applications that integrate with Sage X3 Cloud.