




How to Work with Sage X3 Cloud Data in ETL Validator JDBC

ETL Validator provides data movement and transformation capabilities for integrating data platforms across your organization. CData's JDBC driver seamlessly integrates with ETL Validator and extends its native connectivity to include Sage X3 Cloud data.
This tutorial explains how to build a simple ETL validator data flow to extract data from Sage X3 Cloud data and load it into an example data storage solution: SQL Server.
Add a new ETL Validator data source via CData
CData extends ETL Validator's data connectivity capabilities by providing the ability to add data sources that connect via CData's JDBC drivers. Connecting to Sage X3 Cloud data simply requires creating a new data source in ETL Validator through CData's connectiviy suite as described below.
Login to ETL Validator
Begin by logging into ETL Validator to view the application dashboard.
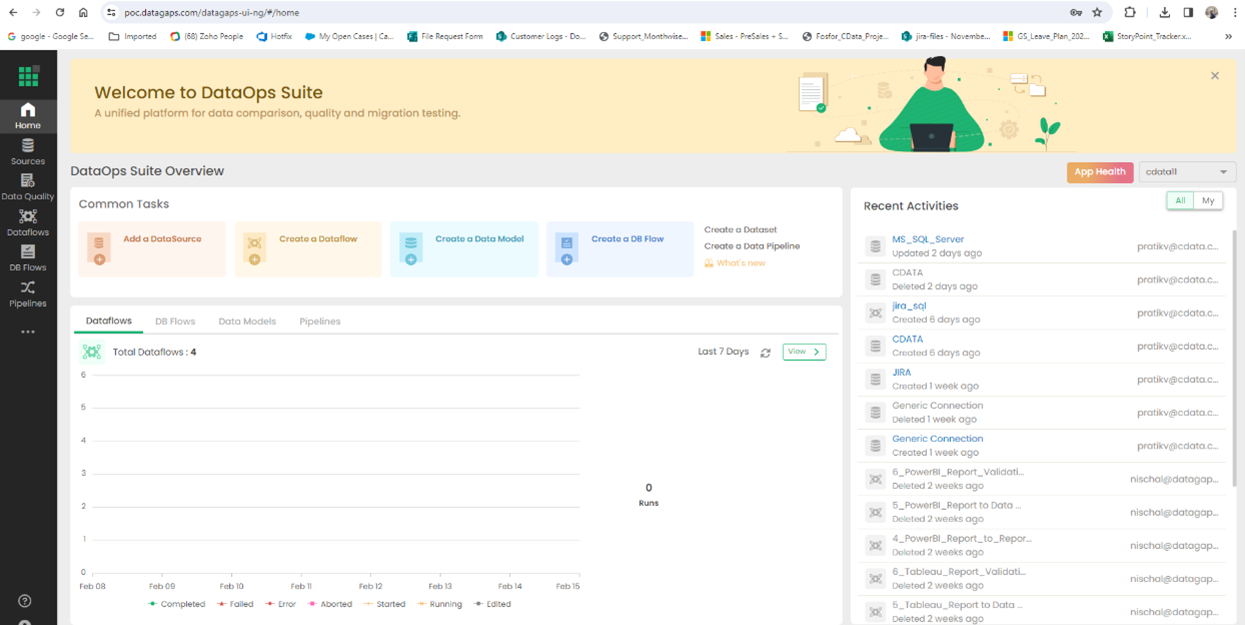
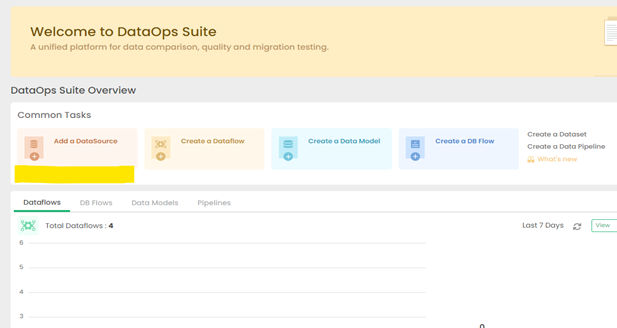
Click on Add a DataSource
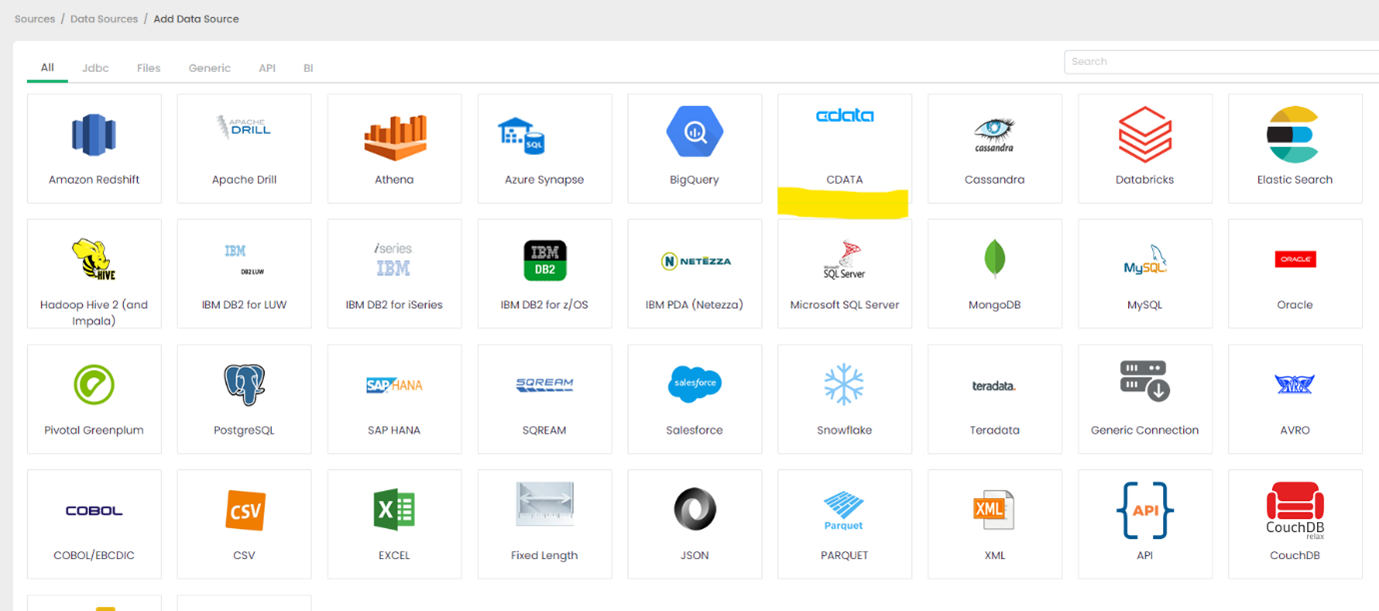
CData extends the data source options within ETL Validator.
Click on CData
CData's connectivity is embedded within ETL Validator's data source options.
Configure the CData Driver Connection String
You will need a JDBC connection string to establish a connection to Sage X3 Cloud in ETL Validator.
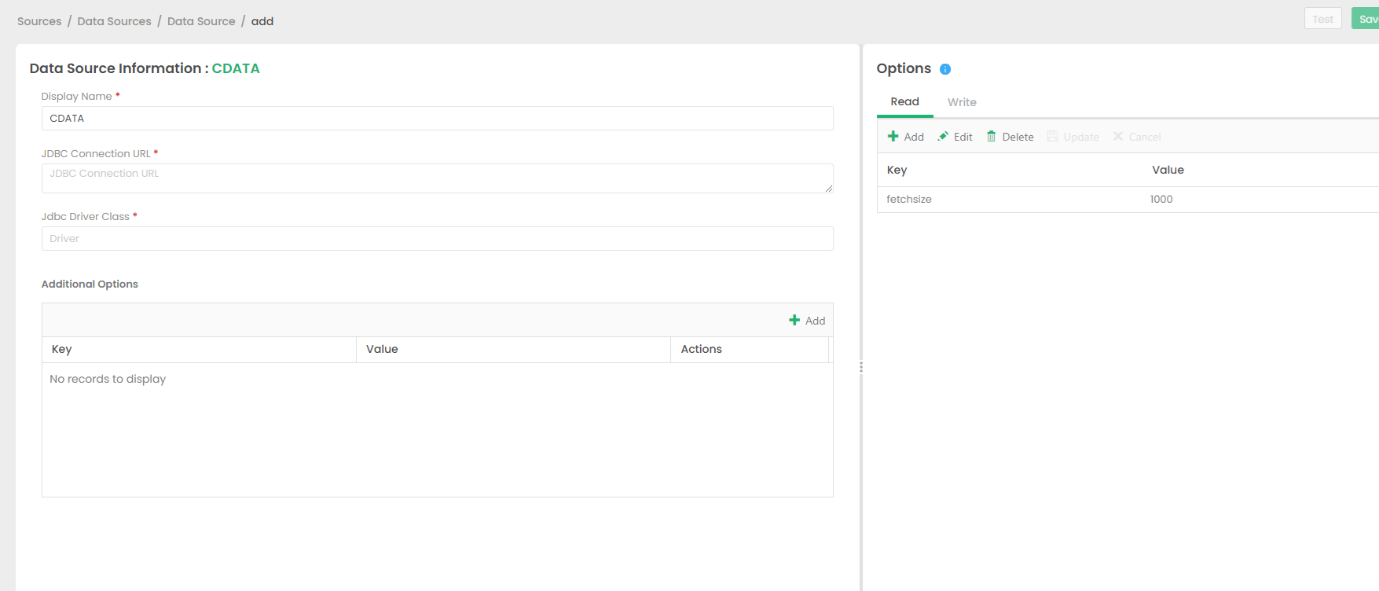
Sage X3 Cloud uses the OAuth 2.0 Client Credentials flow, and an X-API-Key is also required for API access. Set AuthScheme to OAuth and specify the following connection properties:
- URL: The base URL of your Sage X3 Cloud instance.
- OAuthAccessTokenUrl: The OAuth token endpoint (e.g., https://your-auth-domain/oauth/token).
- OAuthClientId: Your OAuth application client ID.
- OAuthClientSecret: Your OAuth application client secret.
- Audience: The API audience value for the token request.
- XAPIKey: The X-API-Key provided by your Sage X3 Cloud administrator.
- Folder: The Sage X3 folder name (e.g., SEED). This folder is used as the default schema.
- Folders (optional): A comma-separated list of Sage X3 folders (e.g., SEED,PERF). Each folder is exposed as a separate schema, so you can query across folders with the Schema.Table syntax.
The driver obtains an access token with the Client Credentials flow and sends it with the X-API-Key on every API request. With InitiateOAuth set to GETANDREFRESH (the default), the driver acquires and refreshes the token automatically.
Built-in Connection String Designer
For assistance in constructing the JDBC URL, use the connection string designer built into the Sage X3 Cloud JDBC Driver. Either double-click the JAR file or execute the jar file from the command-line.
java -jar cdata.jdbc.sagex3cloud.jar

A typical connection string looks like this:
jdbc:sagex3cloud:AuthScheme=OAuth;URL=https://x3server/;OAuthAccessTokenUrl=https://auth-domain/oauth/token;OAuthClientId=your_client_id;OAuthClientSecret=your_client_secret;Audience=https://api-audience;XAPIKey=your_api_key;Folder=SEED;
Licensing the Driver
To ensure the JDBC driver is licensed appropriately, copy the license file to the appropriate location:
Copy the JDBC Driver for Sage X3 Cloud and lic file from "C:\Program Files\CData\CData JDBC Driver for Sage X3 Cloud\lib" to "C:\Datagaps\ETLValidator\Server\apache-tomcat\bin".
            cdata.jdbc.sagex3cloud.jar
            cdata.jdbc.sagex3cloud.lic
Note: If you do not copy the .lic file with the jar, you will see a licensing error that indicates you do not have a valid license installed. This is true for both the trial and full versions.
Save the connection
Should you encounter any difficulties loading the CData JDBC driver class, please contact DataGap's team, and they will provide you instructions on how to load the jar file for the relevant driver.
Add SQL Server as a Target
This example will use SQL Server as a destination for Sage X3 Cloud data data, but any preferred destination can be used instead.
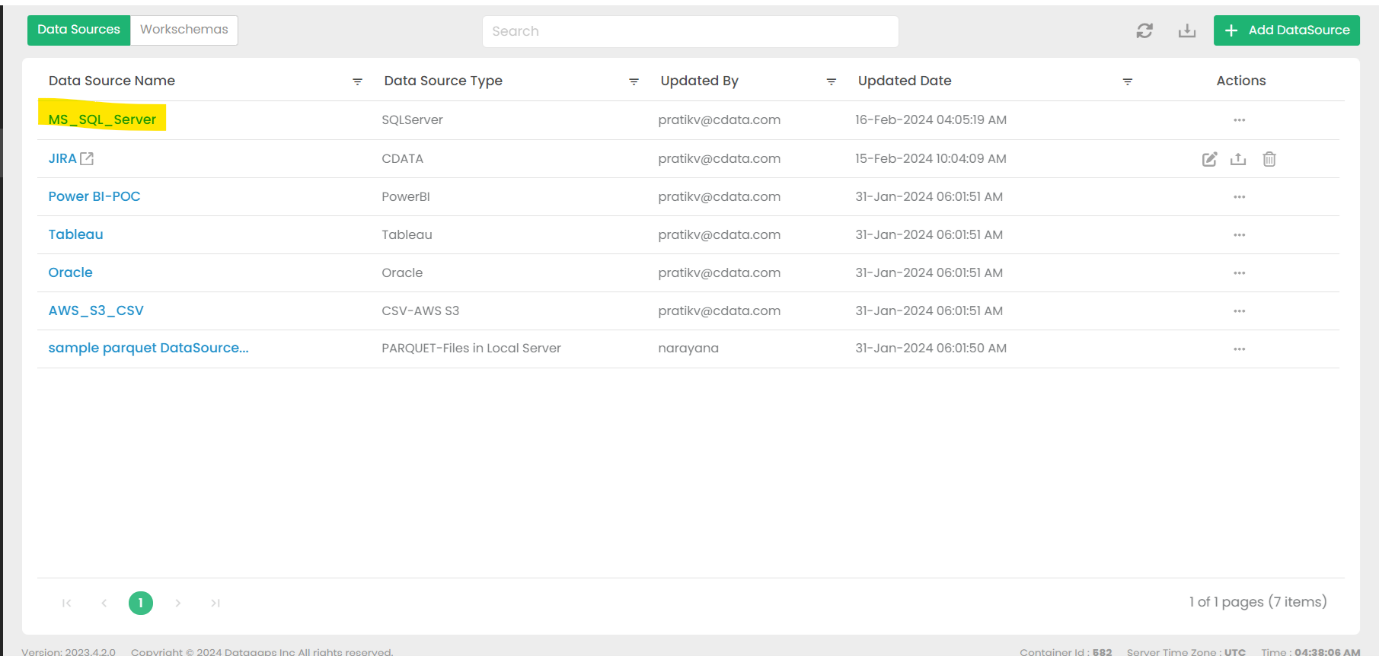
Go to DataSources and select MS_SQL_SERVER
This option is the default.
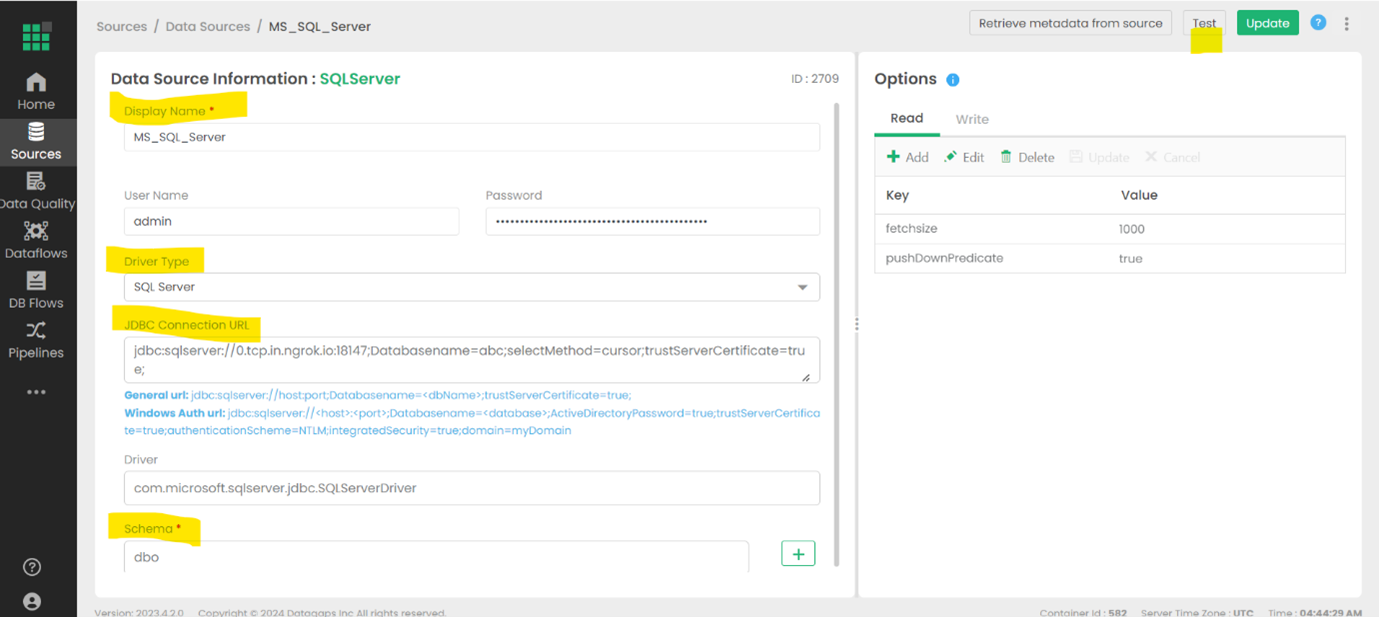
Fill in the necessary connection details and test the connection
The details will depend on the specific target, but these details may include a URL, authentiation credentials, etc.
Create a Dataflow in ETL Validator
Open the Dataflows tab
Configured data flows will appear in this window.
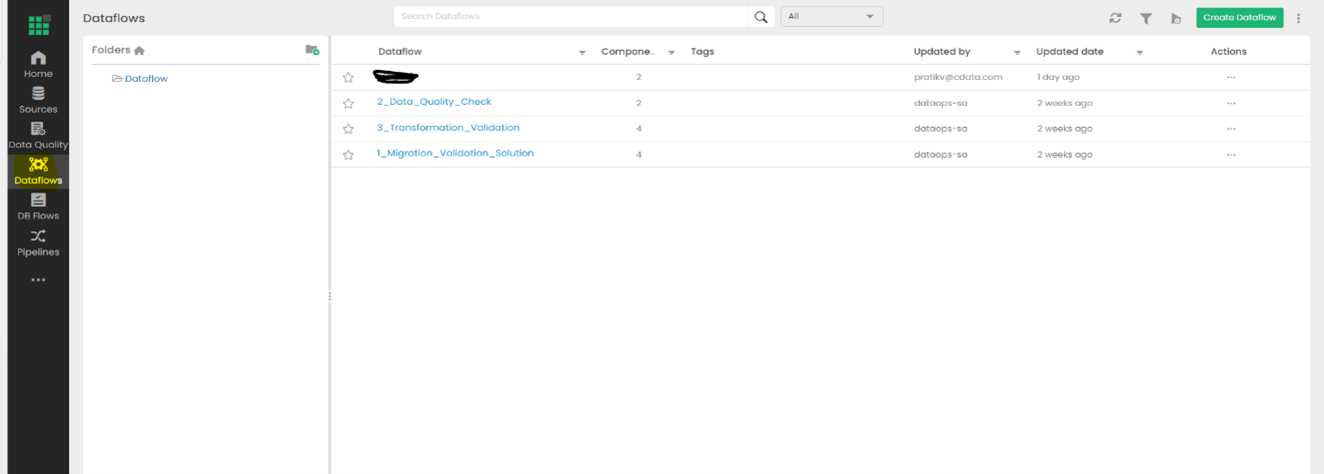
Select Create Dataflow
Name your new dataflow and save it.
Open the Dataflow to view the Dataflow Diagram
The details of the data movement will be configured in this panel.
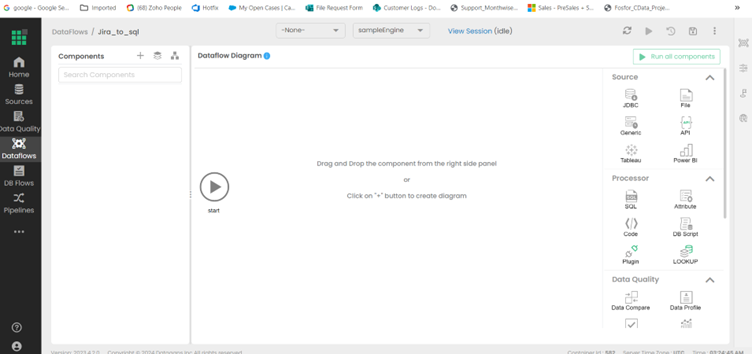
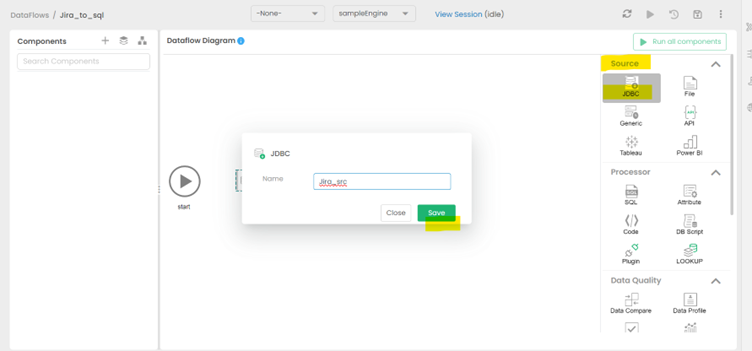
Drag & drop the JDBC as a source from the right side
Give the new source an appropriate name and save it.
Fill in the Query section of the new source
Select the Table from the Schema option that reflects which data should be pulled from Sage X3 Cloud data.
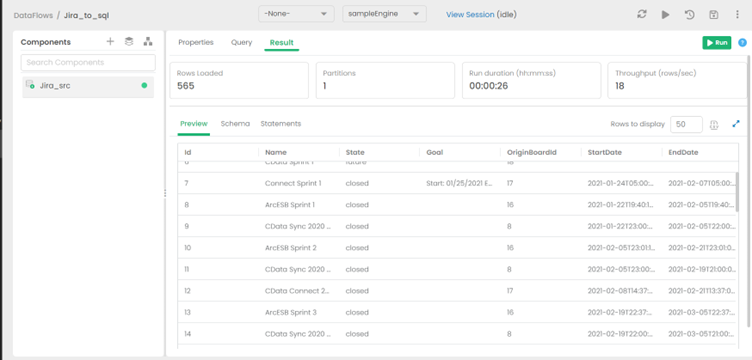
View the expected results of your query
The anticipated outcome of the configured query is displayed in the Result tab.
Add the destination to the Dataflow
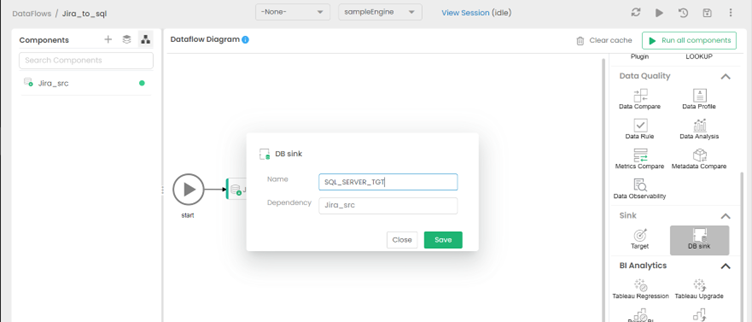
Select Switch to Diagram, then drag & drop the DB Sink as a target from the right side (under Sink options). Give the sink an appropriate name and save it.
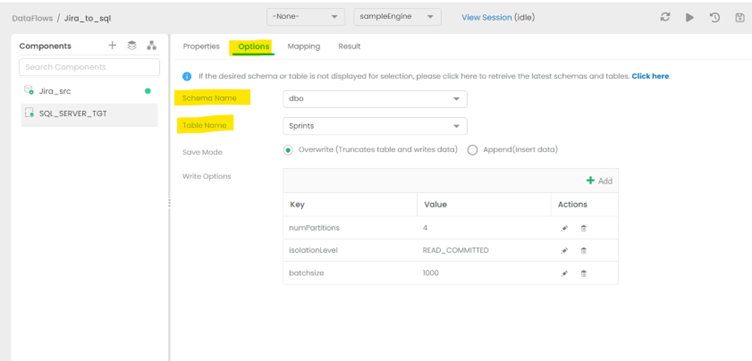
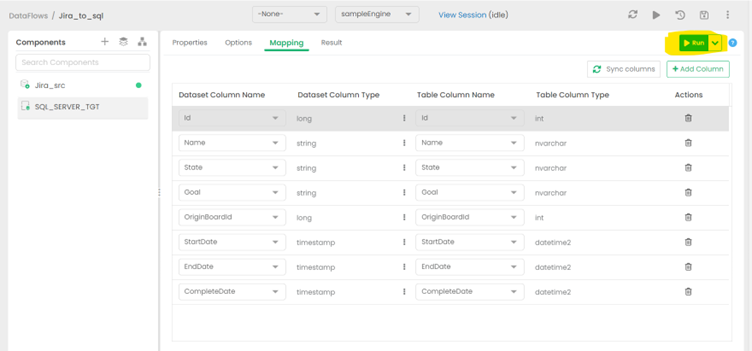
Set the appropriate Schema for the destination
Choose the Schema and table that matches the structure of the source table. For this example, the table on the target side was created to match the Source so that data flow seamlessly. More advanced schema transformation operations are beyond the scope of this article.
Hit the RUN option to begin replication
Running the job will take some time.
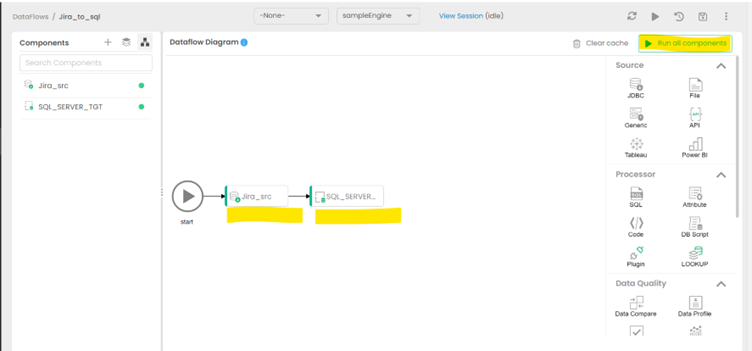
View the finished Dataflow
Return to the diagram to see the finished data replication job from Sage X3 Cloud data to SQL Server.
Get Started Today
Download a free, 30-day trial of the CData JDBC Driver for Sage X3 Cloud and start building Sage X3 Cloud-connected applications with ETL Validator. Reach out to our Support Team if you have any questions.
Ready to get started?
Download a free trial of the Sage X3 Cloud Driver to get started:
Download NowLearn more:
 Sage X3 Cloud JDBC Driver
Rapidly create and deploy powerful Java applications that integrate with Sage X3 Cloud.