




Migrating data from Sage X3 Cloud to Google BigQuery using CData SSIS Components.

Google BigQuery is a serverless, highly scalable, and cost-effective data warehouse designed to help organizations turn big data into actionable insights.
The CData SSIS Components enhance SQL Server Integration Services by enabling users to easily import and export data from various sources and destinations.
In this article, we explore the data type mapping considerations when exporting to BigQuery and walk through how to migrate Sage X3 Cloud data to Google BigQuery using the CData SSIS Components for Sage X3 Cloud and BigQuery.
Data Type Mapping
| Google BigQuery Schema | CData Schema |
|---|---|
|
STRING, GEOGRAPHY, JSON, INTERVAL |
string |
|
BYTES |
binary |
|
INTEGER |
long |
|
FLOAT |
double |
|
NUMERIC, BIGNUMERIC |
decimal |
|
BOOLEAN |
bool |
|
DATE |
date |
|
TIME |
time |
|
DATETIME, TIMESTAMP |
datetime |
|
STRUCT |
See below |
|
ARRAY |
See below |
STRUCT and ARRAY Types
Google BigQuery supports two kinds of types for storing compound values in a single row, STRUCT and ARRAY. In some places within Google BigQuery, these are also known as RECORD and REPEATED types.
A STRUCT is a fixed-size group of values that are accessed by name and can have different types. The component flattens structs so their fields can be accessed using dotted names. Note that these dotted names must be quoted.
An ARRAY is a group of values with the same type that can have any size. The component treats the array as a single compound value and reports it as a JSON aggregate. These types may be combined such that a STRUCT type contains an ARRAY field, or an ARRAY field is a list of STRUCT values.
Special Considerations
- Google BigQuery has both DATETIME (no timezone) and TIMESTAMP (with timezone) data types that the CData SSIS Components map to datetime based on the timezone of your local machine.
- In Google BigQuery, the NUMERIC type supports 38 digits of precision and up to 9 digits after the decimal point, while the BIGNUMERIC type supports 76 digits of precision and up to 38 digits after the decimal point. The CData SSIS Components for Google BigQuery automatically detects the precision/scale, but with the Destination Component users can manually map any high-precision columns.
-
INTERVAL data types:
-
The component represents INTERVAL types as strings. Whenever a query requires an INTERVAL type, it must specify the INTERVAL using the BigQuery SQL INTERVAL format:
YEAR-MONTH DAY HOUR:MINUTE:SECOND.FRACTION -
For example, the value "5 years and 11 months, minus 10 days and 3 hours and 2.5 seconds" in the correct format is:
5-11 -10 -3:0:0.2.5
-
The component represents INTERVAL types as strings. Whenever a query requires an INTERVAL type, it must specify the INTERVAL using the BigQuery SQL INTERVAL format:
Prerequisites
- Visual Studio 2022
- SQL Server Integration Services Projects extension for Visual Studio 2022
- CData SSIS Components for Google BigQuery
- CData SSIS Components for Sage X3 Cloud
Create the project and add components
-
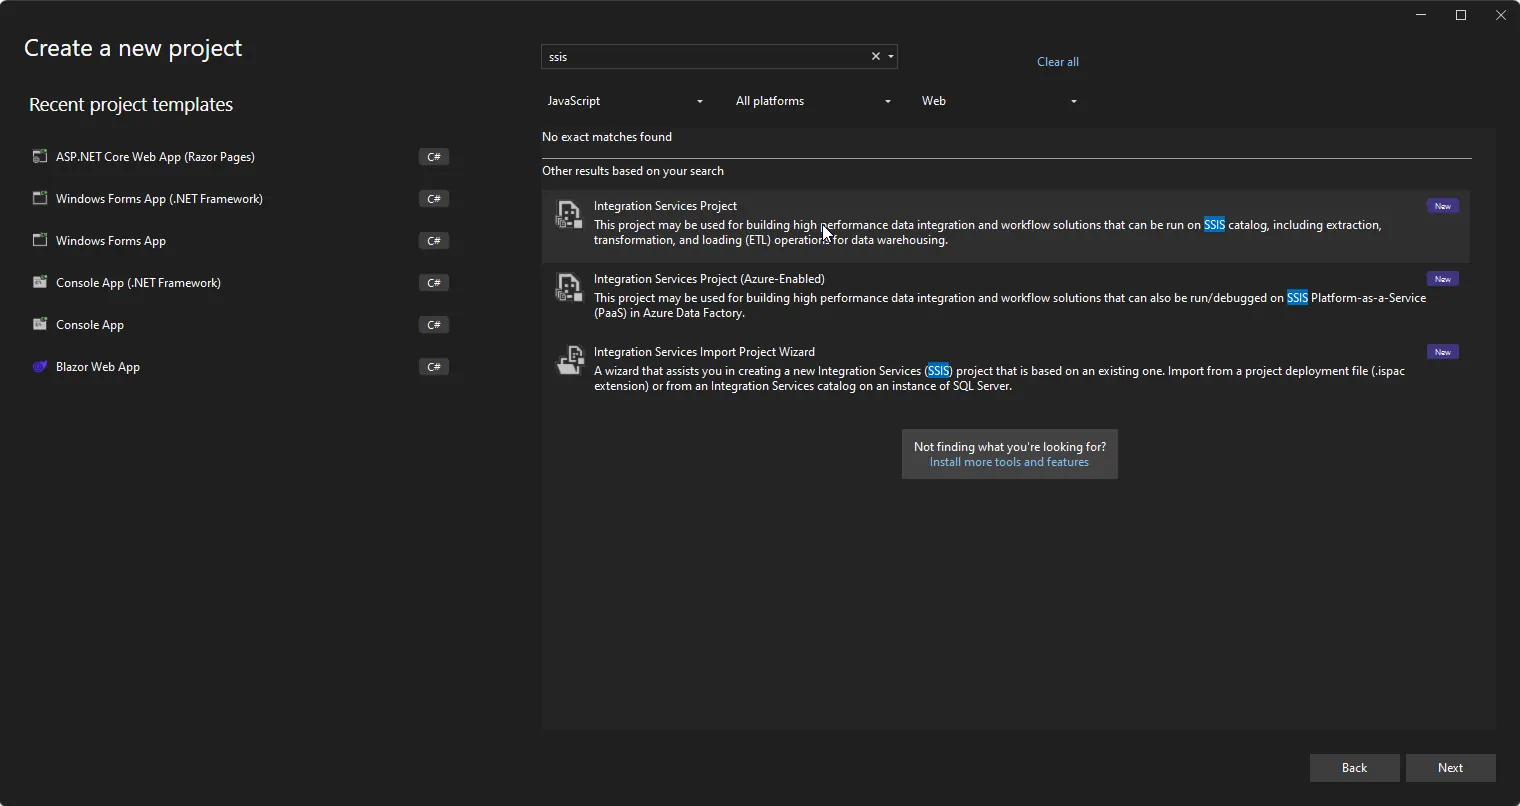
Open Visual Studio and create a new Integration Services Project.
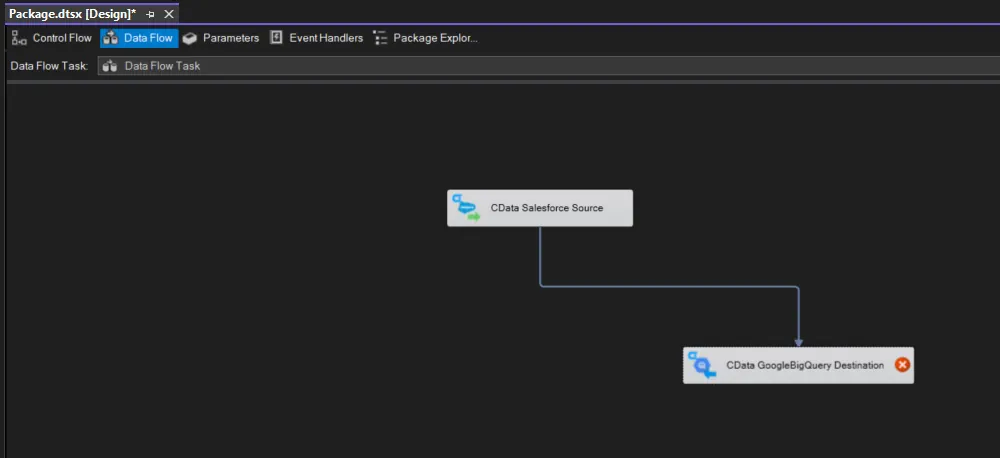
- Add a new Data Flow Task to the Control Flow screen and open the Data Flow Task.
-
Add a CData Sage X3 Cloud Source control and a CData GoogleBigQuery Destination control to the data flow task.
Configure the Sage X3 Cloud source
Follow the steps below to specify properties required to connect to Sage X3 Cloud.
-
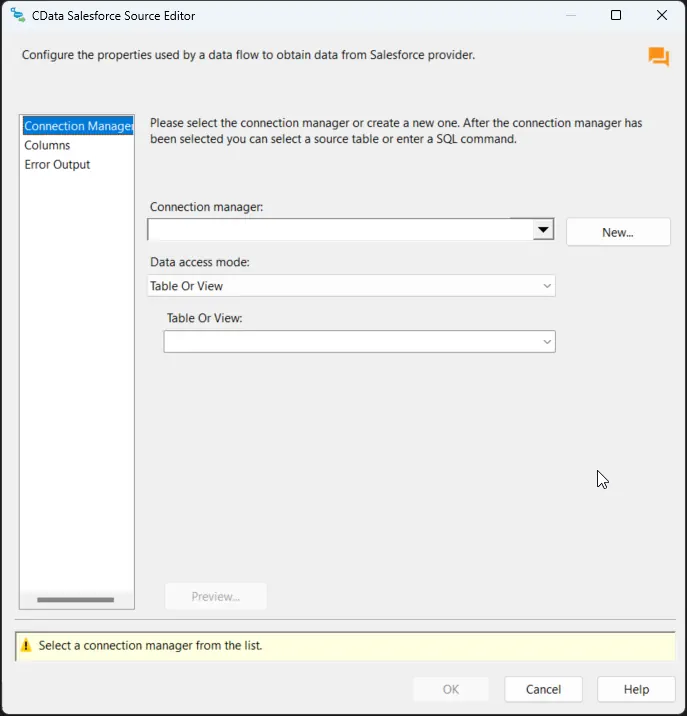
Double-click the CData Sage X3 Cloud Source to open the source component editor and add a new connection.
-
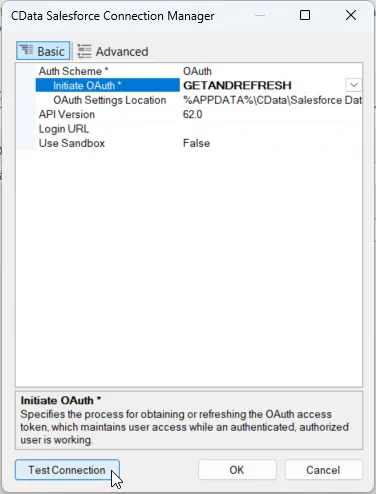
In the CData Sage X3 Cloud Connection Manager, configure the connection properties, then test and save the connection.
Sage X3 Cloud uses the OAuth 2.0 Client Credentials flow, and an X-API-Key is also required for API access. Set AuthScheme to OAuth and specify the following connection properties:
- URL: The base URL of your Sage X3 Cloud instance.
- OAuthAccessTokenUrl: The OAuth token endpoint (e.g., https://your-auth-domain/oauth/token).
- OAuthClientId: Your OAuth application client ID.
- OAuthClientSecret: Your OAuth application client secret.
- Audience: The API audience value for the token request.
- XAPIKey: The X-API-Key provided by your Sage X3 Cloud administrator.
- Folder: The Sage X3 folder name (e.g., SEED). This folder is used as the default schema.
- Folders (optional): A comma-separated list of Sage X3 folders (e.g., SEED,PERF). Each folder is exposed as a separate schema, so you can query across folders with the Schema.Table syntax.
The driver obtains an access token with the Client Credentials flow and sends it with the X-API-Key on every API request. With InitiateOAuth set to GETANDREFRESH (the default), the driver acquires and refreshes the token automatically.
-
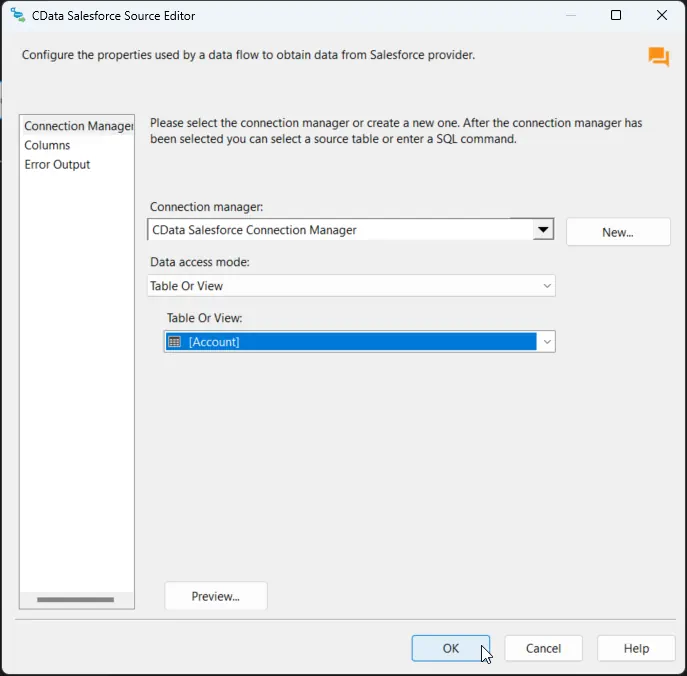
After saving the connection, select "Table or view" and select the table or view to export into Google BigQuery, then close the CData Sage X3 Cloud Source Editor.
Configure the Google BigQuery destination
With the Sage X3 Cloud Source configured, we can configure the Google BigQuery connection and map the columns.
-
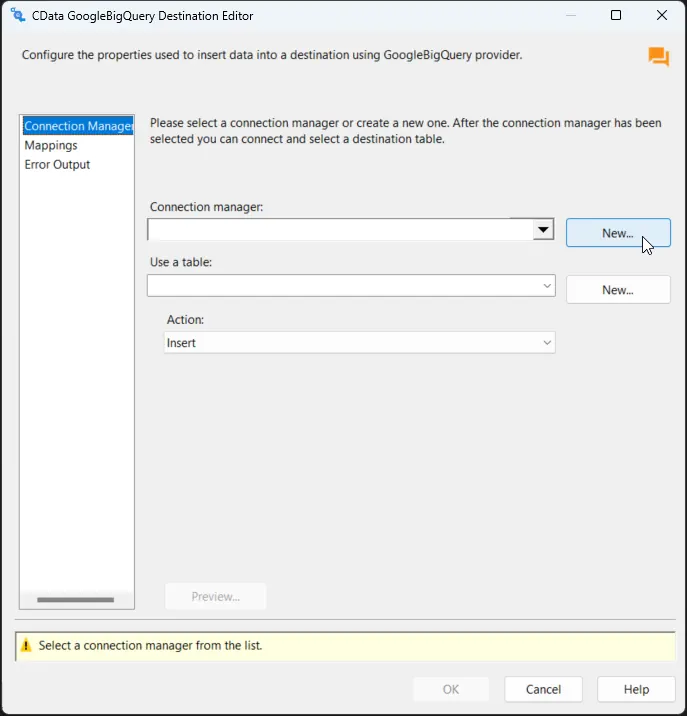
Double-click the CData Google BigQuery Destination to open the destination component editor and add a new connection.
-
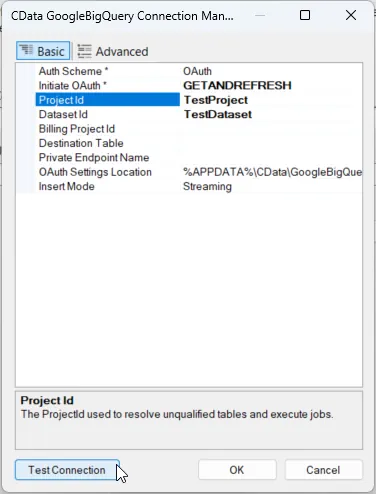
In the CData GoogleBigQuery Connection Manager, configure the connection properties, then test and save the connection.
- Google uses the OAuth authentication standard. To access Google APIs on behalf of individual users, you can use the embedded credentials or you can register your own OAuth app. OAuth also enables you to use a service account to connect on behalf of users in a Google Apps domain. To authenticate with a service account, register an application to obtain the OAuth JWT values. In addition to the OAuth values, specify the DatasetId and ProjectId. See the "Getting Started" chapter of the help documentation for a guide to using OAuth.
Helpful connection properties
- QueryPassthrough: When this is set to True, queries are passed through directly to Google BigQuery.
- ConvertDateTimetoGMT: When this is set to True, the components will convert date-time values to GMT, instead of the local time of the machine.
- FlattenObjects: By default the component reports each field in a STRUCT column as its own column while the STRUCT column itself is hidden. When this is set to False, the top-level STRUCT is not expanded and is left as its own column. The value of this column is reported as a JSON aggregate.
- SupportCaseSensitiveTables: When this property is set to true, tables with the same name but different casing will be renamed so they are all reported in the metadata. By default, the provider treats table names as case-insensitive, so if multiple tables have the same name but different casing, only one will be reported in the metadata.
-
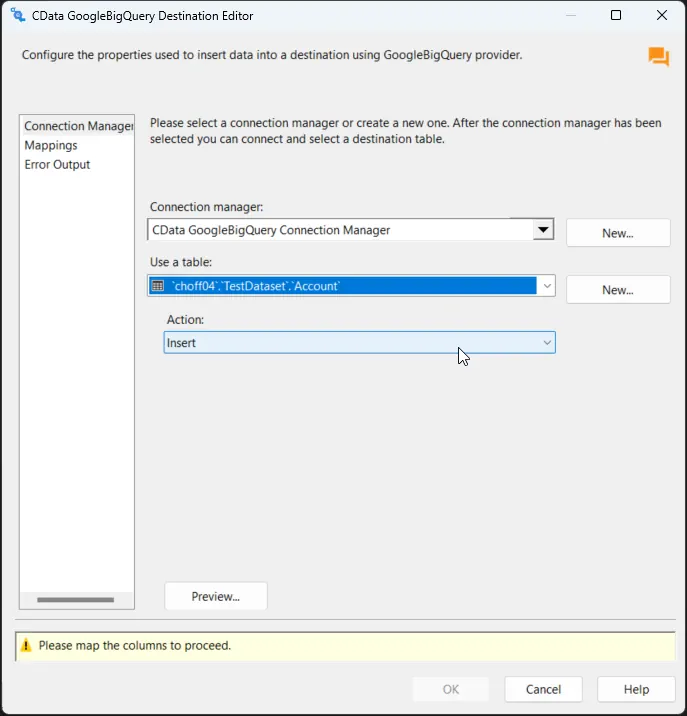
After saving the connection, select a table in the Use a Table menu and in the Action menu, select Insert.
-
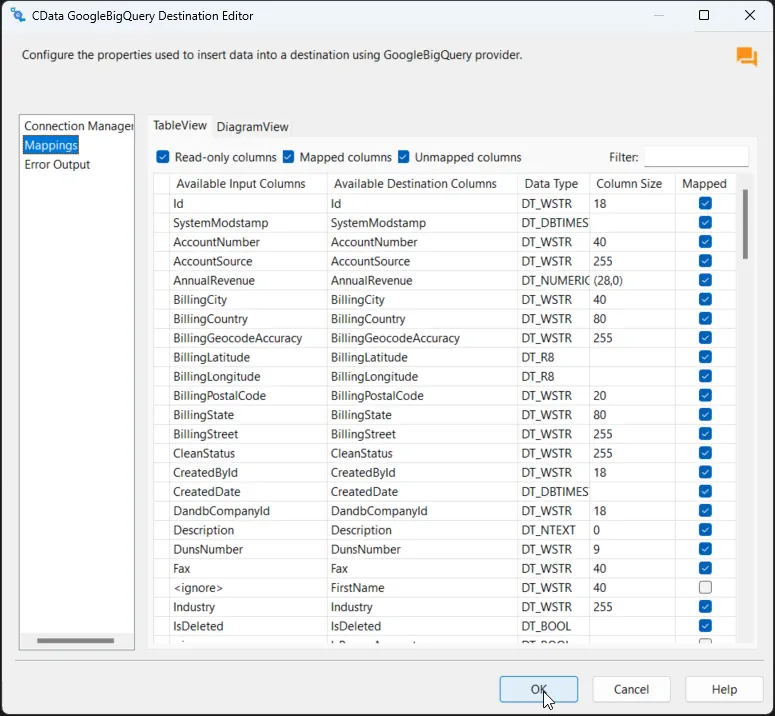
On the Column Mappings tab, configure the mappings from the input columns to the destination columns.
Run the project
You can now run the project. After the SSIS Task has finished executing, data from your SQL table will be exported to the chosen table.
Ready to get started?
Download a free trial of the Sage X3 Cloud SSIS Component to get started:
Download NowLearn more:
 Sage X3 Cloud SSIS Components
Powerful SSIS Source & Destination Components that allow you to easily connect SQL Server with Sage X3 Cloud through SSIS Workflows.
Use the Sage X3 Cloud Data Flow Components to synchronize with Sage X3 Cloud. Perfect for data synchronization, local back-ups, workflow automation, and more!