




Access Live Talkdesk Data in Excel (Desktop) via Connect AI

Microsoft Excel is a widely used spreadsheet software application, primarily used for tasks related to data management, analysis, and visualization. When combined with CData Connect AI, you gain immediate access to Talkdesk data directly within Excel, facilitating data analysis, collaboration, calculations, and more.This article shows how to connect to Talkdesk in your Connect AI instance and access live Talkdesk data in Excel spreadsheets.
CData Connect AI provides a pure cloud-to-cloud interface for Talkdesk, allowing you to easily access live Talkdesk data in Excel for the web. Simply use the Connect AI Add-In to query live data (or write your own). Using optimized data processing out of the box, CData Connect AI pushes all supported query operations (filters, JOINs, etc) directly to Talkdesk, leveraging server-side processing to quickly return Talkdesk data.
This setup requires a CData Connect AI instance and the CData Connect AI Add-In for Excel. To get started, sign up a free trial of Connect AI and install the free Connect AI Excel Add-In.
Configure Talkdesk Connectivity for Excel
Connectivity to Talkdesk from Excel is made possible through CData Connect AI. To work with Talkdesk data from Excel, we start by creating and configuring a Talkdesk connection.
- Log into Connect AI, click Sources, and then click Add Connection
- Select "Talkdesk" from the Add Connection panel
-
Enter the necessary authentication properties to connect to Talkdesk.
Talkdesk uses the OAuth 2.0 Client Credentials grant. There is no browser-based authorization step and no callback URL.
Set the following connection properties:
- AccountName: The name of your Talkdesk account.
- Region: The region where your Talkdesk instance is deployed. Supported values are US (default), EU, CA, AU, UK, and FedRamp.
- OAuthClientId: The Client Id assigned when you registered your custom OAuth application.
- OAuthClientSecret: The Client Secret assigned to your custom OAuth application.
Creating a Custom OAuth Application
- Log in to your Talkdesk account and select OAuth Clients from the navigation menu.
- Click Create OAuth Client and give the client a descriptive name.
- Set Grant Type to Client Credentials.
- Click Add scopes and select the scopes for the data you want to access.
- Click Create and copy the Client Id and Client Secret.
When you connect, the driver automatically requests an access token from Talkdesk, caches it, and refreshes it when it expires. Make sure the scopes selected for the application match the views you plan to query, or the token request can fail.

- Click Save & Test
-
Navigate to the Permissions tab in the Add Talkdesk Connection page and update the User-based permissions.



With the connection configured, you are ready to connect to Talkdesk data from Excel.
Access Live Talkdesk Data in Excel
The steps below outline connecting to CData Connect AI from Excel to access live Talkdesk data.
- Open Excel, create a new sheet (or open an existing one).
- Click Insert and click Get Add-ins. (if you have already installed the Add-In, jump to step 4).
- Search for CData Connect AI Add-In and install the Add-in.
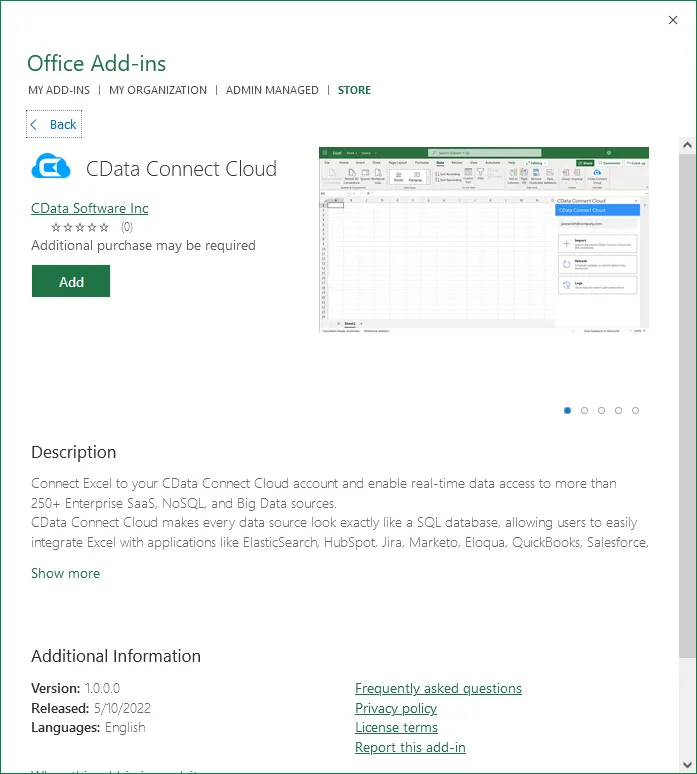
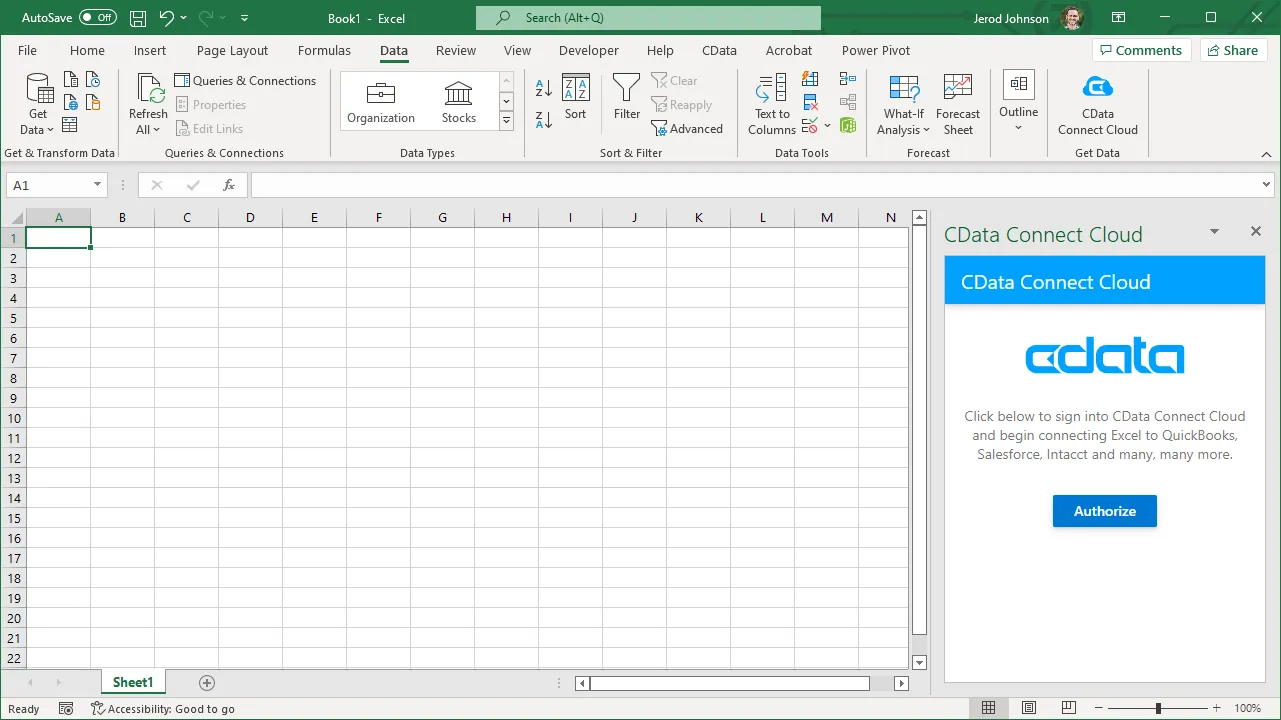
- Click Data and open the CData Connect AI Add-In.
- In the Add-In panel, click Authorize to authenticate with your CData Connect AI instance
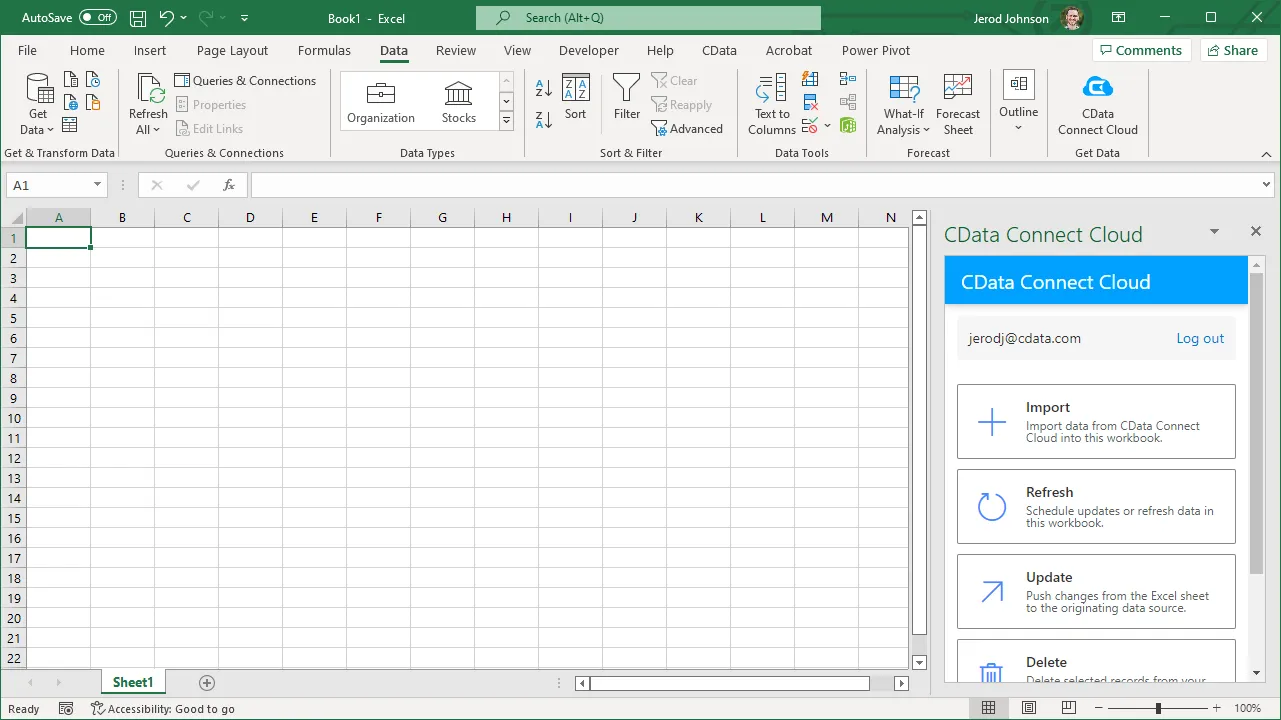
- In the CData Connect AI panel in Excel, click Import
- Choose a Connection (e.g. Talkdesk1), Table (e.g. Users), and Columns to import
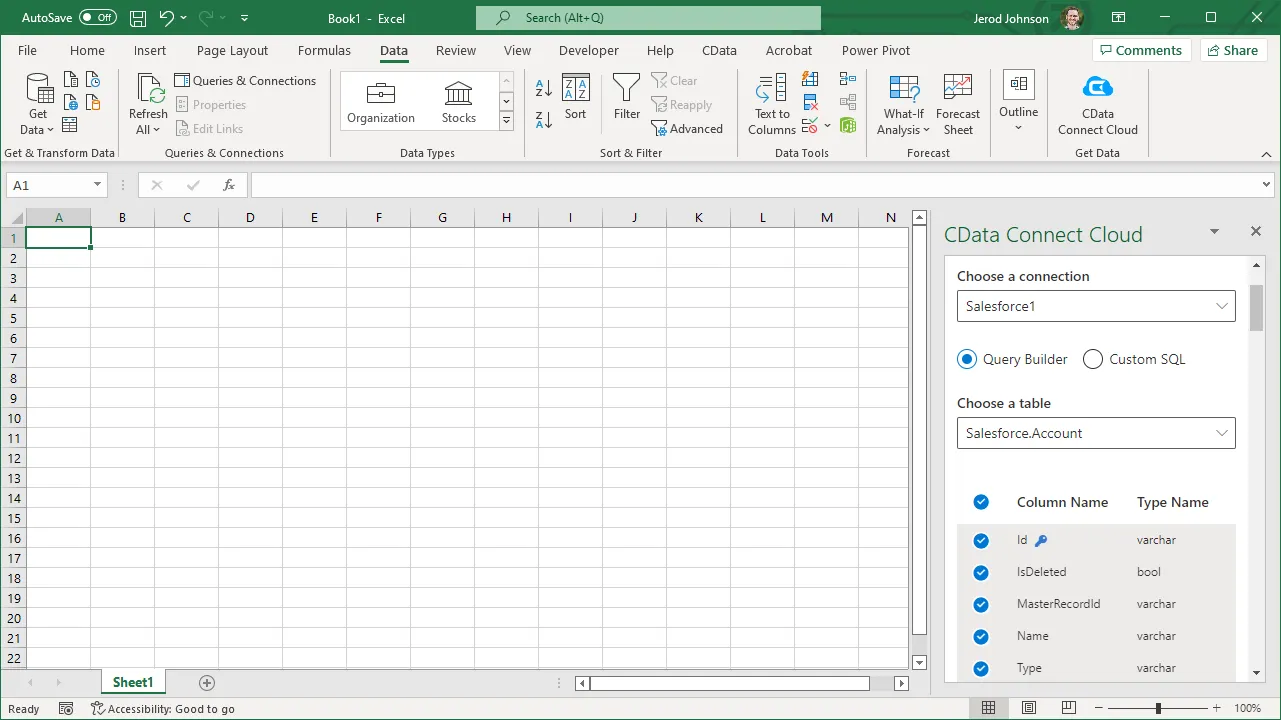
- Optionally add Filters, Sorting, and a Limit
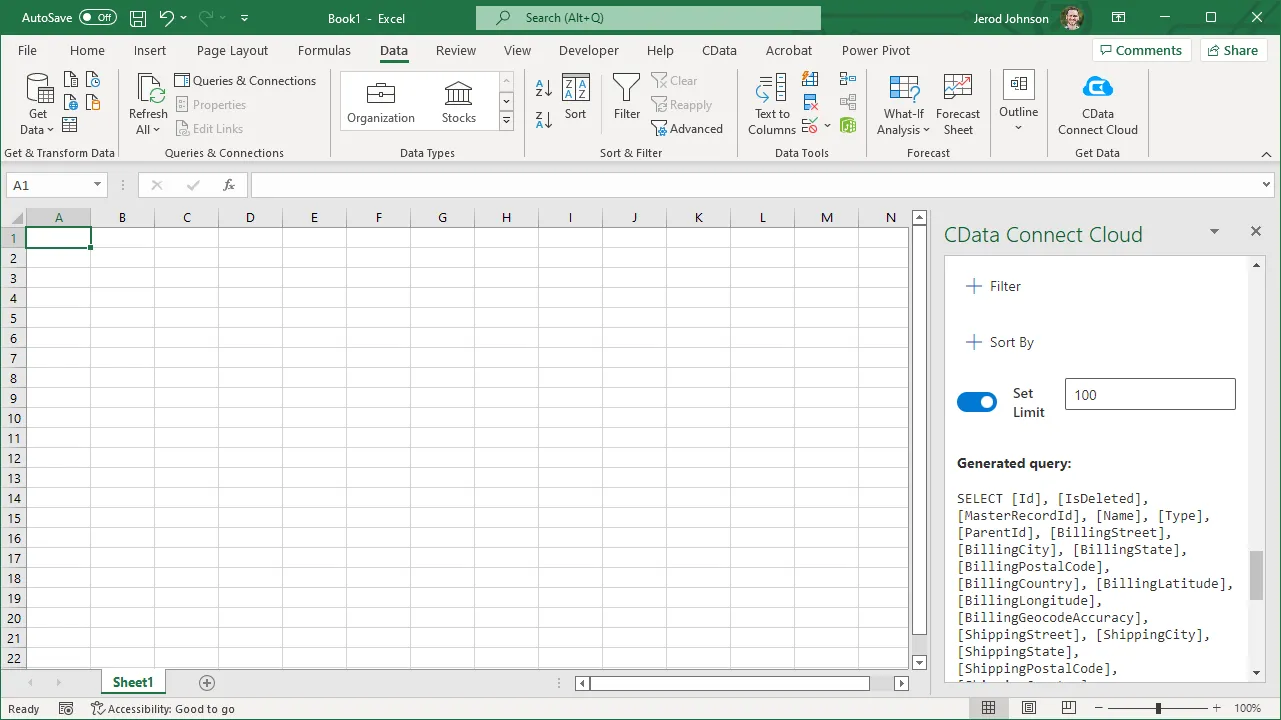
- Click Execute to import the data
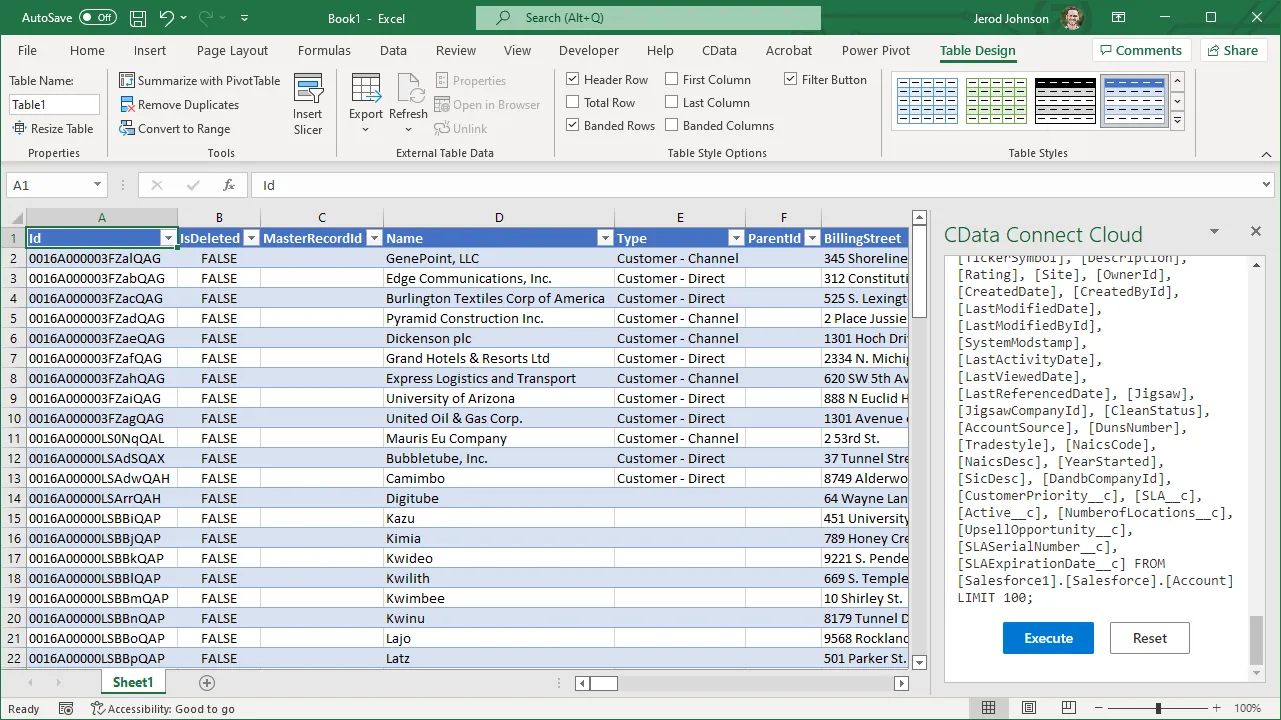
Live Access to Talkdesk Data from Cloud Applications
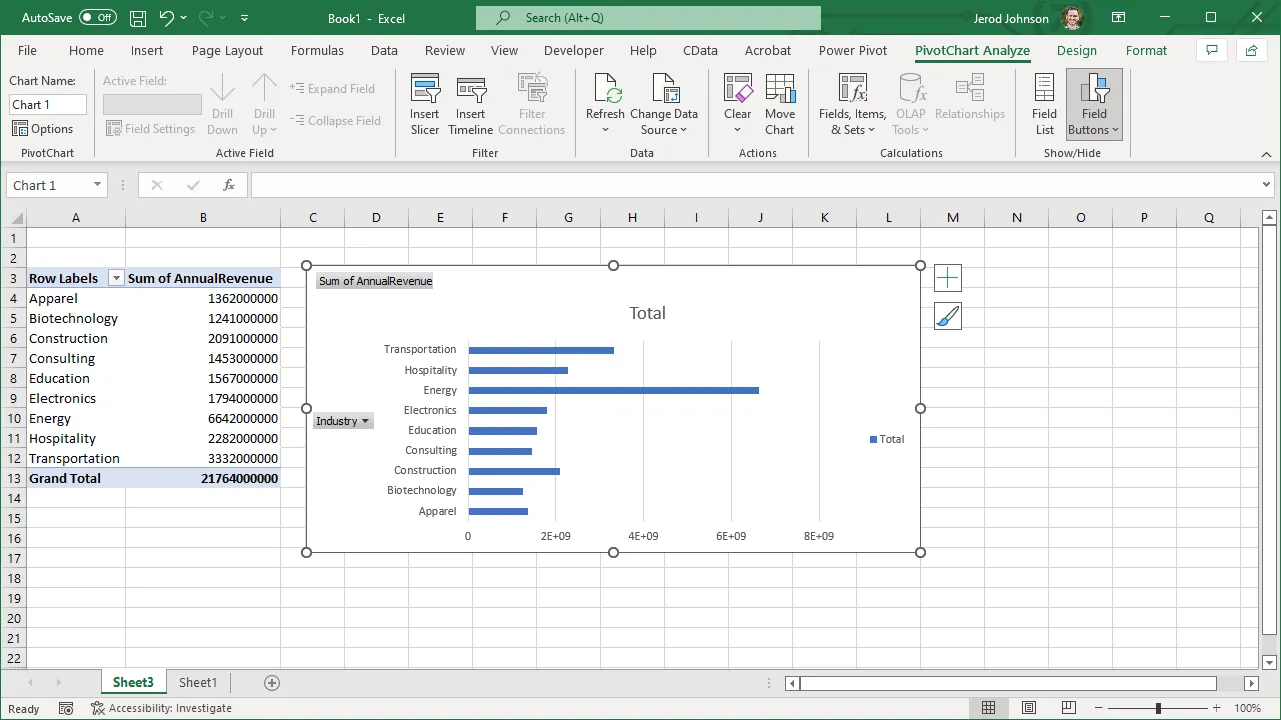
Now, you have a direct, cloud-to-cloud connection to live Talkdesk data from your Excel workbook. You can add more data to your workbook for calculations, aggregations, collaboration, and more.
Try CData Connect AI and get real-time data access to hundreds of SaaS, Big Data, and NoSQL sources directly from your cloud applications.