




Connect to Talkdesk Data in DigitalSuite Studio through RunMyProcess DSEC

The CData JDBC Driver for Talkdesk implements JDBC Standards and enables a applications ranging from BI to IDE to connect with Talkdesk. In this article, we describe how to connect to Talkdesk data from Arkobi Digital RunMyProcess's DSEC and connect to Talkdesk in RunMyProcess.
Setting up EnterpriseConnect Agent
Configure the EnterpriseConnect Agent following the EnterpriseConnect page in the RunMyProcess documentation.
Setting up JDBC Adapter
The JDBC Adapter section describes the steps to connect to RDBMS through JDBC. Follow the steps and open the JDBC.config file.
- Create a JSON entry for the CData JDBC Driver for Talkdesk, e.g.
Talkdesk = { "sqlDriver" : "...", "sqlSource" : "...", "sqlDriverPath" : "..." } - Set the "sqlDriver" field to the Class name for the CData JDBC Driver, e.g.
cdata.jdbc.talkdesk.TalkdeskDriver - Set the "sqlSource" field to a JDBC URL for connecting to Talkdesk, e.g.
jdbc:talkdesk:AccountName=myAccount;Region=US;OAuthClientId=myClientId;OAuthClientSecret=myClientSecret;Built-in Connection String Designer
For assistance in constructing the JDBC URL, use the connection string designer built into the Talkdesk JDBC Driver. Either double-click the JAR file or execute the jar file from the command-line.
java -jar cdata.jdbc.talkdesk.jarFill in the connection properties and copy the connection string to the clipboard.
Talkdesk uses the OAuth 2.0 Client Credentials grant. There is no browser-based authorization step and no callback URL.
Set the following connection properties:
- AccountName: The name of your Talkdesk account.
- Region: The region where your Talkdesk instance is deployed. Supported values are US (default), EU, CA, AU, UK, and FedRamp.
- OAuthClientId: The Client Id assigned when you registered your custom OAuth application.
- OAuthClientSecret: The Client Secret assigned to your custom OAuth application.
Creating a Custom OAuth Application
- Log in to your Talkdesk account and select OAuth Clients from the navigation menu.
- Click Create OAuth Client and give the client a descriptive name.
- Set Grant Type to Client Credentials.
- Click Add scopes and select the scopes for the data you want to access.
- Click Create and copy the Client Id and Client Secret.
When you connect, the driver automatically requests an access token from Talkdesk, caches it, and refreshes it when it expires. Make sure the scopes selected for the application match the views you plan to query, or the token request can fail.

- Set the "sqlDriverPath" field to the name of the CData JDBC Driver JAR file, e.g.
cdata.jdbc.talkdesk.jar
Sample JDBC.config File
#DBAgent Configuration
Talkdesk = {"sqlDriver" : "cdata.jdbc.talkdesk.TalkdeskDriver", "sqlSource" = "jdbc:talkdesk:AccountName=myAccount;Region=US;OAuthClientId=myClientId;OAuthClientSecret=myClientSecret;","sqlDriverPath" = "cdata.jdbc.talkdesk.jar" }
Put the JDBC driver JAR file (cdata.jdbc.talkdesk.jar) into the same directory as unified-adapter-[version].jar.
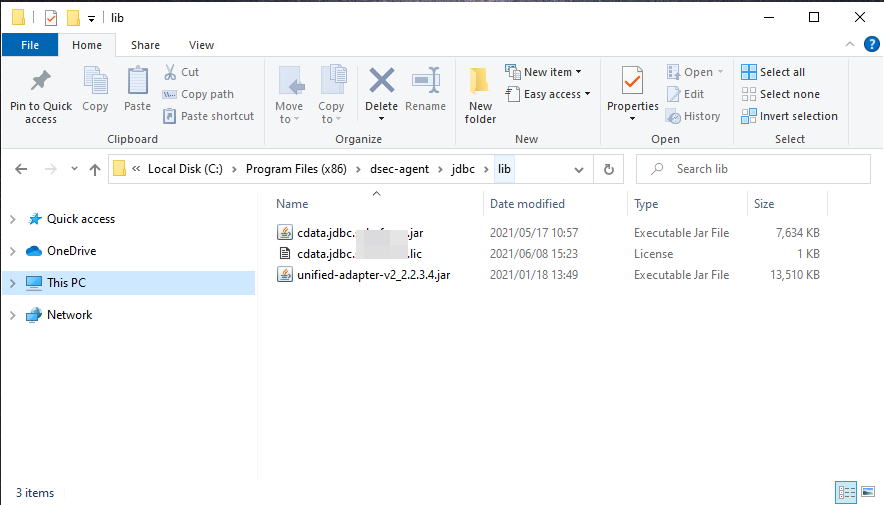
Note: Make sure to put the CData license file (cdata.jdbc.talkdesk.lic) into the same directory. Since the license is generated based on the unique identifier of the machine where the product in installed, you will need an offline activation if you want to put the file on another machine.
Starting DigitalSuite EnterpriseConnect Agent
In Windows, start RunMyProcess DigitalSuite EnterpriseConnect Agent in Windows services. To start the application through command line, see Starting the EnterpriseConnect Agent in the RunMyProcess documents.
Starting the JDBC Adapter
Start the JDBC Adapter from runAdapter.bat. Once the Adapter is running, you can access the application through the agent address (e.g. 127.0.0.1:8080). Below is an example executing the command in Windows.
... > java -Djava.util.logging.config.file=./log.properties -cp lib/* org.runmyprocess.sec2.AdapterHandler :
2021-06-09 14:37:58|INFO|correlationId=|Searching for config file...
2021-06-09 14:37:58|INFO|correlationId=|Adapter Handler started with [JDBC] configuration
2021-06-09 14:37:59|INFO|correlationId=|agent address: 127.0.0.1:8080
2021-06-09 14:38:00.251:INFO::ConnectionThread: Logging initialized @1820ms to org.eclipse.jetty.util.log.StdErrLog
2021-06-09 14:38:00|INFO|correlationId=|onConnect() websocket connection between Agent and Adapter established
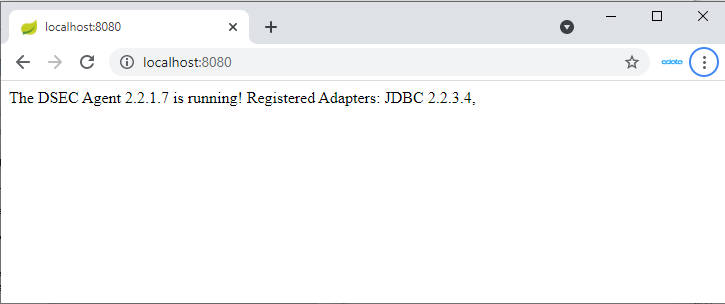
Once the DigitalSuite EnterpriseConnect Agent and JDBC Adapter are running, access http://localhost:(specified-port-number)/ through your browser to open the page shown below.
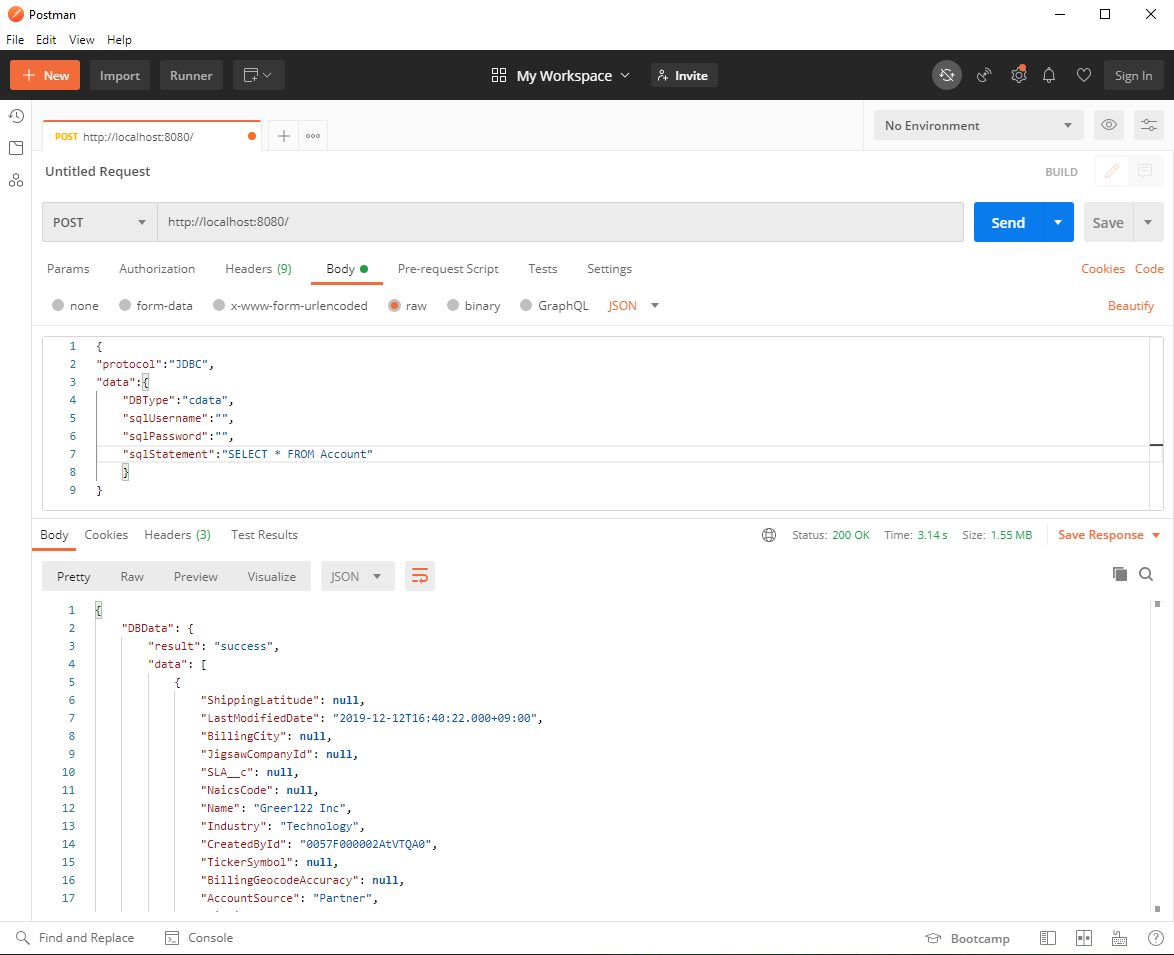
Check the availability of the JDBC Adapter using tools such as Postman or cURL. Here, we use Postman to send the HTTP POST request.
Configure the RequestHeader as follows:
Content-Type application/json
Configure the RequestBody as follows:
{
	"protocol":"JDBC",
	"data":{
		"DBType":"Talkdesk",
		"sqlUsername":"",
		"sqlPassword":"",
		"sqlStatement":"SELECT * FROM Users"
	}
}
If the JDBC.config file contains credential information, sqlUsername and sqlPassword can be left empty. If you are not sure of the table name, you can retrieve the list of tables using the request SELECT * FROM sys_tables
The request is successful if the Status is 200 and the Body contains Talkdesk data in JSON format.
Connect to Talkdesk through DSEC Agent in DigitalSuite Studio
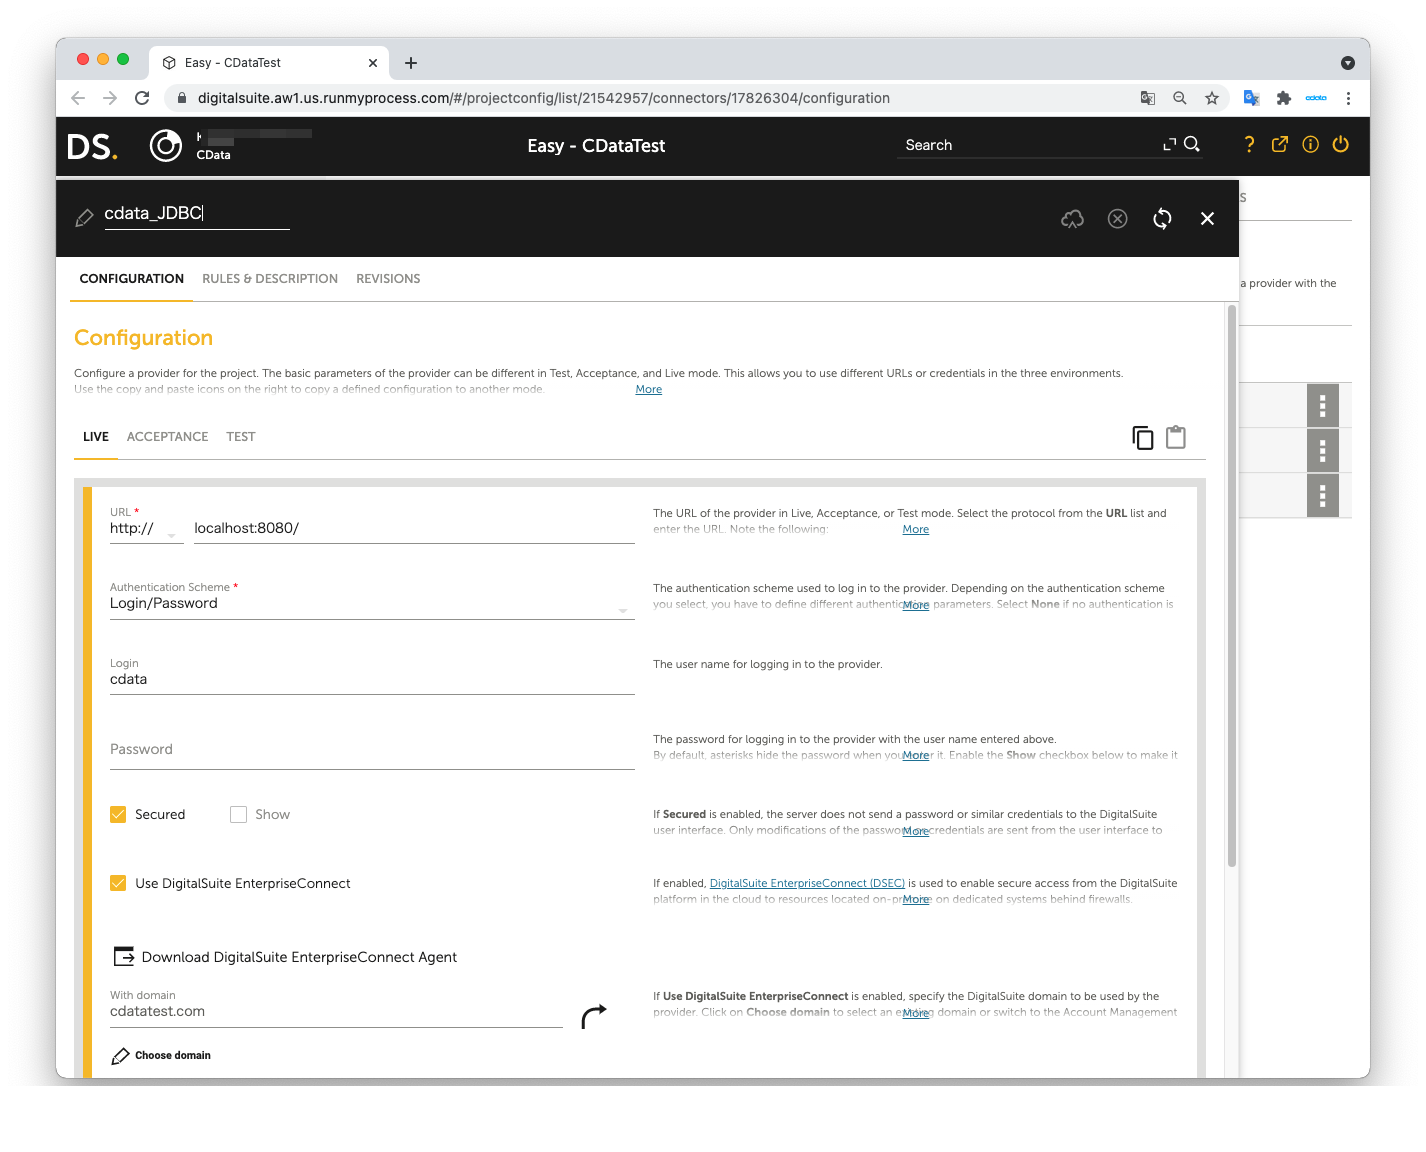
Create a DigitalSuite Studio project and then create a Provider in the project.
- URL: The URL for accessing JDBC Agent (e.g. http:localhost:8080/)
- Authentication Scheme: Login/password
- Login: The value from agent.user in the application.properties file
- Password: agent.password in the application.properties file
- Secured: Checked
- Use DigitalSuite EnterpriseConnect: Checked
- With domain: The value from agent.domain in application.properties file
Next, create a Connector in the Provider.
- Connector URL: Leave this empty
- Architecture: REST/XML-RPC
- Method: POST
- Result format: JSON
- Accept media type: application/json
- Character set: Automatic
- Content: Same as the Request body used in the JDBC Adapter
- Content type: application/json
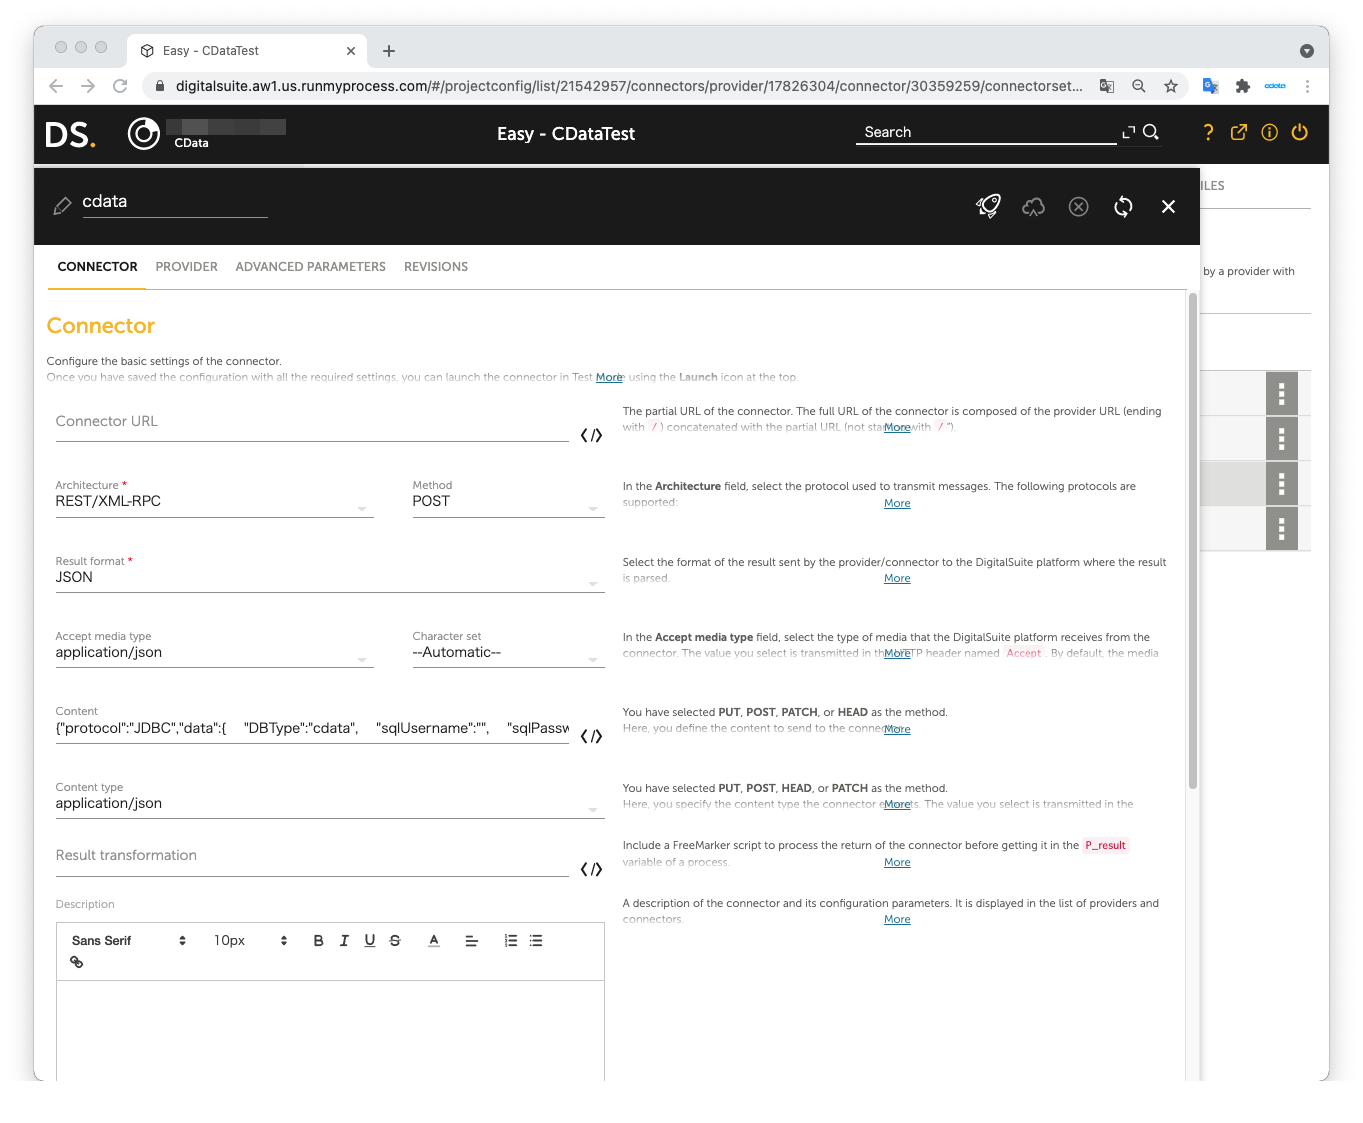
The JSON data we used as the Request body in JDBC Adapter:
{
	"protocol":"JDBC",
	"data":{
		"DBType":"Talkdesk",
		"sqlUsername":"",
		"sqlPassword":"",
		"sqlStatement":"SELECT * FROM Users"
	}
}
Open Launch Test to perform the test. The test is successful if Talkdesk data is shown in Result on the right pane.
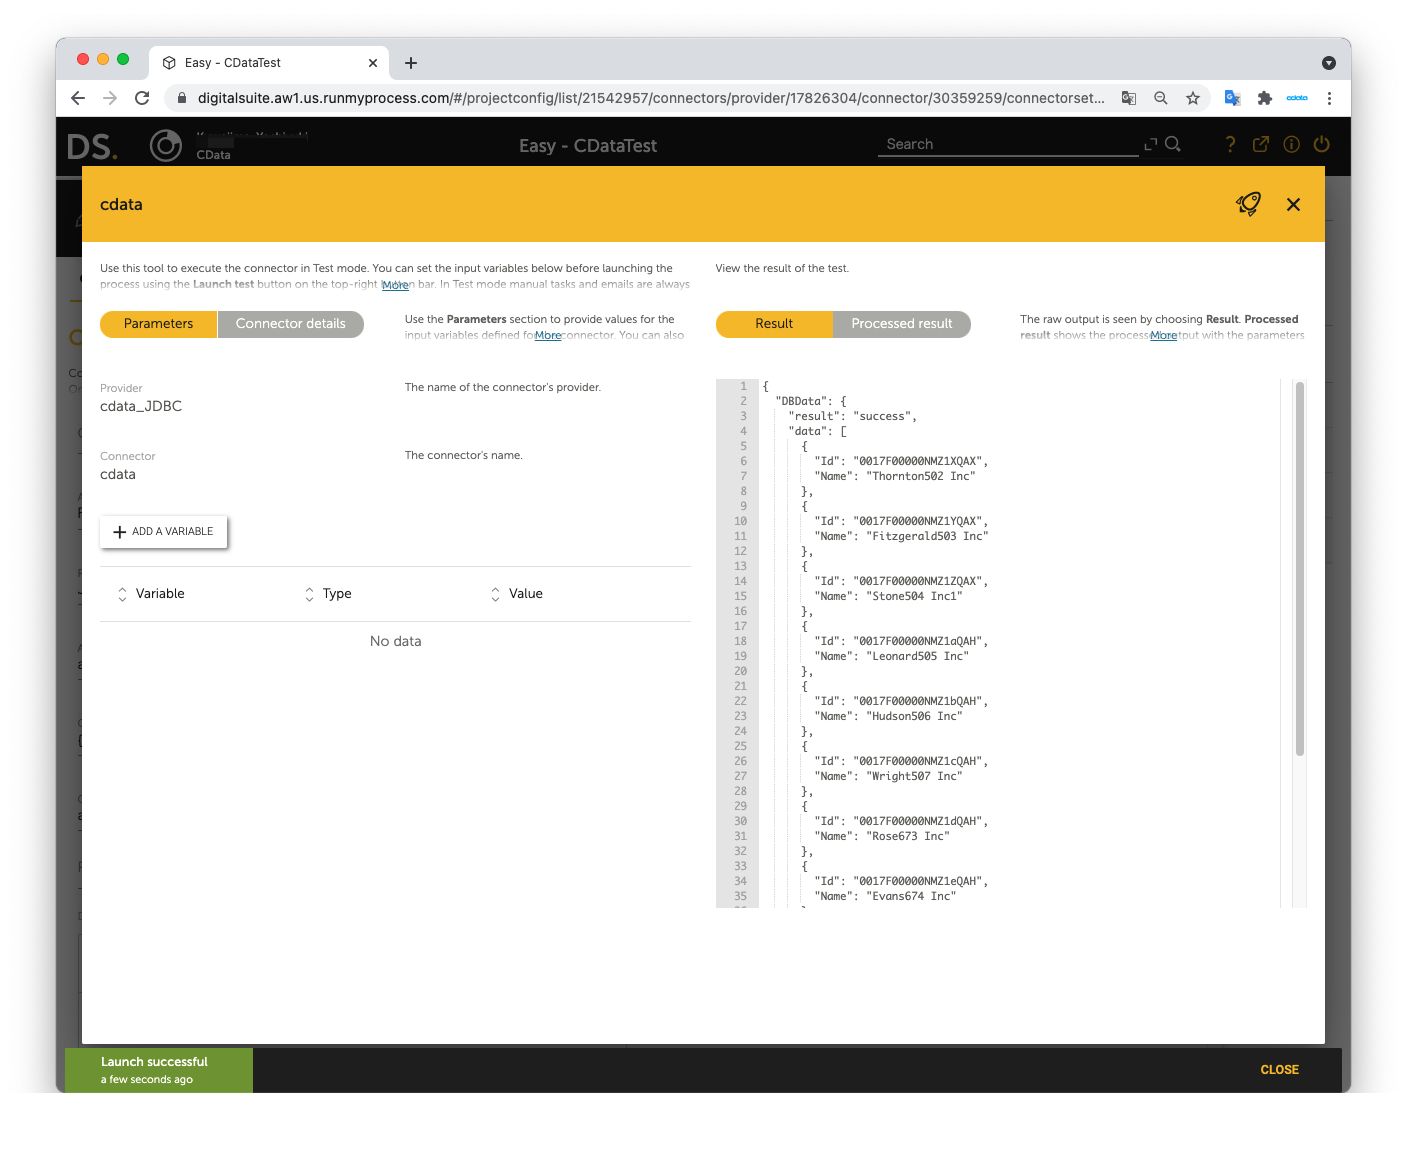
Now you can use Talkdesk data in RunMyProcess DigitalSuite Studio through DSEC.
For the detailed information on supported SQL commands, refer to the SQL Compliance section in our help documentation. For information on tables, refer to the Data Model section.
Ready to get started?
Download a free trial of the Talkdesk Driver to get started:
Download NowLearn more:
 Talkdesk JDBC Driver
Rapidly create and deploy powerful Java applications that integrate with Talkdesk data including Accounts, Attributes, BillingAccounts, Callbacks, Campaigns, Cases, Contacts, GuardianUsers, Invoices, Products, Subscriptions, Teams, Users, Wallets, and more!