




Extract, Transform, and Load Talkdesk Data in Informatica PowerCenter

Informatica provides a powerful, elegant means of transporting and transforming your data. By utilizing the CData ODBC Driver for Talkdesk, you are gaining access to a driver based on industry-proven standards that integrates seamlessly with Informatica's powerful data transportation and manipulation features. This tutorial shows how to create a simple Workflow in Informatica PowerCenter to extract Talkdesk data and load it into a flat file.
Add Talkdesk as an ODBC Data Source
If you have not already, install the driver on the PowerCenter server and client machines. On both machines, specify the connection properties in an ODBC DSN (data source name). This is the last step of the driver installation. You can use the Microsoft ODBC Data Source Administrator to create and configure ODBC DSNs.
Talkdesk uses the OAuth 2.0 Client Credentials grant. There is no browser-based authorization step and no callback URL.
Set the following connection properties:
- AccountName: The name of your Talkdesk account.
- Region: The region where your Talkdesk instance is deployed. Supported values are US (default), EU, CA, AU, UK, and FedRamp.
- OAuthClientId: The Client Id assigned when you registered your custom OAuth application.
- OAuthClientSecret: The Client Secret assigned to your custom OAuth application.
Creating a Custom OAuth Application
- Log in to your Talkdesk account and select OAuth Clients from the navigation menu.
- Click Create OAuth Client and give the client a descriptive name.
- Set Grant Type to Client Credentials.
- Click Add scopes and select the scopes for the data you want to access.
- Click Create and copy the Client Id and Client Secret.
When you connect, the driver automatically requests an access token from Talkdesk, caches it, and refreshes it when it expires. Make sure the scopes selected for the application match the views you plan to query, or the token request can fail.
Create an ETL Workflow in PowerCenter
Follow the steps below to create a workflow in PowerCenter to pull Talkdesk data and push it into a flat file.
Create a Source Using the ODBC Driver
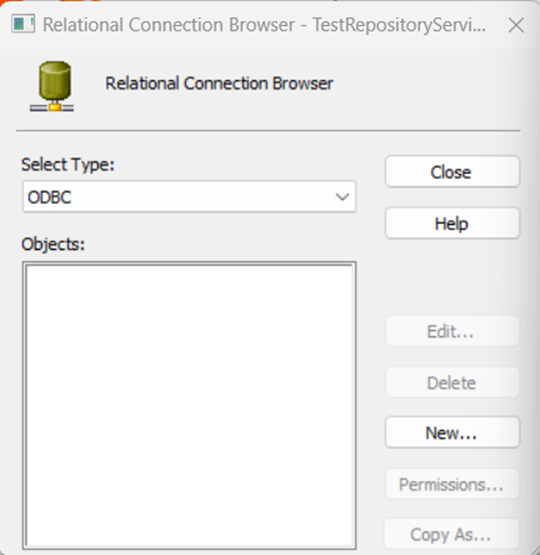
- In PowerCenter Workflow Manager, add a new ODBC relational connection by going to Connections -> Relational, and in the first window select the ODBC type and click New.
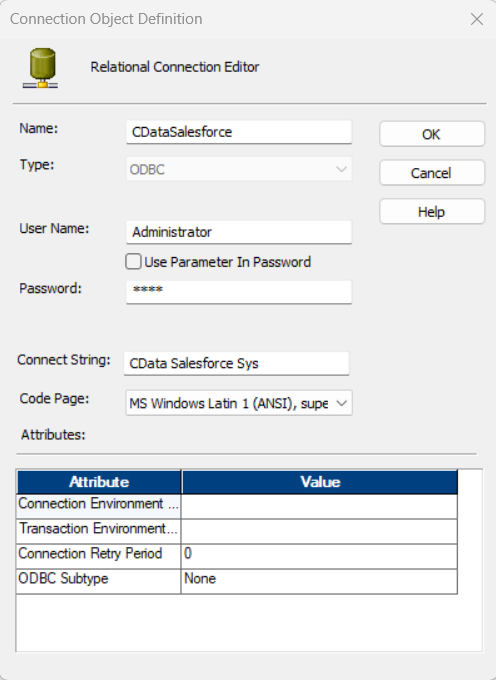
- In the Relational Connection Editor, set the name of the newly created connection and set the User Name and Password based on the credentials utilized to connect to your Repository. Under the Connection String input your System DSN, which by default is called 'CData Talkdesk Sys'.
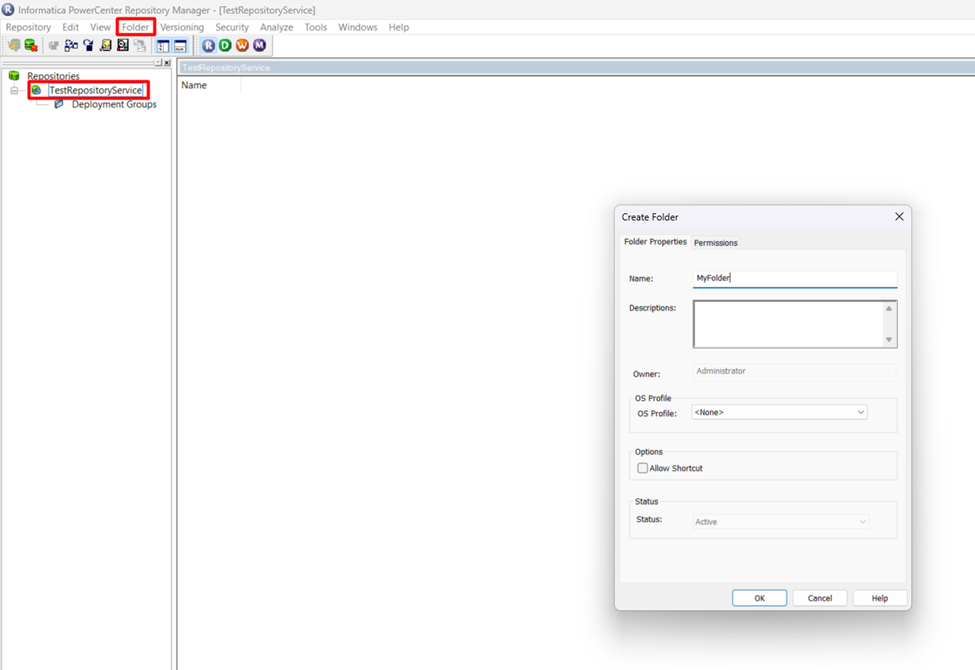
- In PowerCenter Designer, connect to your repository and open your folder. If you do not already have a folder created, you will need to manually create a folder for your repository. To create a folder, open Informatica PowerCenter Repository Manager, connect to your Repository Service and go to Folder -> Create to create a new folder.
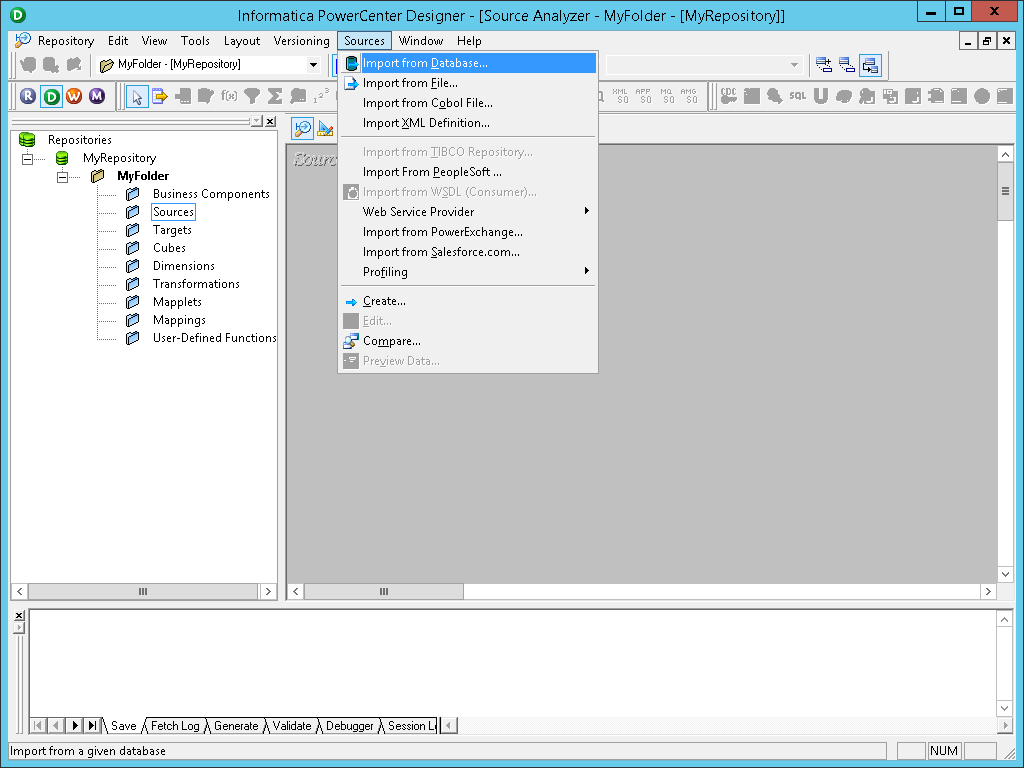
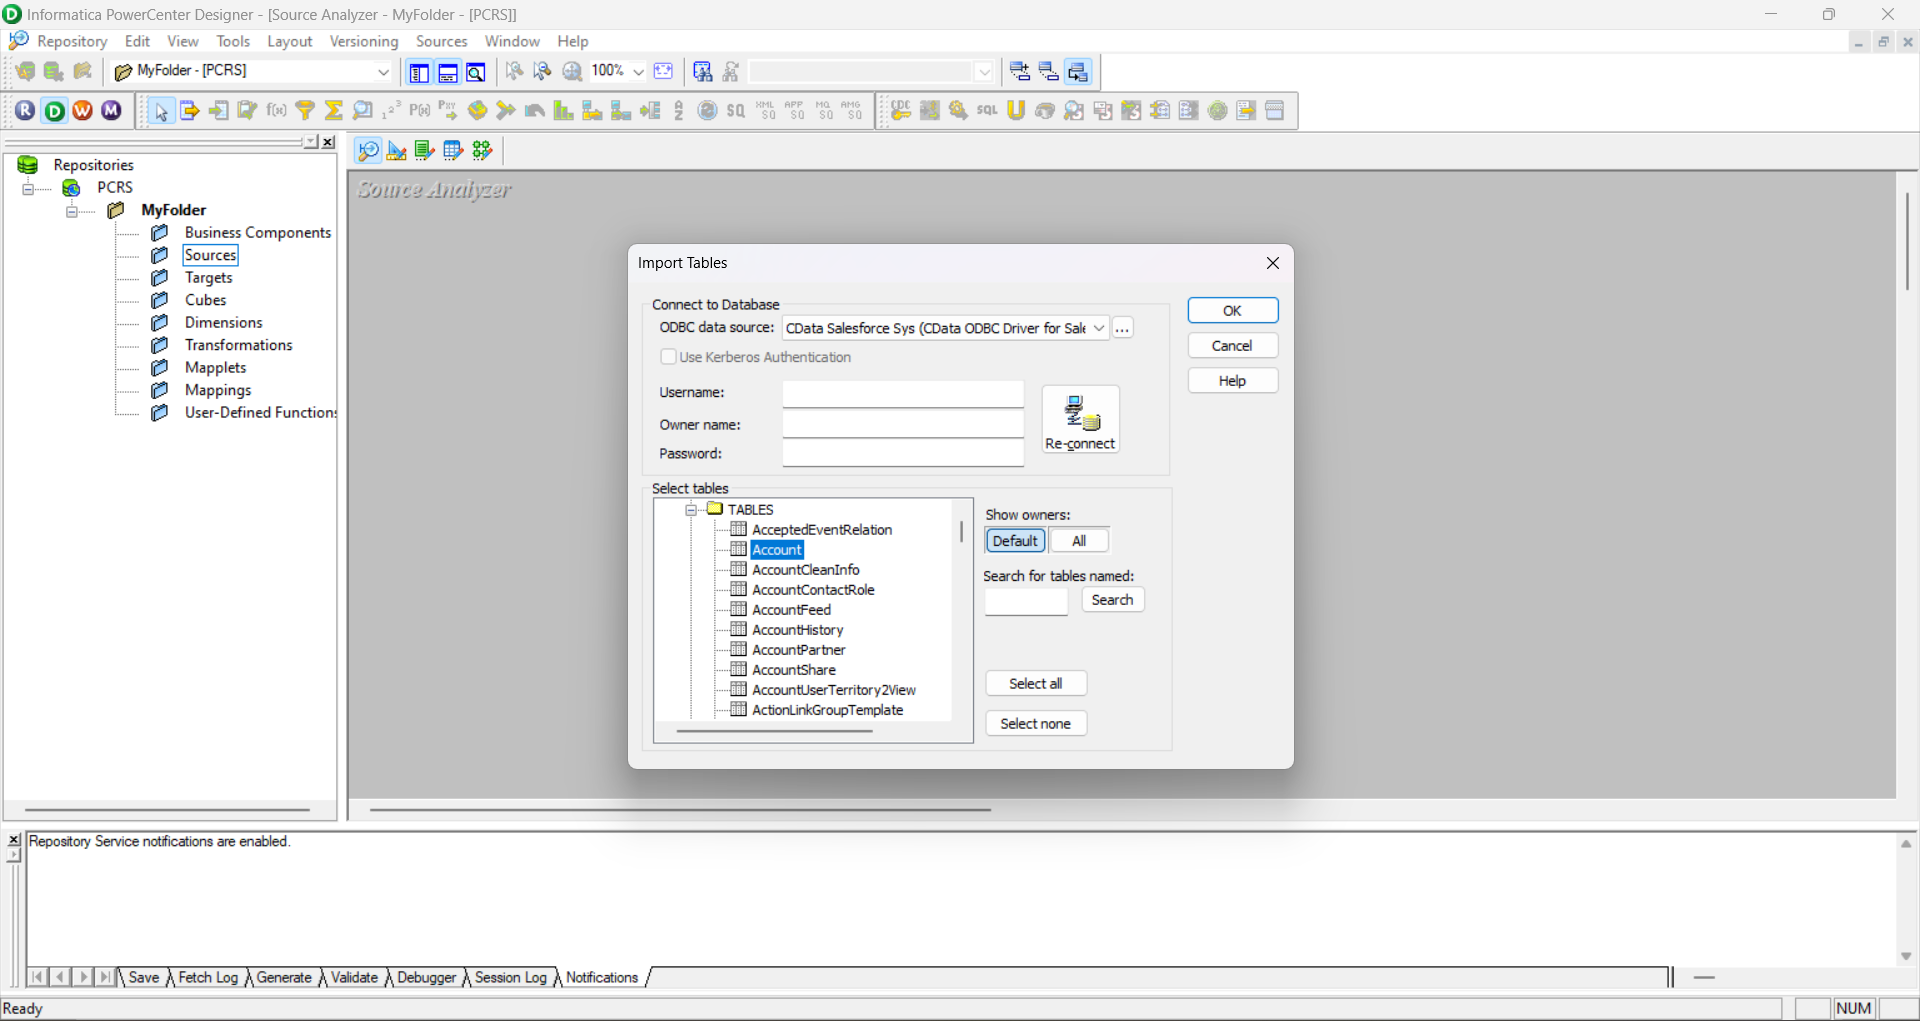
- Select the Source Analyzer, click the sources menu, and select Import from Database...
- In the drop-down menu for ODBC data source, select the DSN you previously configured (CData Talkdesk Sys).
- Click connect and select the tables and views to include.
- Click OK.
Create a Flat File Target Based on the Source
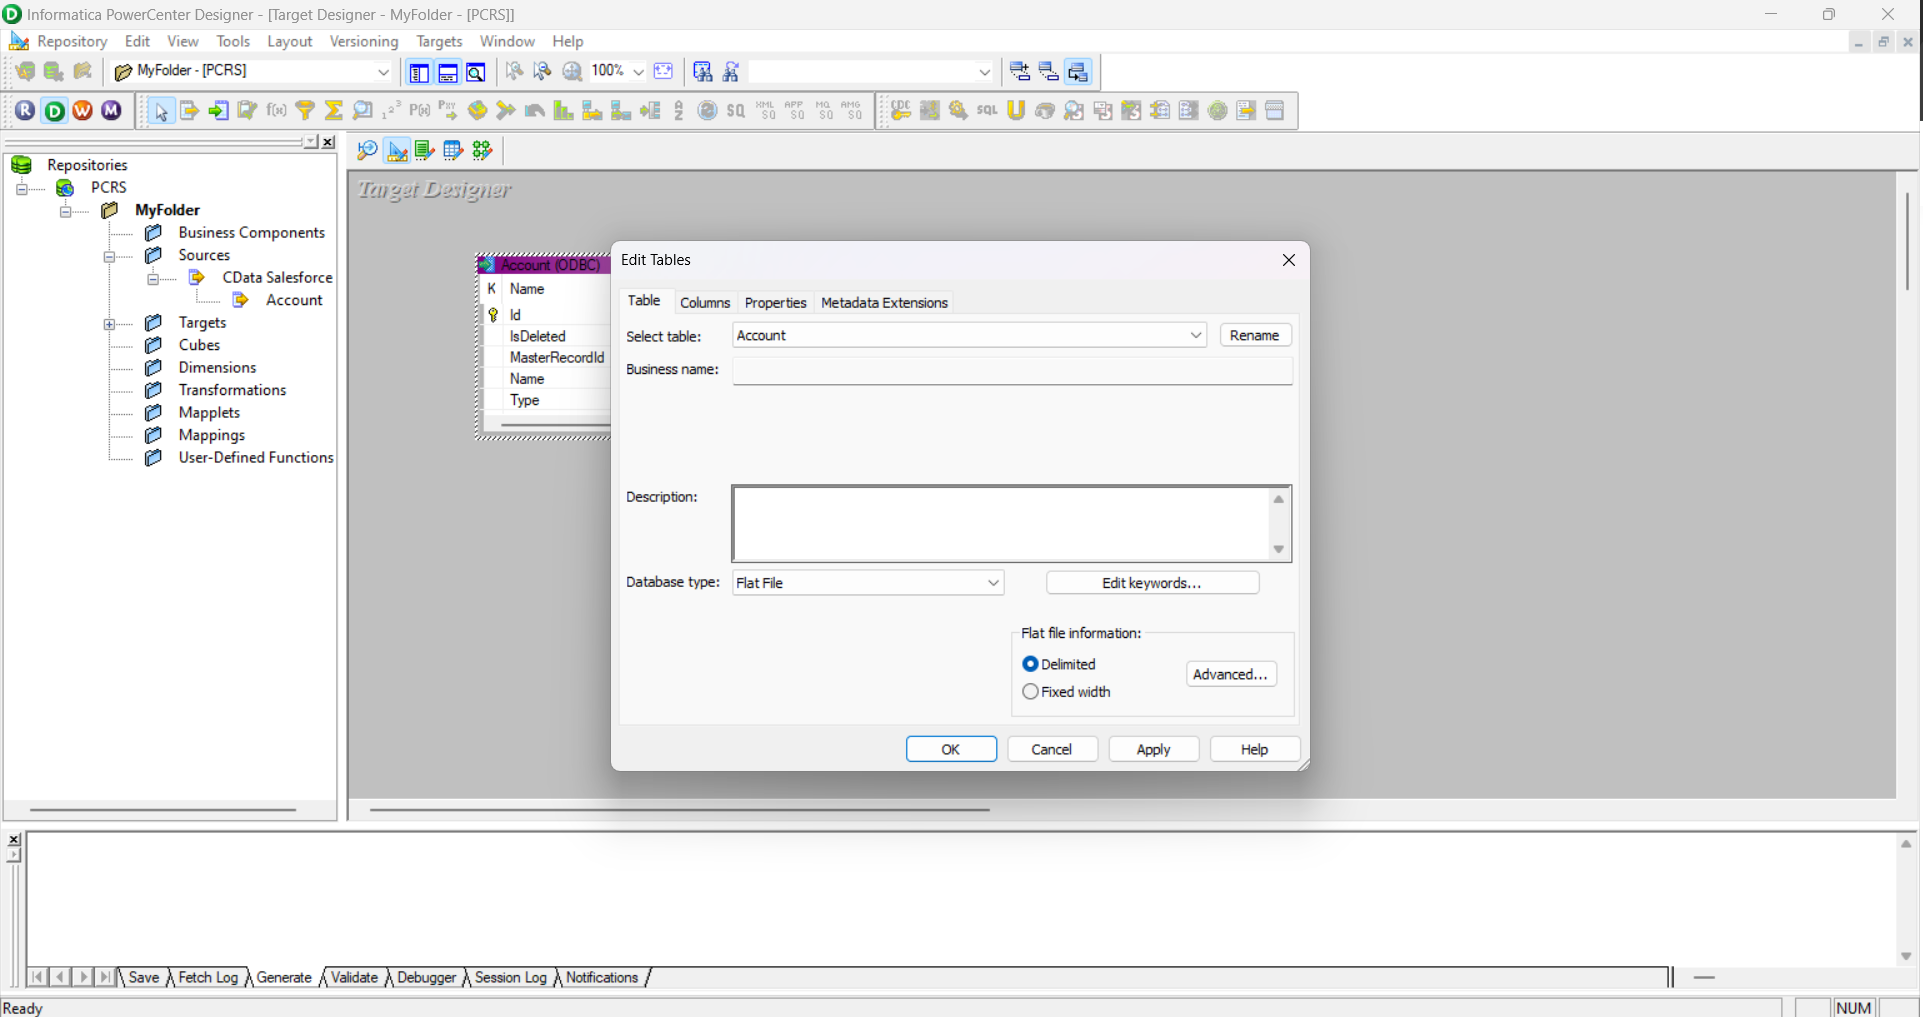
- Select the Target Designer and drag and drop the previously created source onto the workspace. Using the existing source copies the columns into the target.
- Right-click the new target, click edit, and change the database type to flat file.
Create a Mapping to Between Talkdesk Data and a Flat File
- Click on the Mapping Designer.
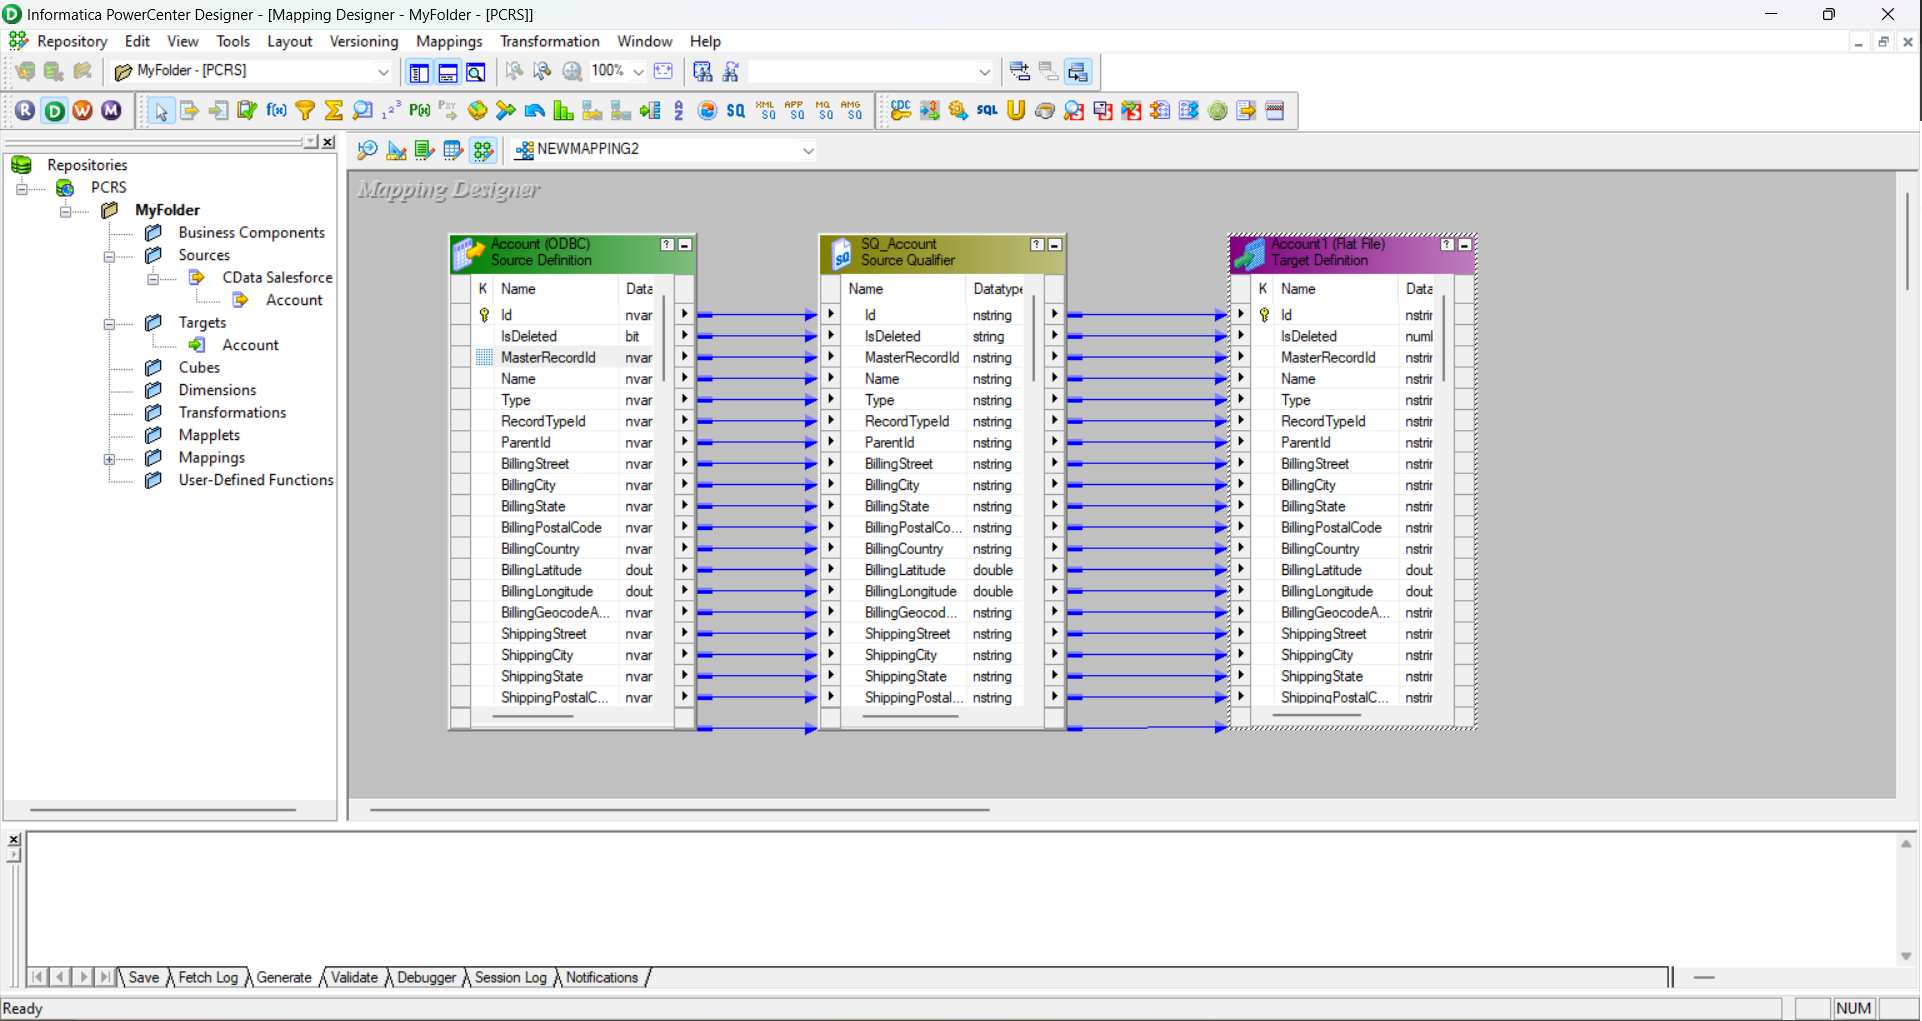
- Drag the source and target to the workspace (name the new mapping, if prompted).
- Right-click on the workspace and select Autolink by Name.
- Drag the columns from the source qualifier to the target definition.
- Save the folder (Ctrl + S).
Create Workflow Based on the Mapping
With the source, target, and mapping created and saved, you are now ready to create the workflow.
- Right-click the mapping and select generate workflow to open the Workflow Generation wizard.
- Create a workflow with a non-reusable session.
- Ensure that you have properly configured the connection object and set the prefixes. If you have not already done so, you will need to create an Integration Service. To create an Integration Service, open your Administrator site, and under Domain, create a new PowerCenter Integration Service. Under the PowerCenter Repository Service, select the Repository you are referring to, and as Username and Password, use your Administrator login information.
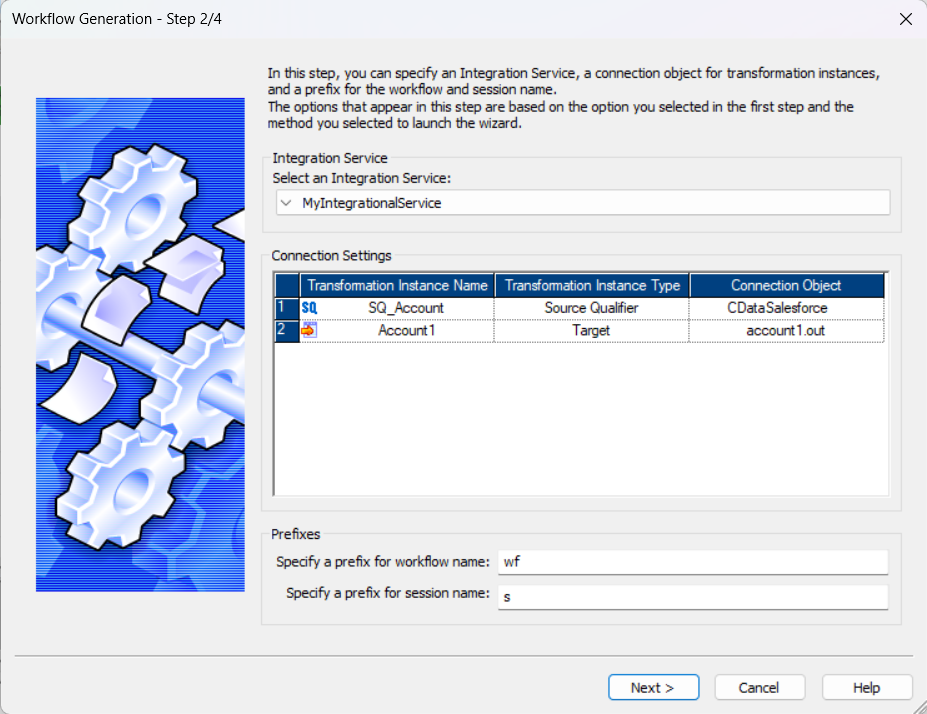
- Configure the Connection as needed.
- Review the Workflow and click Finish.
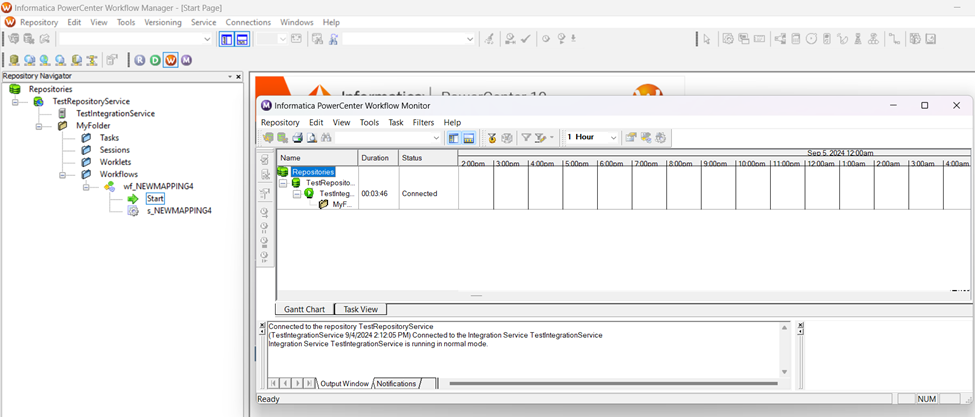
With a workflow created, you can open the PowerCenter Workflow Manager to access and start the workflow, quickly transferring Talkdesk data into a flat file. With the CData ODBC Driver for Talkdesk, you can configure sources and targets in PowerCenter to integrate Talkdesk data into any of the elegant and powerful features in Informatica PowerCenter.
Ready to get started?
Download a free trial of the Talkdesk ODBC Driver to get started:
Download NowLearn more:
 Talkdesk ODBC Driver
The Talkdesk ODBC Driver is a powerful tool that allows you to connect with live data from Talkdesk, directly from any applications that support ODBC connectivity.
Access Talkdesk data like you would a database - read Talkdesk Accounts, Attributes, BillingAccounts, Callbacks, Campaigns, Cases, Contacts, GuardianUsers, Invoices, Products, Subscriptions, Teams, Users, Wallets, etc. through a standard ODBC Driver interface.