




Connect and Query Live UKG Pro HCM Data in Databricks with CData Connect AI

Databricks is a leading AI cloud-native platform that unifies data engineering, machine learning, and analytics at scale. Its powerful data lakehouse architecture combines the performance of data warehouses with the flexibility of data lakes. Integrating Databricks with CData Connect AI gives organizations live, real-time access to UKG Pro HCM data without the need for complex ETL pipelines or data duplication—streamlining operations and reducing time-to-insights.
In this article, we'll walk through how to configure a secure, live connection from Databricks to UKG Pro HCM using CData Connect AI. Once configured, you'll be able to access UKG Pro HCM data directly from Databricks notebooks using standard SQL—enabling unified, real-time analytics across your data ecosystem.
Overview
Here is an overview of the simple steps:
- Step 1 — Connect and Configure: In CData Connect AI, create a connection to your UKG Pro HCM source, configure user permissions, and generate a Personal Access Token (PAT).
- Step 2 — Query from Databricks: Install the CData JDBC driver in Databricks, configure your notebook with the connection details, and run SQL queries to access live UKG Pro HCM data.
Prerequisites
Before you begin, make sure you have the following:
- An active UKG Pro HCM account.
- A CData Connect AI account. You can log in or sign up for a free trial here.
- A Databricks account. Sign up or log in here.
Step 1: Connect and Configure a UKG Pro HCM Connection in CData Connect AI
1.1 Add a Connection to UKG Pro HCM
CData Connect AI uses a straightforward, point-and-click interface to connect to available data sources.
- Log into Connect AI, click Sources on the left, and then click Add Connection in the top-right.
- Select "UKG Pro HCM" from the Add Connection panel.
-
Enter the necessary authentication properties to connect to UKG Pro HCM.
Start by setting the Profile connection property to the location of the UKGProHCM Profile on disk (e.g. C:\profiles\UKGProHCM.apip). Next, set the ProfileSettings connection property to the connection string for UKGProHCM (see below).
UKGProHCM API Profile Settings
UKG Pro HCM uses Basic authentication combined with a customer API key to authorize access to the API. To connect, you will need your UKG Pro HCM credentials and a customer API key issued by UKG.
Set the following connection properties to authenticate:
- AuthScheme: Set this to Basic.
- User: Set this to your UKG Pro HCM username.
- Password: Set this to your UKG Pro HCM password.
- ProfileSettings: Set this to a semicolon-separated list containing:
- Host: Your UKG Pro HCM tenant hostname (e.g., yourcompany.ultipro.com).
- CustomerAPIKey: Your UKG customer API key. This is passed as the US-CUSTOMER-API-KEY request header on each API call.
To obtain your customer API key, contact your UKG Pro HCM administrator or refer to the UKG Developer Portal at https://developer.ukg.com.

- Click Save & Test in the top-right.
-
Navigate to the Permissions tab on the UKG Pro HCM Connection page
and update the user-based permissions based on your preferences.



1.2 Generate a Personal Access Token (PAT)
When connecting to Connect AI through the REST API, the OData API, or the Virtual SQL Server, a Personal Access Token (PAT) is used to authenticate the connection to Connect AI. PAT functions as an alternative to your login credentials for secure, token-based authentication. It is a best practice to create a separate PAT for each service to maintain granularity of access.
- Click on the Gear icon () at the top right of the Connect AI app to open the settings page.
- On the Settings page, go to the Access Tokens section and click Create PAT.
-
Give the PAT a name and click Create.

- Note: The personal access token is only visible at creation, so be sure to copy it and store it securely for future use.
Step 2: Connect and Query UKG Pro HCM Data in Databricks
Follow these steps to establish a connection from Databricks to UKG Pro HCM. You'll install the CData JDBC Driver for Connect AI, add the JAR file to your cluster, configure your notebooks, and run SQL queries to access live UKG Pro HCM data data.
2.1 Install the CData JDBC Driver for Connect AI
- In CData Connect AI, click the Integrations page on the left. Search for JDBC or Databricks, click Download, and select the installer for your operating system.
-
Once downloaded, run the installer and follow the instructions:
- For Windows: Run the setup file and follow the installation wizard.
- For Mac/Linux: Unpack the archive and move the folder to /opt or /Applications. Make sure you have execute permissions.
-
After installation, locate the JAR file in the installation directory:
- Windows:
C:\Program Files\CData\CData JDBC Driver for Connect AI\lib\cdata.jdbc.connect.jar - Mac/Linux:
/Applications/CData/CData JDBC Driver for Connect AI/lib/cdata.jdbc.connect.jar
- Windows:
2.2 Install the JAR File on Databricks
-
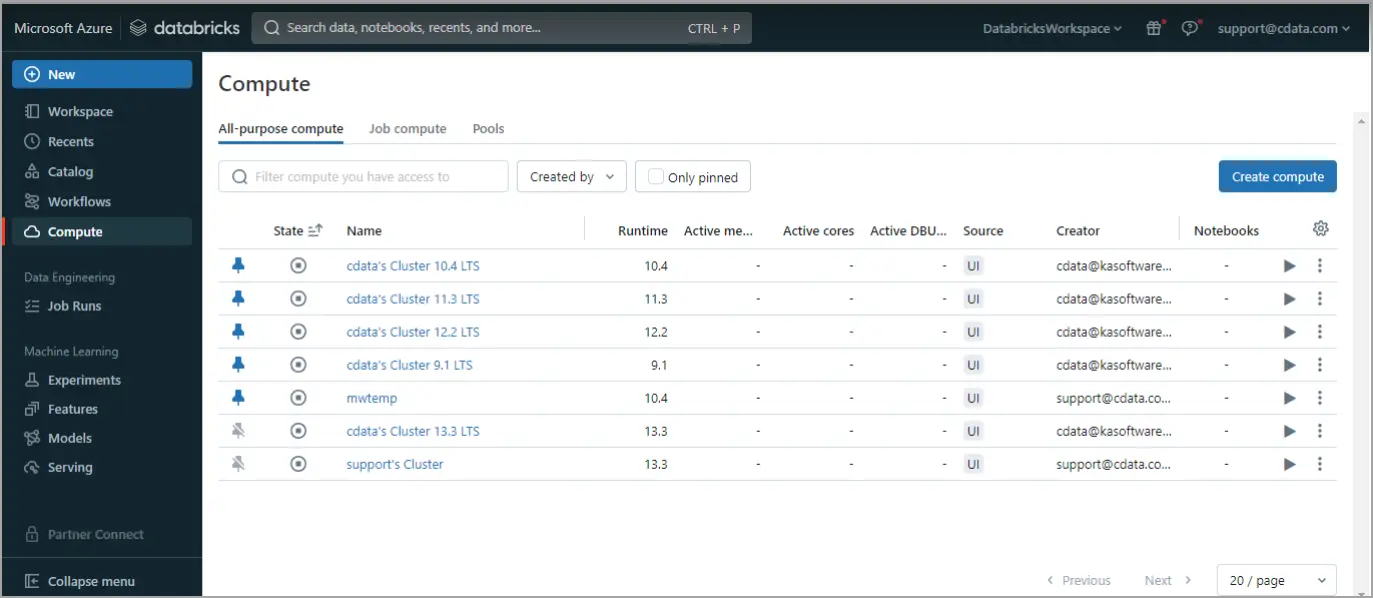
Log in to Databricks. In the navigation pane, click Compute on the left. Start or create a compute cluster.
-
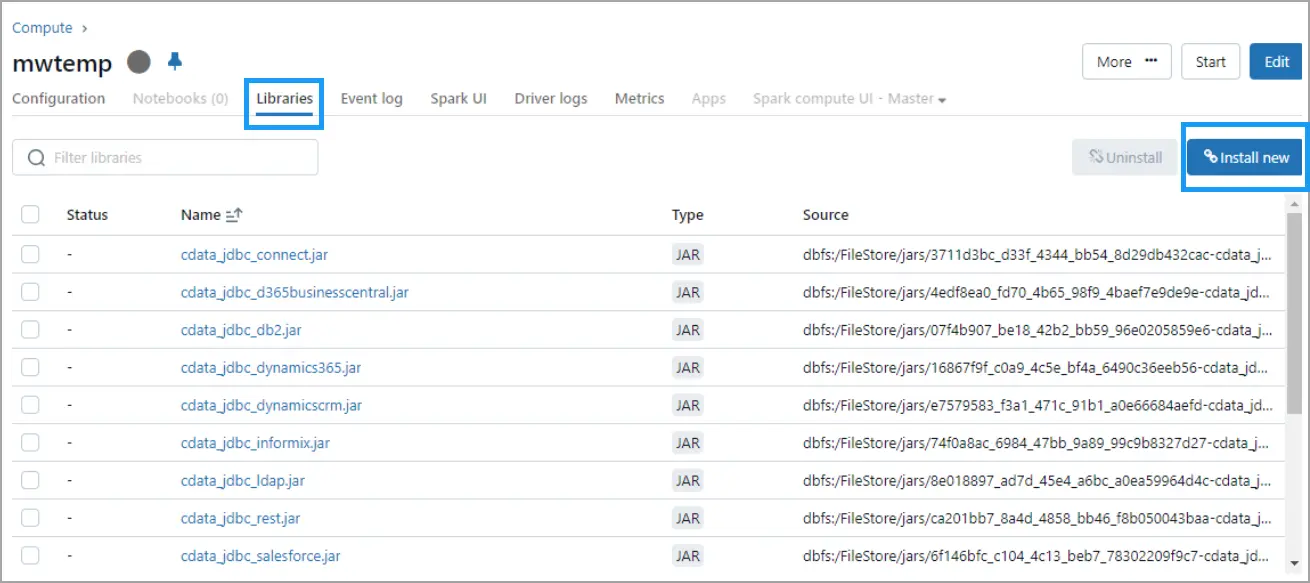
Click on the running cluster, go to the Libraries tab, and click Install New at the top right.
-
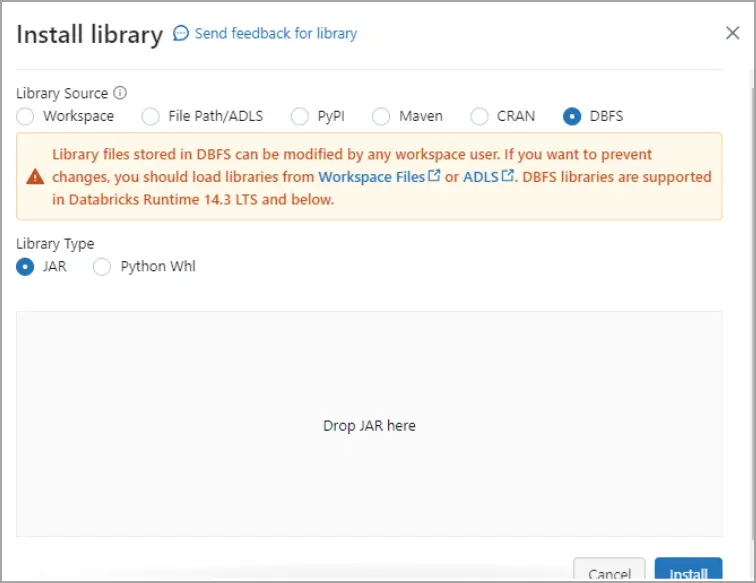
In the Install Library dialog, select DBFS, and drag and drop the
cdata.jdbc.connect.jar file. Click Install.
2.3 Query UKG Pro HCM Data in a Databricks Notebook
Notebook Script 1 — Define JDBC Connection:
- Paste the following script into the notebook cell:
driver = "cdata.jdbc.connect.ConnectDriver"
url = "jdbc:connect:AuthScheme=Basic;User=your_username;Password=your_pat;URL=https://cloud.cdata.com/api/;DefaultCatalog=Your_Connection_Name;"
- Replace:
- your_username - With your CData Connect AI username
- your_pat - With your CData Connect AI Personal Access Token (PAT)
- Your_Connection_Name - With the name of your Connect AI data source, from the Sources page
- Run the script.
Notebook Script 2 — Load DataFrame from UKG Pro HCM data:
- Add a new cell for this second script. From the menu on the right side of your notebook, click Add cell below.
- Paste the following script into the new cell:
remote_table = spark.read.format("jdbc") \
  .option("driver", "cdata.jdbc.connect.ConnectDriver") \
  .option("url", "jdbc:connect:AuthScheme=Basic;User=your_username;Password=your_pat;URL=https://cloud.cdata.com/api/;DefaultCatalog=Your_Connection_Name;") \
  .option("dbtable", "YOUR_SCHEMA.YOUR_TABLE") \
  .load()
- Replace:
- your_username - With your CData Connect AI username
- your_pat - With your CData Connect AI Personal Access Token (PAT)
- Your_Connection_Name - With the name of your Connect AI data source, from the Sources page
- YOUR_SCHEMA.YOUR_TABLE - With your schema and table, for example, API.UserDetails
- Run the script.
Notebook Script 3 — Preview Columns:
- Similarly, add a new cell for this third script.
- Paste the following script into the new cell:
display(remote_table.select("ColumnName1", "ColumnName2"))
- Replace ColumnName1 and ColumnName2 with the actual columns from your UKG Pro HCM structure (e.g. UserId, UserName, etc.).
- Run the script.
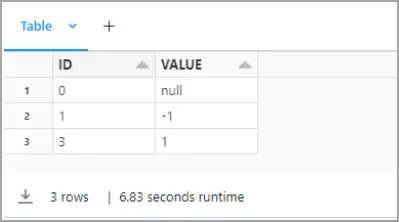
You can now explore, join, and analyze live UKG Pro HCM data directly within Databricks notebooks—without needing to know the complexities of the back-end API and without replicating UKG Pro HCM data.
Try CData Connect AI Free for 14 Days
Ready to simplify real-time access to UKG Pro HCM data? Start your free 14-day trial of CData Connect AI today and experience seamless, live connectivity from Databricks to UKG Pro HCM.
Low code, zero infrastructure, zero replication — just seamless, secure access to your most critical data and insights.