Build MVC Applications with Connectivity to UKG Pro WFM Data

In this article, we will guide you through the process of utilizing wizards within Visual Studio to seamlessly integrate the CData ADO.NET Provider for UKG Pro WFM into a basic MVC (Model, View, Controller) project.
Create the Entity Framework Model
Follow the steps below to save connection properties and map tables to entities in the data model.
- Create a new MVC project in Visual Studio. In this example, the project name is MvcAPIApp.
If you are using Entity Framework 6, you will need to take the preliminary step of registering the UKG Pro WFM Entity Framework provider for your project. See the "LINQ and Entity Framework" chapter in the help documentation for a guide.
Note that MVC 3 scaffolding and MVC 4 scaffolding do not support Entity Framework 6. You can use your scaffolding with Entity Framework 6 by upgrading to the latest version of MVC.- To add the .edmx file from the designer, right-click your Models folder and click Add New Item. Select ADO.NET Entity Data Model, name the model, and click Add. In this example, the name of the model is APIModel.
- In the Entity Data Model wizard, select the option 'EF Designer from database'. The Entity Data Model wizard is displayed.
- Click New Connection. Select CData UKG Pro WFM Data Source in the dialog that is displayed.
Specify the required connection string properties.
Start by setting the Profile connection property to the location of the UKGProWFM Profile on disk (e.g. C:\profiles\UKGProWFM.apip). Next, set the ProfileSettings connection property to the connection string for UKGProWFM (see below).
UKGProWFM API Profile Settings
UKG Pro Workforce Management uses OAuth 2.0 with the Resource Owner Password Credentials grant (grant_type=password) to authorize access to the API. Unlike most OAuth-based profiles, this does not use a browser redirect/authorization-code step: the driver exchanges your UKG Pro WFM username, password, client ID, and client secret directly for an access token.
Set the following connection properties to authenticate:
- AuthScheme: Set this to OAuthPassword.
- Host: Set this to the hostname of your UKG Pro Workforce Management datacenter/tenant (for example, yourcompany.mykronos.com). Do not include the protocol (https://) or a trailing slash.
- OAuthClientId: Set this to the client ID issued for your UKG Pro Workforce Management OAuth application.
- OAuthClientSecret: Set this to the client secret issued for your UKG Pro Workforce Management OAuth application.
- User: Set this to your UKG Pro Workforce Management username.
- Password: Set this to your UKG Pro Workforce Management password.
Access tokens are obtained from https://{Host}/api/authentication/access_token. Refresh tokens issued by UKG Pro Workforce Management expire after 7 days; if a refresh attempt fails because the refresh token itself has expired, the driver must re-authenticate with your User/Password credentials to obtain a new access token.
A typical connection string is below:
Profile=C:\profiles\UKGProWFM.apip;AuthScheme=OAuthPassword;ProfileSettings='Host=yourcompany.mykronos.com;User=your_username;Password=your_password;';OAuthClientId=your_client_id;OAuthClientSecret=your_client_secret;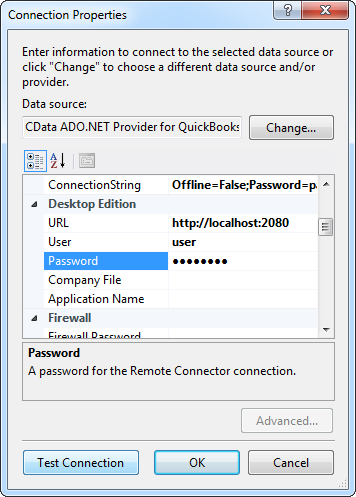
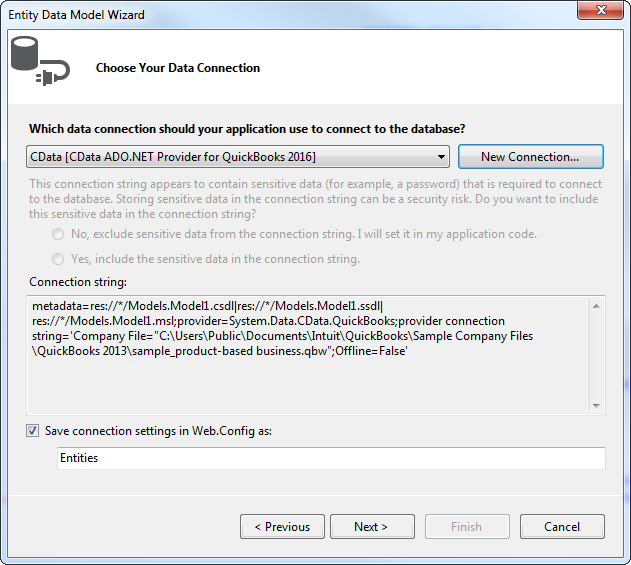
Name the connection and select whether to include sensitive information, such as connection credentials, in the connection string. For simplicity, this example saves sensitive information in Web.config. The connection settings are saved as APIEntities.
- Select the views you need. In this example, Employees is imported. Also, the option to pluralize object names is deselected in this example. Click Finish to create the .edmx file.
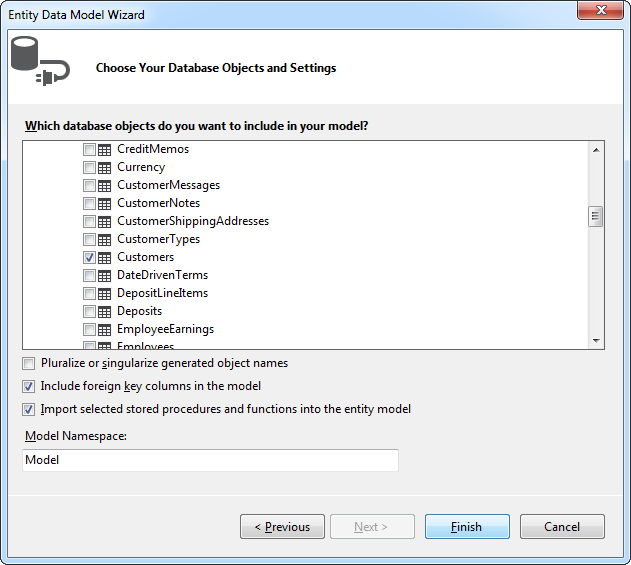
- Build your project to complete this step.
Scaffold the Controller and Views
Once you've established the model and completed the project build, you can employ ASP.NET Scaffolding wizards to generate both the controller and the views.
- In Solution Explorer, right-click the controllers folder and click Add -> Controller. Select MVC 5 Controller with views, using Entity Framework.
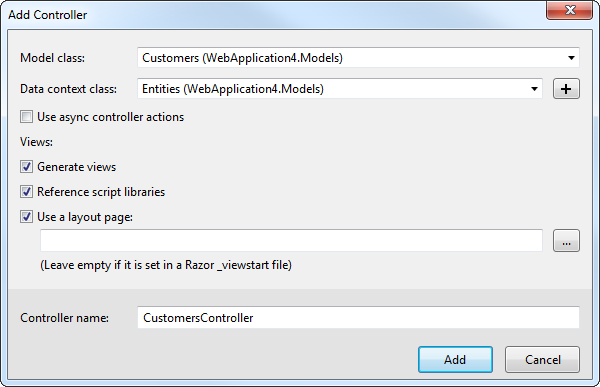
- In the Add Controller dialog that is then displayed, select the following options:
- Model class: Select a table you imported; for example, Employees.
- Data context class: Select your context class.
-
Leave the default values for the other fields.