




Bridge UKG Pro WFM Connectivity with Apache NiFi

Apache NiFi supports powerful and scalable directed graphs of data routing, transformation, and system mediation logic. When paired with the CData API Driver for JDBC, NiFi can work with live UKG Pro WFM data. This article describes how to connect to and query UKG Pro WFM data from an Apache NiFi Flow.
With built-in optimized data processing, the CData JDBC driver offers unmatched performance for interacting with live UKG Pro WFM data. When you issue complex SQL queries to UKG Pro WFM, the driver pushes supported SQL operations, like filters and aggregations, directly to UKG Pro WFM and utilizes the embedded SQL engine to process unsupported operations client-side (often SQL functions and JOIN operations). Its built-in dynamic metadata querying allows you to work with and analyze UKG Pro WFM data using native data types.
Connecting to UKG Pro WFM Data in Apache NiFi
- Download the CData API Driver for JDBC installer, unzip the package, run the .exe file to install the driver.
Copy the CData JDBC Driver JAR file (and license file if it exists), cdata.jdbc.api.jar (and cdata.jdbc.api.lic), to the Apache NiFi lib subfolder, for example, C:\nifi-1.3.0-bin\nifi-1.3.0\lib.
On Windows, the default location for the CData JDBC Driver is C:\Program Files\CData\CData API Driver for JDBC.
Start Apache NiFi by running the run-nifi.bat file in bin subfolder, for example, C:\nifi-1.3.0-bin\nifi-1.3.0\bin.
(OR)
Use the command prompt to navigate to the particular directory and run the run-nifi.bat file for example:
cd C:\nifi-1.3.0-bin\nifi-1.3.0\bin
.\run-nifi.bat
Navigate to the Apache NiFi UI in your web browser: It should be https://localhost:8443/nifi.
Note: If users are utilizing an older version of Apache NiFi, they should access it via http://localhost:8080/nifi. In earlier versions, HTTP was the protocol employed. However, in the most recent version, HTTPS is the standard. By default, HTTP operates on port 8080, while HTTPS uses port 8443.
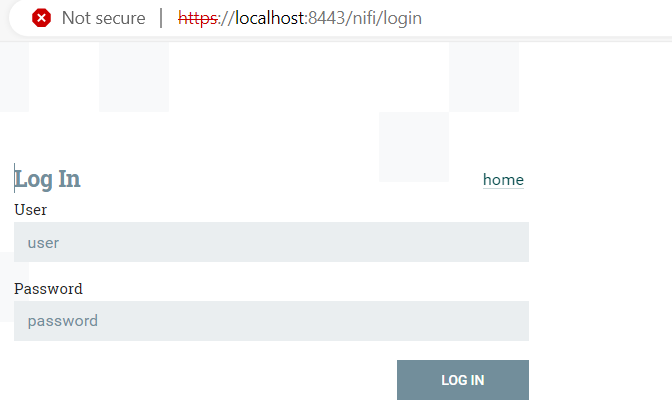
When accessing Apache NiFi via a URL, it prompts you to enter a username and password for login.
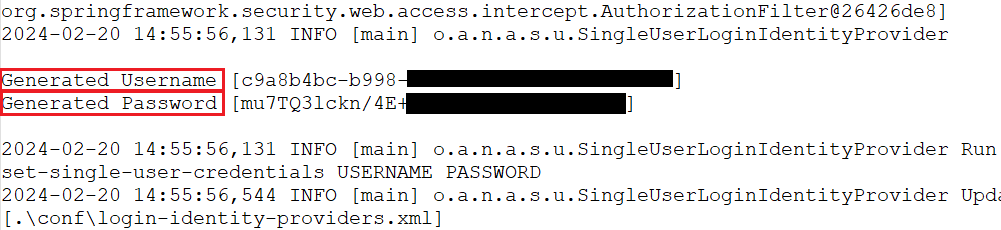
To retrieve login credentials, users should consult the 'App.log' file located within the log directory of their NiFi installation. This file typically contains the necessary details for accessing the NiFi interface.
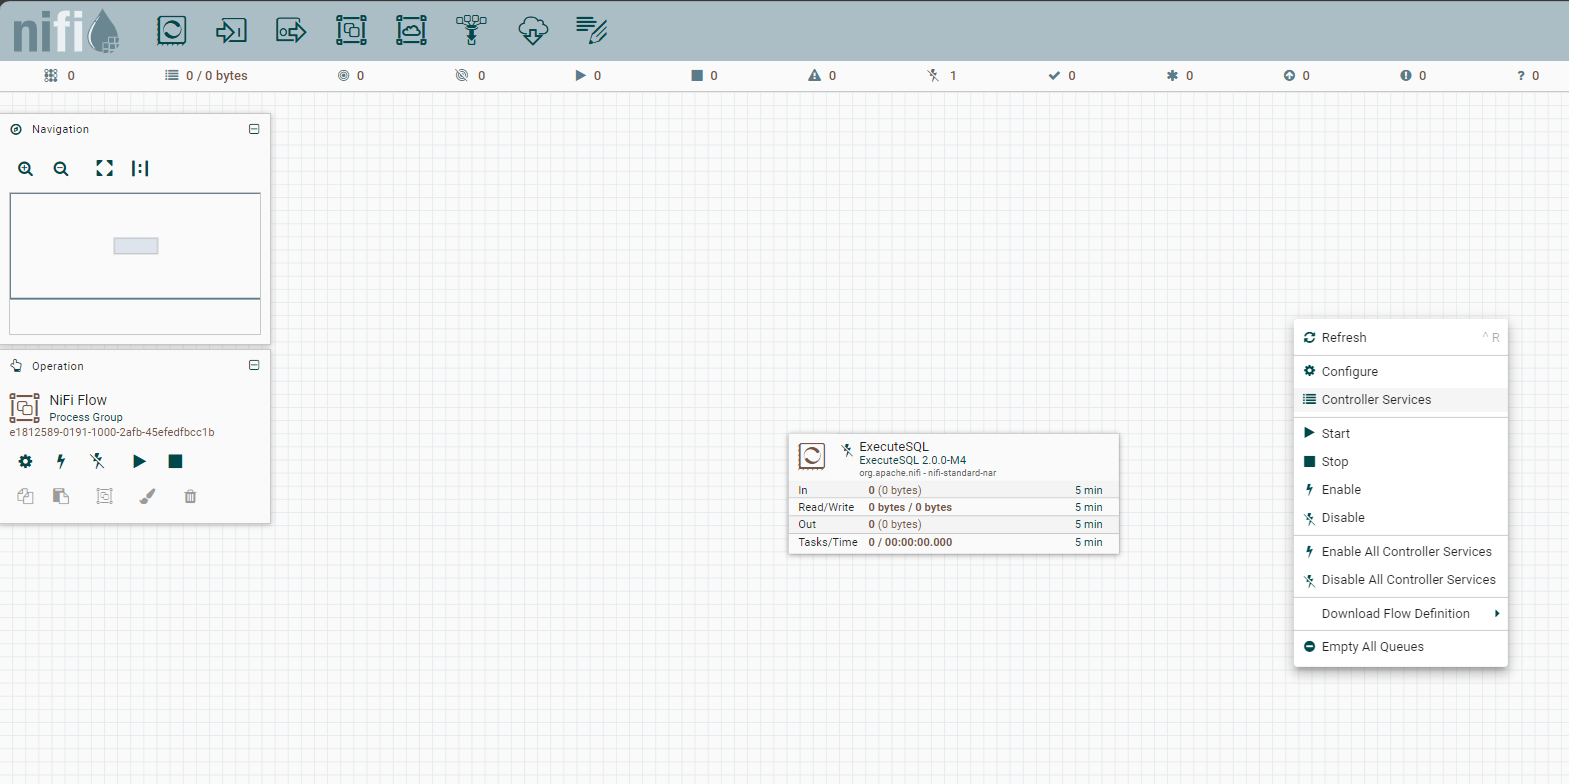
- Right-click on the Nifi Flow's workspace and click "Controller Services"
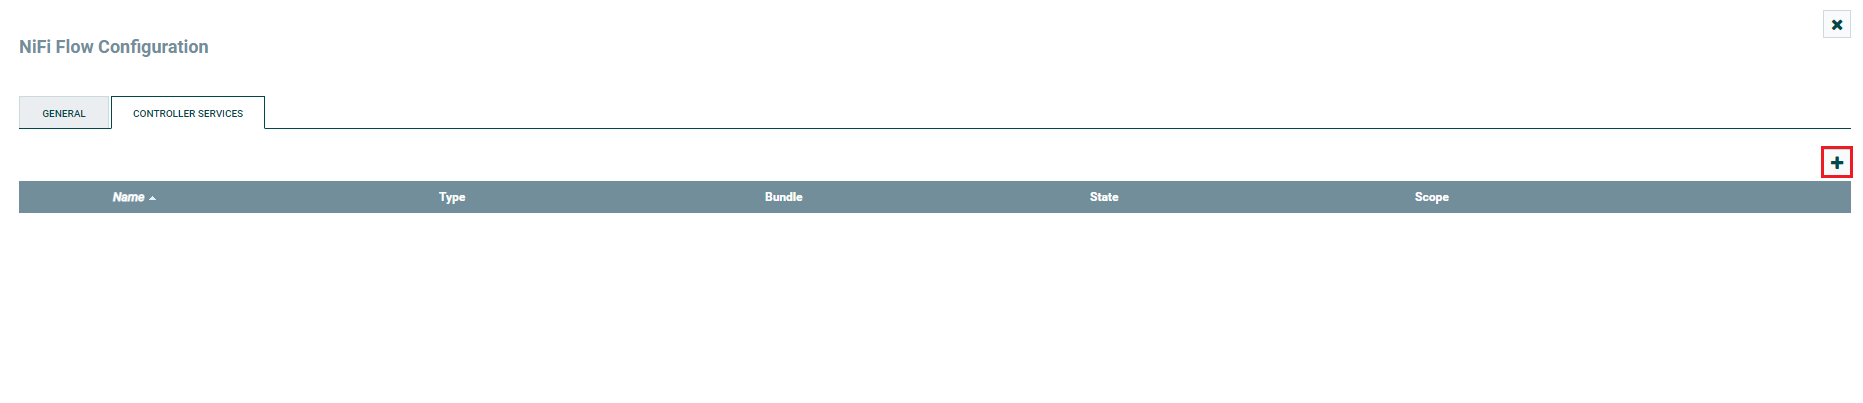
- Click the button to create a new controller service.
- In the Controller Services section, location the newly created "DBCPConnection Pool" and click the menu () >> Edit to configure the new connection.
Fill in the properties:
- Database Connection URL: jdbc:api:Profile=C:\profiles\UKGProWFM.apip;AuthScheme=OAuthPassword;ProfileSettings='Host=yourcompany.mykronos.com;User=your_username;Password=your_password;';OAuthClientId=your_client_id;OAuthClientSecret=your_client_secret;
- Database Driver Class Name: cdata.jdbc.api.APIDriver
- Database Driver Location(s): Path to your Apache NiFi's lib folder where the JAR files are present.
Built-in Connection String Designer
For assistance in constructing the JDBC URL, use the connection string designer built into the UKG Pro WFM JDBC Driver. Either double-click the JAR file or execute the JAR file from the command-line.
java -jar cdata.jdbc.api.jarFill in the connection properties and copy the connection string to the clipboard.
Start by setting the Profile connection property to the location of the UKGProWFM Profile on disk (e.g. C:\profiles\UKGProWFM.apip). Next, set the ProfileSettings connection property to the connection string for UKGProWFM (see below).
UKGProWFM API Profile Settings
UKG Pro Workforce Management uses OAuth 2.0 with the Resource Owner Password Credentials grant (grant_type=password) to authorize access to the API. Unlike most OAuth-based profiles, this does not use a browser redirect/authorization-code step: the driver exchanges your UKG Pro WFM username, password, client ID, and client secret directly for an access token.
Set the following connection properties to authenticate:
- AuthScheme: Set this to OAuthPassword.
- Host: Set this to the hostname of your UKG Pro Workforce Management datacenter/tenant (for example, yourcompany.mykronos.com). Do not include the protocol (https://) or a trailing slash.
- OAuthClientId: Set this to the client ID issued for your UKG Pro Workforce Management OAuth application.
- OAuthClientSecret: Set this to the client secret issued for your UKG Pro Workforce Management OAuth application.
- User: Set this to your UKG Pro Workforce Management username.
- Password: Set this to your UKG Pro Workforce Management password.
Access tokens are obtained from https://{Host}/api/authentication/access_token. Refresh tokens issued by UKG Pro Workforce Management expire after 7 days; if a refresh attempt fails because the refresh token itself has expired, the driver must re-authenticate with your User/Password credentials to obtain a new access token.

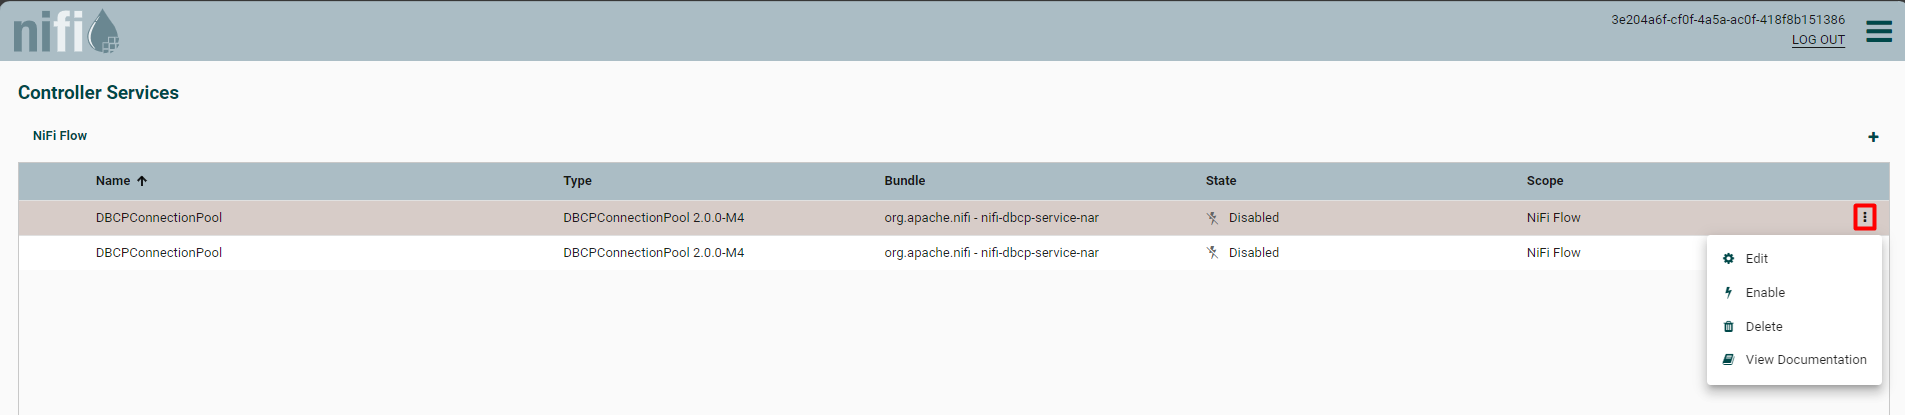
- In the Controller Services section, locate the newly created DBCPConnection Pool and click the menu () >> Enable to enable the new connection.
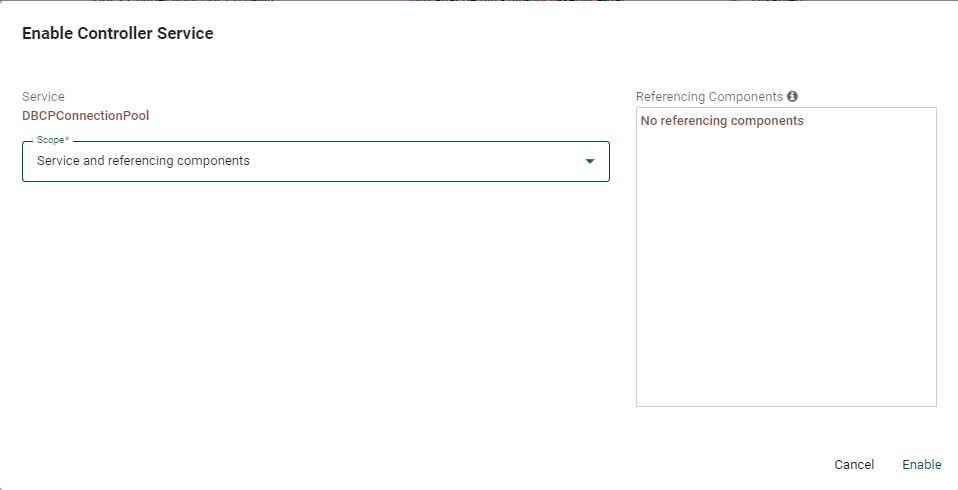
- In the "Enable Controller Service" window, set Scope to "Service and referencing components"
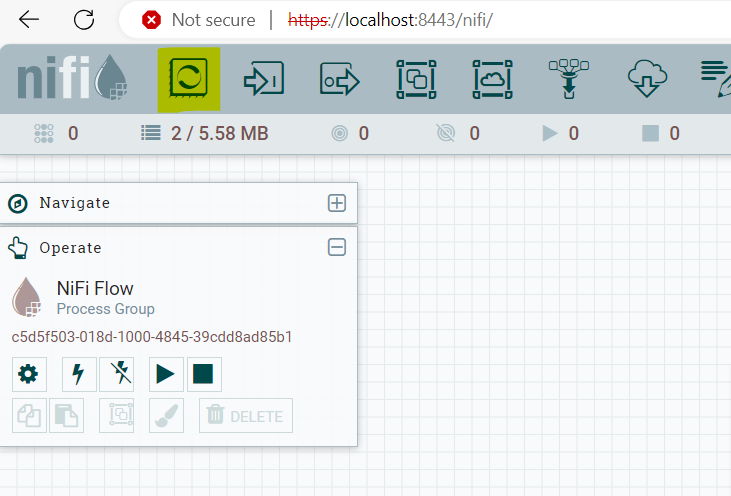
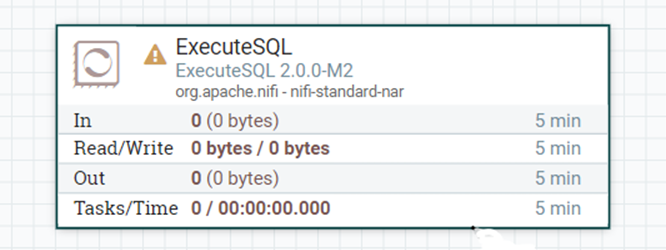
- To establish a connection and execute a select query, simply drag and drop the processor (indicated by the yellow highlight) into the workspace.
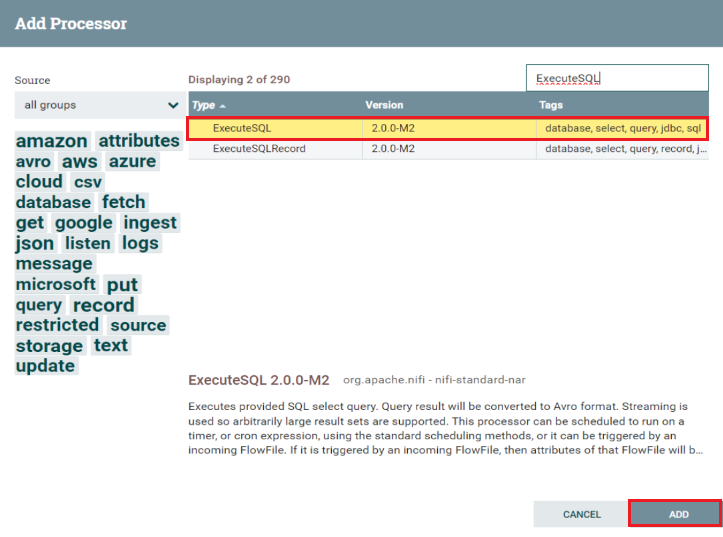
- Select the 'ExecuteSQL' processor and click the 'Add' button to make it visible in the workspace.
- Double-click on the added processor (ExecuteSQL)to open the connection page.
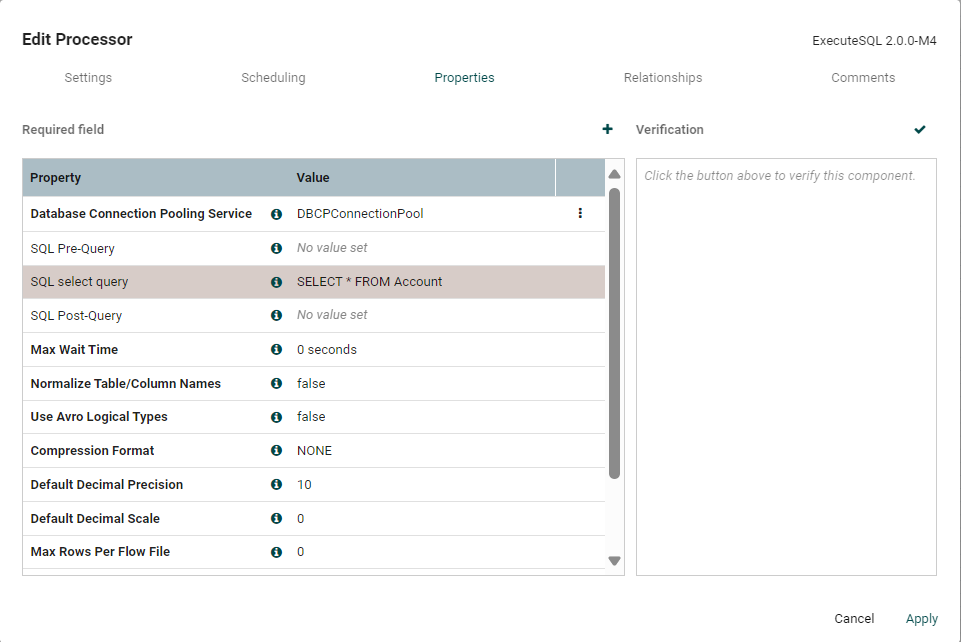
- In the Properties section, fill in the required information. Make sure to set the Database Connection Pooling Service to match the DBCPConnectionPool that you have created, and set your desired SQL query that you want to get executed in the SQL select query section.
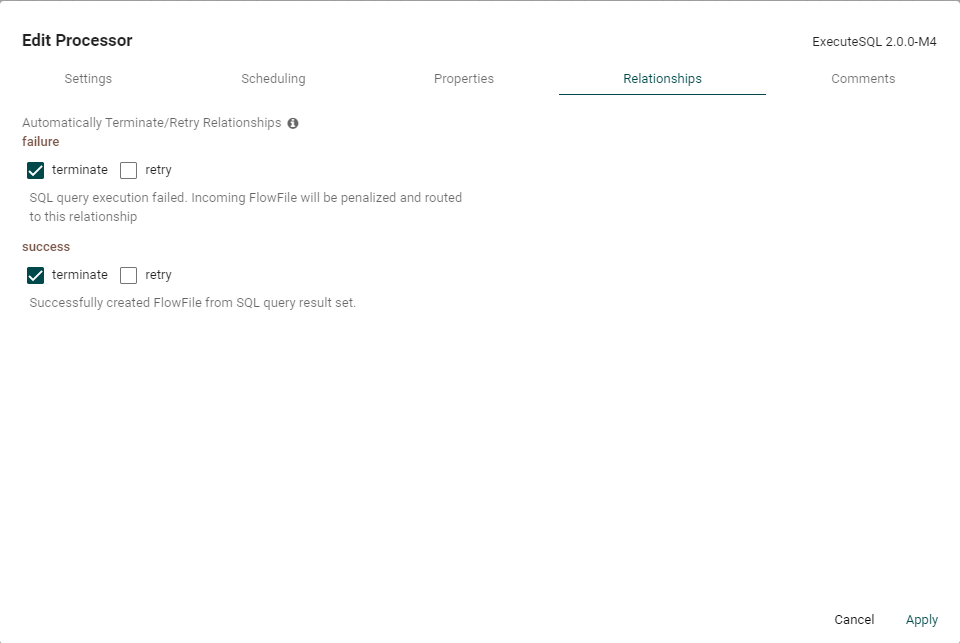
- Go to Relationships and make sure to select an option on how the component should proceed in case of success and failure of the execution process.
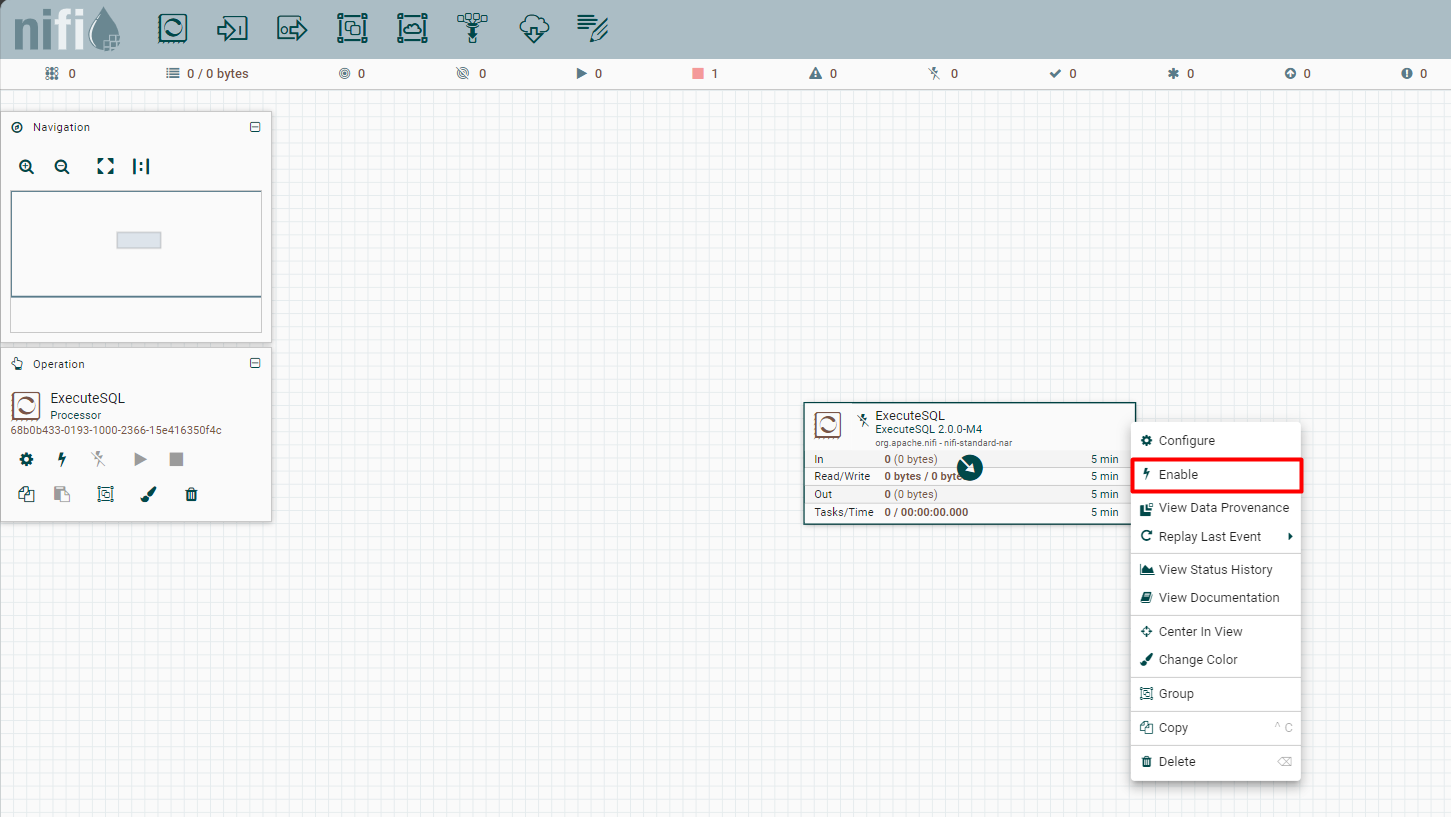
- You can enable the ExecuteSQL component by either selecting it and clicking Enable on the Operation section, or by right-clicking it and selecting Enable.
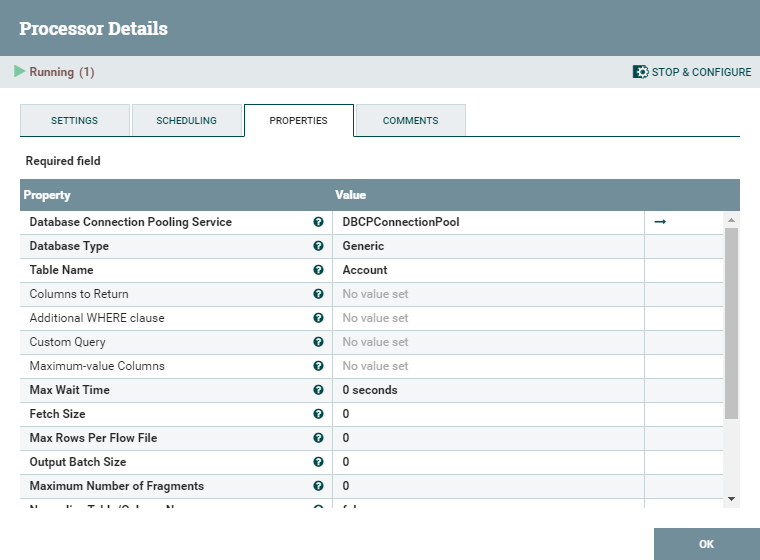
Your UKG Pro WFM data is now available for use in Apache NiFi. For example, you can use the DBCPConnection Pool as the source for a QueryDatabaseTable processor (shown below).
Download a free, 30-day trial of the CData API Driver for JDBC and start working with your live UKG Pro WFM data in Apache NiFi. Reach out to our Support Team if you have any questions.