




Object-Relational Mapping (ORM) with UKG Pro WFM Data Entities in Java

You can use Hibernate to map object-oriented domain models to a traditional relational database. The tutorial below shows how to use the CData JDBC Driver for UKG Pro WFM to generate an ORM of your UKG Pro WFM repository with Hibernate.
Though Eclipse is the IDE of choice for this article, the CData JDBC Driver for UKG Pro WFM works in any product that supports the Java Runtime Environment. In the Knowledge Base you will find tutorials to connect to UKG Pro WFM data from IntelliJ IDEA and NetBeans.
Install Hibernate
Follow the steps below to install the Hibernate plug-in in Eclipse.
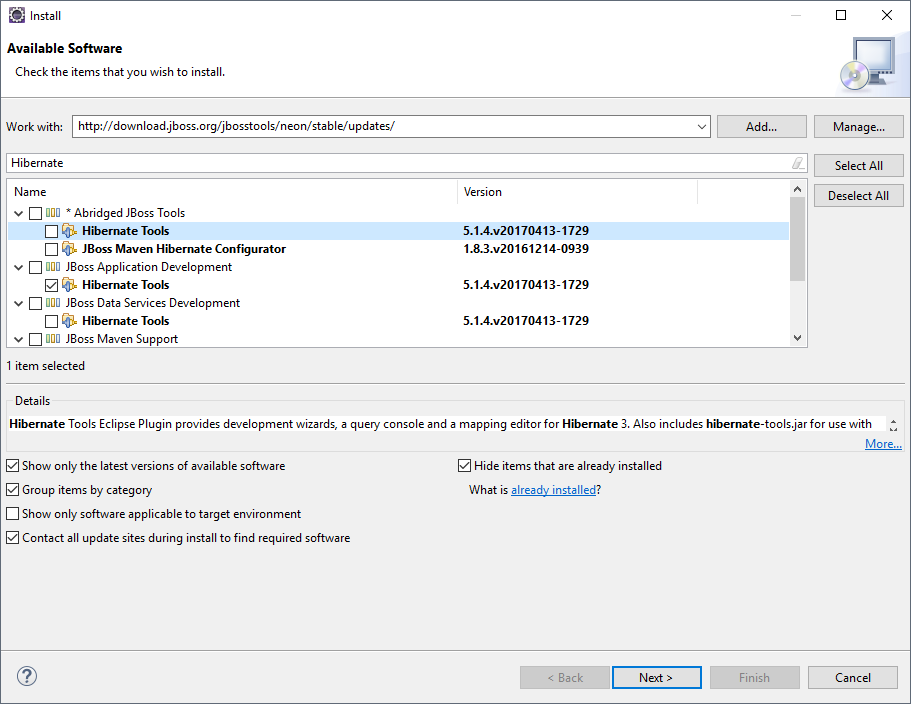
- In Eclipse, navigate to Help -> Install New Software.
- Enter "http://download.jboss.org/jbosstools/neon/stable/updates/" in the Work With box.
- Enter "Hibernate" into the filter box.
- Select Hibernate Tools.
Start A New Project
Follow the steps below to add the driver JARs in a new project.
- Create a new project. Select Java Project as your project type and click Next. Enter a project name and click Finish.
- Right-click the project and click Properties. Click Java Build Path and then open the Libraries tab.
- Click Add External JARs to add the cdata.jdbc.api.jar library, located in the lib subfolder of the installation directory.
Add a Hibernate Configuration File
Follow the steps below to configure connection properties to UKG Pro WFM data.
- Right-click on the new project and select New -> Hibernate -> Hibernate Configuration File (cfg.xml).
- Select src as the parent folder and click Next.
Input the following values:
- Hibernate version:: 5.2
- Database dialect: Derby
- Driver class: cdata.jdbc.api.APIDriver
Connection URL: A JDBC URL, starting with jdbc:api: and followed by a semicolon-separated list of connection properties.
Start by setting the Profile connection property to the location of the UKGProWFM Profile on disk (e.g. C:\profiles\UKGProWFM.apip). Next, set the ProfileSettings connection property to the connection string for UKGProWFM (see below).
UKGProWFM API Profile Settings
UKG Pro Workforce Management uses OAuth 2.0 with the Resource Owner Password Credentials grant (grant_type=password) to authorize access to the API. Unlike most OAuth-based profiles, this does not use a browser redirect/authorization-code step: the driver exchanges your UKG Pro WFM username, password, client ID, and client secret directly for an access token.
Set the following connection properties to authenticate:
- AuthScheme: Set this to OAuthPassword.
- Host: Set this to the hostname of your UKG Pro Workforce Management datacenter/tenant (for example, yourcompany.mykronos.com). Do not include the protocol (https://) or a trailing slash.
- OAuthClientId: Set this to the client ID issued for your UKG Pro Workforce Management OAuth application.
- OAuthClientSecret: Set this to the client secret issued for your UKG Pro Workforce Management OAuth application.
- User: Set this to your UKG Pro Workforce Management username.
- Password: Set this to your UKG Pro Workforce Management password.
Access tokens are obtained from https://{Host}/api/authentication/access_token. Refresh tokens issued by UKG Pro Workforce Management expire after 7 days; if a refresh attempt fails because the refresh token itself has expired, the driver must re-authenticate with your User/Password credentials to obtain a new access token.
Built-in Connection String Designer
For assistance in constructing the JDBC URL, use the connection string designer built into the UKG Pro WFM JDBC Driver. Either double-click the JAR file or execute the jar file from the command-line.
java -jar cdata.jdbc.api.jarFill in the connection properties and copy the connection string to the clipboard.
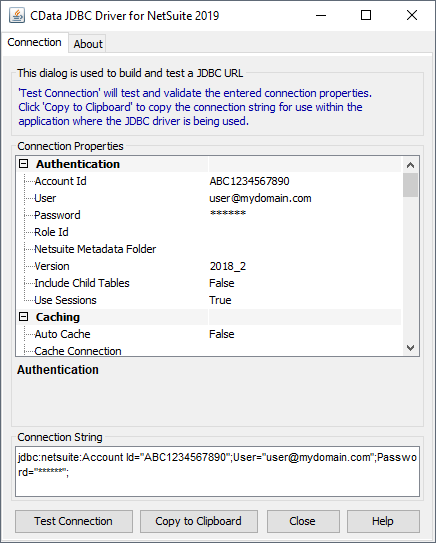
A typical JDBC URL is below:
jdbc:api:Profile=C:\profiles\UKGProWFM.apip;AuthScheme=OAuthPassword;ProfileSettings='Host=yourcompany.mykronos.com;User=your_username;Password=your_password;';OAuthClientId=your_client_id;OAuthClientSecret=your_client_secret;
Connect Hibernate to UKG Pro WFM Data
Follow the steps below to select the configuration you created in the previous step.
- Switch to the Hibernate Configurations perspective: Window -> Open Perspective -> Hibernate.
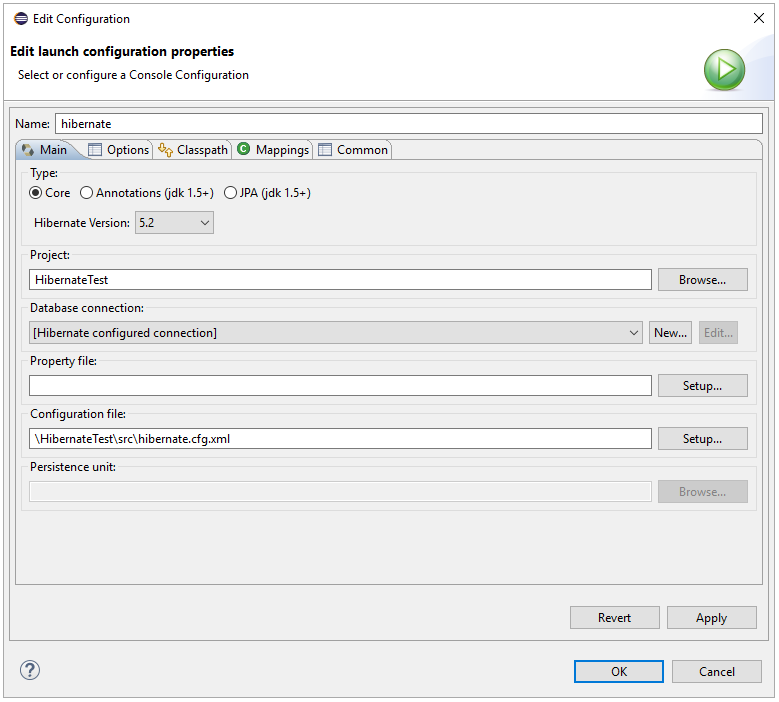
- Right-click on the Hibernate Configurations panel and click Add Configuration.
- Set the Hibernate version to 5.2.
- Click the Browse button and select the project.
- For the Configuration file field, click Setup -> Use Existing and select the location of the hibernate.cfg.xml file (inside src folder in this demo).
- In the Classpath tab, if there is nothing under User Entries, click Add External JARS and add the driver jar once more. Click OK once the configuration is done.
- Expand the Database node of the newly created Hibernate configurations file.
Reverse Engineer UKG Pro WFM Data
Follow the steps below to generate the reveng.xml configuration file. You will specify the tables you want to access as objects.
- Switch back to the Package Explorer.
- Right-click your project, select New -> Hibernate -> Hibernate Reverse Engineering File (reveng.xml). Click Next.
- Select src as the parent folder and click Next.
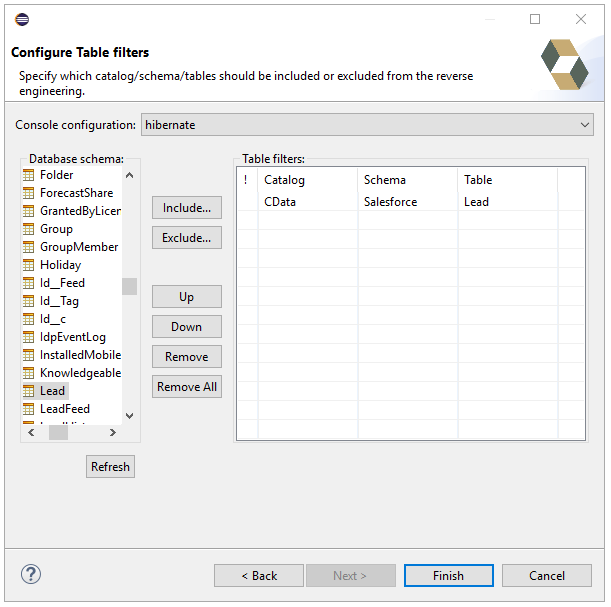
- In the Console configuration drop-down menu, select the Hibernate configuration file you created above and click Refresh.
- Expand the node and choose the tables you want to reverse engineer. Click Finish when you are done.
Configure Hibernate to Run
Follow the steps below to generate plain old Java objects (POJO) for the UKG Pro WFM tables.
- From the menu bar, click Run -> Hibernate Code Generation -> Hibernate Code Generation Configurations.
- In the Console configuration drop-down menu, select the Hibernate configuration file you created in the previous section. Click Browse by Output directory and select src.
- Enable the Reverse Engineer from JDBC Connection checkbox. Click the Setup button, click Use Existing, and select the location of the hibernate.reveng.xml file (inside src folder in this demo).
- In the Exporters tab, check Domain code (.java) and Hibernate XML Mappings (hbm.xml).
- Click Run.
One or more POJOs are created based on the reverse-engineering setting in the previous step.
Insert Mapping Tags
For each mapping you have generated, you will need to create a mapping tag in hibernate.cfg.xml to point Hibernate to your mapping resource. Open hibernate.cfg.xml and insert the mapping tags as so:
      cdata.api.APIDriver


      jdbc:api:Profile=C:\profiles\UKGProWFM.apip;AuthScheme=OAuthPassword;ProfileSettings='Host=yourcompany.mykronos.com;User=your_username;Password=your_password;';OAuthClientId=your_client_id;OAuthClientSecret=your_client_secret;


      org.hibernate.dialect.SQLServerDialect
Execute SQL
Using the entity you created from the last step, you can now search UKG Pro WFM data:
import java.util.*;
import org.hibernate.Session;
import org.hibernate.cfg.Configuration;
import org.hibernate.query.Query;

public class App {
  public static void main(final String[] args) {
    Session session =  new
    Configuration().configure().buildSessionFactory().openSession();
    String SELECT = "FROM Employees E WHERE PersonId = :PersonId";
    Query q = session.createQuery(SELECT, Employees.class);
    q.setParameter("PersonId","12345");
    List<Employees> resultList = (List<Employees>) q.list();

    for(Employees s: resultList){
      System.out.println(s.getPersonNumber());
      System.out.println(s.getUserName());
    }
  }
}