




Integrate UKG Pro WFM Data in Pentaho Data Integration

The CData API Driver for JDBC enables access to live data from data pipelines. Pentaho Data Integration is an Extraction, Transformation, and Loading (ETL) engine that data, cleanses the data, and stores data using a uniform format that is accessible.This article shows how to connect to UKG Pro WFM data as a JDBC data source and build jobs and transformations based on UKG Pro WFM data in Pentaho Data Integration.
Configure to UKG Pro WFM Connectivity
Start by setting the Profile connection property to the location of the UKGProWFM Profile on disk (e.g. C:\profiles\UKGProWFM.apip). Next, set the ProfileSettings connection property to the connection string for UKGProWFM (see below).
UKGProWFM API Profile Settings
UKG Pro Workforce Management uses OAuth 2.0 with the Resource Owner Password Credentials grant (grant_type=password) to authorize access to the API. Unlike most OAuth-based profiles, this does not use a browser redirect/authorization-code step: the driver exchanges your UKG Pro WFM username, password, client ID, and client secret directly for an access token.
Set the following connection properties to authenticate:
- AuthScheme: Set this to OAuthPassword.
- Host: Set this to the hostname of your UKG Pro Workforce Management datacenter/tenant (for example, yourcompany.mykronos.com). Do not include the protocol (https://) or a trailing slash.
- OAuthClientId: Set this to the client ID issued for your UKG Pro Workforce Management OAuth application.
- OAuthClientSecret: Set this to the client secret issued for your UKG Pro Workforce Management OAuth application.
- User: Set this to your UKG Pro Workforce Management username.
- Password: Set this to your UKG Pro Workforce Management password.
Access tokens are obtained from https://{Host}/api/authentication/access_token. Refresh tokens issued by UKG Pro Workforce Management expire after 7 days; if a refresh attempt fails because the refresh token itself has expired, the driver must re-authenticate with your User/Password credentials to obtain a new access token.
Built-in Connection String Designer
For assistance in constructing the JDBC URL, use the connection string designer built into the UKG Pro WFM JDBC Driver. Either double-click the JAR file or execute the jar file from the command-line.
java -jar cdata.jdbc.api.jar
Fill in the connection properties and copy the connection string to the clipboard.

When you configure the JDBC URL, you may also want to set the Max Rows connection property. This will limit the number of rows returned, which is especially helpful for improving performance when designing reports and visualizations.
Below is a typical JDBC URL:
jdbc:api:Profile=C:\profiles\UKGProWFM.apip;AuthScheme=OAuthPassword;ProfileSettings='Host=yourcompany.mykronos.com;User=your_username;Password=your_password;';OAuthClientId=your_client_id;OAuthClientSecret=your_client_secret;Save your connection string for use in Pentaho Data Integration.
Connect to UKG Pro WFM from Pentaho DI
Open Pentaho Data Integration and select "Database Connection" to configure a connection to the CData API Driver for JDBC
- Click "General"
- Set Connection name (e.g. UKG Pro WFM Connection)
- Set Connection type to "Generic database"
- Set Access to "Native (JDBC)"
- Set Custom connection URL to your UKG Pro WFM connection string (e.g.
jdbc:api:Profile=C:\profiles\UKGProWFM.apip;AuthScheme=OAuthPassword;ProfileSettings='Host=yourcompany.mykronos.com;User=your_username;Password=your_password;';OAuthClientId=your_client_id;OAuthClientSecret=your_client_secret; - Set Custom driver class name to "cdata.jdbc.api.APIDriver"
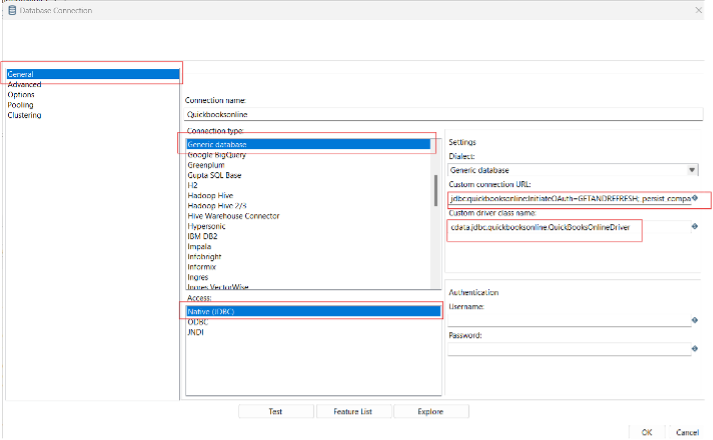
- Test the connection and click "OK" to save.
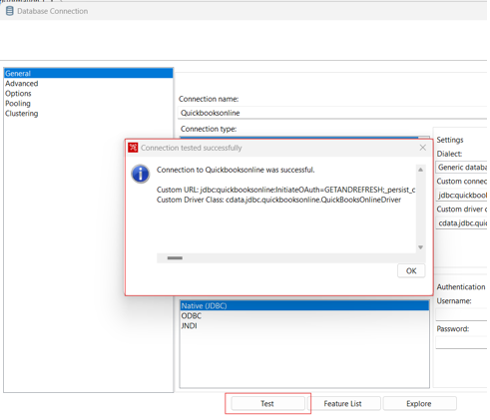
Create a Data Pipeline for UKG Pro WFM
Once the connection to UKG Pro WFM is configured using the CData JDBC Driver, you are ready to create a new transformation or job.
- Click "File" >> "New" >> "Transformation/job"
- Drag a "Table input" object into the workflow panel and select your UKG Pro WFM connection.
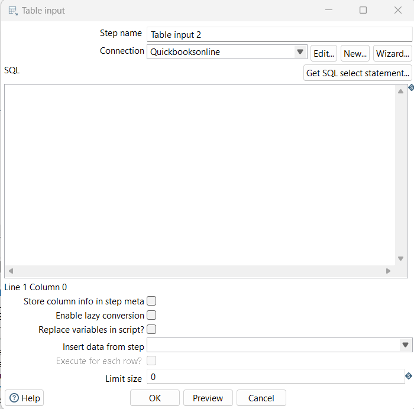
- Click "Get SQL select statement" and use the Database Explorer to view the available tables and views.
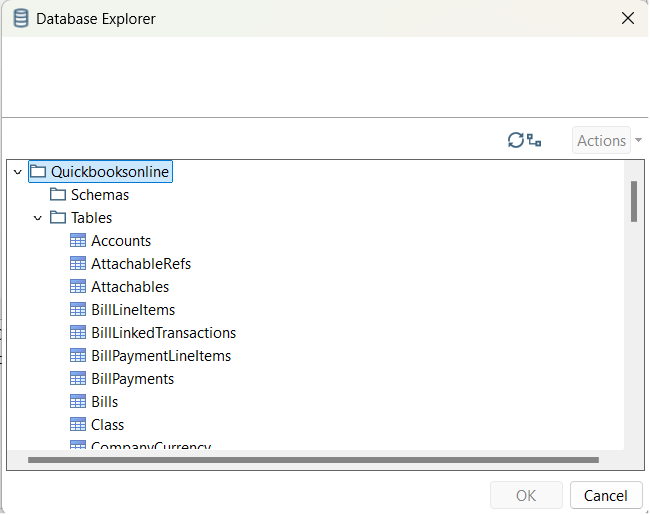
- Select a table and optionally preview the data for verification.
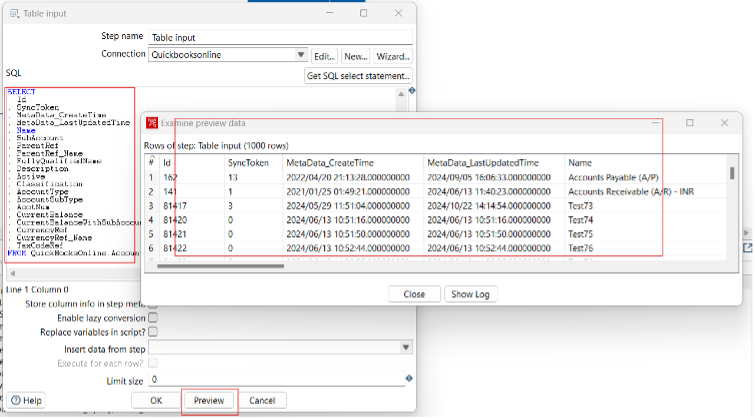
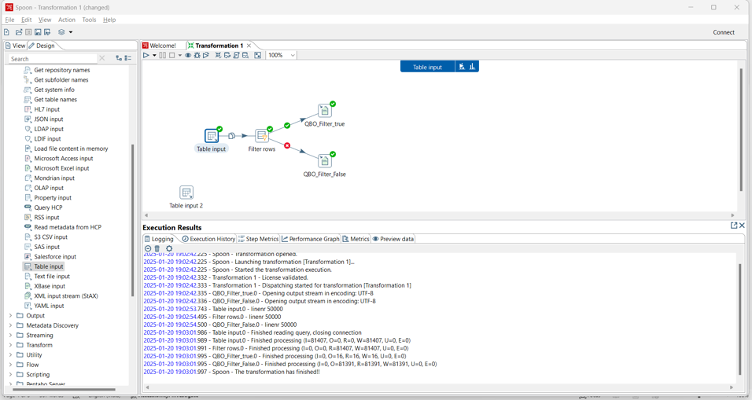
At this point, you can continue your transformation or jb by selecting a suitable destination and adding any transformations to modify, filter, or otherwise alter the data during replication.
Free Trial & More Information
Download a free, 30-day trial of the CData API Driver for JDBC and start working with your live UKG Pro WFM data in Pentaho Data Integration today.