




Connect UKG Pro WFM Data to Claris FileMaker via ESS using an ODBC Driver and the CData SQL Gateway

Claris FileMaker is a low-code platform that enables users to quickly create custom apps to manage and automate data workflows. Using the CData API Driver for ODBC and the CData SQL Gateway, FileMaker connects to UKG Pro WFM data through its ESS (External SQL Source) feature, allowing you to work with UKG Pro WFM records as if they were native FileMaker tables.
In this article, we configure and use the CData API Driver for ODBC and the CData SQL Gateway, along with the MySQL ODBC Driver, to connect to UKG Pro WFM data using the ESS functionality in FileMaker.
Create an ODBC Data Source for UKG Pro WFM
If you have not already, first specify connection properties in an ODBC DSN (data source name). This is the last step of the driver installation. You can use the Microsoft ODBC Data Source Administrator to create and configure ODBC DSNs.
Start by setting the Profile connection property to the location of the UKGProWFM Profile on disk (e.g. C:\profiles\UKGProWFM.apip). Next, set the ProfileSettings connection property to the connection string for UKGProWFM (see below).
UKGProWFM API Profile Settings
UKG Pro Workforce Management uses OAuth 2.0 with the Resource Owner Password Credentials grant (grant_type=password) to authorize access to the API. Unlike most OAuth-based profiles, this does not use a browser redirect/authorization-code step: the driver exchanges your UKG Pro WFM username, password, client ID, and client secret directly for an access token.
Set the following connection properties to authenticate:
- AuthScheme: Set this to OAuthPassword.
- Host: Set this to the hostname of your UKG Pro Workforce Management datacenter/tenant (for example, yourcompany.mykronos.com). Do not include the protocol (https://) or a trailing slash.
- OAuthClientId: Set this to the client ID issued for your UKG Pro Workforce Management OAuth application.
- OAuthClientSecret: Set this to the client secret issued for your UKG Pro Workforce Management OAuth application.
- User: Set this to your UKG Pro Workforce Management username.
- Password: Set this to your UKG Pro Workforce Management password.
Access tokens are obtained from https://{Host}/api/authentication/access_token. Refresh tokens issued by UKG Pro Workforce Management expire after 7 days; if a refresh attempt fails because the refresh token itself has expired, the driver must re-authenticate with your User/Password credentials to obtain a new access token.
When you configure the DSN, you may also want to set the Max Rows connection property. This will limit the number of rows returned, which is especially helpful for improving performance when designing reports and visualizations.
Configuring the CData SQL Gateway
The CData SQL Gateway bridges non-SQL data sources (like SaaS applications, APIs, and NoSQL databases) with SQL-based tools (like FileMaker, MySQL clients, and BI tools).
In simple terms, it exposes any CData driver-supported source - for example, UKG Pro WFM - as a standard MySQL or SQL Server endpoint.
See the SQL Gateway Overview to set up UKG Pro WFM data connectivity as a virtual MySQL database. Set up a MySQL remoting service that listens for MySQL requests from clients, and configure the service through the SQL Gateway UI (as shown below). Save the user credentials (Username and Password) for future use.
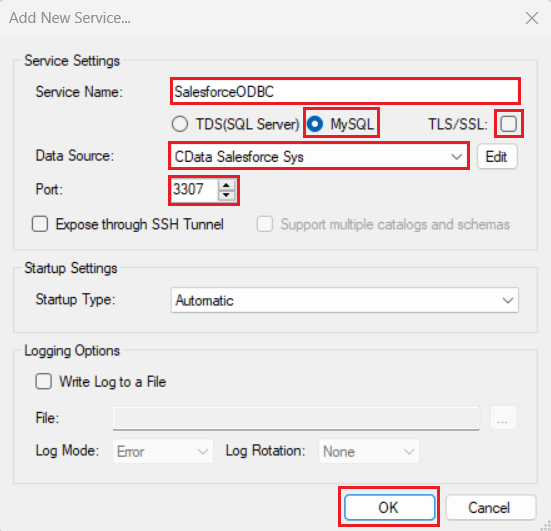
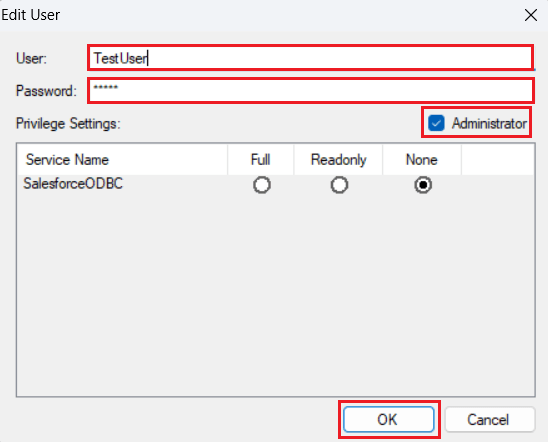
Once you establish the connection, you can use the CData SQL Gateway to access UKG Pro WFM data through the MySQL protocol.
Installing the MySQL ODBC Driver
Follow the steps below to install and configure the MySQL ODBC Driver:
- Download and install the latest 64-bit Windows version of the MySQL ODBC Unicode Driver from this link.
- Launch ODBC Data Sources (64-bit) from Windows search. Open the System DSN tab, click Add, select MySQL ODBC Unicode Driver from the Create New Data Source window, and click Finish.
- Enter the following connection details in the MySQL Connector/ODBC Data Source Configuration window:
- Data Source Name: Enter a DSN of your choice
- TCP/IP Server: localhost
- Port: Enter the port set in the SQL Gateway (for this procedure, use "3307")
- User: Enter the username set in the CData SQL Gateway
- Password: Enter the password set in the CData SQL Gateway
- Database: CData API Sys
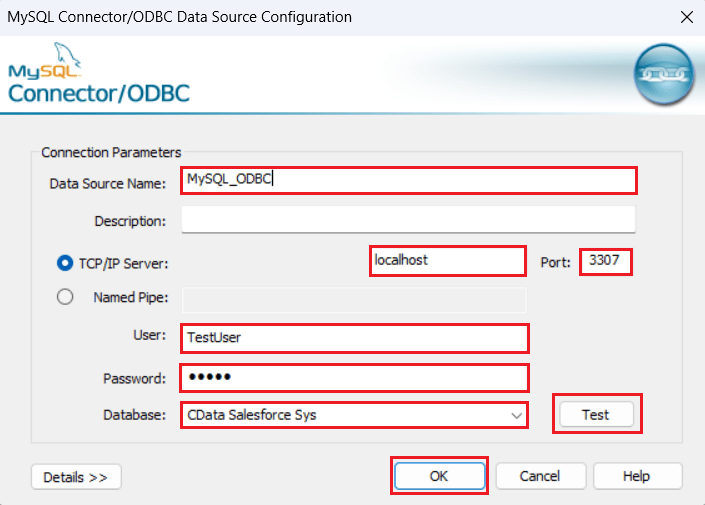
- Click Test to verify that the "Connection Successful" dialog box appears. Then click OK to save the configuration details.
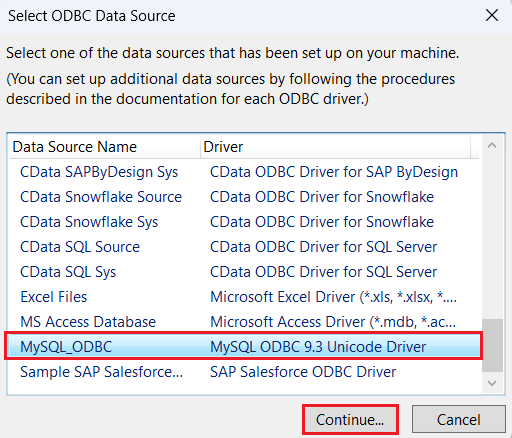
You have now successfully configured the MySQL ODBC Driver.
Use FileMaker ESS function to load UKG Pro WFM data
In this section, we explore how to use the ESS (External SQL Source) feature to retrieve data in the FileMaker application. Follow the given steps to complete the process:
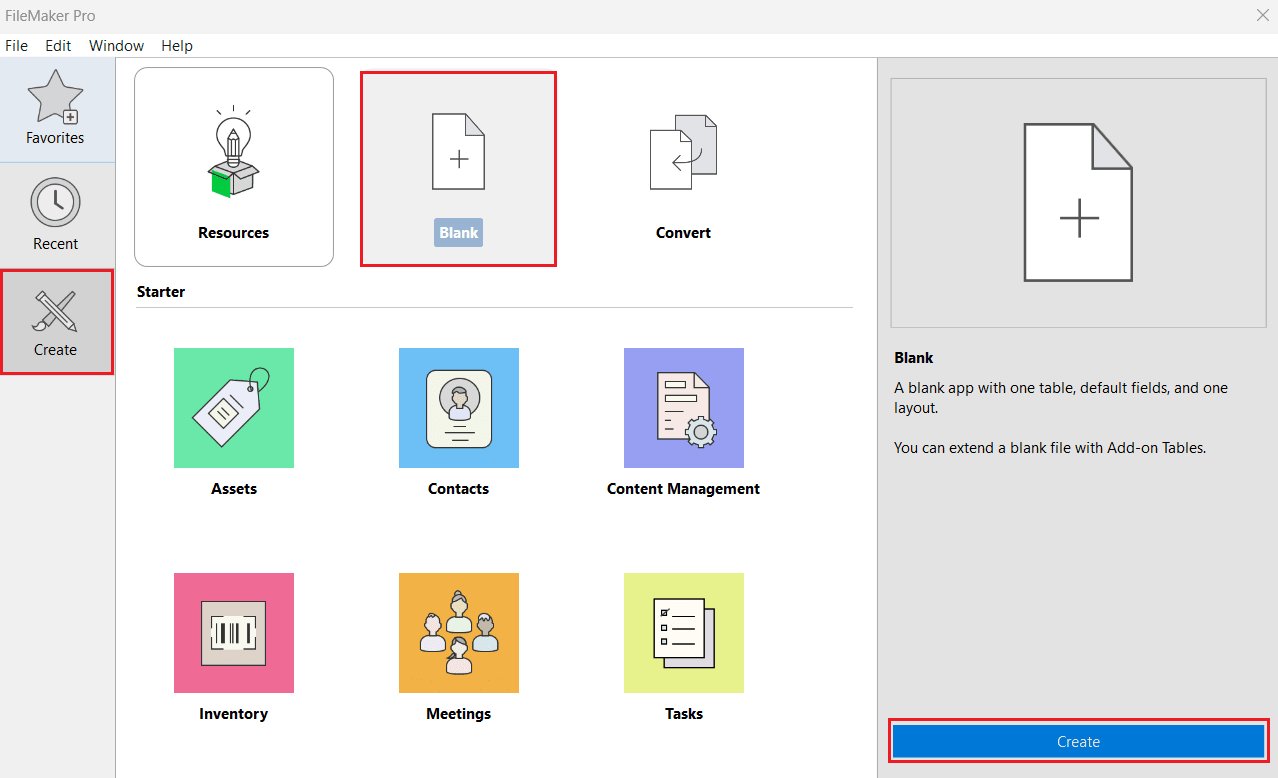
- Open FileMaker Pro. Navigate to Create from the left panel and select Blank > Create.
- Enter a desired filename and click Save.
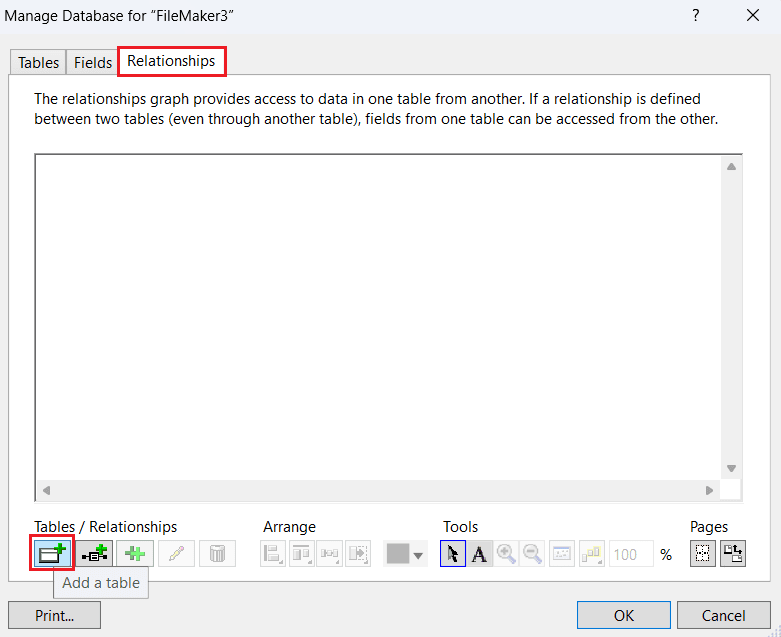
- In Manage Database, remove the Tables and Fields from the respective tabs. Select the Relationships tab and click Add Table.
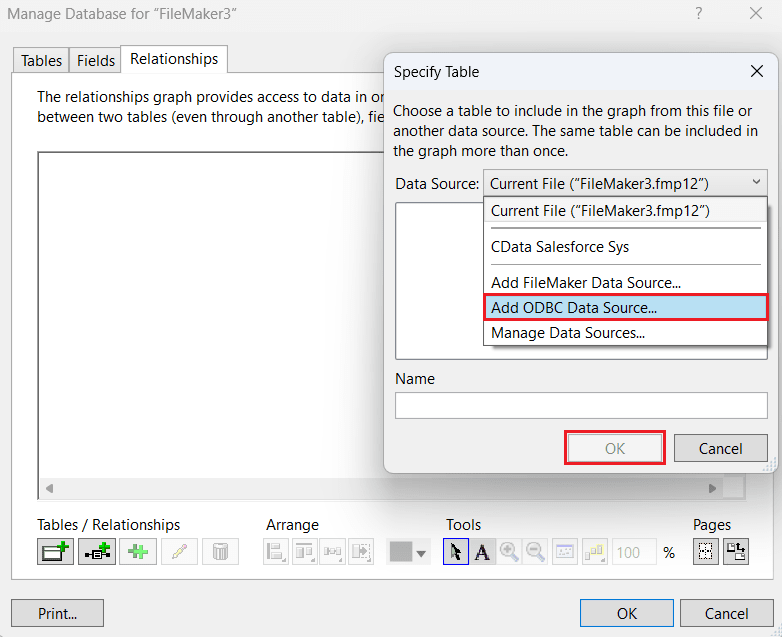
- In Specify Table, expand the Data Source dropdown menu and select Add ODBC Data Source. Click OK.
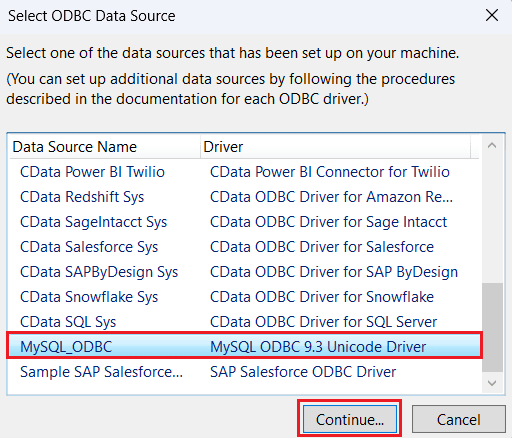
- In Select ODBC Data Source, select the previously configured MySQL ODBC driver and click Continue.
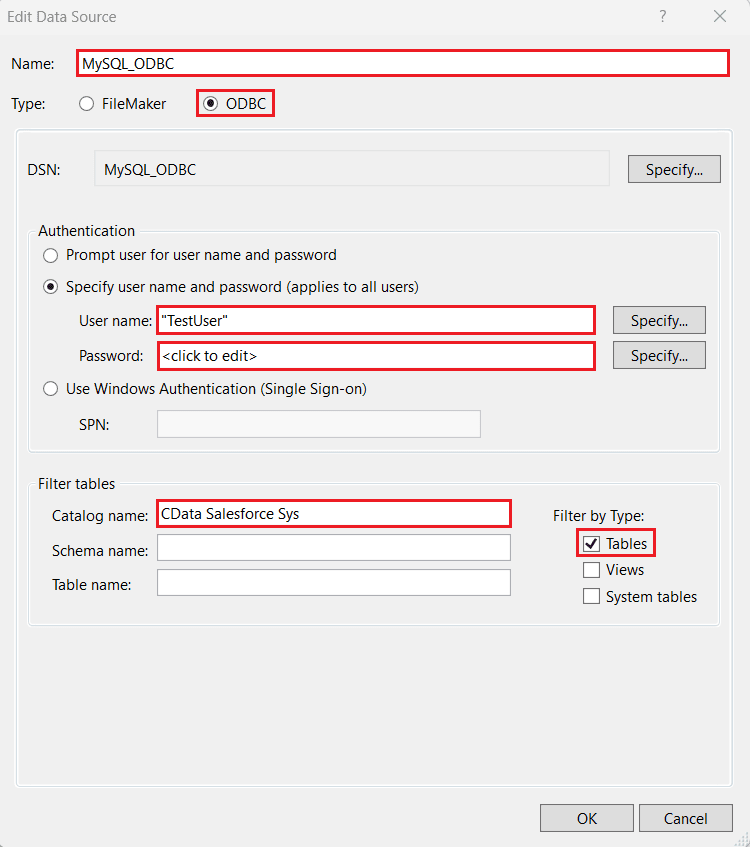
- In the Edit Data Source window, enter the following details:
- Name: This field will be auto-filled. Enter a new name of choice if necessary.
- Type: Select "ODBC".
- Under Authentication, select the Specify username and password radio button and enter the following details:
- User name: Enter the username set in the CData SQL Gateway.
- Password: Enter the password set in the CData SQL Gateway.
- Catalog Name: CData API Sys
- Click OK.
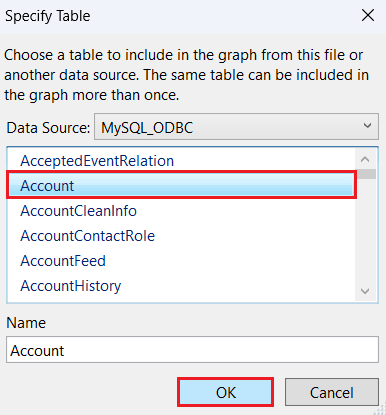
- View the tables from UKG Pro WFM populated under the Data Source section. Select the table of your choice and click OK.
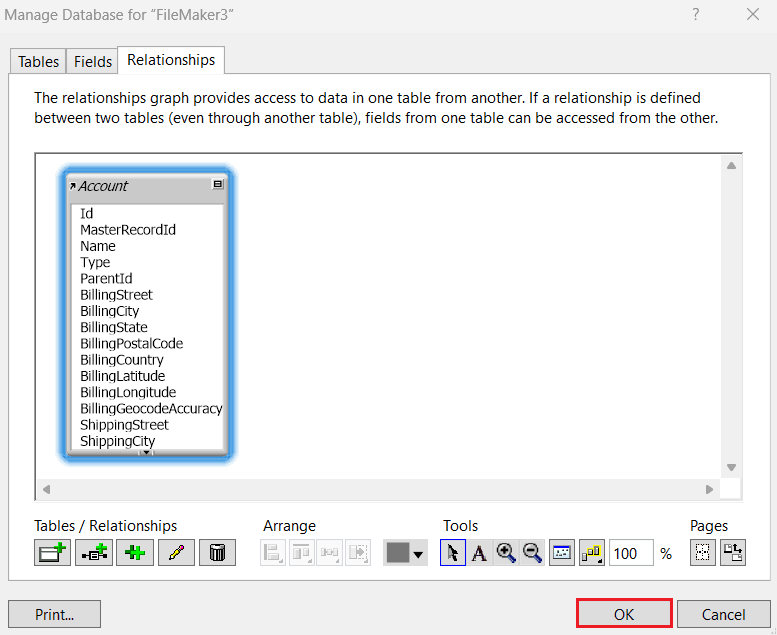
- The Relationships tab now displays the selected table and its metadata. Click OK.
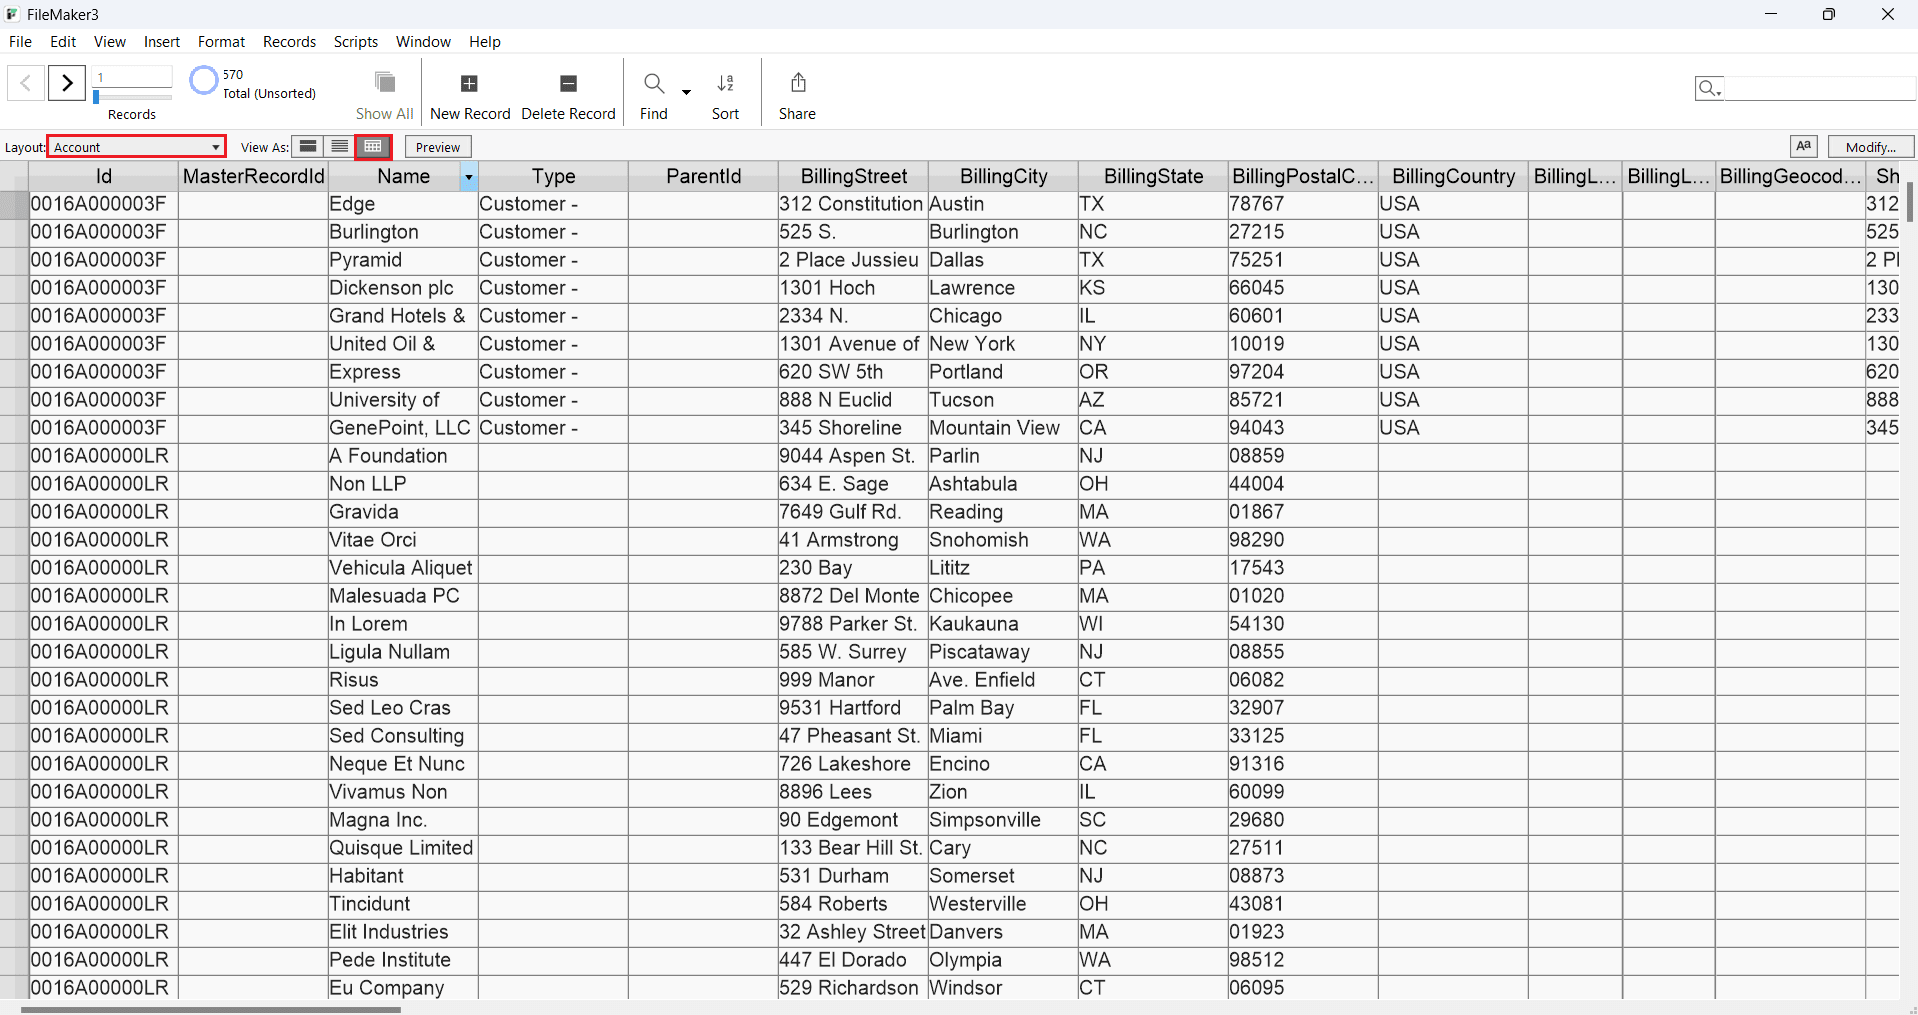
- Select the table from the Layout dropdown. The UKG Pro WFM table data appears on the screen. (As shown)
Get Started Today
Download a free 30-day trial of CData API Driver for ODBC to integrate UKG Pro WFM data into Claris FileMaker and use UKG Pro WFM data in your FileMaker applications.
Contact our Support Team if you have any questions.