




Getting Started with the CData ADO.NET Provider for ApprovalMax
This guide explains everything you need to work with the CData API Driver for ADO.NET. You will learn how to install the provider, set up a connection to your ApprovalMax data, and run simple commands in your .NET applications using familiar ADO.NET patterns.
Whether you are building desktop apps, web apps, or background services, the provider enables secure, high-performance connectivity to live ApprovalMax data without needing to manage API details manually.
Installation and Licensing
System Requirements
- Windows: Windows 10/11 or Windows Server 2016+
- .NET Versions: .NET Framework 4.0+, .NET 6+, .NET Standard assemblies
- IDE: Visual Studio 2017 or later
Installing the ADO.NET Provider
Windows Installation
- Download the ADO.NET provider installer from your CData account or the evaluation page.
- Run the installer and follow the installation wizard to completion.
- The installer registers the provider and places all assemblies in the appropriate CData installation folders.
-
You will be prompted for your license key during installation:
XXXX-XXXX-XXXX-XXXX-XXXX- Note: If you are using a trial, select Trial Key instead.
Activating your License
Licensing behavior varies depending on whether you are developing with the .NET Framework or .NET Standard. Use the steps below to activate the provider in your environment.
.NET Framework (Windows)
On Windows using the .NET Framework, no extra action is required. The installer or NuGet package automatically installs your development license.
.NET Standard (Windows/Mac/Linux)
For .NET Standard platforms like .NET Core, Mono, or Xamarin, you must install a license manually before using the provider.
Using the Install-License Tool
The toolkit includes an install-license utility in the
lib/netstandard2.0To install a trial license:
dotnet ./install-license.dll
To activate a full product license:
dotnet ./install-license.dll
After running the tool, your development machine is licensed and ready to use the provider in .NET applications.
Runtime Licensing
When deploying applications, specify the Runtime Key (RTK) in your connection string to enable redistribution.
| Property | Description |
|---|---|
| RTK | Your Runtime Key used for deployed ADO.NET applications. |
Common Licensing Questions
Can I use my license on multiple machines?
Yes, depending on your subscription tier. If unsure, review your order confirmation or contact [email protected].
I lost my license key. How do I retrieve it?
Email [email protected] with your order number.
Can I transfer my license to another machine?
Submit a License Transfer Request:
https://www.cdata.com/lic/transfer/
Once approved, an activation is added to your product key and the previous installation becomes invalid.
For more licensing support, visit portal.cdata.com or email [email protected].
Connection Configuration
Once installed, the next step is to configure a connection to ApprovalMax. Connections are created using ADO.NET connection strings in your .NET application's code or configuration file.
Creating a connection manager
- Open Visual Studio.
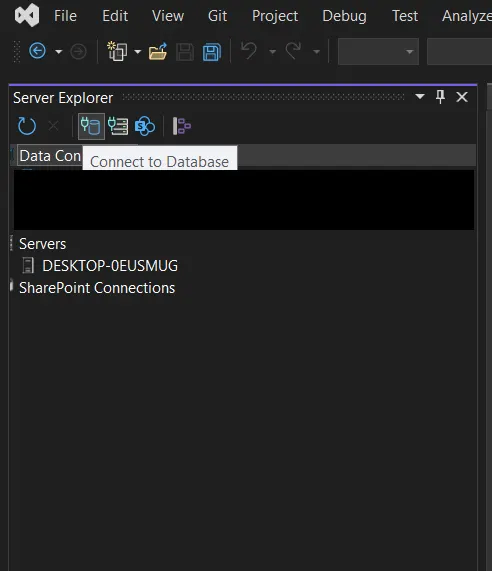
- Navigate to View, select Server Explorer.
-
Click Connect to Database from the left sidebar.
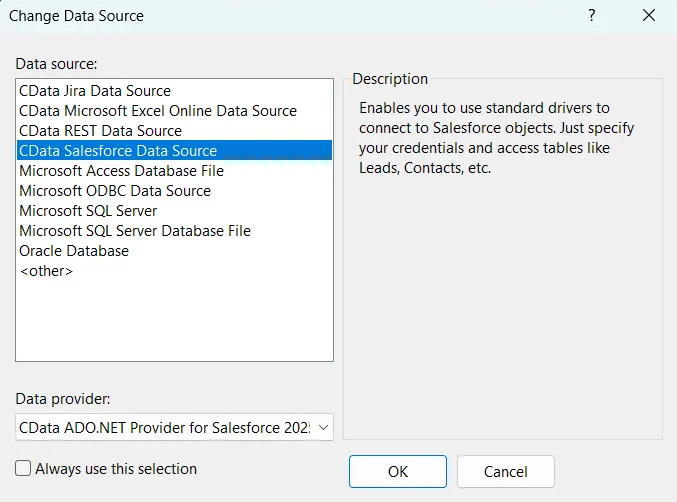
- In the Add Connection dialog, click Change.
-
Choose CData ApprovalMax data source, then click OK.
Configuring Connection Properties
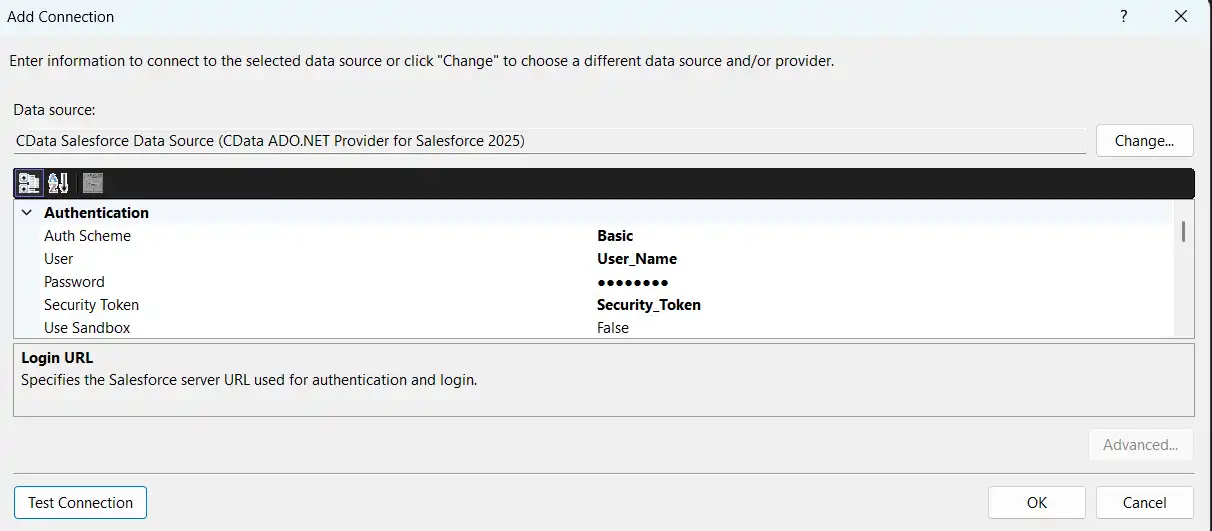
Start by setting the Profile connection property to the location of the ApprovalMax Profile on disk (e.g. C:\profiles\ApprovalMax.apip). Next, set the ProfileSettings connection property to the connection string for ApprovalMax (see below).
ApprovalMax API Profile Settings
To authenticate to ApprovalMax and connect to your own data or to allow other users to connect to their data, the ApprovalMax Public API requires the OAuth 2.0 authorization code flow.
First, you will need to register an OAuth application with ApprovalMax. Sign in to the ApprovalMax Developer Portal (https://developer.approvalmax.com/applications) and create a new application. Your OAuth application will be assigned a Client ID and a Client Secret, and you must register at least one Redirect URI (Callback URL).
A Premium ApprovalMax subscription (or active trial) is required to use the Public API.
After setting the following connection properties, you are ready to connect:
- AuthScheme: Set this to OAuth.
- InitiateOAuth: Set this to GETANDREFRESH. You can use InitiateOAuth to manage the process to obtain the OAuthAccessToken.
- OAuthClientId: Set this to the Client ID that is shown in your application settings on the ApprovalMax Developer Portal.
- OAuthClientSecret: Set this to the Client Secret that is shown in your application settings on the ApprovalMax Developer Portal.
- CallbackURL: Set this to the Redirect URI that is registered in your application settings.
- Scope: (Optional) Override the default OAuth scopes. The default value openid offline_access https://www.approvalmax.com/scopes/public_api/read grants read-only access to all tables in this profile and enables refresh tokens. Use the principle of least privilege when narrowing this scope.
The OAuth Authorization URL is https://identity.approvalmax.com/connect/authorize and the Token URL is https://identity.approvalmax.com/connect/token. Both authorization_code and refresh_token grant types are supported.
Test your connection
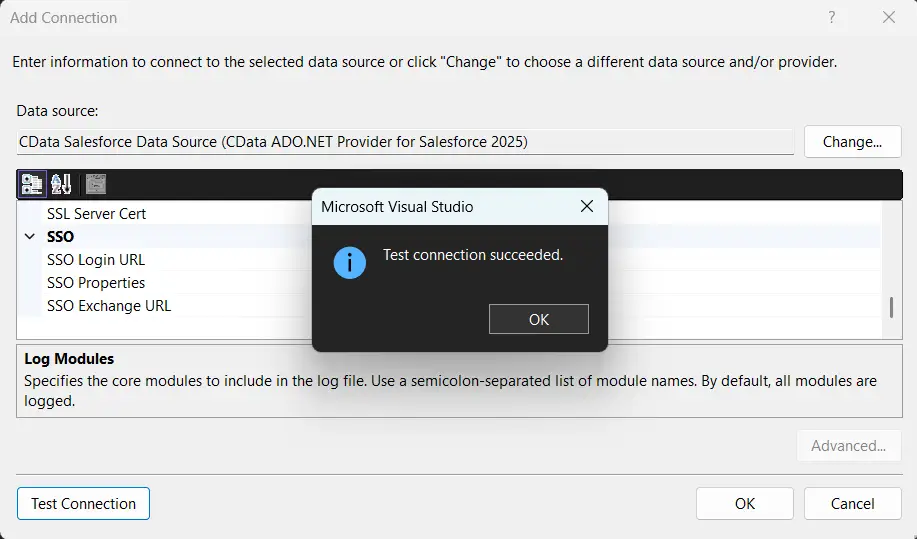
- Click Test Connection.
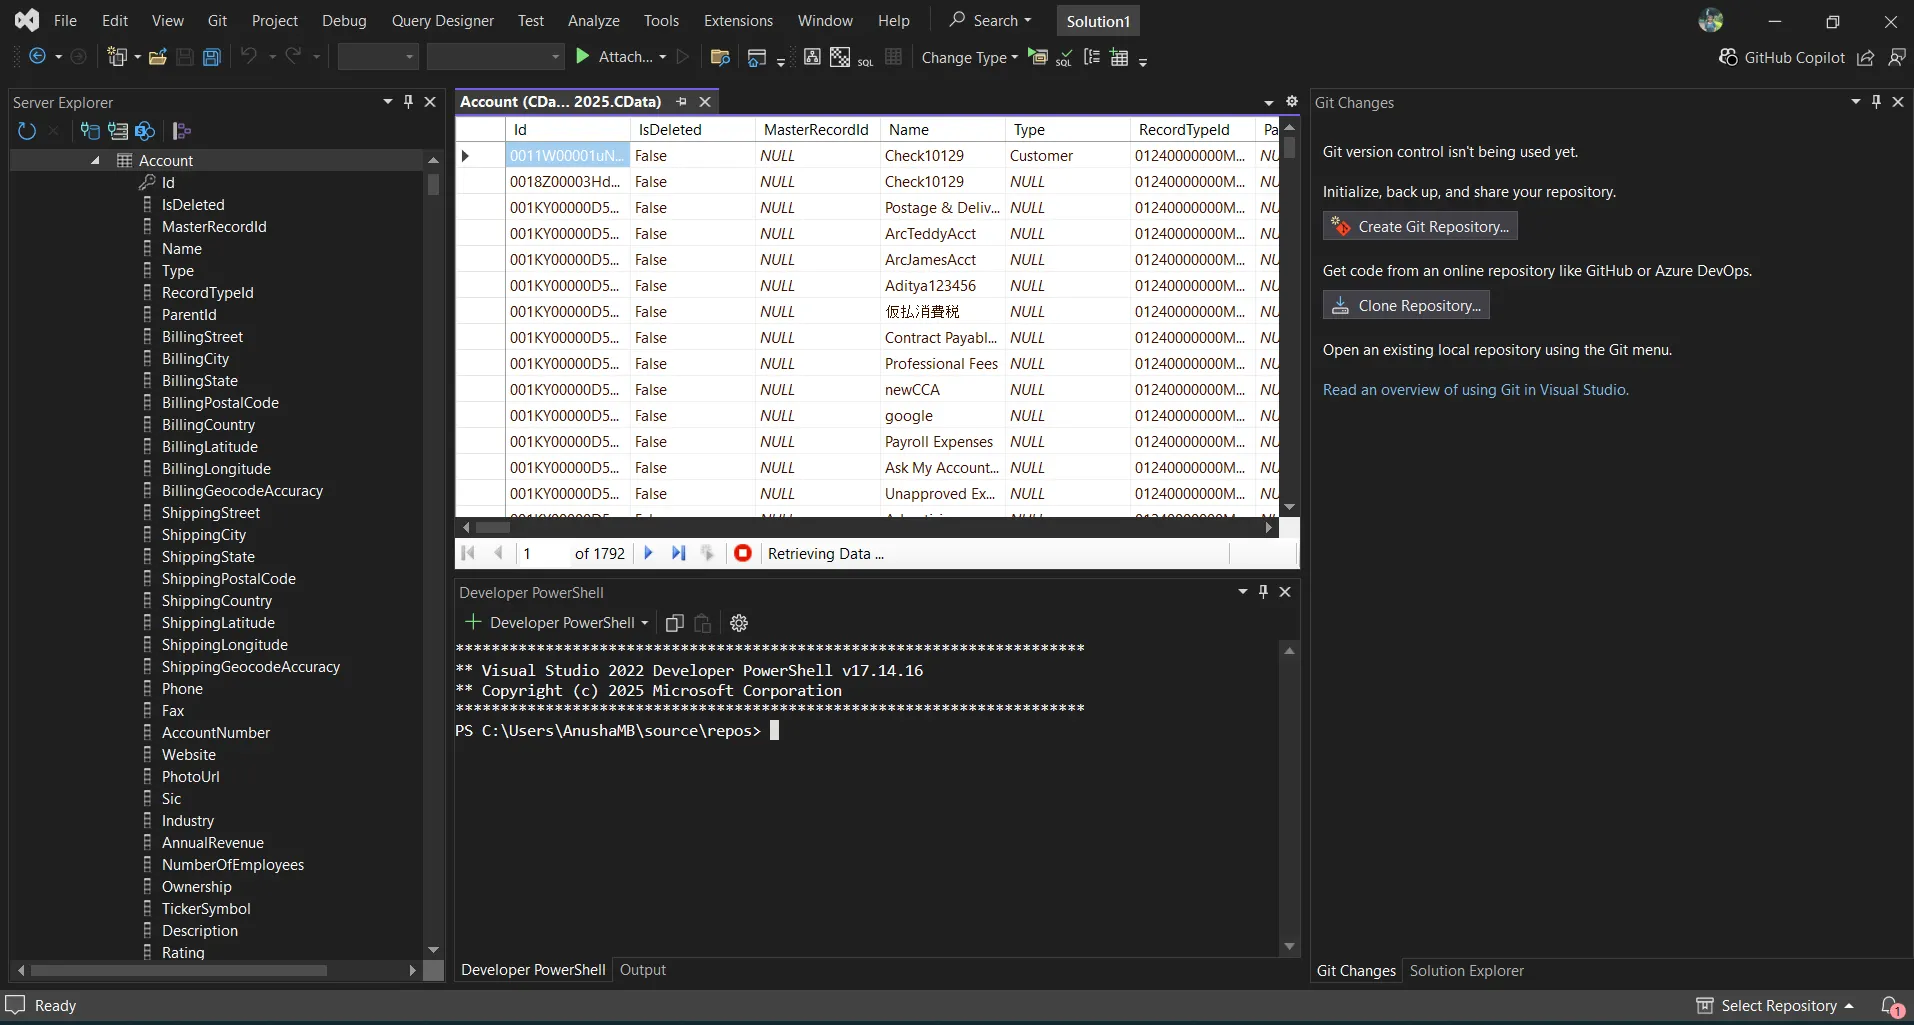
- Once the connection is successful, you can explore the data inside Visual Studio.
Common Connection Issues
Authentication Failed
Solution: Verify OAuth settings, client IDs, secrets, or token permissions for your ApprovalMax. Contact [email protected] for assistance.
Cannot Reach Server
Solution: Check firewall, proxy, and VPN configurations. Contact [email protected] for required port information.
Table Not Found
Solution: Confirm you selected the correct schema or database when querying ApprovalMax.
What's Next
Now that you have installed, licensed, and configured the ADO.NET provider, here are scenarios you can use to explore our ADO.NET tools:
| ADO.NET Providers | Article Title |
|---|---|
| .NET Charts | DataBind Charts to ApprovalMax |
| EF - Code First | Access ApprovalMax with Entity Framework 6 |
| DevExpress | DataBind ApprovalMax to the DevExpress Data Grid |
| LINQPad | Working with ApprovalMax in LINQPad |
| EF - LINQ | LINQ to ApprovalMax |
| EF - MVC | Build MVC Applications with Connectivity to ApprovalMax |
| PowerBuilder | Connect to ApprovalMax from PowerBuilder |
| TIBCO Spotfire | Visualize ApprovalMax in TIBCO Spotfire through ADO.NET |
| Microsoft SSAS | Build an OLAP Cube in SSAS from ApprovalMax |
Get Support
If you need assistance at any point:
- Technical Support: [email protected]
- Community Forum: CData Community Site
- Help Documentation: Installed locally and available online
FAQs
Installation and Licensing
-
Do I need administrator rights to install the ADO.NET Provider?
Yes, administrator rights are required to install components for use across Visual Studio. -
Do I need an RTK to deploy to Azure Data Factory?
Yes. Set the RTK property in your application's connection string before publishing.
Connecting
-
Can I use multiple ApprovalMax accounts?
Create separate Connection =strings for each account. -
Can I connect through a proxy?
Yes. Configure proxy settings in the Connection string. -
How do I test my connection?
Click Test Connection in the Connection Manager UI.
Performance & Troubleshooting
-
How can I improve query performance
Apply filters, limit row counts, and leverage server-side paging properties. -
How do I enable logging?
Add the following to your connection manager:- Logfile: /path/to/logfile.log
- Verbosity: 3
Be prepared to securely upload the log file upon request when reaching out to [email protected] for troubleshooting analysis.
For questions not covered in this FAQ, contact [email protected].