




Use the CData JDBC Driver for ApprovalMax in MicroStrategy

MicroStrategy is an analytics and mobility platform that enables data-driven innovation. When you pair MicroStrategy with the CData JDBC Driver for ApprovalMax, you gain database-like access to live ApprovalMax data from MicroStrategy, expanding your reporting and analytics capabilities. In this article, we walk through creating a database instance for ApprovalMax in MicroStrategy Developer and create a Warehouse Catalog for the ApprovalMax data.
The CData JDBC Driver offers unmatched performance for interacting with live ApprovalMax data in MicroStrategy due to optimized data processing built into the driver. When you issue complex SQL queries from MicroStrategy to ApprovalMax, the driver pushes supported SQL operations, like filters and aggregations, directly to ApprovalMax and utilizes the embedded SQL engine to process unsupported operations (often SQL functions and JOIN operations) client-side. With built-in dynamic metadata querying, you can visualize and analyze ApprovalMax data using native MicroStrategy data types.
Connect to ApprovalMax in MicroStrategy Developer
You can connect to ApprovalMax in MicroStrategy Developer by adding a database instance based on the CData JDBC Driver for ApprovalMax.* Before you begin, you will need to install the JDBC Driver for ApprovalMax on the machine hosting the MicroStrategy Intelligence Server that your instance of MicroStrategy Developer is connected to.
- Open MicroStrategy Developer and select a Project Source.
- Navigate to Administration -> Configuration Managers -> Database Instances and right-click to add a new instance.
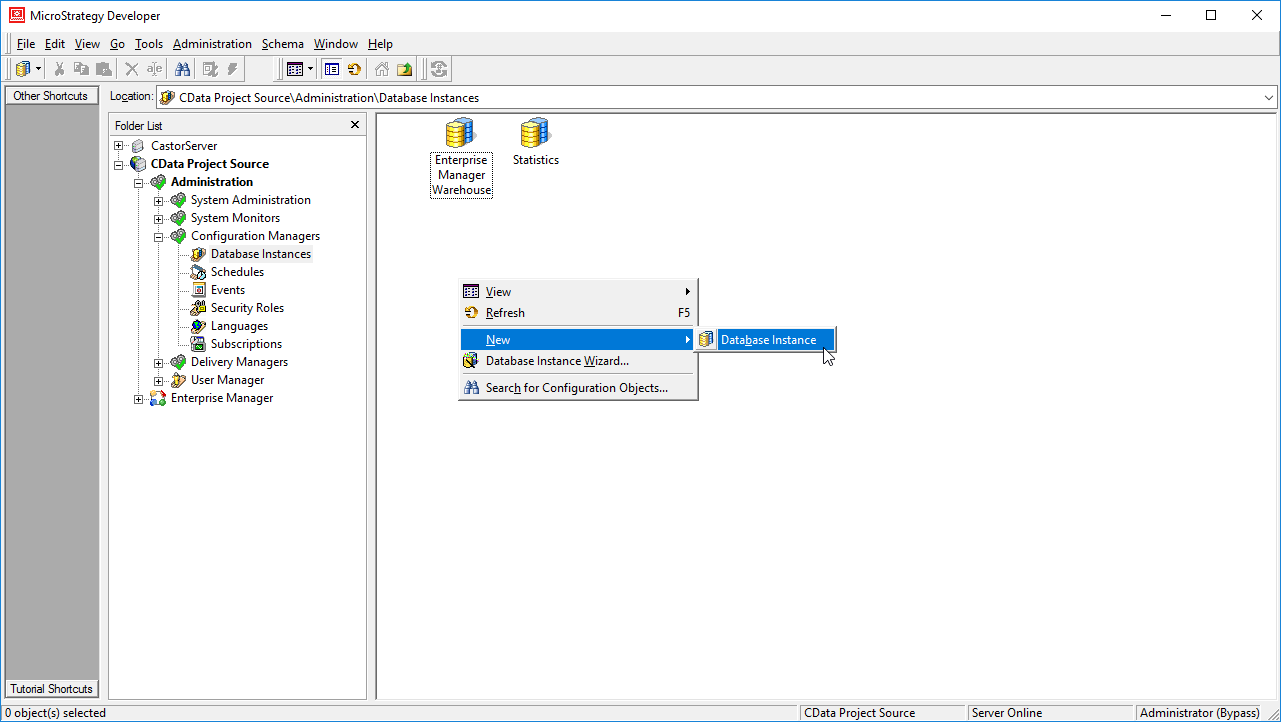
- Name the instance, select Generic DBMS as the database connection type, and create a new database connection.
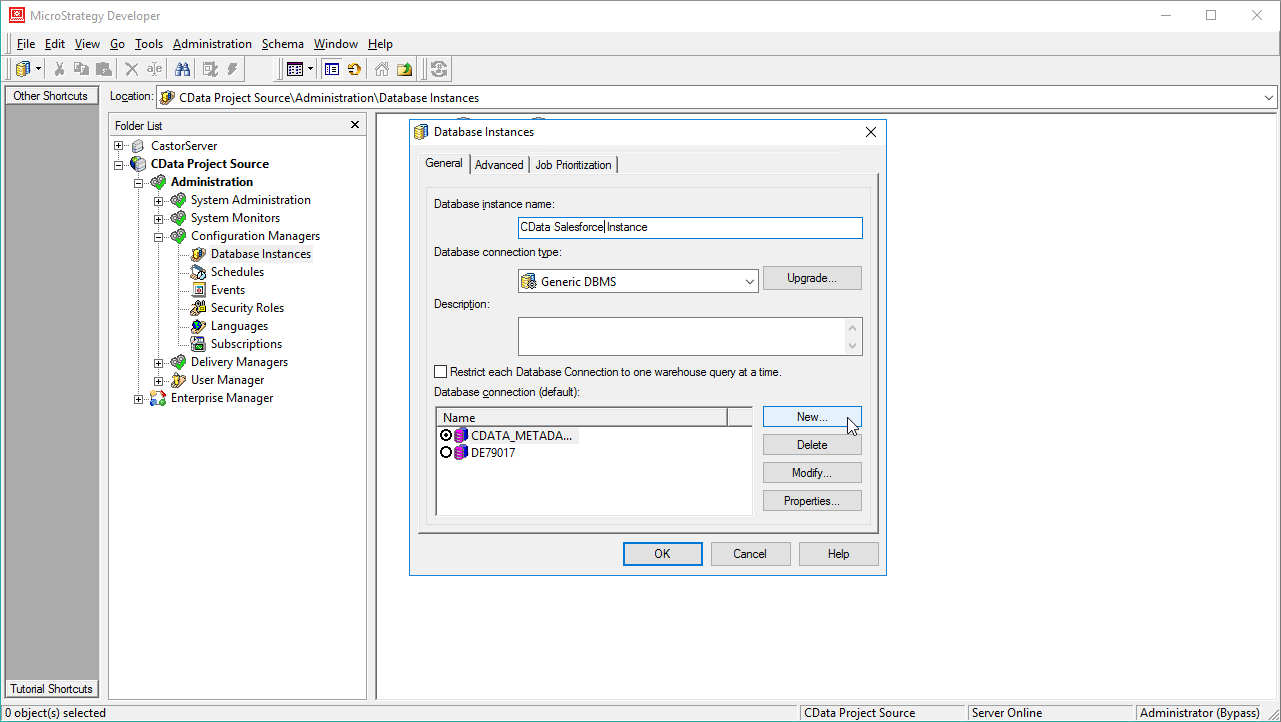
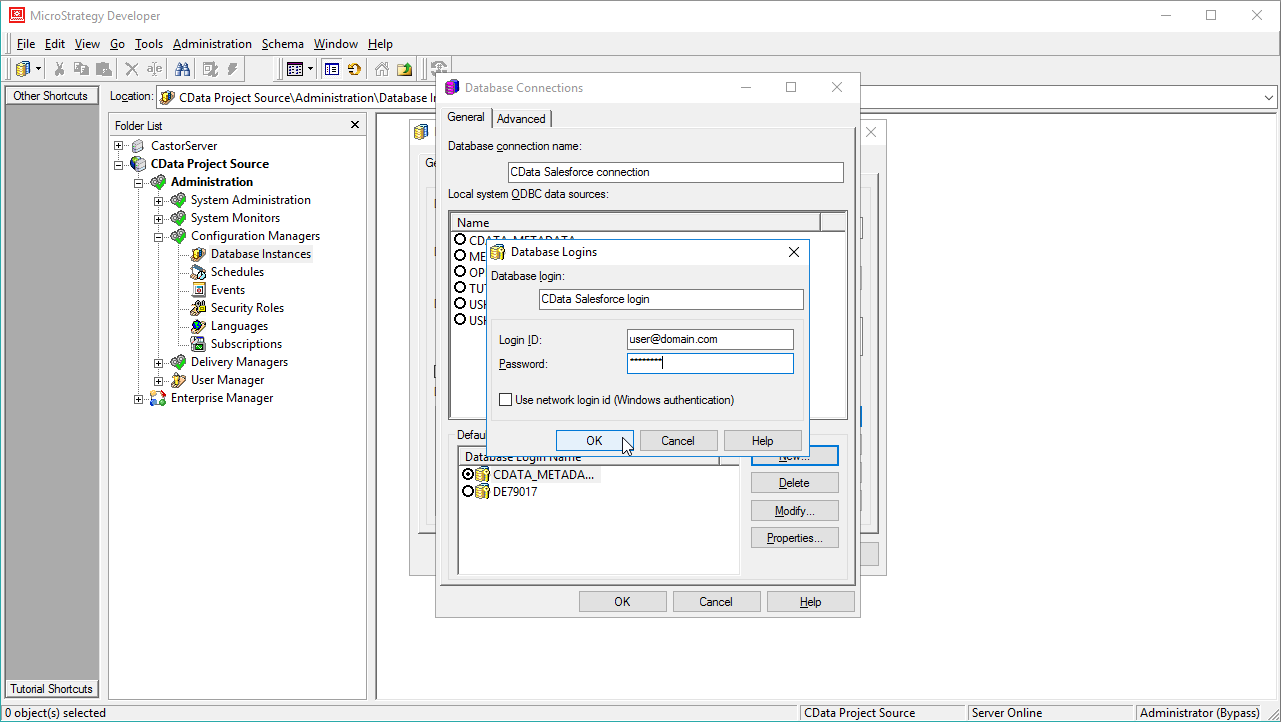
- In the database connection wizard, name the connection and create a new Database Login name, setting the user and password for ApprovalMax.
- On the Advanced tab for the connection wizard, set the additional connection string parameters as follows.
- Add the JDBC keyword to the connection string.
- Set MSTR_JDBC_JAR_FOLDER to the path of the directory containing the JAR file for the JDBC driver. (C:\Program Files\CData JDBC Driver for ApprovalMax\lib\ on Windows.)
- Set DRIVER to cdata.jdbc.api.APIDriver, the driver class.
- Set URL to the JDBC URL for the ApprovalMax driver, which contains the necessary connection properties.
Start by setting the Profile connection property to the location of the ApprovalMax Profile on disk (e.g. C:\profiles\ApprovalMax.apip). Next, set the ProfileSettings connection property to the connection string for ApprovalMax (see below).
ApprovalMax API Profile Settings
To authenticate to ApprovalMax and connect to your own data or to allow other users to connect to their data, the ApprovalMax Public API requires the OAuth 2.0 authorization code flow.
First, you will need to register an OAuth application with ApprovalMax. Sign in to the ApprovalMax Developer Portal (https://developer.approvalmax.com/applications) and create a new application. Your OAuth application will be assigned a Client ID and a Client Secret, and you must register at least one Redirect URI (Callback URL).
A Premium ApprovalMax subscription (or active trial) is required to use the Public API.
After setting the following connection properties, you are ready to connect:
- AuthScheme: Set this to OAuth.
- InitiateOAuth: Set this to GETANDREFRESH. You can use InitiateOAuth to manage the process to obtain the OAuthAccessToken.
- OAuthClientId: Set this to the Client ID that is shown in your application settings on the ApprovalMax Developer Portal.
- OAuthClientSecret: Set this to the Client Secret that is shown in your application settings on the ApprovalMax Developer Portal.
- CallbackURL: Set this to the Redirect URI that is registered in your application settings.
- Scope: (Optional) Override the default OAuth scopes. The default value openid offline_access https://www.approvalmax.com/scopes/public_api/read grants read-only access to all tables in this profile and enables refresh tokens. Use the principle of least privilege when narrowing this scope.
The OAuth Authorization URL is https://identity.approvalmax.com/connect/authorize and the Token URL is https://identity.approvalmax.com/connect/token. Both authorization_code and refresh_token grant types are supported.
Built-in Connection String Designer
For assistance in constructing the JDBC URL, use the connection string designer built into the ApprovalMax JDBC Driver. Either double-click the JAR file or execute the jar file from the command-line.
java -jar cdata.jdbc.api.jarFill in the connection properties and copy the connection string to the clipboard.

When you configure the JDBC URL, you may also want to set the Max Rows connection property. This will limit the number of rows returned, which is especially helpful for improving performance when designing reports and visualizations.
Typical additional connection string properties follow:
JDBC;MSTR_JDBC_JAR_FOLDER=PATH\TO\JAR\;DRIVER=cdata.jdbc.api.APIDriver;URL={jdbc:api:Profile=C:\profiles\ApprovalMax.apip;AuthScheme=OAuth;InitiateOAuth=GETANDREFRESH;OAuthClientId=your_client_id;OAuthClientSecret=your_client_secret;CallbackURL=your_callback_url;};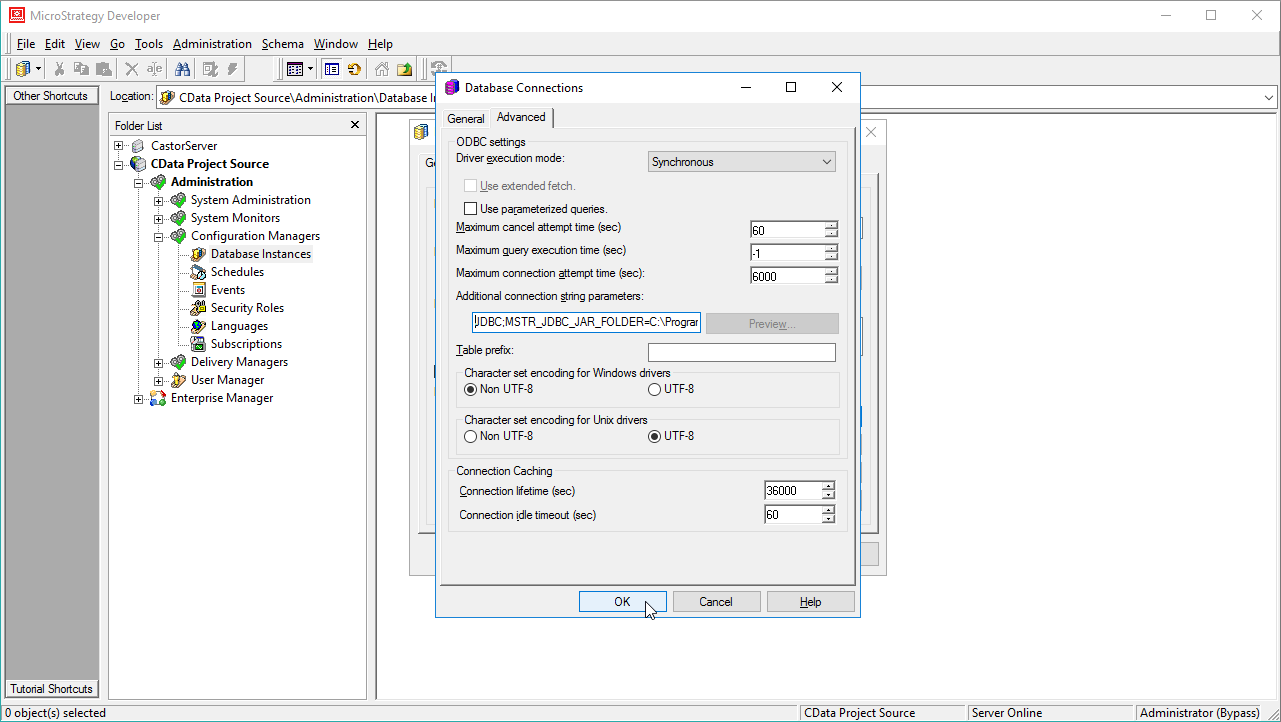
- Ensure that you have not selected an ODBC data source (this will trigger MicroStrategy to use the additional connection string parameters to build the database instance) and click OK.
- Click OK to close the database instance wizard.
- In the Project Source, right-click the project and open the Project configuration.
- Navigate to Database Instances, select the newly created database instance, and click OK.
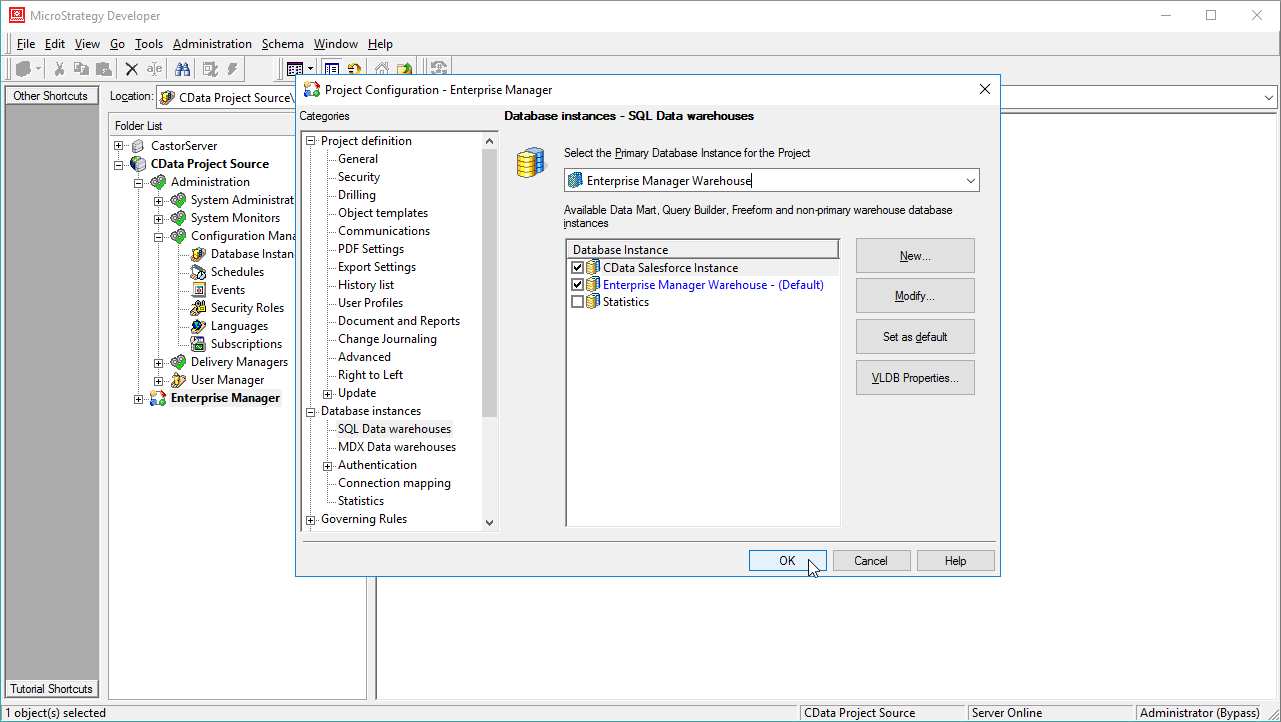
- Close MicroStrategy Developer and restart the connected MicroStrategy Intelligence Server to complete the database instance creation.
With the database instance configured, you will now be able to connect to ApprovalMax data from the Warehouse Catalog and Data Import.
Connect to ApprovalMax Data from the Warehouse Catalog
Once you have created a database instance based on the JDBC Driver for ApprovalMax, you can connect to data from the Warehouse Catalog.
- Select your project and click Schema -> Warehouse Catalog.
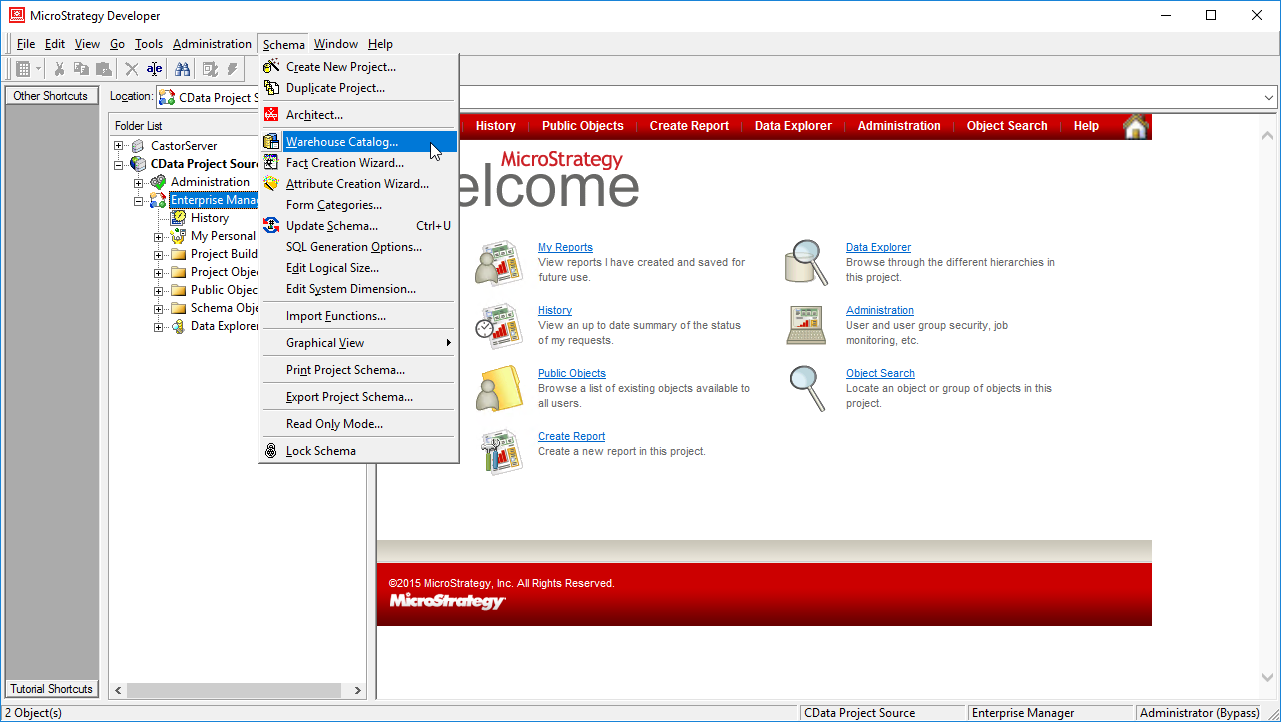
- In the Read Settings for the Catalog, click Settings and set the queries to retrieve the schema:
- To retrieve the list of tables, use the following query:
SELECT * FROM SYS_TABLES - To retrieve the list of columns for selected tables, use the following query:
SELECT DISTINCT
  CatalogName NAME_SPACE,
  TableName TAB_NAME,
  ColumnName COL_NAME,
  DataTypeName DATA_TYPE,
  Length DATA_LEN,
  NumericPrecision DATA_PREC,
  NumericScale DATA_SCALE
FROM
  SYS_TABLECOLUMNS
WHERE
  TableName IN (#TABLE_LIST#)
ORDER BY
  1,2,3

- To retrieve the list of tables, use the following query:
- Select tables to be used in the project.
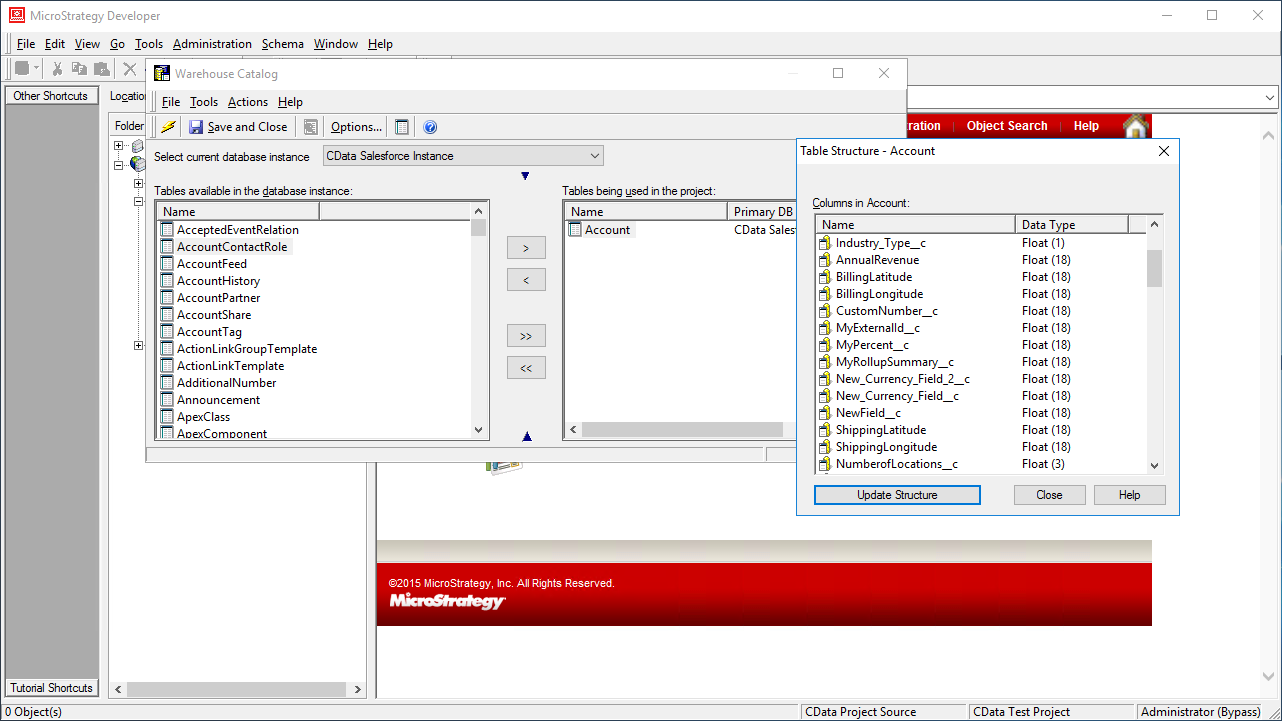
Using the CData JDBC Driver for ApprovalMax in MicroStrategy, you can easily create robust visualizations and reports on ApprovalMax data. Read our other articles on connecting to ApprovalMax in MictroStrategy Web and connecting to ApprovalMax in MicroStrategy Desktop for more information.
Note: Connecting using a JDBC Driver requires a 3- or 4-Tier Architecture.