




How to Seamlessly Import ApprovalMax Data into IBM SPSS Modeler

IBM SPSS Modeler is a powerful data mining and predictive analytics platform that enables organizations to extract valuable insights from their data. By connecting ApprovalMax data data to SPSS Modeler via the CData API Driver for ODBC, you can leverage real-time access for advanced data mining, predictive modeling, and statistical analysis.
This guide takes you through the steps of connecting IBM SPSS Modeler to ApprovalMax data, enabling seamless data import, preparation, and analysis. With the CData API Driver for ODBC, you can unlock the full potential of your ApprovalMax data data within IBM SPSS Modeler for actionable insights.
Overview
Here is an overview of the steps:
- CONFIGURE THE ODBC DRIVER: Set up a connection to ApprovalMax data in the CData API Driver for ODBC by entering the required connection properties.
- SET UP ODBC CONNECTION IN SPSS MODELER: Establish the ODBC connection within IBM SPSS Modeler by selecting the configured DSN.
- IMPORT AND PROCESS DATA: Import the ApprovalMax data data into SPSS Modeler, then review, filter, transform, and prepare the data for predictive analytics and statistical modeling.
Configure the ApprovalMax DSN Using the CData ODBC Driver
To start, configure the DSN (Data Source Name) for ApprovalMax data in your system using the CData ODBC Driver. Download and install a 30-day free trial with all the features from here.
Once installed, launch the ODBC Data Source Administrator:
- On Windows: Search for ODBC Data Source Administrator in the Start menu and open the application.
- On Mac: Open Applications, go to Utilities, and select ODBC Manager.
- On Linux: Use the command line to launch ODBC Data Source Administrator or use unixODBC if installed.
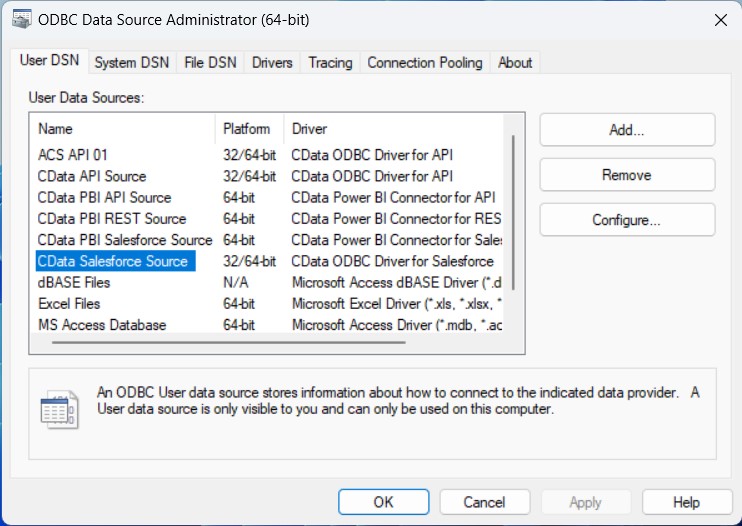
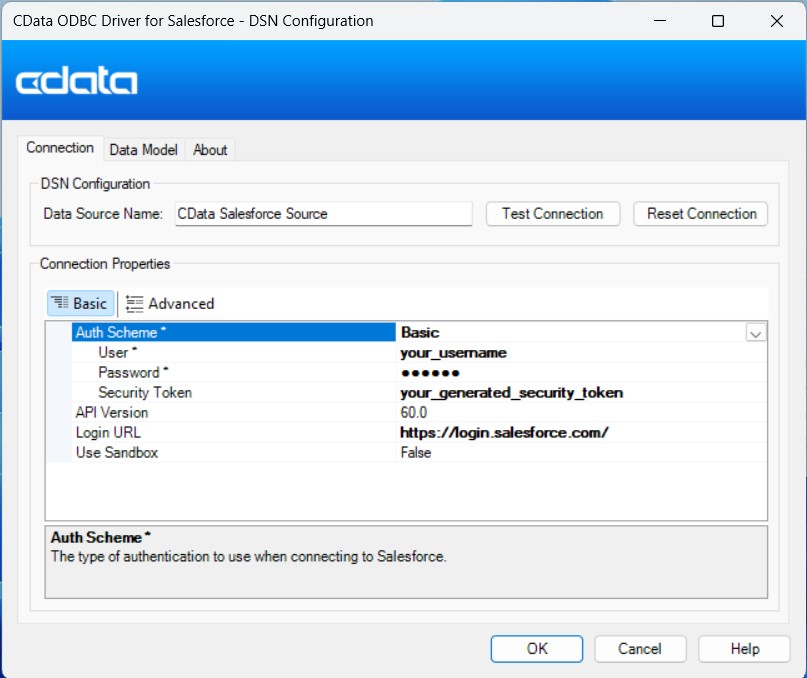
Once launched, double-click on the CData ApprovalMax data Source and enter the required values to establish a connection:
Start by setting the Profile connection property to the location of the ApprovalMax Profile on disk (e.g. C:\profiles\ApprovalMax.apip). Next, set the ProfileSettings connection property to the connection string for ApprovalMax (see below).
ApprovalMax API Profile Settings
To authenticate to ApprovalMax and connect to your own data or to allow other users to connect to their data, the ApprovalMax Public API requires the OAuth 2.0 authorization code flow.
First, you will need to register an OAuth application with ApprovalMax. Sign in to the ApprovalMax Developer Portal (https://developer.approvalmax.com/applications) and create a new application. Your OAuth application will be assigned a Client ID and a Client Secret, and you must register at least one Redirect URI (Callback URL).
A Premium ApprovalMax subscription (or active trial) is required to use the Public API.
After setting the following connection properties, you are ready to connect:
- AuthScheme: Set this to OAuth.
- InitiateOAuth: Set this to GETANDREFRESH. You can use InitiateOAuth to manage the process to obtain the OAuthAccessToken.
- OAuthClientId: Set this to the Client ID that is shown in your application settings on the ApprovalMax Developer Portal.
- OAuthClientSecret: Set this to the Client Secret that is shown in your application settings on the ApprovalMax Developer Portal.
- CallbackURL: Set this to the Redirect URI that is registered in your application settings.
- Scope: (Optional) Override the default OAuth scopes. The default value openid offline_access https://www.approvalmax.com/scopes/public_api/read grants read-only access to all tables in this profile and enables refresh tokens. Use the principle of least privilege when narrowing this scope.
The OAuth Authorization URL is https://identity.approvalmax.com/connect/authorize and the Token URL is https://identity.approvalmax.com/connect/token. Both authorization_code and refresh_token grant types are supported.
Setup an ODBC Connection in IBM SPSS Modeler
After configuring the DSN, it's time to connect to it in IBM SPSS Modeler:
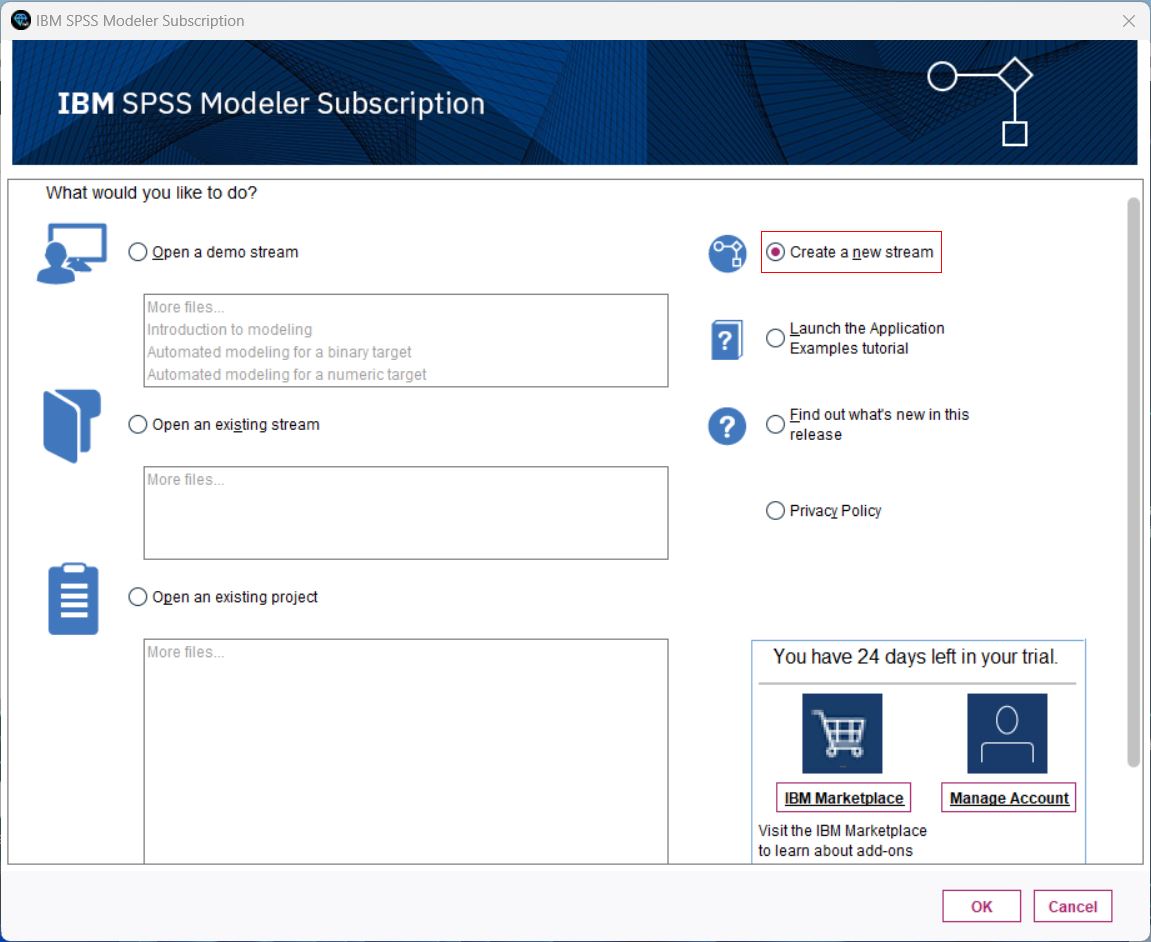
- Launch IBM SPSS Modeler, log in, and create a new stream.
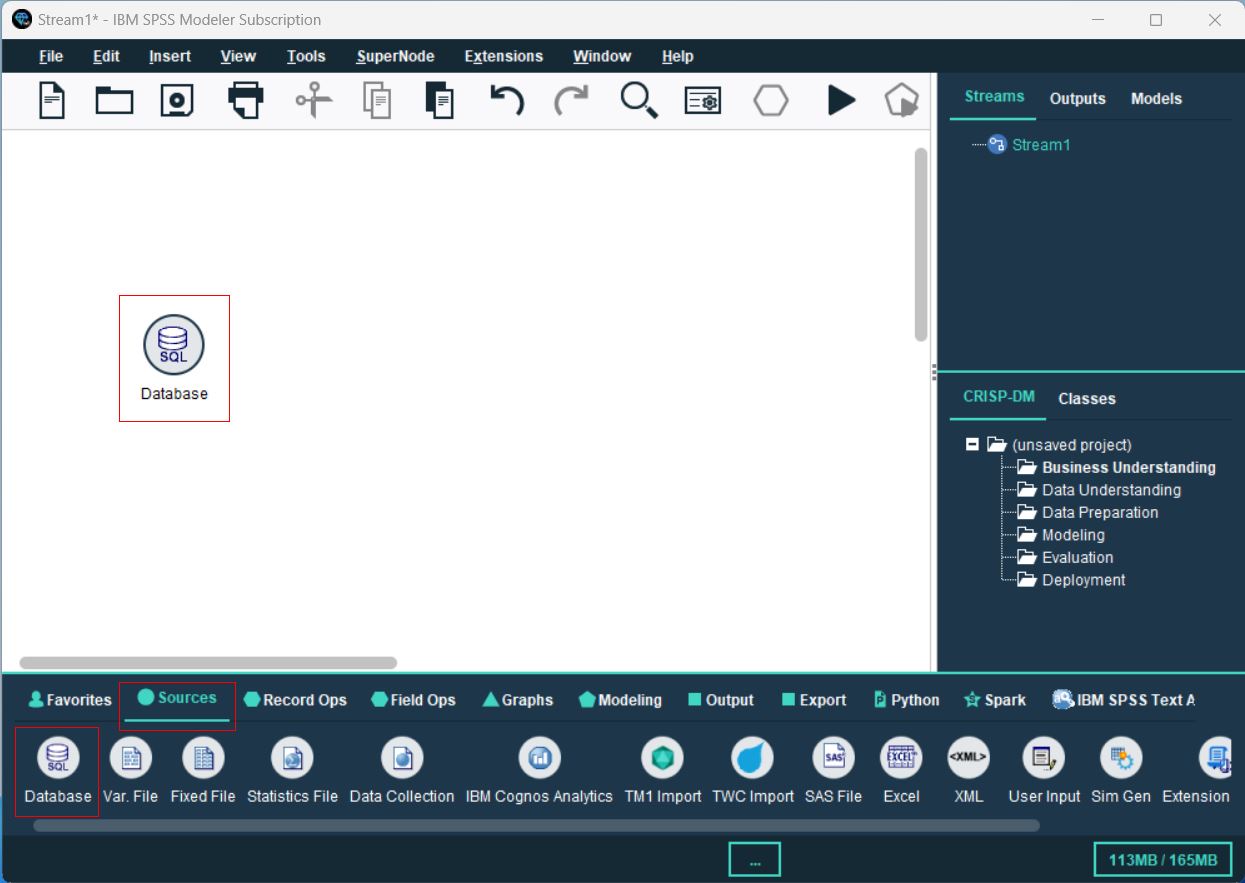
- From the Sources palette, locate the Database node, and drag it onto the canvas.
- Double-click the Database node to open the configuration dialog. Select
, browse to select the configured DSN, then click OK. - In the Database dialog, browse to select the table(s) you’d like to import, preview the data, and click OK to finalize.
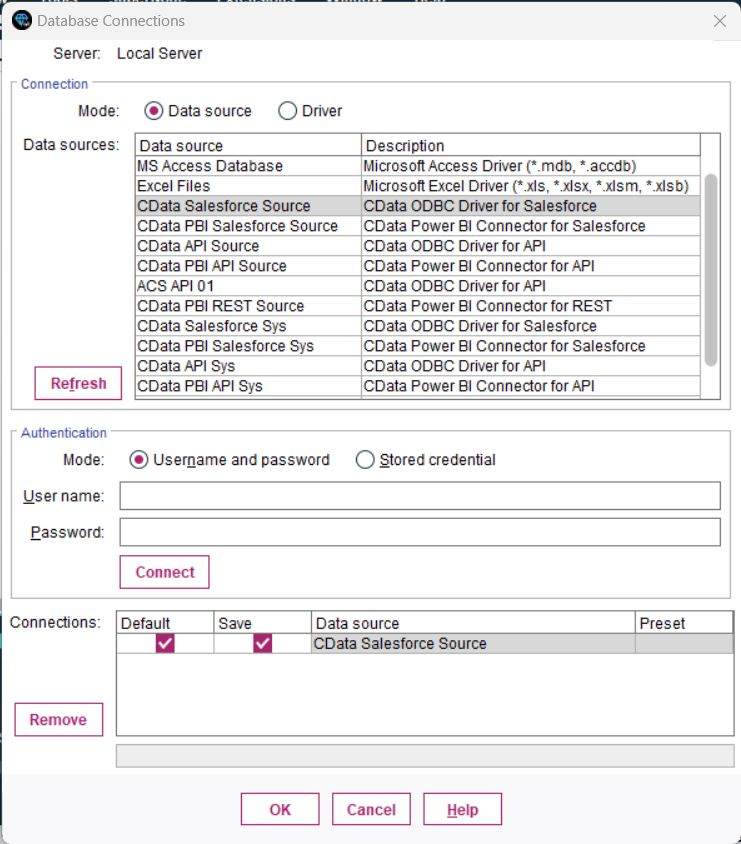
You are now ready to process and analyze the ApprovalMax data data in IBM SPSS Modeler.
Process Data: Filter, Categories, and Model
Once the tables are imported, you can refine, filter, categorize, and model your ApprovalMax data data in SPSS Modeler:
- Filtering: Double-click your Database connection, go to the Filter section, and select/deselect fields to focus on relevant data. This improves processing speed and model accuracy.
- Set Data Types and Roles: Categorize your fields and assign roles to each data type by navigating to the Types section.
- Perform a Basic Analysis: Drag and drop the Analysis node next to your Database node, connect them, and click the Play button to run the stream and analyze the data.
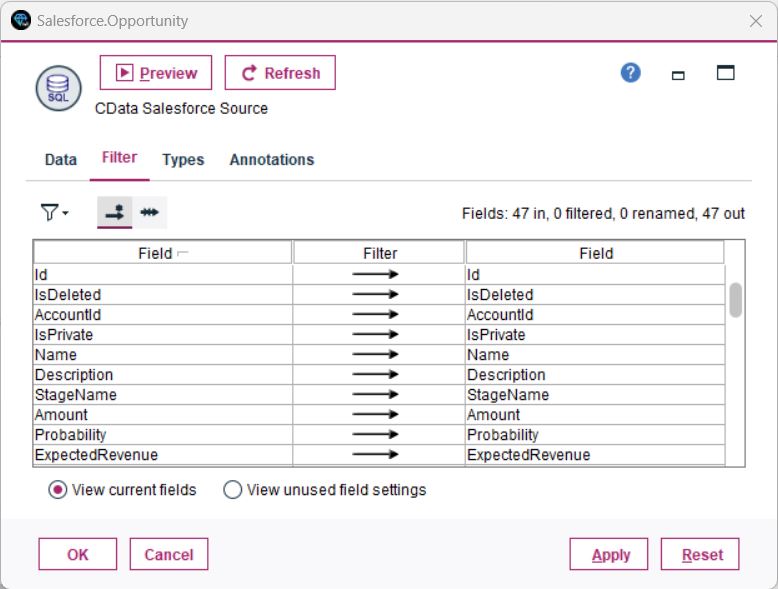
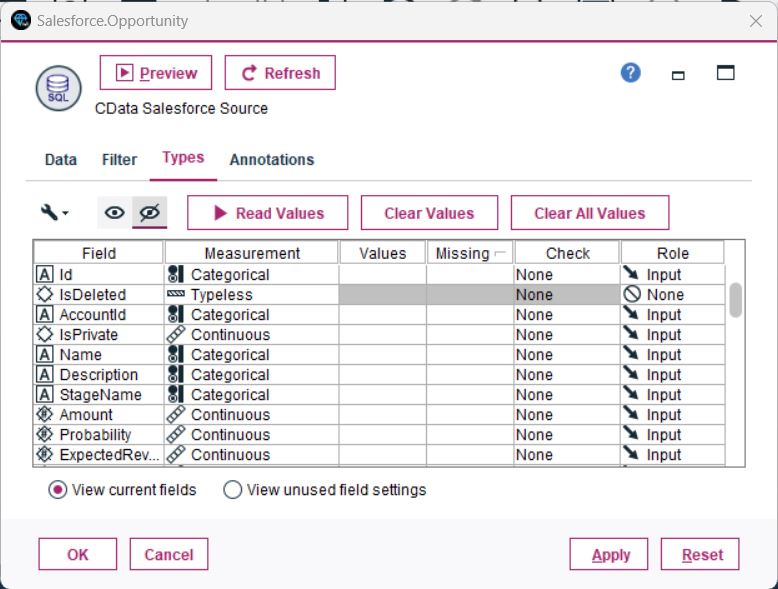
You have now performed a simple analysis, enabling SPSS Modeler to process and display insights from your database.
Unlock the Potential of Your ApprovalMax Data with CData
With the CData API Driver for ODBC, connecting ApprovalMax data data to IBM SPSS Modeler is seamless. Start your free trial today and unlock the full potential of your real-time data for advanced analytics and decision-making.