




Access BugHerd Data from MySQL in Amazon QuickSight

Amazon QuickSight gives you a way to quickly build visualizations, perform analytics, and get insights from AWS data sources, uploaded files, and other databases in the cloud. When paired with the CData SQL Gateway, you get the same functionality with access to hundreds of Big Data, NoSQL, and SaaS sources, both on-premises and in the cloud. In this article, we use the SQL Gateway with the CData ODBC Driver for BugHerd to access BugHerd data through a MySQL connection in Amazon QuickSight, either in real time using direct queries, or by importing the data into SPICE.
Connect to BugHerd Data
If you have not already done so, provide values for the required connection properties in the data source name (DSN). You can use the built-in Microsoft ODBC Data Source Administrator to configure the DSN. This is also the last step of the driver installation. See the "Getting Started" chapter in the help documentation for a guide to using the Microsoft ODBC Data Source Administrator to create and configure a DSN.
Start by setting the Profile connection property to the location of the BugHerd Profile on disk (e.g. C:\profiles\BugHerd.apip). Next, set the ProfileSettings connection property to the connection string for BugHerd (see below).
BugHerd API Profile Settings
BugHerd uses HTTP Basic authentication with an API key as the username. To obtain an API key:
- Sign in to your BugHerd account at https://www.bugherd.com
- Navigate to Settings > General Settings
- Locate the API Key section and copy the generated key
After obtaining your API key, set the following connection properties:
- AuthScheme: Set this to APIKey.
Set the following in the ProfileSettings connection property:
- APIKey: Set this to your BugHerd API key. The driver uses the key as the Basic auth username and sets the password internally to the literal value 'x' as required by BugHerd.
When you configure the DSN, you may also want to set the Max Rows connection property. This will limit the number of rows returned, which is especially helpful for improving performance when designing reports and visualizations.
Configure the SQL Gateway
See the SQL Gateway Overview to set up connectivity to BugHerd data as a virtual MySQL database. You will configure a MySQL remoting service that listens for MySQL requests from clients. The service can be configured in the SQL Gateway UI.
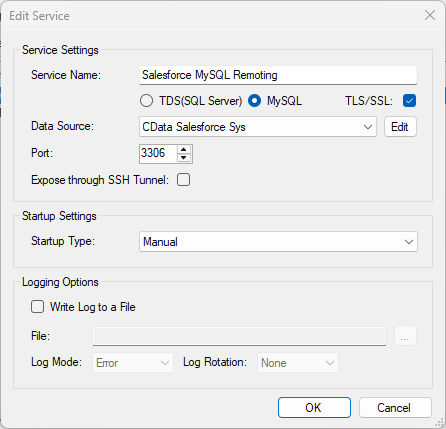
To connect to the SQL Gateway from QuickSight, you will need to run the SQL Gateway on a web-facing machine. After configuring the SQL Gateway, make note of the following information:
- The IP address or domain name of the machine hosting the SQL Gateway
- The data source name (likely CData API Sys) of the MySQL service
- The port number of the MySQL service
- The credentials of a SQL Gateway user with access to the service
Configure Remote Access
If your ODBC Driver and the remoting service are installed on-premise (and not accessible from Amazon QuickSight), you can use the reverse SSH tunneling feature to enable remote access. For detailed instructions, read our Knowledge Base article: SQL Gateway SSH Tunneling Capabilities.
Connect to BugHerd in QuickSight
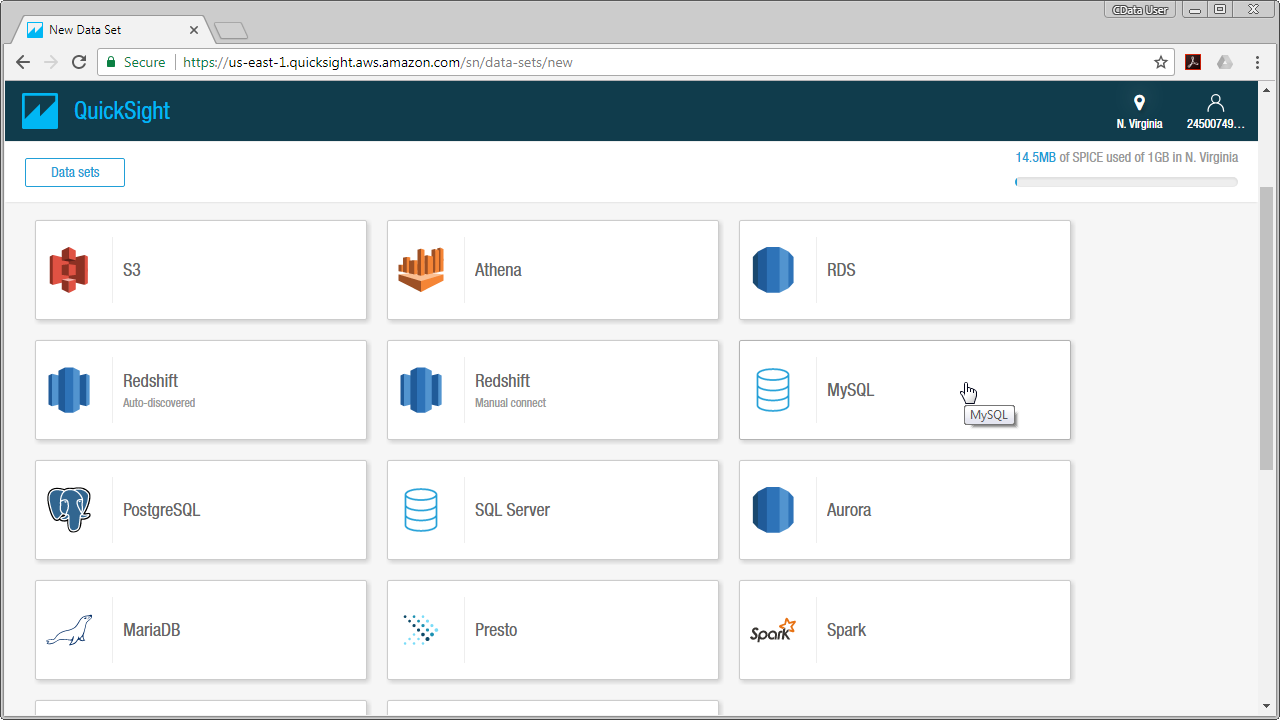
Once you have a MySQL Service configured for the BugHerd ODBC Driver, you are ready to connect to the data in QuickSight. Start by logging in to your QuickSight console. From there, click Manage Data, then click New Data Set and choose MySQL as the data source.
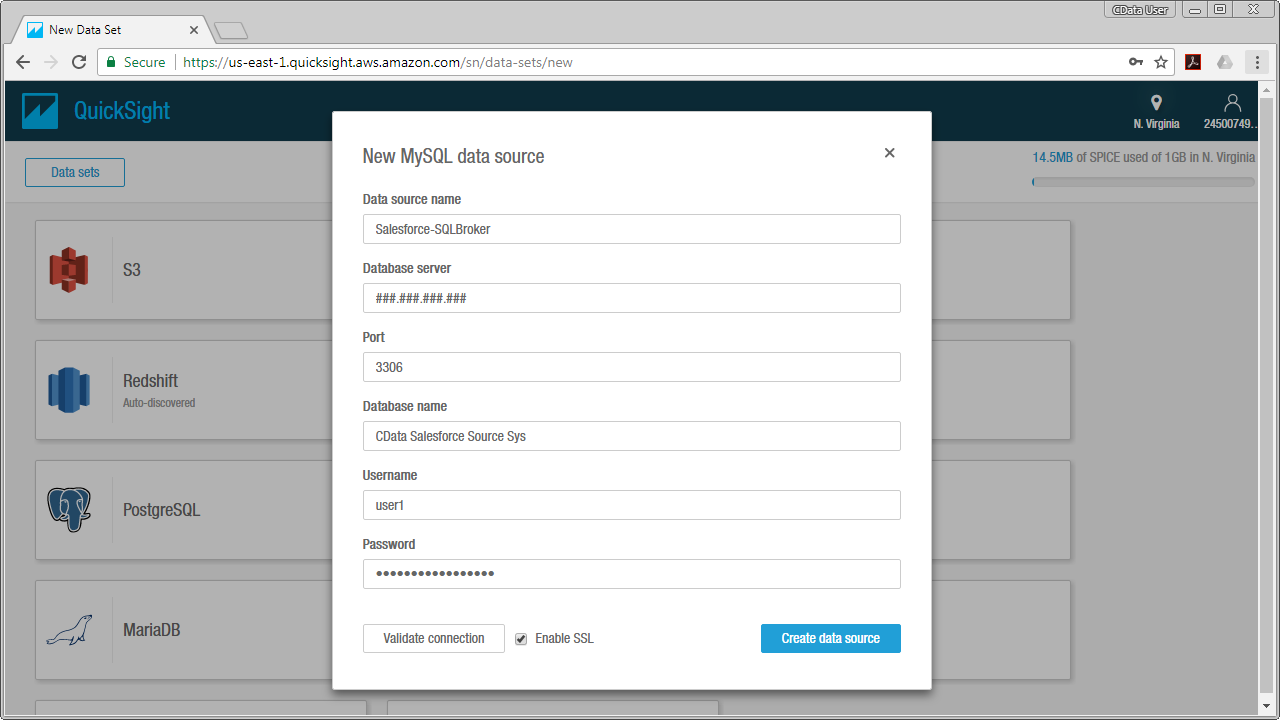
Configure the data set using the values for the MySQL service for BugHerd you configured in SQL Gateway (be sure to use the DSN for the database name). Validate your connection and click Create Data Source.
Visualize BugHerd Data in QuickSight
For this article, we will use a custom SQL query for our data visualization. To do so, click Edit/Preview Data and in the resulting Data Prep screen follow the steps below:
- Name your data set (for example, Tasks).
- If you wish to import your data into QuickSight SPICE, click the SPICE option, otherwise QuickSight will query the data directly.
- Under the Tables menu, click Switch to Custom SQL Tool.
- Give your SQL query a name.
- Enter your custom SQL query. For example:
SELECT Id, Title FROM Tasks - Click Finish.
- Click Save & Visualize.
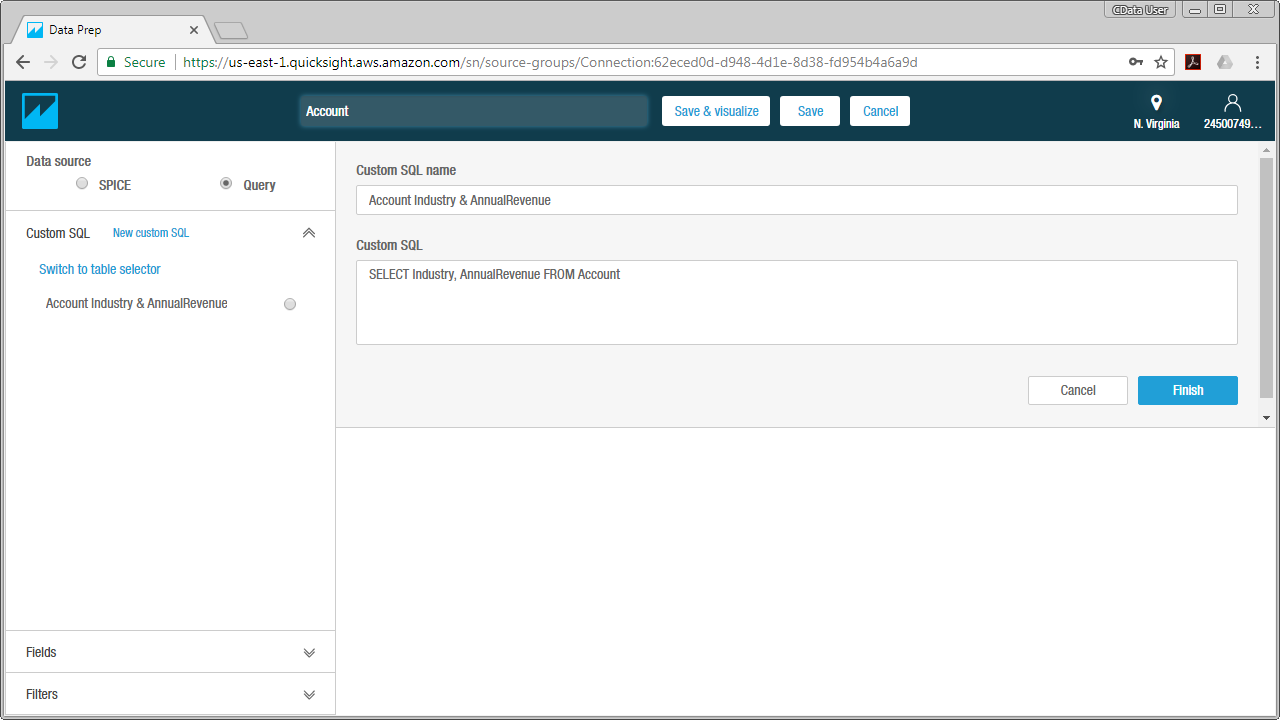
After you have saved the data set, you can configure the visualization. Select the columns you wish to visualize and choose a visual type. Your visualization can be customized, from its name to the way that data is aggregated.
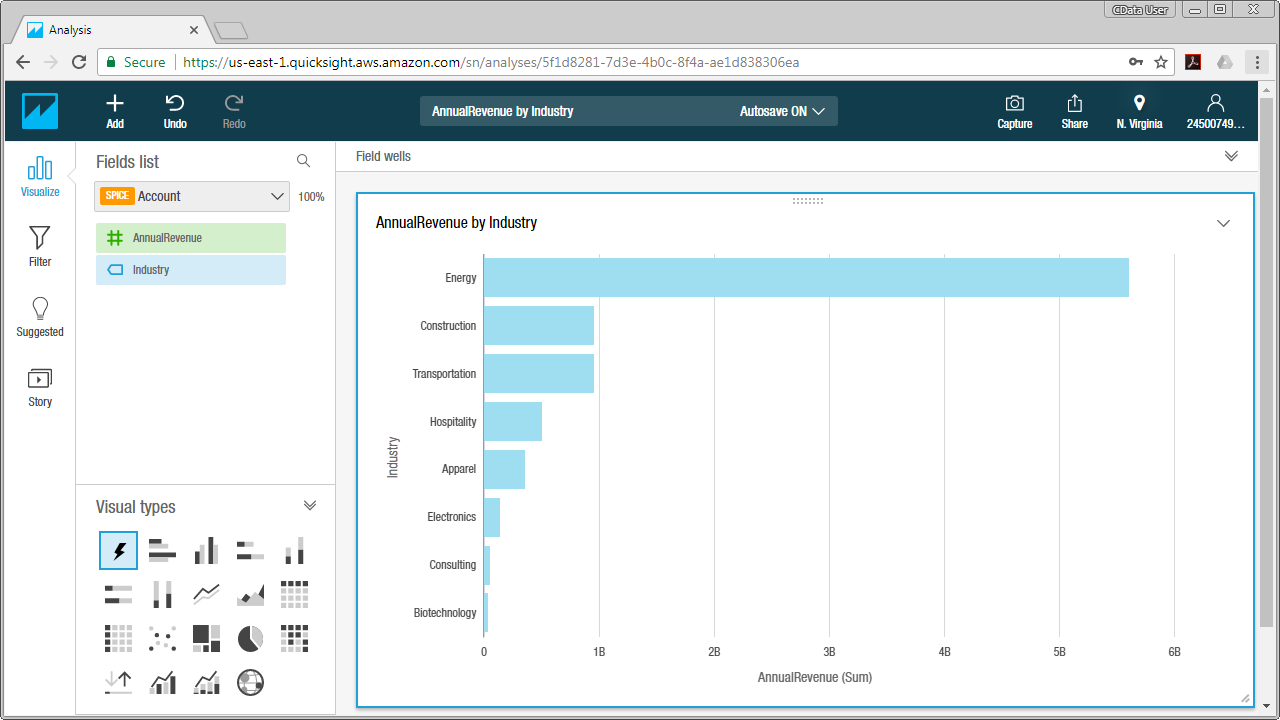
With the CData ODBC Driver for BugHerd and SQL Gateway, you are able to easily build data visualizations and perform analytics on BugHerd data in Amazon QuickSight. If you have any questions, such as needing to access your on-premises data from AWS QuickSight, let our Support Team know.