




Connect to Buildkite from a Connection Pool in WebLogic

The CData JDBC Driver for Buildkite enables you to follow standard procedures to integrate Buildkite data into Java Web applications. This article shows how to deploy the CData JDBC Driver for Buildkite in WebLogic Server.
Deploy the JDBC Driver in WebLogic Server
To deploy the driver, add the driver JAR to your classpath. The .lic file must be located in the same folder as the JAR. These files are located in the lib subfolder of the installation directory.
If you want to add the driver to all domains, prepend the path to the JAR to the WEBLOGIC_CLASSPATH environment variable in WL_HOME\common\bin\commEnv.cmd/sh. This script is located in WL_HOME\common\bin\. For example:
set WEBLOGIC_CLASSPATH=your-installation-directory\lib\cdata.jdbc.api.jar;%WEBLOGIC_CLASSPATH%
In WebLogic 12.2.1 if you want to add the driver to a specific domain, you can simply place the driver JAR and .lic file into DOMAIN_HOME\lib; for example, ORACLE_HOME\user_projects\domains\MY_DOMAIN\lib. These files will be added to the server classpath at startup.
Earlier versions require that you manually add the driver to the classpath: Prepend the following to the PRE_CLASSPATH environment variable in setDomainEnv.cmd/sh. This script is located in the bin subfolder of the folder for that domain.
set PRE_CLASSPATH=your-installation-directory\lib\cdata.jdbc.api.jar;%PRE_CLASSPATH%
After making these changes, restart the server.
Create a JDBC Data Source for Buildkite
After deploying the driver, log into the WebLogic Administration Console and create the connection.
- In the Domain Structure tree, click Services -> Data Sources -> New -> Generic Data Source.
-
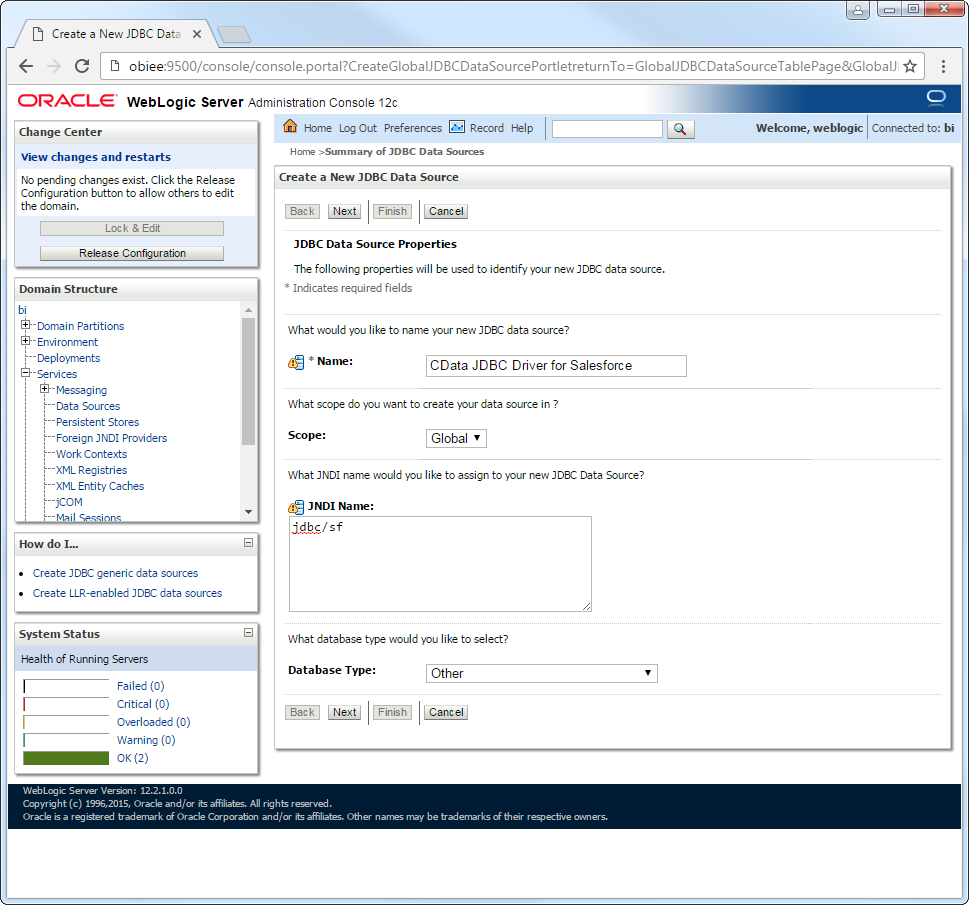
On the JDBC Data Source Properties page, enter the following information:
- Name: Enter a user-friendly name; for example, apijdbc.
- JNDI Name: Enter the path the JDBC data source will be bound to; for example, jdbc/API.
Database Type: Select Other.
-
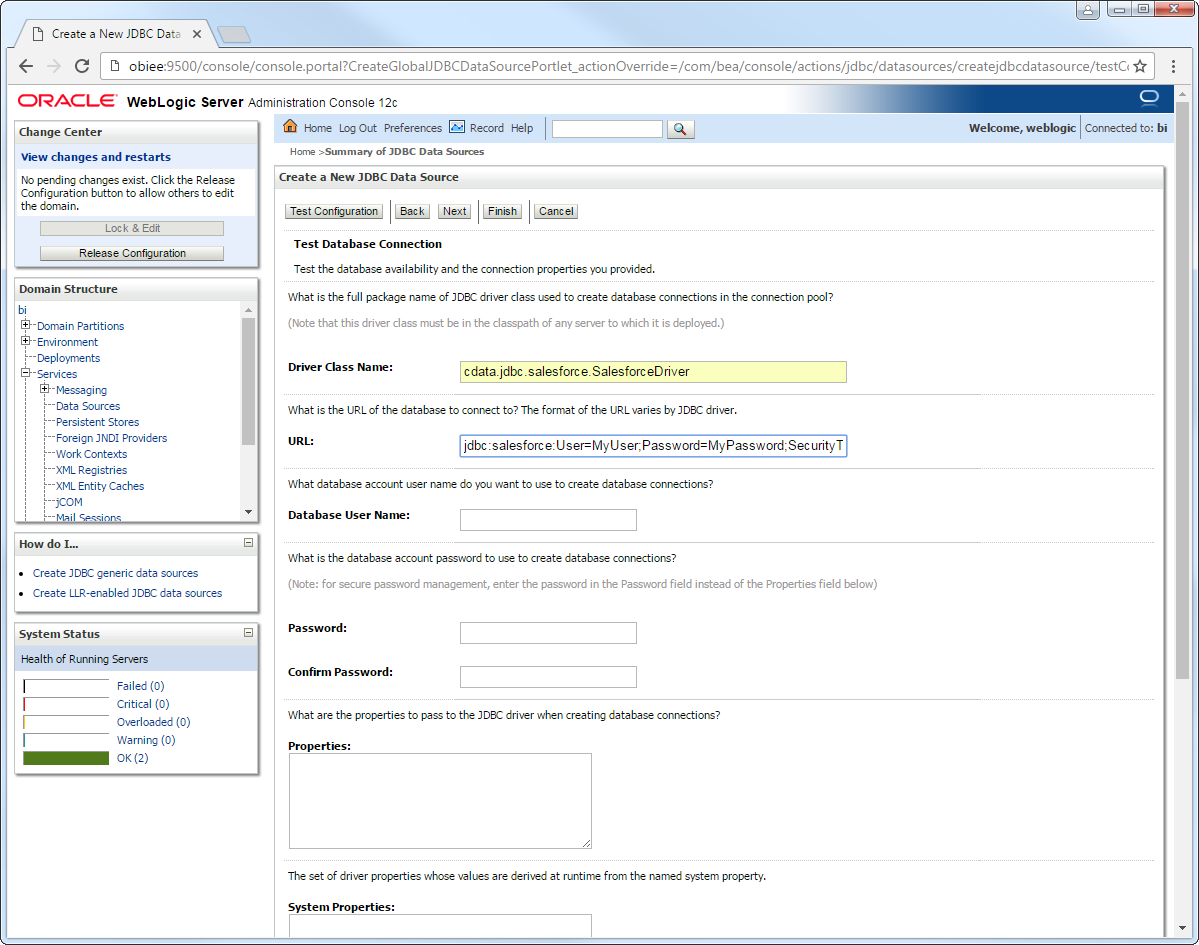
Click Next to use the default options. On the last page, enter the following information and click Test Configuration:
- Driver Class Name: Enter the driver class, cdata.jdbc.api.APIDriver.
URL: Enter the JDBC URL. A typical JDBC URL is below:
jdbc:api:Profile=C:\profiles\Buildkite.apip;AuthScheme=APIKey;ProfileSettings='APIKey=your_api_key;Organization=your_organization_slug';Start by setting the Profile connection property to the location of the Buildkite Profile on disk (e.g. C:\profiles\Buildkite.apip). Next, set the ProfileSettings connection property to the connection string for Buildkite (see below).
Buildkite API Profile Settings
Buildkite uses HTTP API key authentication. Your Buildkite API access token is used to authenticate requests as a Bearer token. You can generate or view your tokens at https://buildkite.com/user/api-access-tokens.
After setting the following connection properties, you are ready to connect:
- AuthScheme: Set this to APIKey.
- APIKey: Set this to your Buildkite API access token.
- Organization: Set this to your Buildkite organization slug (e.g. acme-inc).
Built-in Connection String Designer
For assistance in constructing the JDBC URL, use the connection string designer built into the Buildkite JDBC Driver. Either double-click the JAR file or execute the jar file from the command-line.
java -jar cdata.jdbc.api.jarFill in the connection properties and copy the connection string to the clipboard.

- Database User Name: Enter the username, if not specified in the JDBC URL.
- Password: Enter the password, if not specified in the JDBC URL.
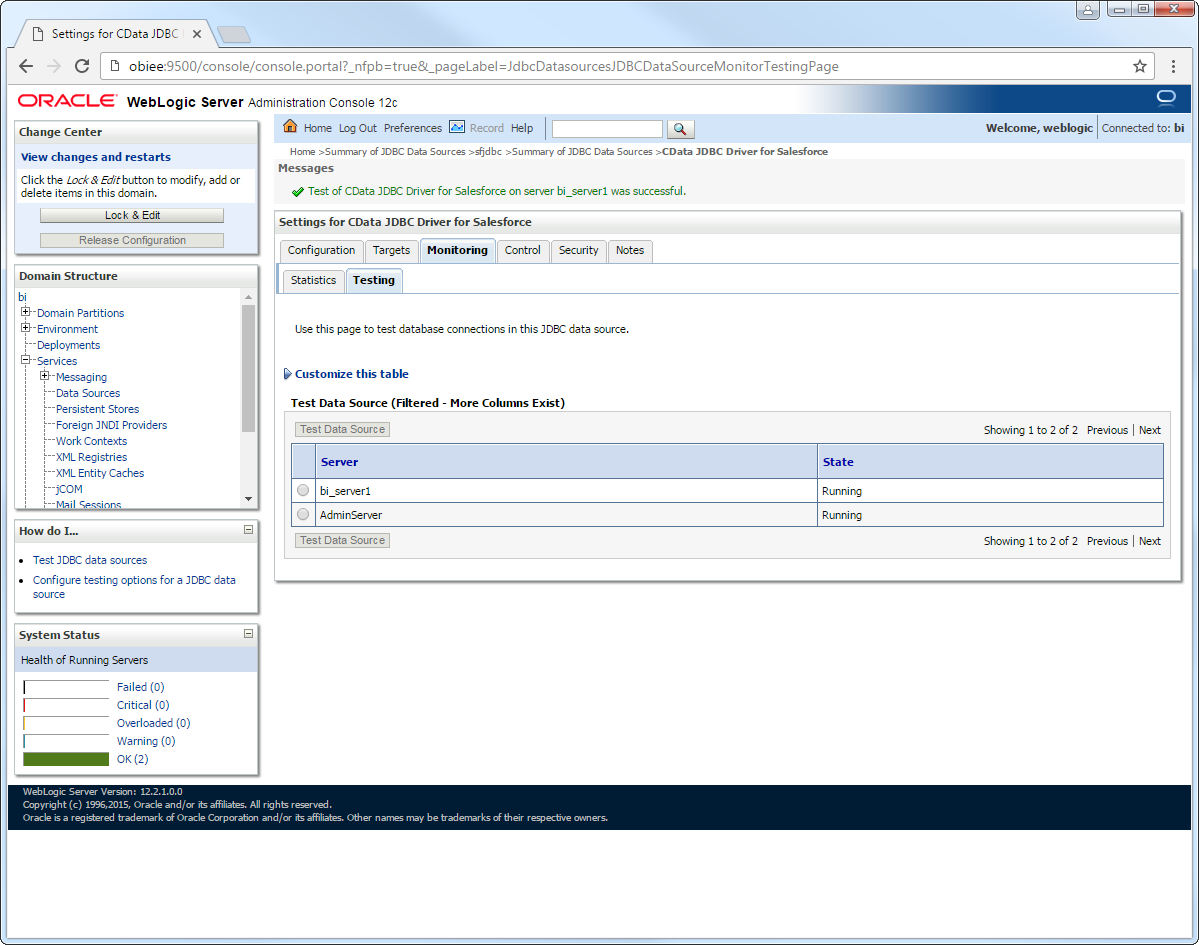
After selecting the server where you want to deploy the JDBC data source, you can now connect to Buildkite data.
More WebLogic Integration
The steps above show how configure the driver in a simple connection pooling scenario. For more use cases and information, see the JDBC sections in the WebLogic Data Sources chapter of the Oracle Fusion Middleware documentation.