




Viewing DeTrack Data in RAD Studio Data Explorer

Embarcadero RAD Studio provides a development environment for Delphi and C++Builder applications. With the CData ODBC Driver for DeTrack, you gain access to live DeTrack data within RAD Studio, abstracting the data into tables, views, and stored procedures that can be used to both retrieve DeTrack data. This article will walk through connecting to DeTrack using the Data Explorer.
Configure a Connection to DeTrack
If you have not already, first specify connection properties in an ODBC DSN (data source name). This is the last step of the driver installation. You can use the Microsoft ODBC Data Source Administrator to create and configure ODBC DSNs.
Start by setting the Profile connection property to the location of the DeTrack Profile on disk (e.g. C:\profiles\DeTrack.apip). Next, set the ProfileSettings connection property to the connection string for DeTrack (see below).
DeTrack API Profile Settings
DeTrack uses API Key authentication. Your DeTrack API key is used to authenticate all requests via the X-API-Key header. You can obtain your API key from your DeTrack account settings at app.detrack.com under Settings > API & Webhooks.
After setting the following connection properties, you are ready to connect:
- AuthScheme: Set this to APIKey.
- APIKey: Set this to your DeTrack API key.
Connecting to DeTrack Data Using Data Explorer
You can create a simple application for displaying DeTrack data by utilizing the CData FireDAC Components for DeTrack and a new VCL Forms Application:
- Open the Data Explorer in RAD Studio and expand FireDAC.
- Right-click the ODBC Data Source node in the Data Explorer.
- Click Add New Connection.
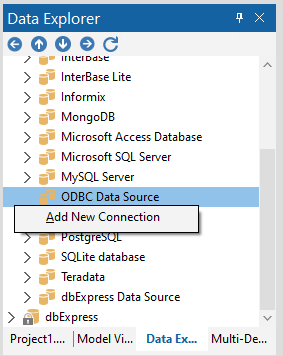
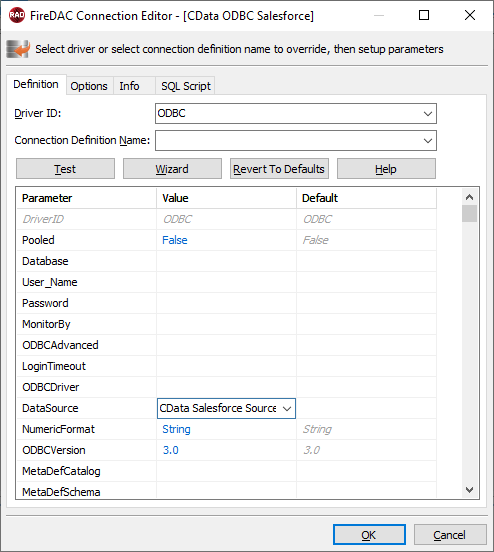
- Enter a name for the connection.
- In the FireDAC Connection Editor that appears, set the DataSource property to the name of the ODBC DSN for DeTrack.
- Back in the Data Explorer, expand the views for the connection.
Create a new VCL Forms application and drag a view (for example: Routes) onto the form.
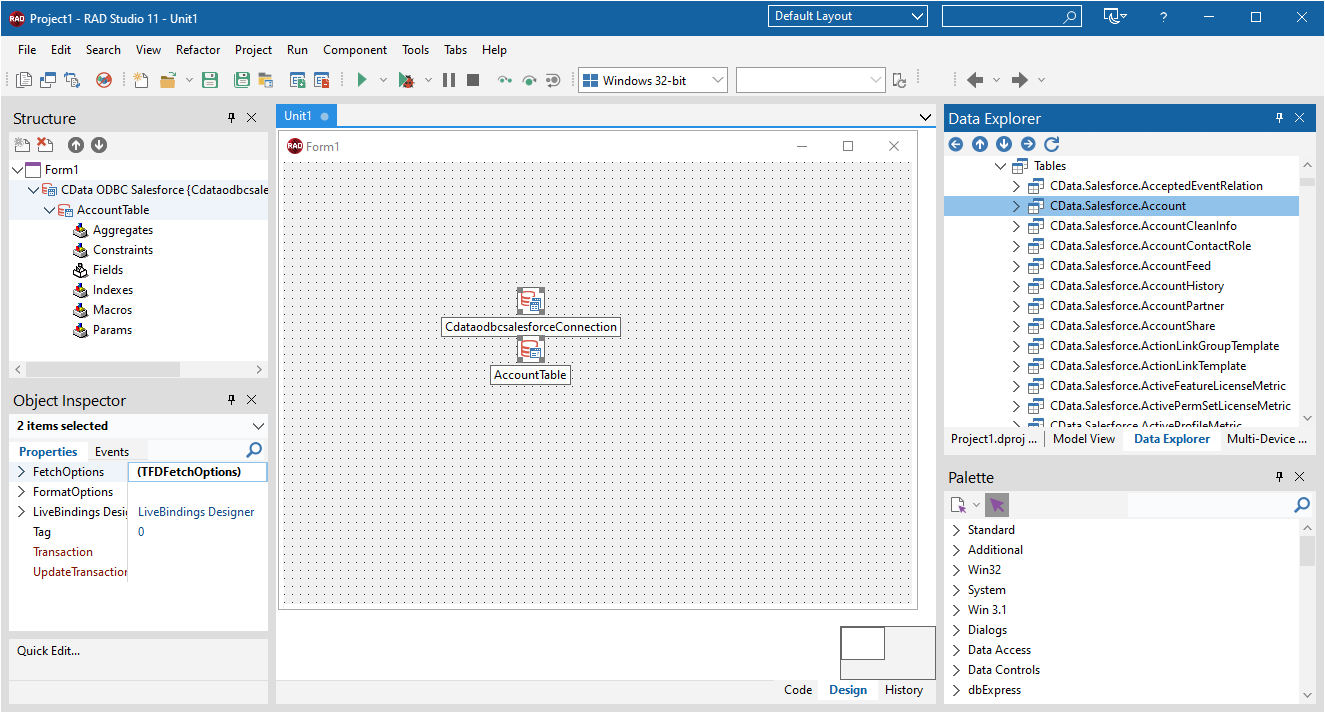
- Select the RoutesView object on the form and set the Active property to true.
Right-click on the object, bind visually, and link everything (*) to a new control (TStringGrid).
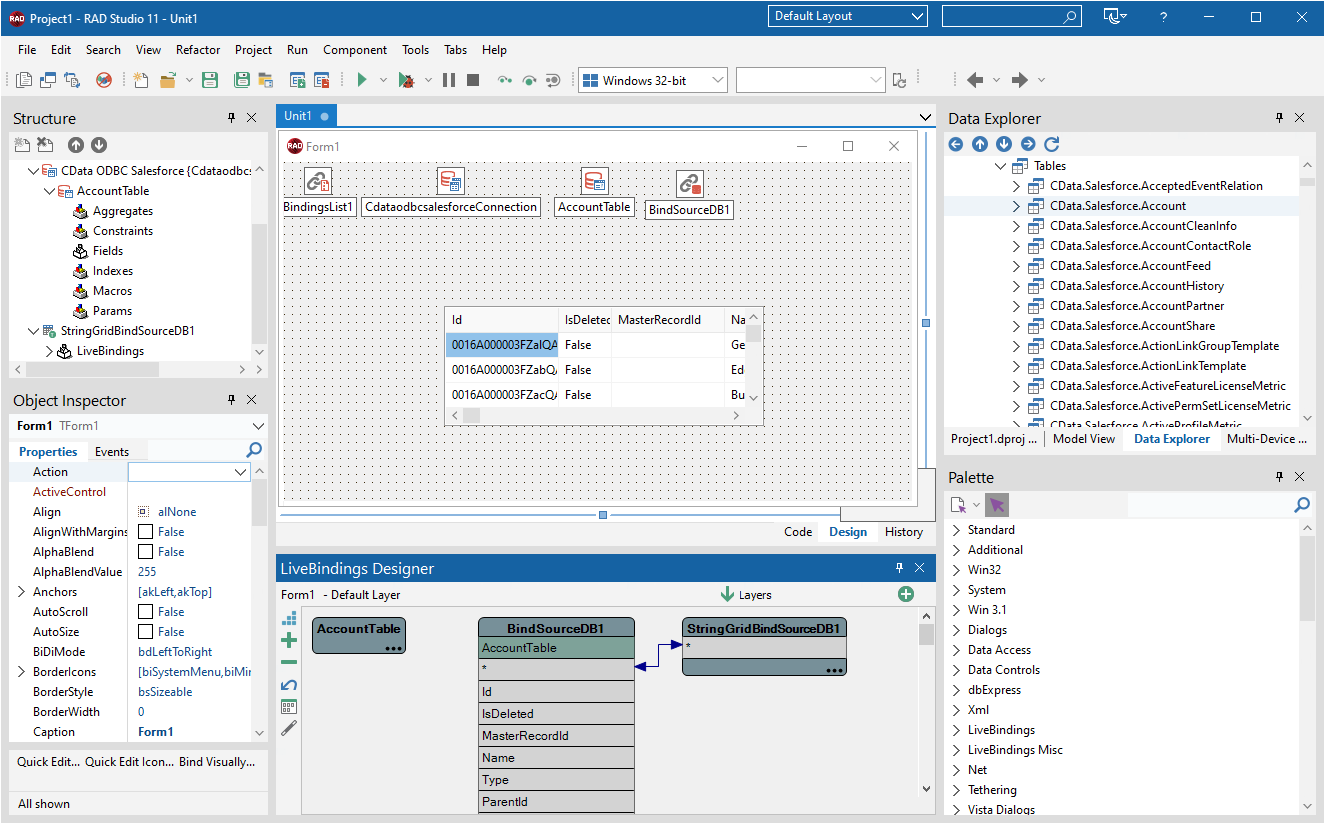
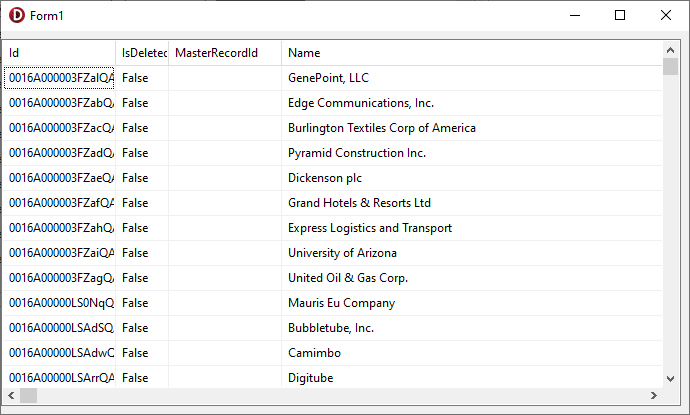
Arrange the TStringGrid on the form and run the application to see the Routes data.
Related Articles
Below you can find other articles for using the CData ODBC Driver with RAD Studio, Delphi, and C++ Builder.