


Search Nuclia External Objects in Salesforce Connect (API Server)

The CData API Server enables you to access Nuclia data from cloud-based applications like the Salesforce console and mobile applications like the Salesforce1 Mobile App. In this article, you will use the API Server and Salesforce Connect to access Nuclia external objects alongside standard Salesforce objects.
Set Up the API Server
If you have not already done so, download the CData API Server. Once you have installed the API Server, follow the steps below to begin producing secure Nuclia OData services:
Connect to Nuclia
To work with Nuclia data from Salesforce Connect, we start by creating and configuring a Nuclia connection. Follow the steps below to configure the API Server to connect to Nuclia data:
- First, navigate to the Connections page.
-
Click Add Connection and then search for and select the Nuclia connection.
")
-
Enter the necessary authentication properties to connect to Nuclia.
Using API Key Authentication
Nuclia uses API key authentication for accessing Knowledge Box data. To obtain an API key:
- Log in to the Nuclia Cloud Dashboard at https://nuclia.cloud
- Navigate to your Knowledge Box settings
- Go to the Service Accounts section
- Create a new service account or copy an existing API key
After obtaining your API key, set the following connection properties:
- AuthScheme: Set this to APIKey.
- APIKey: Set this to your Nuclia service account API key.
- KbId: Set this to your Knowledge Box UUID.
- Zone: Set this to your Nuclia deployment zone (e.g., aws-us-east-2-1).
Example Connection String
Profile=C:\profiles\Nuclia.apip;AuthScheme=APIKey;APIKey=your_service_account_key;KbId=your_kb_uuid;Zone=aws-us-east-2-1;
Connecting to Nuclia
Once the authentication is configured, you can connect to Nuclia and query data from any of the available tables such as Resources, KnowledgeBox, LabelSets, and ProcessingStatus.
")
- After configuring the connection, click Save & Test to confirm a successful connection.
Configure API Server Users
Next, create a user to access your Nuclia data through the API Server. You can add and configure users on the Users page. Follow the steps below to configure and create a user:
- On the Users page, click Add User to open the Add User dialog.
-
Next, set the Role, Username, and Privileges properties and then click Add User.

-
An Authtoken is then generated for the user. You can find the Authtoken and other information for each user on the Users page:

Creating API Endpoints for Nuclia
Having created a user, you are ready to create API endpoints for the Nuclia tables:
-
First, navigate to the API page and then click
Add Table
.

-
Select the connection you wish to access and click Next.
")
-
With the connection selected, create endpoints by selecting each table and then clicking Confirm.
")
Gather the OData Url
Having configured a connection to Nuclia data, created a user, and added resources to the API Server, you now have an easily accessible REST API based on the OData protocol for those resources. From the API page in API Server, you can view and copy the API Endpoints for the API:

Connect to Nuclia Data as an External Data Source
Follow the steps below to connect to the feed produced by the API Server.
- Log into Salesforce and click Setup -> Develop -> External Data Sources.
- Click New External Data Source.
- Enter values for the following properties:
- External Data Source: Enter a label to be used in list views and reports.
- Name: Enter a unique identifier.
- Type: Select the option "Salesforce Connect: OData 4.0".
URL: Enter the URL to the OData endpoint of the API Server. The format of the OData URL is https://your-server:your-port/api.rsc.
Note that plain-text is suitable for only testing; for production, use TLS.
Select JSON in the Format menu.
- In the Authentication section, set the following properties:
- Identity Type: If all members of your organization will use the same credentials to access the API Server, select "Named Principal". If the members of your organization will connect with their own credentials, select "Per User".
- Authentication Protocol: Select Password Authentication to use basic authentication.
- Certificate: Enter or browse to the certificate to be used to encrypt and authenticate communications from Salesforce to your server.
- Username: Enter the username for a user known to the API Server.
- Password: Enter the user's authtoken.
")
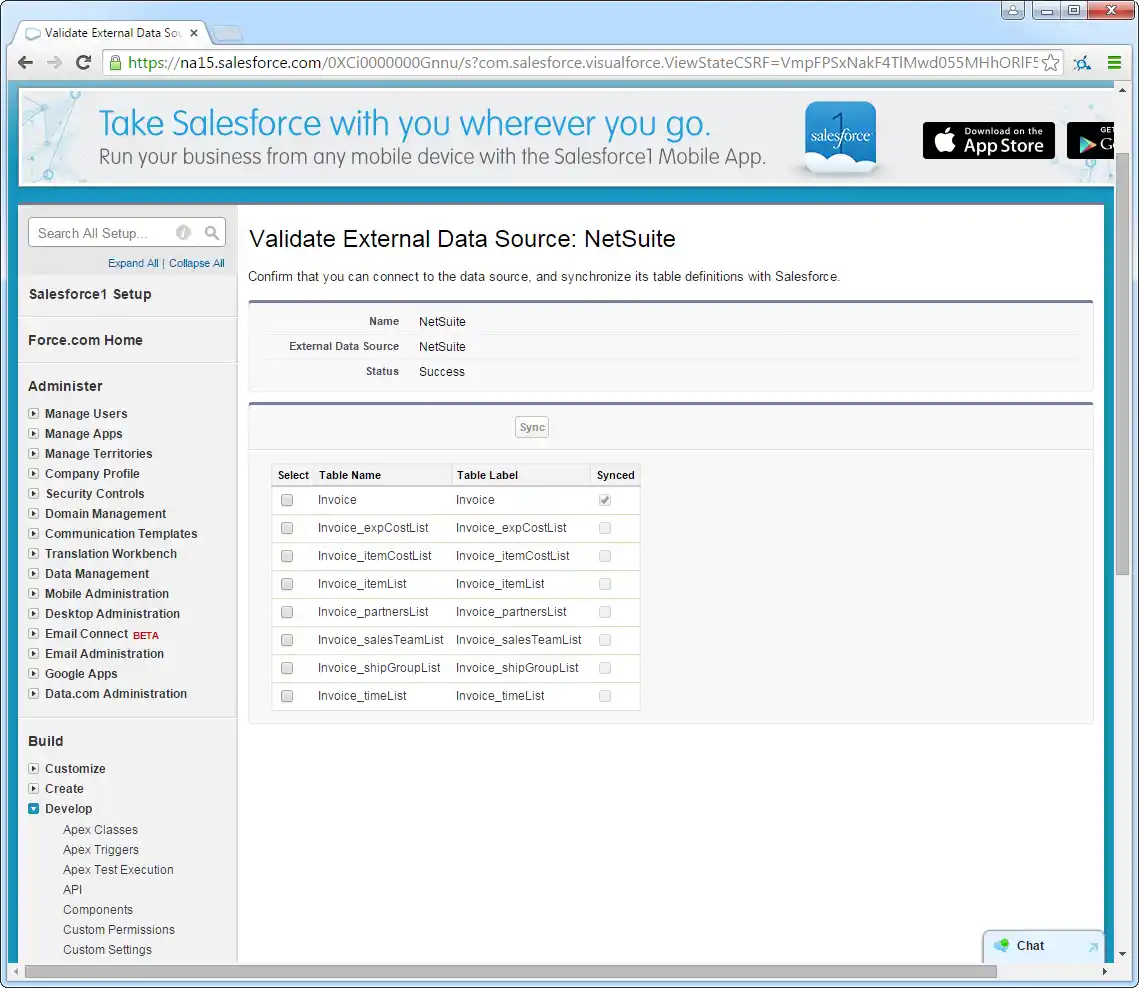
Synchronize Nuclia Objects
After you have created the external data source, follow the steps below to create Nuclia external objects that reflect any changes in the data source. You will synchronize the definitions for the Nuclia external objects with the definitions for Nuclia tables.
- Click the link for the external data source you created.
- Click Validate and Sync.
- Select the Nuclia tables you want to work with as external objects.
Access Nuclia Data as Salesforce Objects
After adding Nuclia data as an external data source and syncing Nuclia tables with Nuclia external objects, you can use the external objects just as you would standard Salesforce objects.
-
Create a new tab with a filter list view:
")
-
Display related lists of Nuclia external objects alongside standard Salesforce objects:
")
Troubleshooting
You can use the following checklist to avoid typical connection problems:
- Ensure that your server has a publicly accessible IP address. Related to this check, but one layer up, at the operating system layer, you will also need to ensure that your firewall has an opening for the port the API Server is running on. At the application layer, ensure that you have added trusted IP addresses on the Settings -> Security tab of the administration console.
- Ensure that you are using a connection secured by an SSL certificate from a commercial, trusted CA. Salesforce does not currently accept self-signed certificates or internal CAs.
Ensure that the server you are hosting the API Server on is using TLS 1.1 or above. If you are using the .NET API Server, you can accomplish this by using the .NET API Server's embedded server.
If you are using IIS, TLS 1.1 and 1.2 are supported but not enabled by default. To enable these protocols, refer to the how-to on MSDN and the Microsoft technical reference.
If you are using the Java edition, note that TLS 1.2 is enabled by default in Java 8 but not in Java 6 or 7. If you are using these earlier versions, you can refer to this this Oracle how-to.