




Visualize Respond.io Data in Tableau

The CData ODBC Driver for Respond.io enables you to access live Respond.io data in business intelligence tools like Tableau. In this article, you will integrate Respond.io data into a dashboard that reflects changes to Respond.io data in real time.
The CData ODBC drivers offer unmatched performance for interacting with live Respond.io data in Tableau due to optimized data processing built into the driver. When you issue complex SQL queries from Tableau to Respond.io, the driver pushes supported SQL operations, like filters and aggregations, directly to Respond.io and utilizes the embedded SQL engine to process unsupported operations (often SQL functions and JOIN operations) client-side. With built-in dynamic metadata querying, you can visualize and analyze Respond.io data using native Tableau data types.
Connect to Respond.io as an ODBC Data Source
If you have not already, first specify connection properties in an ODBC DSN (data source name). This is the last step of the driver installation. You can use the Microsoft ODBC Data Source Administrator to create and configure ODBC DSNs.
Start by setting the Profile connection property to the location of the Respondio Profile on disk (e.g. C:\profiles\Respondio.apip). Next, set the ProfileSettings connection property to the connection string for Respondio (see below).
Respondio API Profile Settings
Respond.io uses API key authentication. To obtain an API key:
- Log in to your Respond.io account.
- Navigate to Settings in your workspace.
- Select Developer under the Integrations section.
- Copy the API key displayed on the page.
After obtaining your API key, set the following connection properties:
- AuthScheme: Set this to APIKey.
Set the following in the ProfileSettings connection property:
- APIKey: Set this to your Respond.io API key.
When you configure the DSN, you may also want to set the Max Rows connection property. This will limit the number of rows returned, which is especially helpful for improving performance when designing reports and visualizations.
Add Respond.io Data to a Dashboard
- Click Connect to Data -> More Servers -> Other Databases (ODBC).
Select the CData Data Source Name (for example: CData API Source). - In the Database menu, select CData.
- In the Table box, enter a table name or click New Custom SQL to enter an SQL query. This article retrieves the Contacts table.
- Drag the table onto the join area. At this point, you can include multiple tables, leveraging the built-in SQL engine to process complex data requests.
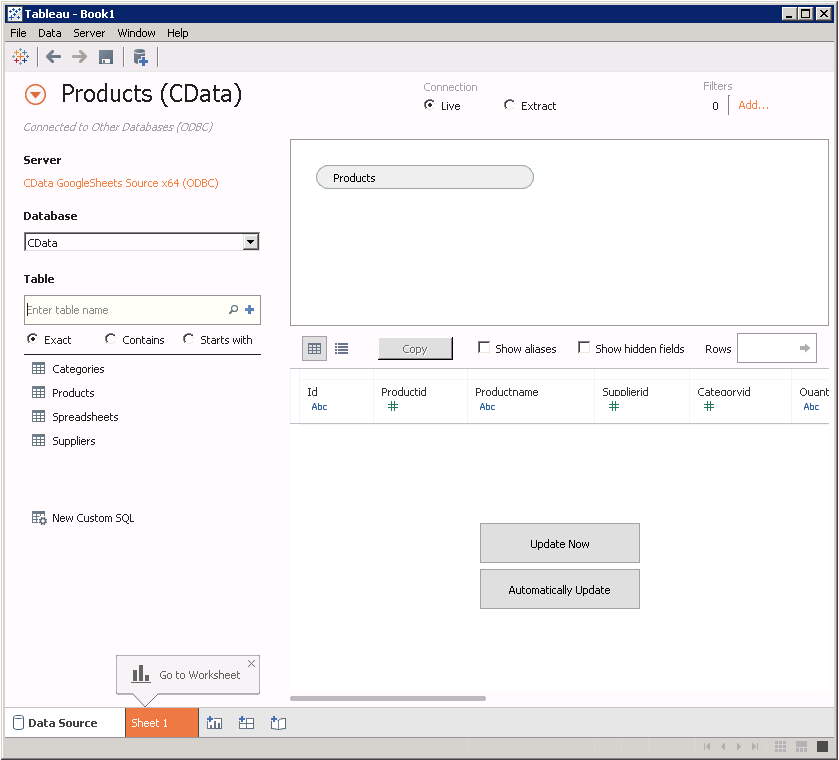
- In the Connection menu, select the Live option, so that you skip loading a copy of the data into Tableau and instead work on real-time data. The optimized data processing native to CData ODBC drivers enables unmatched performance in live connectivity.
- Click the tab for your worksheet. Columns are listed as Dimensions and Measures, depending on the data type. The CData driver discovers data types automatically, allowing you to leverage the powerful data processing and visualization features of Tableau.
- Drop the Id column in the Dimensions pane onto the dashboard. When you select dimensions, Tableau builds a query to the driver. The results are grouped based on that dimension. In Tableau, the raw query is automatically modified as you select dimensions and measures.
Drag the Email column in the Measures field onto the Detail and Color buttons. Tableau executes the following query:
SELECT Id, SUM(Email) FROM Contacts GROUP BY IdWhen you select a measure, Tableau executes a command to the driver to calculate a summary function, such as SUM, AVG, etc., on the grouped values. The SQL engine (embedded within the driver) is leveraged to process the aggregation of the data, where needed, providing a seamless experience in Tableau, regardless of the data source.
To change the summary function, open the Email menu and select the summary you want in the Measure command.
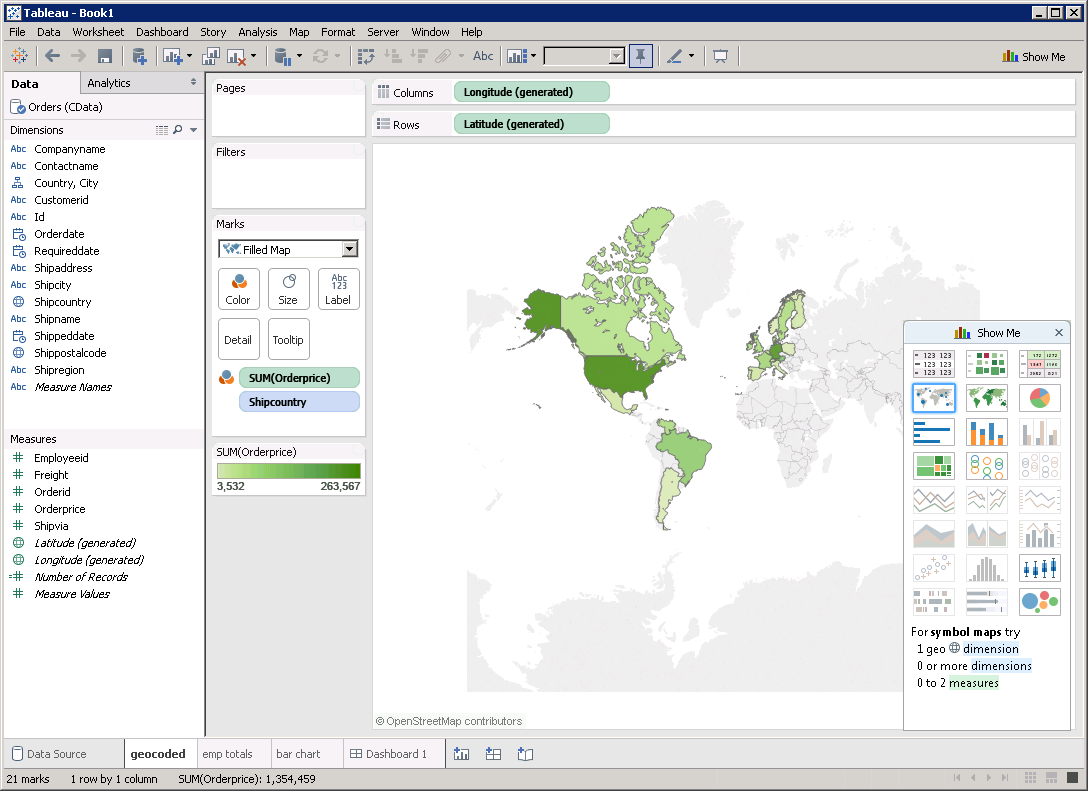
You can create other charts using dimensions and measures to build SQL queries visually:
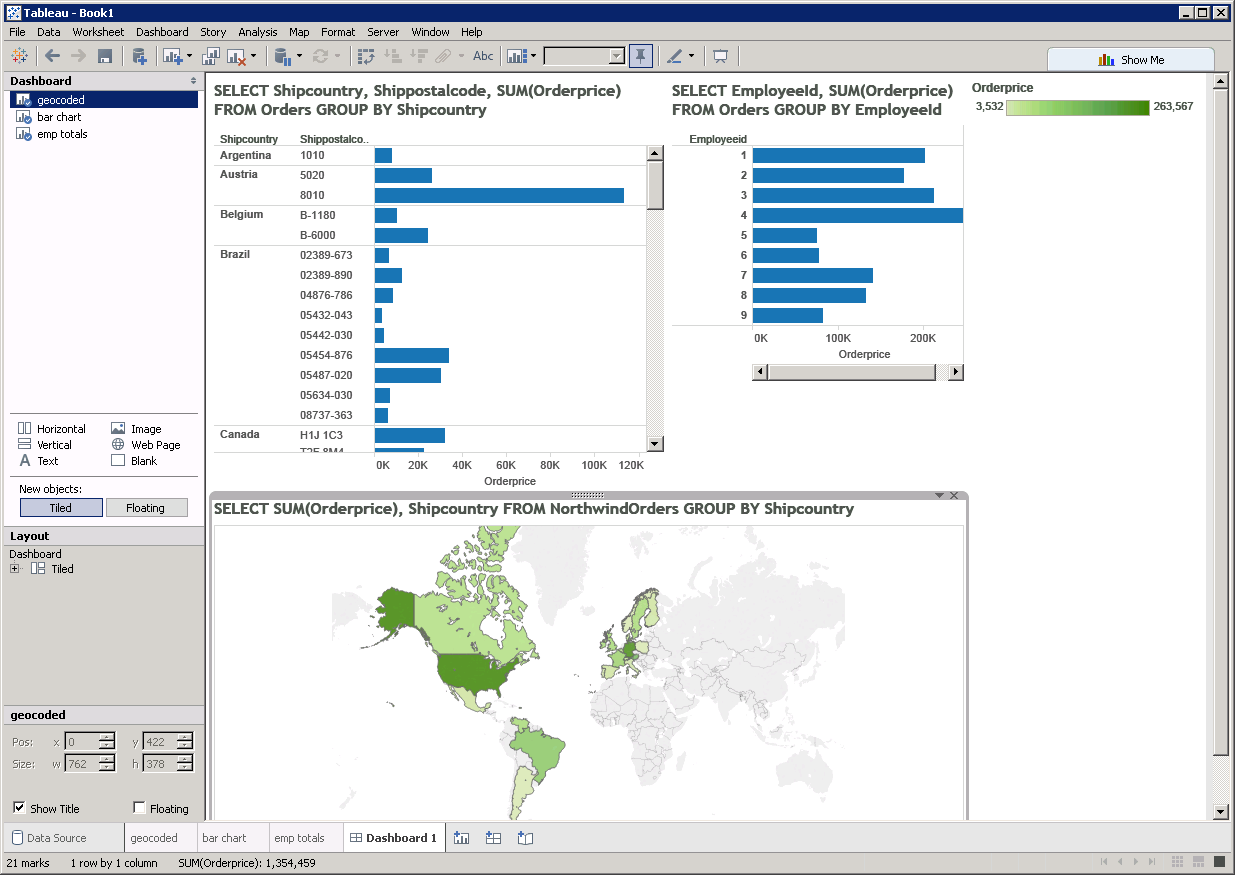
With the CData ODBC Driver for Respond.io, you get live connectivity to your Respond.io data, allowing you to build real-time charts, graphs, and more.